Fifine K669B User manual

1. Easily mount K678 microphone to the stand using the screws.
HEADPHONE OUTPUTCOMPUTER SETUPApple MAC OS 1. Plug the free end of the provided USB cable into the USB port on your computer. The microphone’s green LED will illuminate, indicating the microphone is receiving power. Your computer will automatically recognize the USB device and install a driver.There may be no pop- up window or message though.2. To select the K678 as your audio input, first, open your System Preferences.
1. Pls select “K678-Stereo Microphone”as the input device from the setting when using recording software. if you need to monitor your sound from 1/8" (3.5 mm)headphone jack of computer, pls Choose "Realtek High Definition" .Choose output “K678-Stereo Microphone” if you monitor from the microphone jack.Recording Software Settings1. If computer prompts that it’s unable to identify USB devices, please restart computer and replug the microphone into other USB port.Note: (Applicable for MAC and Windows)
3. Select the Recording tab, and choose “K678-Stereo Microphone” as the default device. When you speak to mic, bar-type icon will turn green and bounce. If it remains unchanged, please reset computer and replug in the USB port. If there’s still no “K678-Stereo Microphone”, please contact FIFINE after service. Notice: logging out of AUDACITY(or other recording software) if you find usb microphone is unavailable. And then plug in mic first , secondly log in software again.Positioning your microphoneIt is important to position the microphone directly in line (on axis) with the person speaking/ singing or instrument (or other sound source) to achieve the best frequency response of the microphone. For use in speaking/singing applications, the ideal placement for the microphone is directly in front of the person speaking/singing. The same placement is optimal when miking an instrument such as an acoustic guitar, drums or piano. Experiment with different mic placements to find the best sound for your particular setup.Protecting your microphoneAvoid leaving your microphone in the open sun or in areas where temperatures exceed 110° F (43° C) for extended periods. Extremely high humidity should also be avoided.Selecting softwareYou have many choices in recording software. Audacity, available for free online at http://audacity.sourceforge.net/, is a widely used software program that provides basic recording software. Note: The microphone must be plugged in first and secondly turning on the recording software.2. Make sure to click off “Listen to this device” in your computer system when you are using any recording software, or else your would hear duet of yourself just like too much echo.
Microphone Capsule - Condenser microphone element with cardioid polar pattern.LED Indicator - Green light shows microphone is on. Red light shows microphone is muted.Headphone Jack - 1/8 inch (3.5 mm) stereo jack for monitor your voice in real time.Headphone Volume - Control the volume of sound in your headphone.USB Cable (6.56’) - Type A to Mini B USB Cable. IMPORTANT NOTICESetting your software levelsCorrect adjustment of microphone level is important for optimum performance. Ideally, the microphone level should be as high as possible without overloading the input of your computer. If you hear distortion, or if your recording program shows levels that are consistently overloaded (at peak levels), turn the microphone gain (or level) down, 3. There are several ways to improve the recording by using Audacity.Come to https://fifinemicrophone.com/blogs/news to search the better solution or SEARCH WIDGET for your interested subject in our blogs.Note:* 1. Fully Plug your earphone into the 3.5mm earphone jack of microphone.
GUIDELINES FOR USE Choose your output settingWhen you plug microphone to your pc, it cancels the audio from any other audio file played or there’s no sound on the playback, you need to manually select the "speaker (Realtek High Definition Audio)" as the default playback device if you want to output sound via the computer built-in speaker.
Mute Button - Press the button for mid-stream when you need to have a rest.Microphone Gain - Control the sensitivity of the mic capsule.5/8 inch Male to 3/8 inch Female Mic Thread Screw Adapter-For connecting Microphone toSuspension Boom Scissor Arm Stand(Not included) if you need.
2. Adjust and pivot the microphone in relation to the sound source to optimize your sound quality.
3. The front of the microphone should be facing the sound source. (A FIFINE icon and LED indicate the front of the microphone; the microphone gain and headphone volume knob displayed on the rear of the microphone.)4. Maintain a distance of approximately 15-20 cm(5.9-7.9 in.) between the sound source and the microphone. 5. Fully plug the provided USB cable with the right angle into the USB output at the base of the microphone6. You can use the included 5/8" male to 3/8" female adapter to install the mic on the standard boom arm.
5/8" Male to 3/8" Female Adapter
Press the button on the microphone to turn the mute on/off. Mute is indicated by a LED on the microphone body.
Red = Microphone is mutedGreen = Microphone is on
MUTE BUTTON OPERATION
USB Output - Connect directly to your computer via the included USB cable.
15-20 cm(5.9-7.9 in.)
RearFront
5. Click the output tab and make certain “K678-Stereo Microphone” is selected as the default output device. (This should have happened automatically.)1. Right-click the speaker icon at the bottom right of the screen. Click "Sounds".Please wait for a few secs when first time operation, since driver of microphone takes time to automatically install. There may be no pop-up window or message though. (If plugging USB connector in a different USB port, driver installs again). 2.Confirm the loudspeaker is open.Click the loudspeaker is being used-”Properties”--“levels”,drag progress bar to adjust volume of output4. Two way to monitor your speaking voice:1) Output from the microphone jack--Please plug earphone in the headphone jack on the base of K678, you can hear your voice at once ,no need to set the output devices through computer and no need to click “listen to this device” under the “listen” tab.2) Output from the Computer-Plug your earphone into the 3.5mm earphone jack of computer/laptop, manual operate output from “Realtek High Definition Audio” under “Playback”,then click Microphone“K678-Stereo Microphone”- “Properties”-“Listen”-click “Listen to this device”-“Apply”.3. Next, click Sound to display the Sound preference pane.4. Click the Input tab and select the “K678-Stereo Microphone” as the device for sound input.
101112 1617K678 includes a standard 1/8"(3.5mm) headphone jack for monitoring and playback.
1). Click off “Listen to this device” when you are using any recording software or chatting software(Skype).Make sure that the microphone gain and headphone volume knob is not on the zero position.When your preliminary setup is completed (Choose "K678-Stereo Microphone"as input), and your USB microphone is connected to your Computer's USB port (the microphone's green LED is illuminated), Use K678 Headphone output to monitor your microphone recording in real-time or tracks recordings from your computer.* 2. Plug earphone in the mic jack, you can hear your voice at once, no need to log in any recording software or click” listen to this Device”.5. Double click the “K678-Stereo Microphone” to open the Microphone Properties window. Right click the speaker icon under the Levels tab, change to decibels from percentage. To get the best sound of the mic, please adjust the mic level during this range (+6.8 to +10.0 dB), when the output volume of the speaker is max.lnput: K678-Stereo Microphone131415
Click!
CONTROL PANEL 4. For windows computers, we recommend audacity, and for Apple computers, you can use Apple's own QuickTime player to test the recording.
2). Make sure the led is on green color indicate that microphone's on.NOTE: Note: 2. If mic recognized but no sound comes out, please check whether System Sound is mute and whether you have turned volume control on microphone to minimum.3. If mic recognized but no sound out, and your computer runs windows 10, please go to settings > privacy > microphone and click the Allow apps to access the microphone to ON then restart.
123456789
CONTACT USGet Social:Facebook page: http://bit.ly/FifinePageContact Info: Email: web@fifine.ccGuidelines For Use Computer set-up(windows&)MAC OSRecording Software SettingsImportant Notice1 X Microphone1 X Adjustable Desk Stand1 X 6.56' Type A to Mini B USB Cable 1 X 5/8" Male to 3/8" Female Adapter1 X User’s ManualWHAT’S IN THE BOX?3-89-1515-1616-17
. . . . . . . . . . . . . . . . . . . . . . . . . . . . . . . . . .
CONTENTSWARRANTY
. . . . . . . . . . . . . . . . . . . . . . .. . . . . . . . . . . . . . . . . . . . . . . . . . . . . . . . . . . . . . . . . . . . . . . . . . . . . . . . . . . . . . .
Front K678 USER’S GUIDESound SourceMute ButtonMicrophone GainHeadphone VolumeFrontRearListen music from computerOutput: Pls choose correct output* 3. If there is no sound out when you plug earphone into the base of microphone, check by clicking “K678-Stereo Microphone”- “Properties”-“Levels”. make sure the speaker and the microphone is on under the levels tab. Typical Frequency Response CurvePower Supply:Operating Current:Polar Pattern:Frequency Response: Sensitivity:Equivalent Noise Level:Dynamic Range:S/N Ratio:Max.SPL:SPECIFICATION5V80mAUni-directional40Hz—20kHz-45±3dB (at 1kHz)66dB-A88dB85dB130dB03060606090120150180210240270300330+20+100-10-20-3020501002005001K2K5K10K20KFrequency Response (0dB=1V/pa)Frequency Hz
After installation, you can test the mic by speaking to it. If the mic picks up no sound, please follow procedures below. either through your control panel (or system preferences) settings, or through your recording software. If your recording program shows insufficient level, you can increase the microphone gain either from the control panel (or system preferences) settings or through your recording program.
Fifine microphone warrants its hardware product defects in materials and workmanship for a period of one year from the date of original retail purchase, provided the purchase was made from an authorized Fifine microphone dealer. This warranty is void if the equipment is altered, misused, mishandled, suffers excessive wear or is serviced by any parties not authorized by Fifine Microphone. For warranty service ,contact your local distributor or web@fifine.cc B2B Version:Feb-11-2020

K669B Handleiding
Pagina 1
Contents
GUIDELINES FOR USE
COMPUTER SET-UP (WINDOWS & MAC OS)
RECORDING SOFTWARE SETTINGS
IMPORTANT NOTICE
What’s in the box
1 X Microphone
1 X Adjustable Desk Stand
1 X 6.56’ Type A to Mini B USB cable
1 X 5/8” Male to 3/8” Female Adapter
1 X User Manual
Contact Us
Get Social:
Facbook page: http://bit.ly/FifinePage
Contact info:
Email: [email protected]
Pagina 2
Warranty
Fifine microphone warrants its hardware product defects in materials and workmanship for a
period of one year from the date of original retail purchase, provided the purchase was made
from an authorized Fifine microphone dealer. This warranty is void if the equipment is
altered, misused, mishandled, suffers excessive wear or is serviced by any parties not
authorized by Fifine Microphone. For warranty service, contact your local distributor or
web@fifine.cc
Control Panel
1. Microphone capsule - Condenser microphone element with cardioid polar pattern
2. Let indicator - Green light shows microphone is on. Red light shows microphone is
muted.
3. Mute button - Press the button for midstream when you need to have a rest
4. USB output - Connect directly to your computer via the included USB cable
5. Headphone jack – 1/8 inch (3.5 mm) stereo jack for monitor your voice in real time
6. Microphone gain - Control the sensitivity of the mic capsule
7. Headphone volume - Control the volume of sound in your headphone

8. USB cable (6.56’) - type A to Mini B USB cable
9. 5/8 inch Male to 3/8 inch Female Mic Thread Screw Adapter - For connecting
Microphone to Suspension Boom Scissor Arm Stand (not included) if you need
Pagina 3
Guidelines for use
1. Easily mount K678 microphone to the stand using the screws
2. Adjust and pivot the microphone in relation to the sound source to optimize your
sound quality
Pagina 4
3. The front of the microphone should be facing the sound source (a fifine icon and LED
indicate the front of the microphone; the microphone gain and headphone volume
knob displayed on the rear of the microphone)
Sound source
Front
Rear
4. Maintain a distance of approximately 15-20 centimeters (5.9-7.9inch) between the
sound source and the microphone.
5. Fully plug the provided USB cable with the right angle into the USB output at the base
of the microphone
Pagina 6
You can use the included 5/8” male to 3/8” female adapter to install the mic on the standard
boom arm
5/8” male to 3/8” female adapter
Mute button operation
Press the button on the microphone to turn the mute on/off mute is indicated by a LED on the
microphone body
Red = microphone is muted
Green = microphone is on
Headphone output
K678 includes a standard 1/8” (3.5mm) headphone jack for monitoring and playback. when
your preliminary setup is completed (Choose “K678-Stereo Microphone” as input), and your
USB microphone is connected to your computer's USB port (The microphone's green LED is
illuminated). Use K678 headphone output to monitor your microphone recording in real time
or tracks recordings from your computer.
Pagina 7

Note:
1. fully plug your earphone into the 3.5mm earphone jack of microphone
2. plug your phone in the mic Jack you can hear your voice at once no need to log in any
recording software or click listen to this device
3. if there is no sound out when you plug earphone into the base of microphone check by
clicking “K678-stereo microphone” – “properties” – “levels” make sure the speaker and
the microphone is on under the levels tab
Listen music from computer
Pagina 8
Specification
Power Supply:
5V
Operating Current:
80mA
Polar Pattern:
Uni-directional
Frequency Response:
40Hz-20KHz
Sensitivity:
-45dB ± 3dB (at 1kHz)
Equivalent Noise Level: 66dB-A
S/N Ratio:
85dB
Max. SPL:
130dB
Typical Frequency Response Curve
Frequency Response (0dB=1V/pa)
Pagina 9
COMPUTER SETUP
Apple MAC OS
1. Plug the free end of the provided USB cable into the USB port on your computer. Your
computer will automatically recognize the USB device and install a driver. There may be
no pop-up window or message though.
2. To select the K678 as your audio input, first, open your System Preferences.
3. Next, click Sound to display the Sound preference pane.
4. Click the Input tab and select the “K678-Stereo Microphone” as the device for sound
input.
Pagina 10

5. Click the output tab and make certain the “K678-Stereo Microphone” is selected as the
default output device. (This should have happened automatically.)
Windows
Please wait for a few seconds when first time operation, since driver of microphone takes
time to automatically install. There may be no pop-up window or message though. (If
plugging USB connector in a different USB port, driver installs again).
Pagina 11
After installation, you can test the mic by speaking to it. If the mic picks up no sound, please
follow procedures below.
1. Right-click the speaker icon at the bottom right of the screen.
Click "Sounds".
2. Confirm the loudspeaker is open.
Click the loudspeaker is being used - “Properties” -- “levels”, drag progress bar to adjust
volume of output
Pagina 12
3. Select the Recording tab, and choose “K678-Stereo Microphone” as the default device.
When you speak to mic, bar-type icon will turn green and bounce. If it remains unchanged,
please reset computer and replug in the USB port. If there’s still no “K678-Stereo
Microphone” ,please contact FIFINE after service.
NOTE:
1. Click off “Listen to this device” when you are using any
recording software or chatting software (Skype).
2. Make sure the LED is on green color indicate that microphones on
Pagina 13
4. Two way to monitor your speaking voice:
1) Output from the microphone jack--Please plug earphone in the headphone jack on the
base of K678, you can hear your voice at once, no need to set the output devices through
computer and no need to click “listen to this device” under the “listen” tab.
2) Output from the Computer-Plug your earphone into the 3.5mm earphone jack of
computer/laptop, manual operate output from “Realtek High Definition Audio” under
“Playback”, then click Microphone “K678-Stereo Microphone”- “Properties”-“Listen”- click
“Listen to this device”-“Apply”.
Pagina 14
5. Double click the “K678-Stereo Microphone” to open the Microphone Properties window.
Right click the speaker icon under the Levels tab, change to decibels from percentage. To get

the best sound of the mic, please adjust the mic level during this range (+6.8 to +10.0 dB),
when the output volume of the speaker is max.
Note:
Make sure that the microphone gain and headphone volume knob is not on the zero
position.
Pagina 15
Note:(Applicable for MAC and Windows)
1. If computer prompts that it’s unable to identify USB devices, please restart computer and
replug the microphone into other USB port.
2. If mic recognized but no sound comes out, please check whether System Sound is mute
and whether you have turned volume control on microphone to minimum.
3. If mic recognized but not sound out, and your computer runs windows 10, please go to
settings>privacy>microphone and click the Allow apps to access the microphone to ON then
restart.
Recording Software Settings
1. Pls select “K678-Stereo Microphone”as the input device from the setting when using
recording software. if you need to monitor your sound from 1/8" (3.5 mm)headphone jack
of computer, pls Choose "Realtek High Definition" .Choose output “K678-Stereo
Microphone” if you monitor from the microphone jack.
Input: K678-Stereo Microphone
Output: Pls choose correct output
Pagina 16
Notice: logging out of AUDACITY(or other recording software) if you find usb microphone is
unavailable. And then plug in mic first , secondly log in software again.
2. Make sure to click off “Listen to this device” in your computer system when you are using
any recording software, or else your would hear duet of yourself just like too much echo.
3. There are several ways to improve the recording by using Audacity. Come to
https://fifinemicrophone.com/blogs/news to search the better solution or SEARCH WIDGET
for your interested subject in our blogs.
4. For windows computers, we recommend audacity, and for Apple computers, you can use
Apple's own QuickTime player to test the recording.
IMPORTANT NOTICE
Setting your software levels
Correct adjustment of microphone level is important for optimum performance.
Ideally, the microphone level should be as high as possible without overloading the
input of your computer. If you hear distortion, or if your recording program shows
levels that are consistently overloaded (at peak levels), turn the microphone volume

(or level) down, either through your control panel (or system preferences) settings,
or through your recording software. If your recording program shows insufficient
level, you can increase the microphone gain either from the control panel (or system
preferences) settings or through your recording program.
Pagina 17
Selecting software
You have many choices in recording software. Audacity, available for free online at
http://audacity.sourceforge.net/, is a widely used software program that provides
basic recording software.
Note: The microphone must be plugged in first and secondly turning on the recording
software.
Positioning your microphone
It is important to position the microphone directly in line (on axis) with the person
speaking/ singing or instrument (or other sound source) to achieve the best
frequency response of the microphone. For use in speaking/singing applications, the
ideal placement for the microphone is directly in front of the person
speaking/singing.
Protecting your microphone
Avoid leaving your microphone in the open air or in areas where temperatures
exceed 110° F (43° C) for extended periods. Extremely high humidity should also be
avoided.
When you plug microphone to your pc, it cancels the audio from any other audio file
played or there’s no sound on the playback, you need to manually select the "speaker
(Realtek High Definition Audio)" as the default playback device if you want to output
sound via the computer built-in speaker.
Pagina 0
User’s Guide

T669 Manuel
Pagina 1
Inhoud
RICHTLIJNEN VOOR GEBRUIK
COMPUTERINSTELLING (WINDOWS & MAC OS)
INSTELLINGEN VOOR OPNAMESOFTWARE
BELANGRIJKE MEDEDELING
Wat zit er in de doos
1 x microfoon
1 x verstelbare bureaustandaard
1 x 6.56’ Type A naar Mini B USB-kabel
1 x 5/8" male naar 3/8" female adapter
1 x gebruikershandleiding
Neem contact op
Vind ons op sociale media:
Facebook-pagina: http://bit.ly/FifinePage
Contact informatie:
E-mail: [email protected]
Pagina 2
Garantie
De Fifine-microfoon geeft garantie op defecten in het hardwareproduct in materiaal en vakmanschap
voor een periode van één jaar vanaf de oorspronkelijke aankoopdatum, op voorwaarde dat de
aankoop is gedaan bij een geautoriseerde Fifine-microfoondealer. Deze garantie vervalt als het
apparaat werd gewijzigd, verkeerd of slecht werd gehanteerd, overmatige slijtage vertoont of
hersteld werd door een partij die niet is geautoriseerd door Fifine Microphone. Neem voor
garantieservice contact op met uw lokale distributeur of [email protected]
Controlepaneel
1. Microfooncapsule - Condensatormicrofoonelement met cardioïde opnamepatroon.
2. LED indicator - Groen lampje geeft aan dat de microfoon is ingeschakeld. Rood lampje geeft aan
dat de microfoon is gedempt.
3. Mute-knop - Druk op de knop voor midstream als je rust nodig hebt
4. USB-uitgang - Maak rechtstreeks verbinding met uw computer via de meegeleverde USB-kabel
5. Koptelefoonaansluiting - 3,5 mm stereo-aansluiting om uw stem in realtime te kunnen volgen
6. Microfoonversterking - Regel de gevoeligheid van de microfooncapsule
7. Hoofdtelefoonvolume - Regel het volume van het geluid in uw hoofdtelefoon
8. USB-kabel (6.56’) - type A naar Mini B USB-kabel
9. 5/8 inch male naar 3/8 inch female mic draad schroefadapter - Voor het aansluiten van microfoon
op ophanggiek schaararmstandaard (niet inbegrepen) indien nodig.

Pagina 3
Richtlijnen voor gebruik
1. Monteer de K678-microfoon eenvoudig op de standaard met behulp van de schroeven.
2. Pas de microfoon aan en draai deze ten opzichte van de geluidsbron om uw geluidskwaliteit te
optimaliseren.
Pagina 4
3. De voorkant van de microfoon moet naar de geluidsbron zijn gericht (een FIFINE icoon en een LED-
lampje geven de voorkant van de microfoon aan; de knop voor microfoonversterking en
hoofdtelefoonvolume wordt weergegeven op de achterkant van de microfoon)
Geluidsbron
Voorkant
Mute knop
Achter
Microfoonversterking
Hoofdtelefoonvolume
4. Bewaar een afstand van ongeveer 15-20 cm tussen de geluidsbron en de microfoon.
5. Sluit de meegeleverde USB-kabel met de juiste hoek volledig aan op de USB-uitgang aan de
onderkant van de microfoon.
Pagina 6
U kunt de meegeleverde 5/8" male naar 3/8" female adapter gebruiken om de microfoon op de
standaard boomarm te installeren
5/8" male naar 3/8" female adapter
Mute-knopbediening
Druk op de knop op de microfoon om de mute aan/uit te zetten. Mute wordt aangegeven door een
LED op de microfoonbehuizing.
Rood = microfoon is gedempt
Groen = microfoon staat aan
Koptelefoonuitgang
De K678 bevat een standaard 3.5mm koptelefoonaansluiting voor monitoren en afspelen. Wanneer
uw voorbereidende installatie is voltooid (kies "K678-stereomicrofoon" als invoer), en uw USB-
microfoon is aangesloten op de USB-poort van uw computer (de groene LED van de microfoon
brandt), gebruik de K678-hoofdtelefoonuitgang om uw microfoonopname in realtime te volgen of
om opnamen vanaf uw computer bij te houden.
Pagina 7
Opmerking:
1. Sluit uw oortelefoon volledig aan op de 3,5 mm koptelefoonaansluiting van de microfoon.

2. Sluit je koptelefoon aan op de microfoonaansluiting, je kunt je stem meteen horen, je hoeft niet in
te loggen op opnamesoftware of te klikken op “luisteren naar dit apparaat”
3. Als er geen geluid is wanneer u de oortelefoon in de onderkant van de microfoon steekt,
controleer dan door op "K678-stereomicrofoon" - "eigenschappen" - "volume" te klikken, controleer
of de luidspreker en de microfoon zijn ingeschakeld onder het tabblad volume.
Luister naar muziek vanaf de computer
Pagina 8
Specificatie
Stroomvoorziening:
5V
Bedrijfsstroom:
80mA
Polair patroon:
Unidirectioneel
Frequentierespons:
40Hz-20KHz
Gevoeligheid:
-45dB ± 3dB (bij 1 kHz)
Equivalent geluidsniveau: 66dB-A
S / R-verhouding:
85dB
Max. Hoogte SPL:
130dB
Typische frequentieresponscurve
Frequentiebereik (0dB = 1V / pa)
Pagina 9
COMPUTERINSTELLING
Apple MAC OS
1. Sluit het vrije uiteinde van de meegeleverde USB-kabel aan op de USB-poort van uw computer. De
groene LED van de microfoon gaat branden om aan te geven dat de microfoon stroom krijgt. Uw
computer herkent automatisch het USB-apparaat en installeert een stuurprogramma. Het is echter
mogelijk dat er geen pop-upvenster of bericht verschijnt.
2. Om de K678 als uw audio-ingang te selecteren, opent u eerst uw Systeemvoorkeuren.
3. Klik vervolgens op Geluid om het voorkeurenpaneel Geluid weer te geven.
4. Klik op het tabblad Invoer en selecteer de "K678-stereomicrofoon" als het apparaat voor
geluidsinvoer.
Pagina 10
5. Klik op het tabblad Uitvoer en zorg ervoor dat de "K678-stereomicrofoon" is geselecteerd als het
standaard uitvoerapparaat. (Dit gebeurt normaal automatisch.)
Windows

Wacht een paar seconden bij het eerste gebruik, aangezien de driver van de microfoon even tijd
nodig heeft om automatisch te installeren. Mogelijk is er echter geen pop-upvenster of bericht. (Als
de USB-connector op een andere USB-poort wordt aangesloten, wordt het stuurprogramma opnieuw
geïnstalleerd).
Pagina 11
Na installatie kun je de microfoon testen door er tegen te praten. Volg de onderstaande procedures
als de microfoon geen geluid oppikt.
1. Klik met de rechtermuisknop op het luidsprekerpictogram rechtsonder in het scherm.
Klik op "Geluiden".
2. Bevestig dat de luidspreker open is.
Klik op de luidspreker die wordt gebruikt - "Eigenschappen" - "niveaus", sleep de voortgangsbalk om
het uitgangsvolume aan te passen
Pagina 12
3. Selecteer het tabblad Opname en kies "K678-stereomicrofoon" als het standaardapparaat. Als je
tegen de microfoon spreekt, wordt het balktype pictogram groen en stuitert het. Als het ongewijzigd
blijft, reset u de computer en sluit u de USB-poort opnieuw aan. Als er nog steeds geen "K678-
stereomicrofoon" is, neem dan na service contact op met FIFINE.
NOTITIE:
1. Klik op "Luister naar dit apparaat" wanneer u een apparaat gebruikt
opnamesoftware of chatsoftware (Skype).
2. Zorg ervoor dat het LED-licht brandt. Groen geeft aan dat de microfoon is ingeschakeld.
Pagina 13
4. Twee manieren om uw spreekstem te monitoren:
1) Uitgang van de microfoonaansluiting - Sluit de oortelefoon aan op de koptelefoonaansluiting
onderaan de K678, kunt u uw stem meteen horen, u hoeft de uitvoerapparaten niet via de computer
in te stellen en u hoeft niet op "luister naar dit apparaat" te klikken onder het tabblad "luisteren".
2) Uitvoer van de computer - Sluit uw oortelefoon aan op de 3,5 mm koptelefoonaansluiting van
computer/laptop, bedien de uitvoer handmatig van "Realtek High Definition Audio" onder "Afspelen"
en klik vervolgens op Microfoon "K678-stereomicrofoon" - "Eigenschappen" - "Luister" - klik op
"Luister naar dit apparaat" - "Toepassen".
Pagina 14
5. Dubbelklik op de “K678-stereomicrofoon” om het venster Microfooneigenschappen te openen.
Klik met de rechtermuisknop op het luidsprekerpictogram onder het tabblad Volume, verander van
percentag. Om het beste geluid van de microfoon te krijgen, past u het microfoonniveau aan tijdens
dit bereik (+6,8 tot +10,0 dB), wanneer het uitgangsvolume van de luidspreker op max. staat.
Opmerking:
Zorg ervoor dat de microfoonversterking en de volumeknop van de hoofdtelefoon niet op de
nulstand staan.
Pagina 15
Opmerking: (van toepassing op MAC en Windows)

1. Als de computer aangeeft dat het geen USB-apparaten kan identificeren, start u de computer
opnieuw op en sluit u de microfoon weer aan op een andere USB-poort.
2. Als de microfoon wordt herkend maar er komt geen geluid uit, controleer dan of het
systeemgeluid is gedempt en of u de volumeregeling op de microfoon op het minimum hebt gezet.
3. Als de microfoon wordt herkend maar niet klinkt en uw computer werkt met Windows 10, ga dan
naar instellingen> privacy> microfoon en klik op de knop Apps toegang tot de microfoon geven AAN
en start de computer opnieuw op.
Instellingen opnamesoftware
1. Selecteer bij gebruik van opnamesoftware “K678-stereomicrofoon” als invoerapparaat uit de
instelling. Als u uw geluid wilt monitoren vanaf de 3.5 mm hoofdtelefoonaansluiting van de
computer, kies dan" Realtek High Definition ". Kies uitgang “K678-stereomicrofoon" als u monitort
via de microfoonaansluiting.
Input: K678-stereomicrofoon
Output: Pls kies de juiste output
Pagina 16
Opmerking: Log uit bij AUDACITY (of andere opnamesoftware) als u merkt dat de USB-microfoon niet
beschikbaar is. Sluit daarna eerst de microfoon aan, en log vervolgens de software opnieuw in.
2. Zorg ervoor dat u "Luister naar dit apparaat" in uw computersysteem uitschakelt wanneer u
opnamesoftware gebruikt, anders hoort u een duet van uzelf met echo tot gevolg.
3. Er zijn verschillende manieren om de opname te verbeteren door Audacity te gebruiken. Kom naar
https://fifinemicrophone.com/blogs/news om de betere oplossing te zoeken of ZOEK WIDGET voor
uw geïnteresseerde onderwerp in onze blogs.
4. Voor Windows-computers raden we Audacity aan, en voor Apple-computers kunt u Apple's eigen
QuickTime-speler gebruiken om de opname te testen.
BELANGRIJKE MEDEDELING
• Uw softwarevolumes instellen
De juiste afstelling van het microfoonvolume is belangrijk voor optimale prestaties. Idealiter zou het
microfoonvolume zo hoog mogelijk moeten zijn zonder de input van uw computer te overbelasten.
Als u vervorming hoort, of als uw opnameprogramma niveaus vertoont die constant overbelast zijn
(op piekniveaus), verlaagt u het microfoonvolume (of niveau) via uw configuratiescherm (of
systeemvoorkeuren) of via uw opnamesoftware. Als uw opnameprogramma onvoldoende niveau
vertoont, kunt u de microfoonversterking verhogen via de instellingen van het bedieningspaneel (of
systeemvoorkeuren) of via uw opnameprogramma.
Pagina 17
• Software selecteren
Je hebt veel keuzes in opnamesoftware. Audacity is gratis online beschikbaar op
http://audacity.sourceforge.net/, het is een veelgebruikt softwareprogramma dat
basisopnamesoftware levert.
Opmerking: de microfoon moet eerst zijn aangesloten en alvorens de opnamesoftware in te
schakelen.
• Positionering van uw microfoon
Het is belangrijk om de microfoon direct in lijn (op as) te plaatsen met de persoon die spreekt/zingt
of met het instrument (of een andere geluidsbron) om de beste frequentierespons van de microfoon

te bereiken. Voor gebruik in spreek- / zangtoepassingen is de ideale plaatsing van de microfoon
direct voor de spreker/zanger
• Bescherming van uw microfoon
Laat uw microfoon niet gedurende langere tijd in de open lucht of in gebieden waar de temperatuur
hoger is dan 43°C. Een extreem hoge luchtvochtigheid moet ook worden vermeden.
• Kies de geluidsuitvoerinstelling
Wanneer u een microfoon op uw pc aansluit, wordt de audio van elk ander afgespeeld audiobestand
geannuleerd. Als er geen geluid is bij het afspelen, moet u handmatig de 'luidspreker (Realtek High
Definition Audio)' selecteren als het standaard afspeelapparaat als u wilt dat de uitvoer van het
geluid via de ingebouwde luidsprekers van uw computer wordt afgespeeld.
Pagina 0
Handleiding

Manuel T669
Page 1
Contenu
CONSEILS D'UTILISATION
CONFIGURATION DE L'ORDINATEUR (WINDOWS ET MAC OS)
PARAMÈTRES DU LOGICIEL D’ENREGISTREMENT
ANNONCE IMPORTANTE
Qu'y a-t-il dans la boite
1 x microphone
1 x support de bureau réglable
1 câble USB type A vers Mini B de 6.56'
1 x adaptateur 5/8" mâle à 3/8" femelle
1 x manuel d'utilisation
Contactez-nous
Retrouvez-nous sur les réseaux sociaux:
Page Facebook: http://bit.ly/FifinePage
Informations de contact:
Courriel: web@fifine.com
Page 2
Garantie
Le microphone Fifine est garanti contre les défauts de matériel et de fabrication pendant une
période d'un an à compter de la date d'achat originel, à condition que l'achat ait été effectué auprès
d'un revendeur de microphones Fifine agréé. Cette garantie est nulle si l'appareil a été modifié, mal
manipulé, s’il présente une usure excessive ou s’il a été réparé par une partie non autorisée par
Fifine Microphone. Pour le service de garantie, veuillez contacter votre distributeur local ou
Panneau de configuration
1. Capsule du microphone - Élément de microphone à condensateur avec motif de capteur cardioïde.
2. Indicateur LED - Le voyant vert indique que le microphone est activé. La lumière rouge indique que
le microphone est coupé.
3. Bouton de Sourdine - Appuyez sur le bouton si vous avez besoin de repos.
4. Sortie USB - Connectez l’appareil directement à votre ordinateur par le câble USB inclus.
5. Prise casque - prise stéréo 3.5 mm pour surveiller votre voix en temps réel
6. Gain du microphone - Ajustez la sensibilité de la capsule du microphone
7. Volume du casque - Réglez le volume du son dans votre casque
8. Câble USB (6.56’) - Câble USB de type A vers Mini B
Adaptateur de vis filetée micro mâle 5/8 pouces à 3/8 pouces femelle - Pour connecter le
microphone au support de bras de ciseaux à flèche de suspension (non inclus) si nécessaire.

Page 3
Conseils d'utilisation
1. Montez simplement le microphone K678 sur le support à l'aide des vis.
2. Ajustez et faites pivoter le microphone par rapport à la source sonore pour optimiser votre qualité
sonore.
Page 4
3. L'avant du microphone doit faire face à la source sonore (une icône FIFINE et un voyant LED
indiquent l'avant du microphone; le bouton de gain du microphone et de volume du casque sont
affichés à l'arrière du microphone)
Source sonore
Devant
Bouton de sourdine
Derrière
Gain du microphone
Volume du casque
4. Gardez une distance d'environ 15 à 20 cm entre la source sonore et le microphone.
5. Insérez complètement le câble USB fourni dans le port de sortie USB en bas du microphone à
l'angle correct.
Page 6
Vous pouvez utiliser l'adaptateur 5/8" mâle à 3/8" femelle fourni pour installer le microphone sur le
bras de perche standard
Adaptateur 5/8" mâle à 3/8" femelle
Fonctionnement du bouton de sourdine
Appuyez sur le bouton du microphone pour activer/désactiver la sourdine.
La sourdine est indiquée par une LED sur le microphone.
Rouge = le microphone est coupé
Vert = le microphone est allumé
Sortie casque
Le K678 comprend une prise casque standard de 3.5 mm pour la surveillance et la lecture. Lorsque
votre installation préliminaire est terminée (choisissez «K678 Stereo Microphone» comme entrée) et
que votre microphone USB est connecté au port USB de votre ordinateur (le voyant vert du
microphone est allumé), utilisez la sortie casque K678 pour enregistrer votre microphone en temps
réel ou pour suivre les enregistrements depuis votre ordinateur.
Page 7
Remarque:
1. Connectez complètement vos écouteurs à la prise casque 3.5 mm du microphone.

2. Connectez vos écouteurs à la prise microphone, vous pouvez entendre votre voix tout de suite, pas
besoin de vous connecter au logiciel d'enregistrement ou de cliquer sur «écouter cet appareil»
3. S'il n'y a pas de son lors de l'insertion de l'écouteur dans le bas du microphone, veuillez vérifier en
cliquant sur «microphone stéréo K678» - «propriétés» - «volume», vérifiez si le haut-parleur et le
microphone sont allumés sous l’onglet volume.
Écouter de la musique depuis l'ordinateur
Page 8
Spécifications
Source de courant:
5V
Courant de fonctionnement:
80 mA
Directivité polaire:
Unidirectionnel
Fréquence de réponse:
40 Hz à 20 kHz
Sensibilité:
-45 dB ± 3dB (à 1 kHz)
Niveau de bruit équivalent: 66dB-A
Rapprt S /N:
85 dB
Max. Hauteur SPL:
130 dB
Courbe de réponse en fréquence typique
Gamme de fréquence (0dB = 1V/pa)
Page 9
RÉGLAGE DE L'ORDINATEUR
Mac OS d'Apple
1. Connectez l'extrémité libre du câble USB fourni au port USB de votre ordinateur. La LED verte du
microphone s'allumera pour indiquer que le microphone est alimenté. Votre ordinateur détectera
automatiquement le périphérique USB et installera un pilote. Cependant, il se peut qu'il ne s’ouvre
aucune fenêtre ni de message.
2. Pour sélectionner le K678 comme entrée audio, ouvrez d'abord vos Préférences Système.
3. Cliquez ensuite sur Son pour afficher le volet des préférences Son.
4. Cliquez sur l'onglet Entrée et sélectionnez le "Microphone stéréo K678" comme périphérique
d'entrée audio.
Page 10
5. Cliquez sur l'onglet Sortie et assurez-vous que le "Microphone stéréo K678" est sélectionné
comme périphérique de sortie par défaut. (Cela se produit normalement de manière automatique.)
Windows

Veuillez patienter quelques secondes lors de la première utilisation car le pilote du microphone
prendra un certain temps à s'installer automatiquement. Cependant, il se peut qu'il ne s’ouvre
aucune fenêtre ni de message. (Si le connecteur USB est branché sur un autre port USB, le pilote sera
réinstallé).
Page 11
Après l'installation, vous pouvez tester le microphone en lui parlant. Si le microphone ne capte pas le
son, suivez les procédures ci-dessous.
1. Cliquez avec le bouton droit de la souris sur l'icône du haut-parleur en bas à droite de l'écran.
Cliquez sur "Sons".
2. Vérifiez que le haut-parleur est ouvert.
Cliquez sur l'enceinte utilisée - "Propriétés" - "Volume", faites glisser la barre de progression pour
régler le volume de sortie
Page 12
3. Sélectionnez l'onglet Enregistrement et choisissez «Microphone stéréo K678» comme
périphérique par défaut. Lorsque vous parlez au microphone, l'icône du type de barre devient verte
et rebondit. S'il reste inchangé, réinitialisez l'ordinateur et reconnectez le port USB. S'il n'y a toujours
pas de "microphone stéréo K678", veuillez contacter le service après-vente de FIFINE.
REMARQUE:
1. Cliquez sur «Écouter cet appareil» lorsque vous utilisez un appareil
logiciel d'enregistrement ou logiciel de chat (Skype).
2. Assurez-vous que le voyant LED est allumé. Le vert indique que le microphone est activé.
Page 13
4. Deux façons de surveiller votre voix parlée:
1) Sortie de la prise microphone - Connectez l'écouteur à la prise casque au bas du K678, vous pouvez
entendre votre voix tout de suite, pas besoin de régler les périphériques de sortie via l'ordinateur et
pas besoin de cliquer sur "écouter cet appareil" sous l'onglet "écouter".
2) Sortie de l'ordinateur - Connectez votre écouteur à la prise casque 3.5 mm de
l'ordinateur/portable, contrôlez manuellement la sortie de «Realtek High Definition Audio» sous
«Lecture», puis cliquez sur Microphone «K678 Stereo Microphone» - "Propriétés " - "Écouter " -
cliquez sur "Écouter cet appareil" - "Appliquer".
Page 14
5. Double-cliquez sur «K678 Stereo Microphone» pour ouvrir la fenêtre Propriétés du Microphone.
Cliquez avec le bouton droit sur l'icône du haut-parleur sous l'onglet Volume, changez de
pourcentage à décibels. Pour obtenir le meilleur son du microphone, réglez le niveau du microphone
dans cette plage (+6,8 à +10,0 dB) lorsque le volume de sortie du haut-parleur est réglé sur max.
Remarque:
Assurez-vous que le gain du microphone et la commande de volume du casque ne sont pas réglés sur
la position zéro.
Page 15
Remarque: (applicable à MAC et Windows)

1. Si l'ordinateur indique qu'il ne peut pas identifier les périphériques USB, redémarrez l'ordinateur
et reconnectez le microphone à un autre port USB.
2. Si le microphone est reconnu mais qu'aucun son ne sort, vérifiez que le son du système ne soit pas
coupé et que vous avez réglé la commande de volume du microphone au minimum.
3. Si le microphone est reconnu mais ne sonne pas et que votre ordinateur exécute Windows 10,
allez dans paramètres> confidentialité> microphone et cliquez sur le bouton Applications autorisant
l'accès au microphone ACTIVÉ et redémarrez l'ordinateur.
Paramètres du logiciel d'enregistrement
1. Lors de l'utilisation d'un logiciel d'enregistrement, sélectionnez «K678 Stereo Microphone» comme
périphérique d'entrée dans le réglage. Si vous souhaitez contrôler votre son à partir de la prise
casque 3.5 mm de l'ordinateur, sélectionnez "Realtek High Definition". Sélectionnez la sortie
«microphone stéréo K678» lors de la surveillance par la connexion du microphone.
Entrée: microphone stéréo K678
Sortie: veuillez choisir la sortie correcte
Page 16
Remarque: déconnectez-vous d'AUDACITY (ou d'un autre logiciel d'enregistrement) si vous constatez
que le microphone USB n'est pas disponible. Connectez d'abord le microphone, puis reconnectez-
vous au logiciel.
2. Assurez-vous de désactiver «Écouter cet appareil» sur votre système informatique lorsque vous
utilisez un logiciel d'enregistrement, sinon vous entendrez un duo de votre choix avec un écho.
3. Il existe plusieurs façons d'améliorer l'enregistrement à l'aide d'Audacity. Veuillez vous rendre sur
https://fifinemicrophone.com/blogs/news pour trouver la meilleure solution ou CHERCHER WIDGET
pour votre sujet intéressé dans nos blogs.
4. Pour les ordinateurs Windows, nous recommandons Audacity et pour les ordinateurs Apple, vous
pouvez utiliser le lecteur QuickTime d'Apple pour tester l'enregistrement.
ANNONCE IMPORTANTE
• Définissez vos volumes des logiciels
Un réglage correct du volume du microphone est important pour des performances optimales.
Idéalement, le volume du microphone doit être aussi élevé que possible sans surcharger l'entrée de
votre ordinateur. Si vous entendez une distorsion ou si votre programme d'enregistrement a des
niveaux constamment surchargés (aux niveaux de crête), baissez le volume (ou niveau) du
microphone via votre panneau de commande (ou les préférences système) ou via votre logiciel
d'enregistrement. Si votre programme d'enregistrement ne montre pas de volume, vous pouvez
augmenter le gain du microphone via les paramètres du panneau de commande (ou les préférences
système) ou via votre programme d'enregistrement.
Page 17
• Sélectionnez un logiciel
Vous avez plusieurs choix de logiciels d'enregistrement. Audacity est disponible en ligne
gratuitement à http://audacity.sourceforge.net/, c'est un logiciel largement utilisé qui fournit un
logiciel d'enregistrement de base.
Remarque: Le microphone doit être connecté à l’ordinateur avant d'activer le logiciel
d'enregistrement.

• Positionnement de votre microphone
Il est important de placer le microphone directement en ligne (sur l'axe) avec la personne qui
parle/chante ou avec l'instrument (ou toute autre source sonore) pour obtenir la meilleure réponse
en fréquence du microphone. Pour une utilisation dans les applications de parole/chant, le
placement idéal du microphone se trouve directement devant le haut-parleur/chanteur
• Protection de votre microphone
Ne laissez pas votre microphone à l'air libre ou dans des zones où la température est supérieure à
43°C pendant de longues périodes. Une humidité extrêmement élevée doit également être évitée.
• Choisissez votre périphérique de sortie de son
Lorsque vous branchez le microphone à votre ordinateur, cela annulera l'audio de tout autre fichier
audio lu. S’il n'y a pas de son sur la lecture, vous devez sélectionner manuellement le "haut-parleur
(Realtek High Definition Audio)" comme périphérique de lecture par défaut si vous souhaitez
reproduire le son par le haut-parleur intégré de l'ordinateur.
Page 0
Manuel d'instructions
Other manuals for K669B
1
Table of contents
Languages:
Other Fifine Microphone manuals
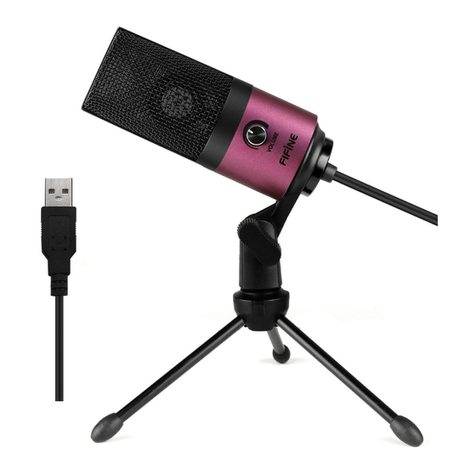
Fifine
Fifine K669 User manual
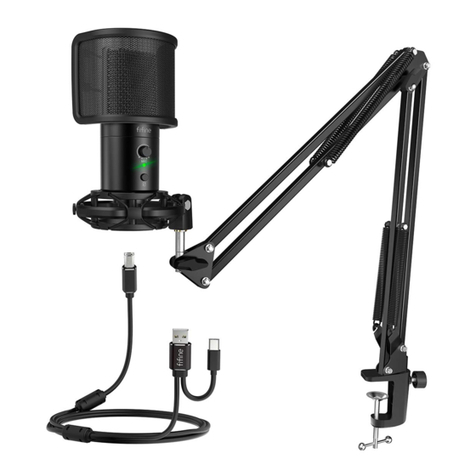
Fifine
Fifine T683 User manual
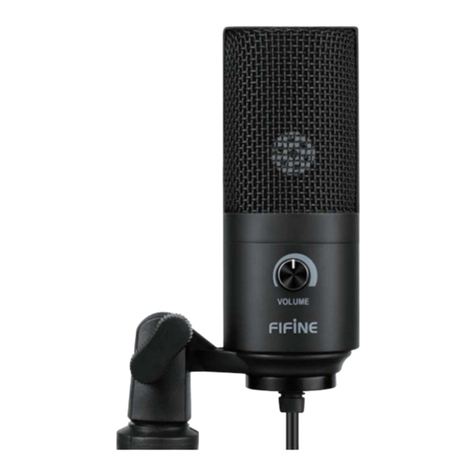
Fifine
Fifine K669B User manual
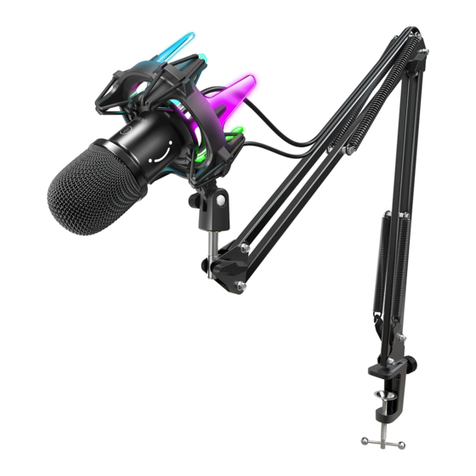
Fifine
Fifine K651 User manual
Fifine
Fifine K720 User manual
Fifine
Fifine AMPLIGAME A8 PLUS User manual
Fifine
Fifine K658 User manual
Fifine
Fifine K025 User manual
Fifine
Fifine K726 User manual
Fifine
Fifine K670 User manual


