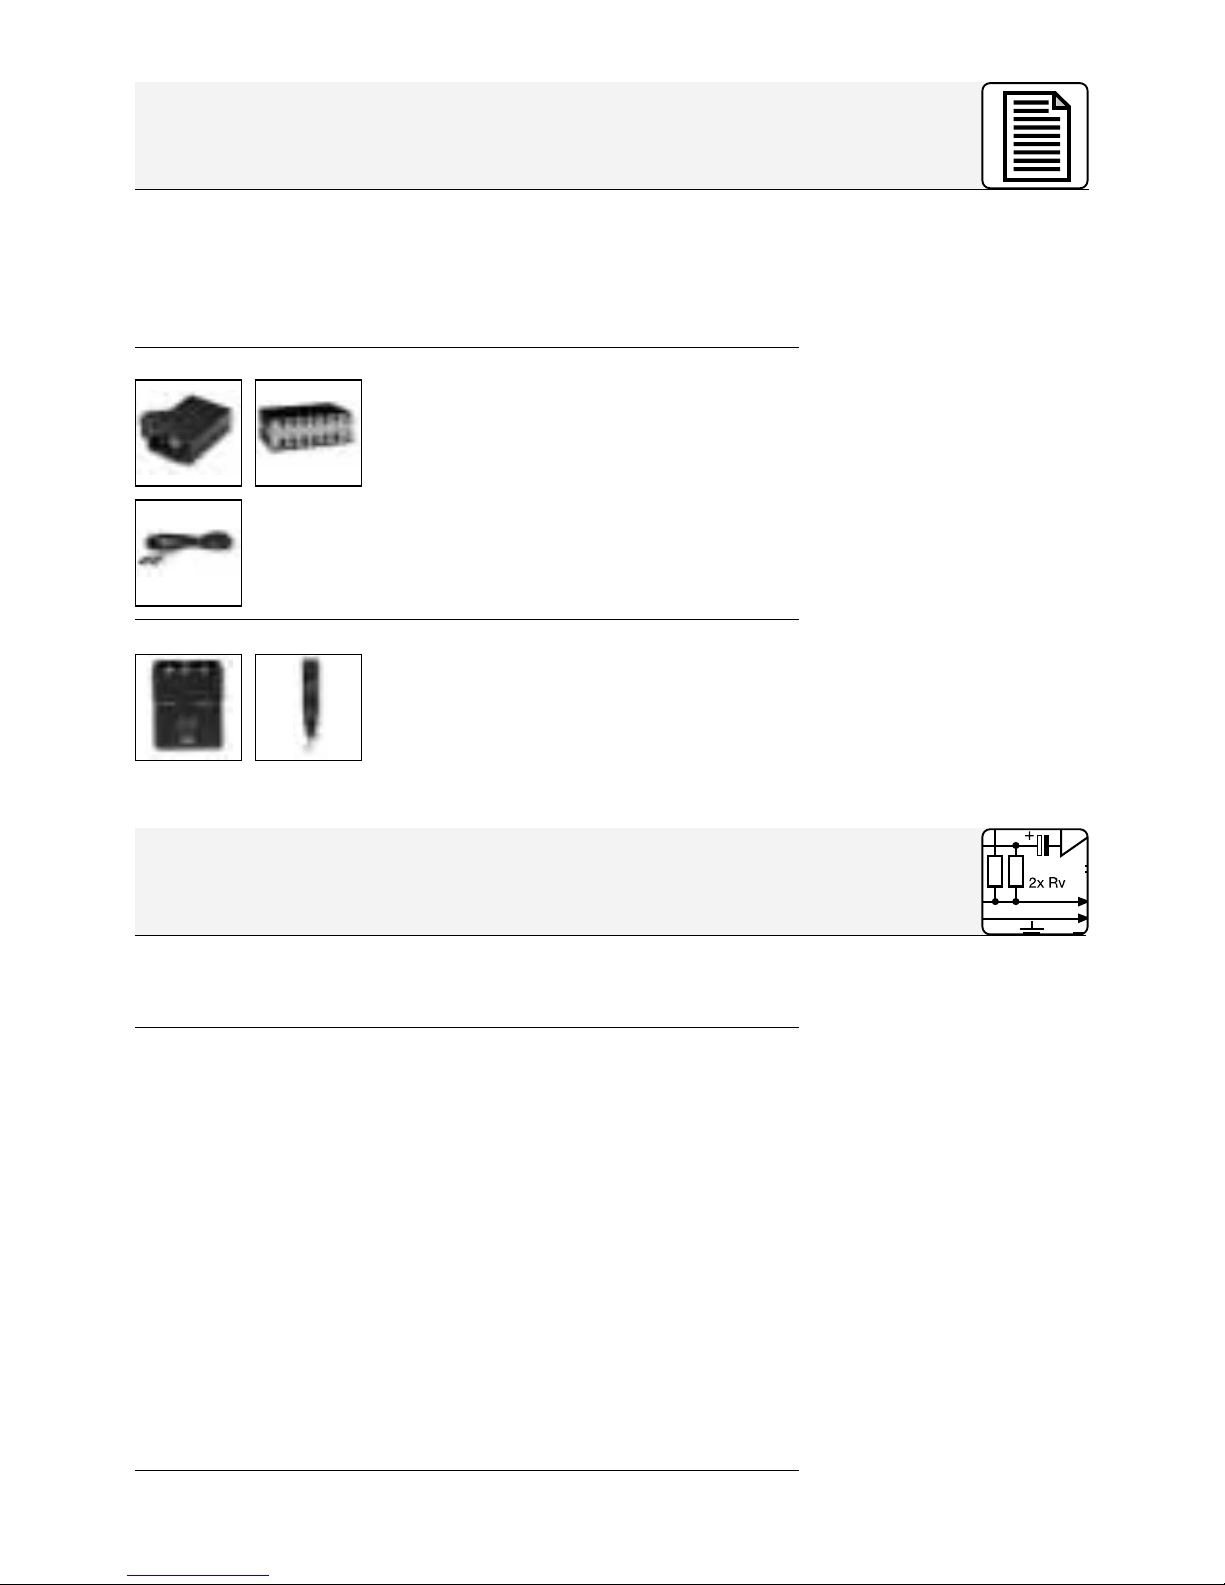
AKG C 420 User manual

Bitte vor Inbetriebnahme des Gerätes lesen!
Please read the manual before using the equipment!
Veuillez lire cette notice avant d’utiliser le système!
Prima di utilizzare l’apparecchio, leggere il manuale!
Antes de utilizar el equipo, lea por favor el manual!
Por favor leia este manual antes de usar o equipamen
to!
C 420
Bedienungshinweise. . . . . . . S. 2
User Instructions . . . . . . . . . p. 12
Mode d’emploi . . . . . . . . . . . p. 22
Istruzioni d’uso. . . . . . . . . . . p. 32
Modo de empleo . . . . . . . . . p. 42
Instruções de uso . . . . . . . . p. 52

2
Das C 420 ist ein Miniatur-Kondensatormikrofon,
das mit einem Nackenbügel am Kopf getragen
wird. Das Mikrofon hat eine nierenförmige Richt-
charakteristik und nimmt daher Schall von vorne
(vom Mund) bevorzugt auf.
Das Mikrofongehäuse mit dem Kondensator-
wandler ist über eine elastische Lagerung mit dem
Mikrofonarm verbunden, um Kabelgeräusche und
Körperschall zu unterdrücken. Der Mikrofonarm
positioniert das Mikrofon seitlich vor dem Mund.
Dadurch werden Popgeräusche weitgehend ver-
mieden und das Mikrofon vor Verunreinigung ge-
schützt. Der mitgelieferte Windschutz unterdrückt
zusätzlich Wind- und Popgeräusche.
Das C 420 ist in drei Ausführungen erhältlich:
Mit 3-poligem XLR-Stecker mit eingebautem Ad-
apter für Universal-Phantomspeisung von 9 bis
52 V.
Mit verriegelbarem Mini-XLR-Stecker zum An-
schluss an Battteriespeisegerät B 29 (neue Aus-
führung), Phantomspeise-adapter MPA II (neue
Ausführung) oder AKG-Taschensender.
Mit verriegelbarem 3,5 mm-Klinkenstecker zum
Anschluss an das Battteriespeisegerät B 29 (alte
Ausführung), Phantomspeiseadapter MPA II (alte
Ausführung) oder Taschensender PT 300.
1 Beschreibung
1.1 Allgemeines
1.2 Varianten
C 420:
C 420 L:
C 420/B-lock:

3
1 Beschreibung
1.3. Mitgeliefer-
tes Zubehör
1.4 Empfohlenes
Zubehör für
C 420
1.5 Empfohlenes
Zubehör für
C 420 L,
C 420 B/lock
2.1 C 420
Alle Ausführungen des C 420 werden mit folgen-
dem Zubehör geliefert:
Schaumstoff-Windschutz W 44
Batteriespeisegerät B 18
Netzgerät N 62 E, N 66 E
Anschlusskabel MK 9/10, 10 m
Batteriespeisegerät B 29
Phantomspeiseadapter
MPA II
Das C 420 ist ein Kondensatormikrofon und
benötigt daher eine Stromversorgung.
1. Schliessen Sie den Phantomspeiseadapter am
Mikrofon-kabel an einen symmetrischen XLR-
Mikrofoneingang mit Phantomspeisung an.
2. Schalten Sie die Phantomspeisung ein. (Lesen
Sie dazu in der Betriebsanleitung des jeweili-
gen Gerätes nach.)
3. Wenn Ihr Mischpult keine Phantomspeisung
besitzt, schalten Sie zwischen Mikrofon und
Mischpulteingang ein AKG-Phantomspeise-
gerät (N 62 E, N 66 E, B 18 E).
Das Phantomspeisegerät können Sie auch an
einen asymmetrischen Eingang anschließen.
2 Anschluss

4
2 Anschluss
2.2 C 420 L
2.3 C 420 B/lock
2.4 Batterie-
speisegerät
B29
2.5 Phantom-
speiseadapter
MPA II
2.6 Externe
Phantomspeise-
geräte
Wichtig!
1. Stecken Sie den Mini-XLR-Stecker am Mikro-
fonkabel bis zum Anschlag in eine der beiden
Mini-XLR-Buchsen am B 29, die Mini-XLR-
Kupplung am Anschlusskabel des MPA II bzw.
die Eingangsbuchse des Taschensenders an.
Der Stecker verriegelt sich automatisch.
2. Verbinden Sie das B 29 bzw. den MPA II mit
dem gewünschten Eingang.
Diese Ausführung entspricht dem C 420 L, besitzt
jedoch einen schraubbaren 3,5-mm-Monoklin-
kenstecker, den Sie direkt an die alte Ausführung
des B 29, MPA II bzw. AKG-Taschensenders
PT 300 anschließen können. (Lesen Sie dazu in
der Betriebsanleitung des jeweiligen Gerätes
nach.)
Das optionale Batteriespeisegerät B 29 ermög-
licht Ihnen, zwei Mikrofone an einen gemeinsa-
men symmetrischen oder asymmetrischen Ein-
gang anzuschliessen, sodass Sie weniger Misch-
pulteingänge benötigen.
Mit dem optionalen Phantomspeiseadapter MPA
II können Sie das C 420 an jede Phantomspeise-
quelle sowie an XLR-Eingänge mit 9 bis 52 V
Phantomspeisung anschließen.
Als Phantomspeisegeräte für C 420 L und C 420 B/
lock mit MPA II empfehlen wir das optionale Netz-
gerät N 62 E oder N 66 E sowie das (ebenfalls op-
tionale) Batteriespeisegerät B 18 von AKG.
Wenn Sie andere als die von AKG empfohle-
nen Speisegeräte verwenden, kann das Mi-
krofon beschädigt werden und erlischt die
Garantie.

5
2 Anschluss
2.7 Anschluss-
kabel
Zum Anschluss an symmetrische (XLR-) Ein-
gänge verwenden Sie ein normales XLR-Kabel.
Für asymmetrische Eingänge (Mono-Klinken-
buchse) verwenden Sie ein Kabel mit XLR-Stecker
(weiblich) und Mono-Klinkenstecker (s. Abb. 1):
1. Verbinden Sie im XLR-Stecker mittels einer
Drahtbrücke Stift 1 mit Stift 3 und mit der Ab-
schirmung.
2. Verbinden Sie die innere Ader des Kabels mit
Stift 2 des XLR-Steckers und der Spitze des
Klinkensteckers.
Abb. 1: Anschlusskabel für asymmetrische Mi-
krofoneingänge.

6
3 Anwendungshinweise
3.1 Mikrofon
aufsetzen
1. Stellen Sie die Ohrbügel so ein, dass der Na-
ckenbügel sicher am Kopf sitzt.
Abb. 2: Ohrbügel einstellen
2. Setzen Sie den Nackenbügel wie in Abb. 3
bis 5 gezeigt auf.
Abb. 3: Nackenbügel
Abb. 4 Abb. 5

Abb. 8:
5. Biegen Sie den Schwanenhals so, dass das
Mikrofon seitlich vor dem Mundwinkel sitzt.
6. Führen Sie das Mikrofonkabel durch die drei
Schlitze im Halteclip und klemmen Sie den
Halteclip am Hemdkragen an.
Dadurch wird das Mikrofon vom Zug des Ka-
bels entlastet und sitzt angenehm leicht am
Kopf.
7
3 Anwendungshinweise
Ohrbügel nach-
justieren:
Mikrofon
positionieren:
Zugentlastung:
Abb. 6 Abb. 7
3. Falls der Nackenbügel nicht optimal sitzt, kön-
nen Sie die Ohrbügel wie in Abb. 6 gezeigt ein-
stellen. Verschieben Sie den Kabelhalter so,
dass das Kabel lose bleibt (s. Abb. 7).
4. Falls das Mikrofon
noch immer zu lo-
cker sitzt, können
Sie den Nackenbü-
gel leicht nach innen
biegen (s. Abb. 8).

8
3 Anwendungshinweise
3.2 Windschutz Falls (z.B. im Freien) starke Windgeräusche oder
Popgeräusche auftreten, befestigen Sie den mit-
gelieferten Schaumstoff-Windschutz am Mikro-
fon.
1. Stecken Sie den Windschutz auf die Mikrofon-
kapsel auf.
2. Ziehen Sie den Windschutz auch über das
äußere Ende der Mikrofonkapsel.
4.1 Mikrofon
Arbeitsweise: Kondensatormikrofon mit Permanentladung
Richtcharakteristik: Niere
Übertragungsbereich: 20-20.000 Hz
Empfindlichkeit: 5 mV/Pa (-46 dBV bez. auf 1 V/Pa)
Elektrische Impedanz bei 1000 Hz: 200 Ω
Empfohlene Lastimpedanz: >2000 Ω
Grenzschalldruckpegel
für 1% / 3% Klirrfaktor: 126 / 130 dB SPL
Äquivalentschalldruckpegel: 33 dB (nach DIN 45412)
Speisespannung:
C 420: 9-52 V Universalphantomspeisung
C 420 L: 9 V Batteriespeisung über B 29 oder
Taschensender, oder 9 - 52 V
Universalphantomspeisung über
Adapter MPA II
C 420 B/lock: 9 V Batteriespeisung über B 29 oder
9 - 52 V Universalphantomspeisung über
Adapter MPA II
Stromaufnahme: ca. 2 mA
Steckerart: XLR 3-polig
Oberfläche: mattschwarz
Abmessungen: 130 mm ø
4 Technische Daten

9
4 Technische Daten
4.4
Polardiagramm
4.2 Konfor-
mitätshinweis
Kabellänge: 3 m
Nettogewicht: 30 g ohne Stecker
5 Reinigung
4.3 Frequenzkurve
Alle Metalloberflächen können Sie problemlos mit
(Industrie-) Spiritus oder Alkohol reinigen.
Den Schaumstoff-Windschutz reinigen Sie am
besten mit einer milden Waschmittellösung. Der
Windschutz ist sofort nach dem Trocknen wieder
einsatzbereit.
Dieses Produkt entspricht der Norm EN 50 082-1,
vorausgesetzt, dass nachgeschaltete Geräte CE-
konform sind.

10
6 Fehlerbehebung
Fehler
1. Mikrofon funktio-
niert nicht:
2. Headset sitzt nicht
fest am Kopf;
Mikrofonarm
wackelt:
3. Starke Pop-, oder
Wind- und Atem-
geräusche hörbar:
4. Mikrofon klingt
mit der Zeit immer
dumpfer:
Mögliche Ursache
Keine Speisespan-
nung
Nackenbügel nicht
richtig eingestellt.
Mikrofon zu nahe an
Mund oder Nase.
Verschmutzter Innen-
oder Aussenwind-
schutz W 44 dämpft
hohe Frequenzen.
Behebung
C 420: Phantomspei-
sung überprüfen.
C 420 B/lock: Batte-
rien im B 29 bzw.
PT 300 überprüfen.
C 420 L: Batterien im
Taschensender
überprüfen.
Nackenbügel genau
nach Kapitel 3.1 ein-
stellen. Besonders
Abb. 9 beachten!
Mikrofon-Einsprech-
öffnungen zum Mund-
winkel ausrichten und
so weit von Mund und
Nase entfernt, dass
Atemgeräusche nicht
mehr auftreten.
1. Windschutz W 44
mit Seifenlauge rei-
nigen.
2. Innenwindschutz
von AKG-Service
reinigen lassen.
ACHTUNG: Mikrofon-
gehäuse nicht öff-
nen, da ansonsten
die Garantie er-
lischt.

11
6 Fehlerbehebung
Fehler
5. Mikrofon klingt
”dünn”, Rück-
kopplung bereits
bei geringen Pe-
geln:
Mögliche Ursache
Mikrofon zu weit vom
Mundwinkel entfernt.
Behebung
Mikrofon näher am
Mundwinkel positio-
nieren.

12
1 Description
1.1 General
1.2 Versions
C 420:
C420 L:
C 420/B-lock:
The C 420 is a head-worn miniature condenser
microphone with a convenient behind-the-neck
headband. The microphone has a cardioid polar
pattern and therefore “prefers” sounds arriving
from in front of it (from the user’s mouth).
The microphone case containing the condenser
transducer is shock mounted on the microphone
arm in order to suppress cable and mechanical
noise. The microphone arm will place the micro-
phone in front of the corner of your mouth to mini-
mize pop noise and protect the microphone from
contamination. The supplied windscreen makes
the microphone even less susceptible to wind and
pop noise.
The C 420 is available in three versions:
With 3-pin XLR connector with integrated adapter
for 9 to 52 V universal phantom power.
With locking mini XLR connector for use with the
new version B 29 battery power supply, new ver-
sion MPA II phantom power adapter, or AKG
bodypack transmitters.
With locking mini jack plug for use with the old
version B 29 battery power supply or old version
MPA II phantom power adapter.

13
1 Description
1.3 Standard
Accessories
1.4 Optional
Accessories for
C 420
1.5 Optional
Accessories for
C 420 L,
C 420 B/lock
2.1 C 420
All C 420 versions are supplied with:
W 44 foam windscreen
B 18 battery supply
N 62 E, N 66 E AC power
supplies
MK 9/10 10-m (33-ft.)
connecting cable
B 29 battery supply
MPA II phantom power adapter
The C 420 is a condenser microphone and there-
fore needs a power supply.
1. Connect the phantom power adapter on the
microphone cable to a balanced XLR micro-
phone input with phantom power.
2. Switch the phantom power on. (Refer to the
instruction manual of the unit to which you
connected your C 420.)
3. If your mixer provides no phantom power,
connect an AKG phantom power supply
(N 62 E, N 66 E, B 18) between the microphone
and the mixer.
You may connect AKG phantom power sup-
plies to balanced or unbalanced inputs.
2 Interfacing

14
2 Interfacing
2.2 C 420 L
2.3 C 420 B/lock
2.4 B 29 Battery
Supply
2.5 MPA II
Phantom Power
Adapter
2.6 External
Phantom Power
Supplies
Important!
1. Plug the mini XLR connector on the micro-
phone cable all the way into one of the two mini
XLR sockets on the B 29, the mini XLR socket
on the connecting cable of the MPA II, or the
input socket on the bodypack transmitter.
The connector will lock automatically.
2. Connect the B 29 or MPA II to the desired
input.
This version is identical to the C 420 L except that
it uses a screw-in mini jack plug that you can
connect directly to the old versions of the B 29,
MPA II, or AKG bodypack transmitters. (Refer to
the instruction manual of the unit you are using.)
The optional B 29 battery supply allows you to
connect two microphones to a common balanced
or unbalanced input in order to save on mixer
inputs.
The optional MPA II phantom power adapter lets
you connect the C 420 to any phantom power
source or XLR input with 9 to 52 V phantom power.
For phantom powering the C 420 L and C 420
B/lock with MPA II we recommend the optional
N 62 E or N 66 E AC power supply or the B 18 bat-
tery supply (also optional) from AKG.
Using any power supply other than those
recommended by AKG may damage your
microphone and will void the warranty.

15
2 Interfacing
2.7 Connecting
Cables
To connect to a balanced (XLR) input, use a
standard XLR cable.
To connect to an unbalanced input (mono jack),
use a cable with a female XLR connector and
TS jack plug (see fig. 1 below):
1. On the XLR connector, use a wire bridge to
connect pin 1 to pin 3 and the cable shield.
2. Connect the inside wire of the cable to pin 2 on
the XLR connector and the tip contact of the
jack plug.
Fig. 1: Connecting cable for unbalanced micro-
phone inputs.

16
3 Operating Notes
3.1 Putting the
Microphone on
1. Adjust the temple pieces so that the behind-
the-neck headband will rest securely against
your head.
Fig. 2: Adjusting the temple pieces.
2. Put the behind-the-neck headband on as
shown in figs. 3 through 5.
Fig. 3: Behind-the-
neck headband.
Fig. 4 Fig. 5

Fig. 8:
5. Bend the gooseneck so that the microphone
will sit to one side in front of the corner of your
mouth.
6. Reeve the microphone cable through the three
slots in the cable clip and clamp the cable clip
on your shirt collar. This takes the pull of the
cable off the microphone and the microphone
will fit your head securely and lightly.
17
3 Operating Notes
Readjusting the
Temple Pieces:
Aligning the
Microphone:
Strain Relief:
Fig. 6 Fig. 7
3. If the behind-the-neck headband does not fit
snugly, readjust the temple pieces as shown in
fig. 6. Slide the cable holder so as to slacken
the cable a little (refer to fig. 7).
4. Should the micro-
phone still fit loo-
sely, bend the
behind-the-neck
headband slightly
inward referring to
fig. 8.

18
3 Operating Notes
3.2 Windscreen If (for instance, in outdoor use) excessive wind or
pop noise becomes audible, attach the supplied
windscreen to the microphone.
1. Slide the windscreen onto the microphone
capsule.
2. Pull the windscreen over the outer edge of the
microphone capsule.
4 Specifications
4.1 Microphone
Type: Pre-polarized condenser microphone
Polar pattern: Cardioid
Frequency range: 20 Hz to 20,000 Hz
Sensitivity: 5 mV/Pa (-46 dBV re 1 V/Pa)
Electrical Impedance at 1000 Hz: 200 Ω
Recommended load impedance: >2000 Ω
Max. SPL for 1% / 3% THD: 126 dB / 130 dB
Equivalent noise level: 33 dB (to DIN 45412)
Supply voltage:
C 420: 9 to 52 V universal phantom power
C 420 L: 9 V battery supply through B 29 or body-
pack transmitter, or 9 to 52 V universal
phantom power through MPA II adapter
C 420 B/lock: 9 V battery supply through B 29 or 9 to
52 V universal phantom power through
MPA II adapter
Current consumption: Approx. 2 mA
Connector: 3-pin male XLR
Finish: Matte black
Size: 130 mm (5.2 in.) in dia.
Cable length: 3 m (10 ft.)
Net weight: 30 g (1.1 oz.) exc. of connector

4.4 Polar
Diagram
5 Cleaning
4.3 Frequency Response
Clean metal surfaces with (industrial grade)
methylated spirits or alcohol.
Clean the foam windscreen in mild soap suds. You
can use the windscreen again as soon as it has
dried.
19
4 Specifications
4.2 Declaration
of Conformity
When connected to equipment with a CE sign, this
product conforms to EN 50 082-1.

20
6 Troubleshooting
Problem
1. Microphone does
not work:
2. Headset does not
fit securely;
microphone arm
wobbles:
3. Loud pop, wind,
and/or breath
noise:
4. Microphone
sound becomes
duller by and by:
Possible Cause
No supply voltage.
Headband is not ad-
justed correctly.
Microphone sits too
close to mouth or
nose.
Internal or W 44
external windscreen
when soiled
attenuates high fre-
quencies.
Remedy
C 420: Check phan-
tom power source.
C 420 B/lock: Check
batteries in the
B 29 or PT 300.
C 420 L: Check bat-
teries in the body-
pack transmitter.
Adjust headband
exactly as described in
section 3.1, referring
particularly to fig. 9.
Align microphone
sound entry with
corner of mouth and
move microphone just
far enough away from
mouth and nose to
stop breath noise.
1. Clean W 44 wind-
screen with soap
suds.
2. Refer cleaning of
internal windscreen
to nearest AKG
Service Center.
ATTENTION: Do not
open microphone
case yourself. This
would void the war-
ranty.
Other manuals for C 420
1
Table of contents
Languages:
Other AKG Microphone manuals