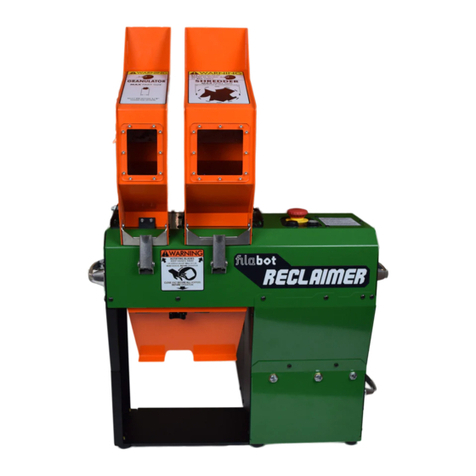
Filabot FB00823 User manual

REV. 1 12-8-2020
Filabot
Vermont, USA, Earth
1-802-505-6772
Filabot Pelletizer
Operation Manual
This manual applies to the Filabot Pelletizer.
Triex LLC, Barre, VT 05641, USA

1
CAUTION! Read Carefully
• HEAVY Always use the handles to lift the Pelletizer. Check that the
power cord is disconnected before moving the unit.
• HIGH SPEED SHARP ROTATING BLADES Never operate the
Pelletizer without all of the components assembled closed and
secured. Never operate the Pelletizer if any parts appear missing or
damaged. NEVER ATTEMPT TO MODIFY OR BYPASS SAFETY
SWITCHES OR CIRCUITRY.
• BOLT TENSIONED BEARING ASSEMBLY Make sure the long
Allen head through-bolts securing the head are hand tight before
operation. Failure to do so can lead to improper operation or
damage. Tighten the bolts in an X pattern.Do not overtighten, this
could prevent the motor and cutter from turning.
• In Case of Emergency pull the power cord out of the machine.
• Only use the Pelletizer to process thermoplastic polymer filaments.
No other use has been tested or approved by Filabot.
• The Pelletizer is designed to process filament between 1mm to 3mm
in diameter. Inserting filament outside of these dimensions can
cause clogs or performance issues.
• Always STOP the Pelletizer and unplug the power cord before
opening or removing any components.
• The Pelletizer is designed for indoor use only. Operate in a clean,
dry area.
• Check the AC input voltage specified on the S/N Label near the
power inlet. Only use the specified input voltage to operate the
Pelletizer or damage to the components will occur.
• Do not use this device if any parts appear missing or damaged.
• Do not modify this device without authorization from Filabot.
Contact Filabot with any questions
1-802-505-6772

2

3
General Specifications
Power Input:
115VAC-10A or 230VAC-65A 50/60Hz 1-phase
350W NOMINAL
Input Power Connector Type: IEC 320-C14
Weight:
20kg (45 lbs)
Overall Dimensions:
Drive Control:
230V 3-phase Variable Frequency Drive
Drive Motor:
1/2HP 230V 1.36A 3-phase
60Hz 1725 RPM
Inverter duty
Rotating Cutter:
Standard 5/8” Shank 6 flute HSS Endmill 1” OD
Stationary Blade:
1” wide 0.25” thick 0.65” long High Speed M2
Hardened steel

4
Parts Included
1. Pelletizer
2. Spooler mounting bracket
3. Bowden tube block
4. (20) Plastic Drawstring Bags 10" Wide, 14" High
Tools Required:
#2 Phillips Screw Driver
5/32” Allen wrench
3/16” Allen wrench
Call 1-802-505-6772 or visit Filabot.com for additional or replacement
parts

5
Spooler Mounting Bracket Assembly
The Spooler mounting bracket and Bowden tube block allow quick
switching between feeding filament into the Pelletizer and winding
filament onto a spool. If manually feeding filament into the Pelletizer by
hand, these instructions can be skipped.
1. Remove the (2) Philips screws beside the rollers on the Spooler.
2. Install the Spooler mounting bracket so the flanges are pointed
toward the rollers. Align the holes with the ones on the Spooler the
Philips screws were removed from, then re-install the Philips screws.
3. Insert the Bowden tube
block into the mounting
bracket so the pointed
end is between the
rollers. Adjust the
mounting bracket so the
angled faces of the block
do not touch the rollers,
then tighten the Philips
screws.

6
Spooler Mounting Bracket Assembly cont.
4. Insert the Bowden tube into the push-to-connect fitting on the
Pelletizer.
5. The Spooler will push filament into the Pelletizer through the Bowden
tube. Adjust the speed of the Pelletizer or Spooler to precisely
change the length of the pellets.

7
Controls & Inputs
1. Filament Input (1mm to 3mm diameter)
2. Pellet Output hopper
3. Start and Stop button – Press to start the machine, press while
running to stop the machine.
4. Safety Reset button – Press at initial power on or after the safety
switches are tripped to reset the safety circuit.
5. Motor Speed Control – Adjust to contol the filament cutting speed
which determines the length of the pellets.

8
Controls & Inputs cont.
6. Main power switch and main power indicator.
7. Serial Number & Voltage Input Label
8. Power inlet – IEC C14

9
Operation
1. Secure the drawstring collection bag to the flange on the bottom of the output
hopper as shown:
2. Plug the power cable into the power inlet on the machine and into an outlet.
3. Turn on the main power switch. It should illuminate if the machine has power.
4. Push the Safety Reset button to power up the drive. You should hear the
contactor relay click if the drive has powered on.
5. Press the Start/Stop button to start the machine. If the cutter does not begin to
spin, turn up the speed control knob, or check the head assembly bolt
tightness (refer to Removing the Head Assembly section).
6. To begin pelletizing, feed filament into the filament input on the Pelletizer either
manually by hand or through the Bowden tube using the Spooler. Adjust the
motor speed to control the size of the pellets.

10
Blade Adjustment
The distance between the stationary blade and the rotating cutter must
be as small as possible for filament to be pelletized efficiently. If pellets
do not appear to be cleanly cut or strands of filament appear in the
output the blade may need adjustment.
Stop and disconnect the power cord from the Pelletizer first.
1. Using a 5/32” Allen wrench, loosen the (2) set screws that secure the
blade holder in the head assembly just enough that the tool holder
can be slid in and out by holding the Bowden tube push-to-connect
fitting.

11
Blade Adjustment cont.
2. Press the stationary cutting blade tool inwards until it touches against
the rotating cutter.
3. Using a 3/16” Allen wrench, manually rotate the cooling fans of the
motor to spin the rotating cutter clockwise. Complete a full 360-
degree rotation of the cutting tool. The back edge of the rotating
cutter blades will push the stationary blade tool holder in so it will be
as close as possible without touching.

12
Blade Adjustment cont.
4. Tighten the (2) set screws that secure the blade holder in the head
assembly which were loosened in Step 1.
5. Before turning the Pelletizer on, manually rotate the cooling fans of
the motor to spin the rotating cutter counter-clockwise (opposite
direction as done in Step 3). Complete a full 360-degree rotation of
the cutting tool. Check for any change in resistance or hang-ups
while rotating which indicate the stationary blade is catching on the
rotating cutter because it has been moved too close. Begin again
from Step 1 until the rotating cutter can complete a full turn freely. If
upon starting the machine the sound of the blade scraping can be
heard, repeat steps 1-4 and back the blade off slightly. As long as
consistent pellets are being cut you have a tight enough blade gap.

13
Cleaning
Under typical operating conditions the Pelletizer can be cleaned using
compressed air. With the Pelletizer running, blow compressed air into the
push-to-connect fitting and into the output hopper, alternating between
the two, to remove trapped pellets and debris from inside the head
assembly.
For removal of melted plastic or packed/tangled filament refer to the next
section for removing the head assembly.

14
Removing the Head Assembly
Disconnect the power cord from the Pelletizer before continuing.
1. Using a 3/16 Allen wrench, remove the (4) long Allen head assembly
bolts from the front of the head assembly.
2. Remove the single Philips head machine screw from both sides of
the sheet metal enclosure.

15
Removing the Head Assembly cont.
2. cont.
3. Pull the head assembly away from the motor and bearing tube.
Caution: Sharp blades! Wear gloves and be safe when working around
the exposed rotating cutter.
Be careful not to pull the bearing tube, rotating cutter, and bearings away
from the motor face with the head assembly. If this happens, the wedges
of the flex coupler will have to be aligned so the assembly can be pushed
back flush against the motor face.
Remove any stuck debris or tangled filament from the head assembly.

16
Removing the Head Assembly cont.
4. Before reassembling, check the seal for damage and remove any
debris.
5. Reinstall the head assembly (reverse Step 3).
6. Reinstall the Phillips head machine screws (reverse Step 2).
7. Reinstall the (4) long Allen head assembly bolts. These need very
little torque to secure the head to the motor base. Excessive torque
will put too much pressure on the bearings and can stop the motor
from turning or strip the threads. The leverage afforded by the short
end of the hex tool is plenty for this task. Tighten the bolts in an X
pattern until they are finger tight.
8. Refer to the Blade Adjustment section to ensure proper blade
adjustment before operating.

17

REV. 1 12-8-2020
2020, Triex LLC, Barre VT, USA. No part of this manual may be copied, stored, transmitted, or
otherwise released without the express written consent of Triex LLC. This manual applies only to
the Filabot Pelletizer. While Triex LLC has applied all possible caution in producing this manual, we
urge the customer or user of this device to contact Triex LLC with any questions or concerns about
operation, before operating the device or making any adjustments. Triex LLC provides no
assurance of applicability of the product to customers' requirements.
Table of contents
Other Filabot Industrial Equipment manuals


