ON/OFF Switch Information For Your Sprayer
"o" is OFF
(12 Volt Pump)
"-" is ON
in the ON (-) position
This switch is shown
"ON" position before operating your sprayer.
Make sure BOTH of these switches are in the
number system, where 1=ON and 0=OFF)
(These symbols are based off the binary
"o" is for the OFF position
"-" is for the ON position
Things you need to know about the switches:
your battery connecting cable. (in most cases)
plastic cover. A similar switch will be located on
'rear' of the pump, located underneath a clear
switches. The one on the pump will be at the
Your sprayer may be equipped with (2) ON/OFF
Page 4
Operation
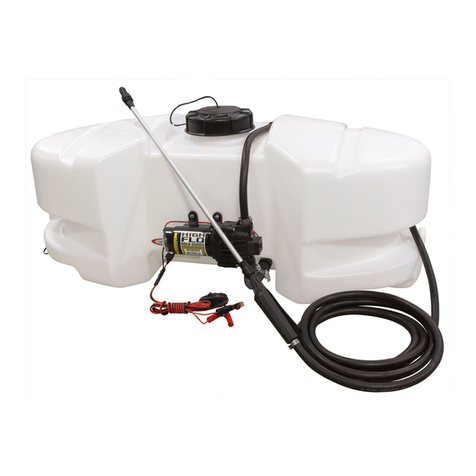
Your sprayer is equipped with (2) ON/OFF switches. One is on the wire assembly that you hook up to your battery, the other is on the pump itself, on the
opposite end of the pressure switch. The "-" is the "ON" position and the "o" is the "OFF" position for the switches. Make sure both switches are
depressed in the "-" position for operation.
In addition to the ON/OFF switch, the pump is equipped with an electronic pressure switch that is factory pre-set for it to shut off at 60 p.s.i.. This switch
assembly is the 'square box' on the head portion of the pump.
Always fill the tank with a desired amount of water first, and then add the chemical slowly, mixing as you pour the chemical into the tank. You may use
the handgun to spray into the solution in order to mix the chemical and water.
Initially begin spraying by opening the handgun. This will enable the air in the line to be purged through the handgun tip, while building pressure.
The pumping system draws solution from the tank, through the strainer/filter, and to the pump. The pump forces the solution under pressure to the
handgun and/or boom nozzles.
Open the handgun by squeezing the handle lever.
•
Rotating the adjustable nozzle tip on the handgun will change the tip pattern from a straight stream to a cone pattern (finer mist).
•
Drain all water out of your sprayer, paying special attention to the pump, handgun, and valve(s). These items are especially prone to damage from
chemicals and freezing weather.
The sprayer should be winterized before storage by pumping a solution of RV antifreeze through the entire plumbing system. This antifreeze solution
should remain in the plumbing system during the winter months. When spring time comes and you are preparing your sprayer for the spray season,
rinse the entire plumbing system out, clearing the lines of the antifreeze solution. Proper care and maintenance will prolong the life of your sprayer.
Winter Storage
Testing the Sprayer
NOTE:
It is VERY important for you to test your sprayer with plain water before actual spraying is attempted. This will enable you to
check the sprayer for leaks, without the possibility of losing any expensive chemicals.
Conditions of weather and terrain must be considered when setting the sprayer. Do not spray on windy days. Protective clothing must
be worn in some cases.
Be sure to read the chemical label(s) correctly!
After Spraying
After use, fill the sprayer tank part way with water. Start the sprayer, and allow the clear water to be pumped through the plumbing system and out
through the spray nozzles.
Refill the tank about half full with plain water and use FIMCO Tank Neutralizer and Cleaner, and repeat cleaning instructions above.
Flush the entire sprayer with the neutralizing/cleaning agent, then flush out one more time with plain water. Follow the chemical manufacturer's disposal
instructions of all wash or rinsing water.
For the boom, (if applicable) remove the tips and screens from the nozzle assemblies. Wash these items out thoroughly. Blow the orifice clean and dry.
If the orifice remains clogged, clean it with a fine bristle (NOT WIRE) brush, or with a toothpick. Do not damage the orifice. Water rinse and dry the tips
before storing.
WARNING: Some chemicals will damage the pump valves if allowed to soak untreated for a length of time! ALWAYS flush the pump as
instructed after each use.

