FIRST TUNNELS DOM User manual

Copyright © First Tunnels Ltd 2012.
Overhead Irrigation
Installation Guide DOM
www.FirstTunnels.co.uk/Quality

Warnings
General
■ Please keep children and pets away from the work area.
■ If any holes are not to be lled for a period of time, please cover them over.
■ Keep the working area free of tools and parts.
■ Always wear safety glasses, ear defenders and a face mask where applicable.
■ Wear gloves when working with the metal parts.
■ Never wear loose clothing, hanging hair or jewellery.
■ Always use sharp tools.
■ Never carry any sharp tools in your pocket.
■ Never use yourself or anyone else for support.
■ Heavy items – Don’t try lifting a heavy item by yourself, get some help.
Ladders
■ Never overreach when working on a ladder or steps.
■ Reposition a ladder to avoid the risk of overbalancing.
■ Make sure you are well balanced for the start and the nish of an operation.
■ Always use stabilizers, tie or get somebody to stand on the bottom of ladders.
■ Use the ladder rule - one measure out for every four measures in height.
■ Ladders should be placed on a rm level surface.
■ The top should rest on something solid.
Electrical power tools
■ Always use RCD’s (Residual Current Devices) when using power tools outdoors.
■ Never use in wet conditions.
■ Follow the safety instructions provided with the tools.

2
1
End stop
(3106 0020)
End stop
Spray line
(20LDPE)
Overhead Irrigation Installation Guide
Spray line
Down tube and Sprayer
see (dia. 4)
Tap and Pressure
Regulator with
Hose Connector
see (dia. 3)
Elbows
see (dia. 2)
Elbow
(3102 2020)
Joining pipe
(20LDPE)
TIP
Inserting the barb fittings into the pipe can be
very tight - holding the pipe in hot water for a
few seconds will help.
TOOLS REQUIRED. Hacksaw, Sharp knife, Hammer and a
Phillips Screwdriver.
Overhead Irrigation
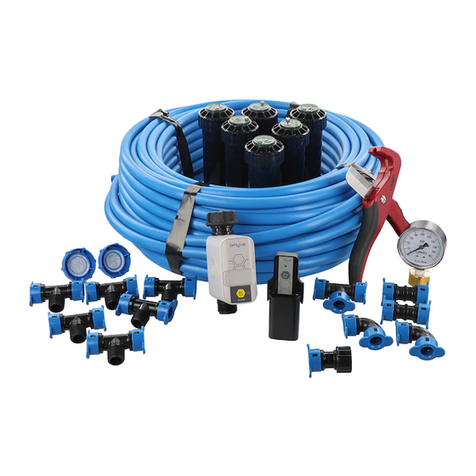
The system you have purchased consists of a 20mm spray
line which attaches to the ridge of the
Polytunnel and continues down the door post where
it connects to a hose-pipe. The water inlet system pipe
contains a ball valve (tap), pressure regulator and hose
connector (dia.1).
Overhead Spray-line
Using a sharp knife, cut a section of 20mm pipe 1m shorter
than the length of your Polytunnel to form the spray line.
At one end of the pipe push in the barbed end stop and at
the opposite end t a barbed elbow. These barbed ttings
are a tight t and may require some force to fully press
home (dia.2).
Fix the pipe to the ridge using the cable ties spaced
equally down the polytunnel length. Ensure that the pipe
with the fitted elbow is at the end where the water supply
will enter the Polytunnel. The pipe may bend and weave
to avoid fixtures and fittings but this is allowed. (Leave the
ties slightly loose at this stage to allow the pipe to move).
Elbow
(3102 2020)
Door Post pipe
(20LDPE)
TIP
Flush out and drain water irrigation tubes so
they don’t crack in frosty weather

4
3
Door Post Pipe System
Turn the elbow in the overhead spray line so that it
is pointing in the direction of the door post you have
chosen to support the pipe work. Cut a short piece of the
remaining 20mm pipe at a length that spans the distance
between the elbow in the spray line and the centre of the
doorpost. Push a barbed elbow into one end of this joining
pipe and push the opposite end of the pipe onto the
barbed elbow on the spray line (dia.2).
Assemble the Water Inlet System using the remainder
of the 20mm pipe and the parts shown (dia.3). Use 2-3
complete turns in a clockwise direction of PTFE tape to
join the Tap to the Pressure Regulator, see (dia.3 detail).
Hold this assembly up to the door post and decide on a
suitable height for the tap. Cut the Water Inlet System pipe
to match up to the elbow in the joining pipe. (Ensure that
the joining pipe is as close to the horizontal as possible).
Using the pipe clamp screw this to the door post inline
with the joint between the tap and pressure regulator
whilst holding the tap at the required height. Clip the
pressure regulator into the pipe clamp to prevent the
manifold from sliding up and down. Use the nail on pipe
clamps to x the remainder of the Water Inlet System pipe
to the door post.
Spray Nozzles
Tighten the cable ties along the ridge and use the hole
punch to punch a hole approximately in the middle of
a hoop space in the underside see (dia. 4 detail). Insert
a down tube adaptor in each hole using the punch for
assistance. Assemble the down tube and spray nozzle
(dia.4) and insert into each of the adaptors. Note the
direction of ow on the Anti drip valve.
Pipe clamp
(FI0010)
Pipe
(20LDPE)
Pipe clamp (7125 0032)
with screw for Pressure
regulator
Tap
(3174 0202)
Pressure
regulator
(4801 0172)
Hose connection
(3718 0002)
Door post
Adaptor
(3054 0006)
15cm Microtube
with weight
(3050 0015)
Anti drip valve
(3035 0606)
Female
coupling
(3061 0606)
Stable sprayer
(3012 0???)
Overhead Irrigation Installation Guide
Mains in
Tap/regulator
joint for pipe
clamp
Prestige Overhead Irrigation (if ordered).
If you ordered a Prestige Irrigation System then you will
need to t the Water Controller onto the tap of your water
source. The water controller is supplied with fittings for
either a 3/4in or 1in male threaded tap. Use the two ‘Hose
to Female Click’ ttings to run a hose between the ‘Male
Click’ ttings on the Water Controller and the Polytunnel.
You will require a hose pipe and may require extra ‘Click’
ttings depending on the type of tap being used.
TIP
The Anti Drip Valve used is designed to
prevent the sprayers from dripping when the
water supply is turned off. However, low water
pressure supplies may not close the valve and
so prevent the system form working correctly.
If so these valves can be removed to improve
the effectiveness of the system.
Pressure
regulator
PTFE Tape
(4007 0001)
Hole punch
(1068 0004)

Adaptor
(3054 0006)
15cm
Microtube
with weight
(3050 0015)
Anti drip
valve
(3035 0606)
Stable
sprayer
(3012 0???)
Female
coupling
(3061 0606)
Down Tube AssemblyPipe Fixing and Regulator Kit
PARTS
PFRK DTA
Controller and Connectors
WC0001, 3711 0001
Quantities depend on the length of your Polytunnel
LDPE 20mm Pipe (6bar)
20LDPE
27cm Cable Ties
FI0008
Hole punch
(3068 0003)
Clamp and Screw
(7125 0032)
Male plug
(3106 0020)
Tap
(3174 0202)
Pipe Clamp
(FI0010)
PTFE tape
(4007 0001)
Pressure
Regulator
(4801 0172)
Hose
connection
(3718 0002)
Elbow
(3102 2020)
Water controller
(WC0001)
Hose connection
(3711 0001)


Copyright © First Tunnels Ltd 2012.
All rights reserved. No part of this document may be reproduced or transmitted in any form,
by any means (electronic, photocopying, storing in any medium, recording, or otherwise)
without the prior written permission of First Tunnels Ltd.
www.PolytunnelGardening.co.uk www.facebook.com/polytunnels www.youtube.com/polytunnels
Share your gardening pictures and videos, post hints, tips and experiences.
PLUS... nd out more about our online gardening community.
If you experience any diculties during
construction please call us on:
Monday to Friday (9am - 5pm) 01282 601253
Saturday & Sunday (9am - 5pm) 07801 601253
Email/Web: help@rsttunnels.co.uk or visit our
web site www.polytunnels.co.uk for assistance.
Table of contents
