manuals.online logo
Brands
  1. Home
  2. •
  3. Brands
  4. •
  5. Fisher-Price
  6. •
  7. Toy
  8. •
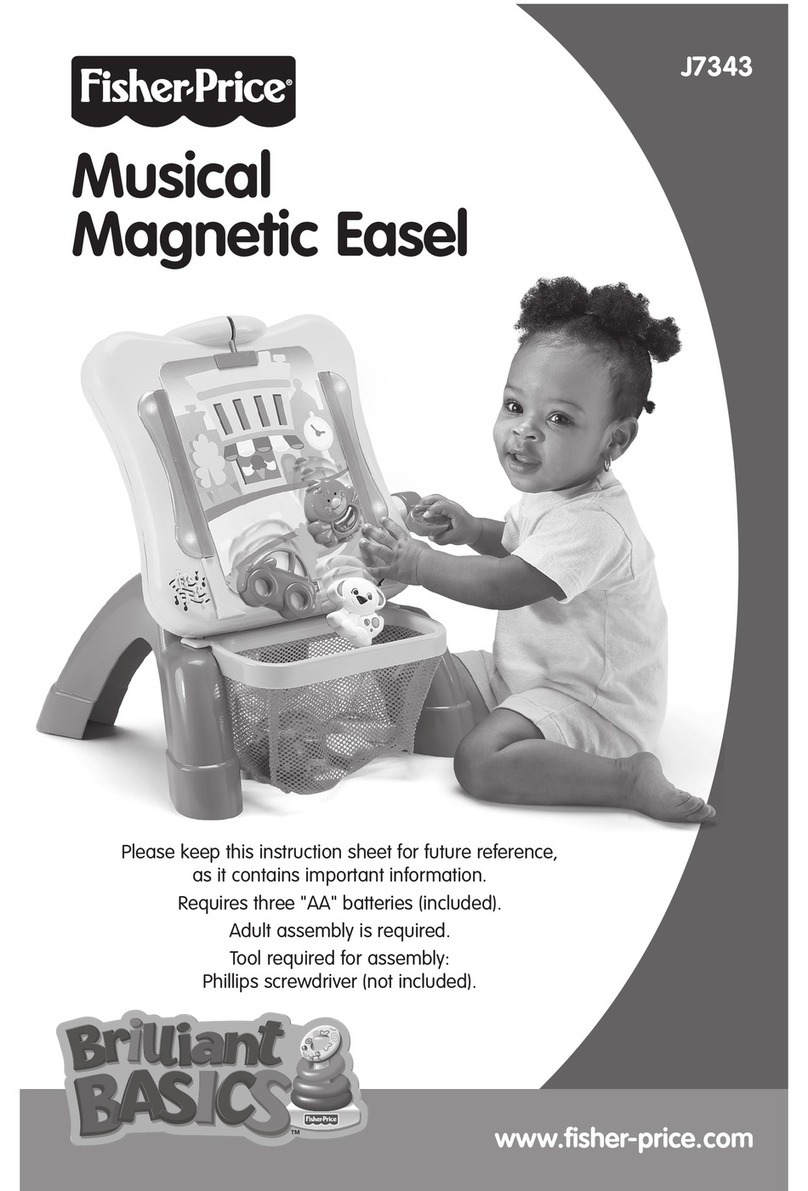
  9. Fisher-Price B1981 User manual

Fisher-Price B1981 User manual

B1981
w
w
w.
fi
s
he
r
-p
r
i
c
e
.
c
o
m
eEnglish speaking toy only.
Please keep this instruction sheet for future reference,
as it contains important information.
Requires three “AA” batteries (included).
Adult assembly is required for battery replacement.
Tool needed for battery replacement: Phillips screwdriver
(not included).
fJouet d’expression anglaise seulement.
Conserver ces instructions, car elles contiennent
des renseignements importants.
Fonctionne avec 3 piles AA (fournies).
Les piles doivent être remplacées par un adulte.
Outil requis pour le remplacement des piles :
tournevis cruciforme (non fourni).
eBefore First-Time Use
fAvant le premier emploi
2
eNote: A plastic tab is attached to the back of this toy for in-storedemonstration
purposes. Pull and remove the plastic tab from the back of the toy. Throw the
plastic tab away.
fRemarque : Une patte de plastique est fixée à l’arrière du jouet pour le mode
démonstration. Tirer et enlever la patte de plastique du jouet. Jeter la patte
de plastique.
ePlease keep small parts such as
plastic tabs out of children’s reach.
Throw the plastic tab away.
fTenir hors de la portée des enfants les
petites pièces, comme les pattes de
plastique. Jeter la patte de plastique.
e
CAUTION
f
MISE EN GARDE
eIMPORTANT! Before first-time use, completely darken the drawing screen with
the magnetic pen. Slide the eraser lever slowly from side to side to clear the
drawing screen. Repeat this procedure several times to enable the drawing
screen to create the clearest, darkest images.
fIIMPORTANT ! Avant le premier emploi, noircir complètement l’écran avec le
crayon magnétique. Puis, glisser lentement l’effaceur d’un côté à l’autre pour
nettoyer l’écran. Répéter ce procédé plusieurs fois pour que l’écran reproduise
par la suite des images suffisamment claires et foncées.
eBattery Replacement
fRemplacement des piles
eBattery Compartment Door
fCouvercle du
compartiment des piles
eFor best performance, we recom-
mend replacing the batteries that
came with this toy with three,
new “AA” (LR6) alkaline batteries.
• Locate the battery compartment
on the back of the toy.
• Loosen the screw in the battery
compartment door with a Phillips
screwdriver. Remove the battery
compartment door. Throw the
exhausted batteries away.
• Insert three “AA” (LR6) alkaline
batteries.
Hint: We recommend using alkaline
batteries for longer battery life.
• Replace the battery compartment
door and tighten the screw with
a Phillips screwdriver. Do not
over-tighten.
• When sounds or lights from this
toy become faint or stop, it's time
for an adult to change the batteries!
fPour de meilleurs résultats, il est
recommandé de remplacer les
piles fournies avec ce produit par
3 piles alcalines AA (LR6) neuves.
• Trouver le compartiment des piles
à l’arrière du jouet.
• Dévisser la vis du couvercle du
compartiment avec un tournevis
cruciforme. Retirer le couvercle.
Jeter la pile usée.
• Insérer 3 piles alcalines AA (LR6).
Remarque : Il est recommandé
d’utiliser des piles alcalines, car
elles durent plus longtemps.
•Remettre le couvercle en place et
serrer la vis à l’aide d’un tournevis
cruciforme. Ne pas trop serrer.
• Replace the battery compartment
door and tighten the screw with
a Phillips screwdriver. Do not
over-tighten.
• Lorsque les lumières ou les sons
du jouet faiblissent ou cessent,
un adulte doit remplacer les piles.
3
4
1.5V x 3
"AA" (LR6)
eShown Actual Size
fDimensions réelles
eBatteries may leak fluids that can
cause a chemical burn injury or ruin
your toy. To avoid battery leakage:
• Do not mix old and new batteries
or batteries of different types:
alkaline, standard (carbon-zinc)
or rechargeable (nickel-cadmium).
• Insert batteries as indicated inside
the battery compartment.
• Remove batteries during long
periods of non-use. Always remove
exhausted batteries from the toy.
Dispose of batteries safely.
• Never short circuit the battery
terminals.
• Use only batteries of the same or
equivalent type, as recommended.
• Do not charge non-rechargeable
batteries.
• Remove rechargeable batteries
from the toy before charging.
• If removable, rechargeable
batteries are used, they are
only to be charged under adult
supervision.
eBattery Safety Information
fConseils de sécurité concernant les piles
fLes piles pourraient couler et causer
des brûlures chimiques ou endom-
mager irréparablement le jouet.
Pour éviter que les piles coulent :
• Ne pas combiner des piles
usées avec des piles neuves ou
différents types de piles alcalines,
standard (carbone-zinc) ou
rechargeables (nickel-cadmium).
• Insérer les piles dans le
sens indiqué à l’intérieur du
compartiment.
• Retirer les piles si le jouet n’est
pas utilisé pendant une longue
période. Toujours retirer les piles
usées du produit. Jeter les piles
usées dans un conteneur réservé
à cet usage.
• Ne jamais court-circuiter les
bornes des piles.
• N’utiliser que des piles du même
type que celles recommandées,
ou des piles équivalentes.
• Ne pas recharger des piles non
rechargeables.
• Toujours retirer les piles recharge-
ables du jouet avant de les charger.
• Les piles rechargeables ne
doivent être rechargées que
sous la surveillance d’un adulte.
5
eGetting Started
fPréparation
L
e
t
t
e
r
s
A
-
D
eInsert one of the two-sided learning cards into the slot at the top
of the bus.
fInsérer une des deux cartes à deux faces dans la fente située sur
le dessus de l’autobus.
ePress one of the three mode buttons: Learning , Quiz or
Musical Free Draw .
fAppuyer sur un des trois boutons de mode : apprentissage ,
questionnaire ou dessin libre en musique .
eSlide the power/volume switch on the back of the toy to either
on with low volume ; or on with high volume .
fGlisser l’interrupteur alimentation/volume situé à l’arrière du jouet sur
l’icône "faible volume" ou sur l’icône "volume fort" .
1
1
1
1
2
2
3
3
3
3
2
2
6
eLearning and Drawing Fun!
fLe plaisir d’apprendre et de dessiner !
L
e
t
t
e
r
s
A
-
D
Letters A-D
Learning
A friendly voice invites you to
touch a letter or number in the bus
windows. Press the letter or number
in the window to hear it identified.
You are then asked to draw the
letter. When you’re finished touch
the stop sign and you can try again
with another number or letter.
Quiz
A friendly voice asks you to find a
number or letter. Press the correct
letter or number in the bus windows
and you’ll hear a positive response.
You’ll then be asked to draw a
picture. When you’re finished touch
the stop sign to try again.
Musical Free Draw
Press any of the letters or numbers
in the bus windows to hear it identi-
fied. Then draw along to a fun song.
Press another number or letter to
hear a different song.
Apprentissage
Une voix amicale invite l’enfant
à toucher une lettre ou un chiffre
apparaissant dans une des fenêtres
de l’autobus. Quand l’enfant appuie
sur une de ces lettres ou un de ces
chiffres, la voix amicale l’identifie.
Elle lui demande ensuite de dessiner
la lettre ou le chiffre. Quand l’enfant
a terminé, il appuie sur « STOP »
et recommence avec une autre lettre
ou un autre chiffre.
Questionnaire
Une voix amicale demande à l’enfant
de trouver un chiffre ou une lettre.
Si l’enfant appuie sur la bonne lettre
ou le bon chiffre, la voix amicale le
félicite. Puis, elle lui demande de
faire un dessin. Quand l’enfant a
terminé, il appuie sur « STOP » et
essaie encore.
Dessin libre en musique
L’enfant appuie sur n’importe quelle
lettre ou n’importe quel chiffre pour
entendre le jouet l’identifier. Puis,
il peut dessiner au son d’une chan-
son amusante. Pour entendre une
autre chanson amusante, il suffit
d’appuyer sur un autre chiffre ou
une autre lettre.
e
f
eICES-003
fNMB-003
eThis Class B digital apparatus complies with Canadian ICES-003.
fCet appareil numérique de la classe B est conforme à la norme NMB-003
du Canada.
7
eAll Finished
fLe jeu est terminé
eStore the learning cards in the slot
in the side of the toy.
fRanger les cartes dans la fente sur
le côté du jouet.
ePress to “snap” the pen into the
groove on the side of the toy.
fAppuyer pour emboîter le crayon
dans la rainure du jouet.
e• When your child is finished playing with this toy, slide the power/volume switch
to the off position O.
Hint: This toy turns off automatically (sleep mode) if your child is not
actively playing with it. Press any of the mode buttons to turn it back on.
f• Quand l’enfant n’utilise plus le jouet, glisser l’interrupteur alimentation/volume
à la position d’arrêt O.
Remarque : Si l’enfant ne joue pas avec le jouet, celui-ci s’éteint automatique-
ment (mode veille). Pour le rallumer, appuyer sur un des boutons de mode.
©2003 Mattel, Inc. All Rights Reserved. ® and ™ designate U.S. trademarks of Mattel, Inc.
Fisher-Price, Inc., a subsidiary of Mattel, Inc., East Aurora, New York 14052, U.S.A.
Magna Doodle® trademark and patent rights used under license from Pilot Pen Corporation of America.
©2003 Mattel, Inc. Tous droits réservés. ® et ™ désignent des marques déposées de Mattel, Inc. aux É.-U.
Fisher-Price, Inc., une filiale de Mattel, Inc., East Aurora, New York 14052, É. -U.
La marque Magna Doodle® et les droits d’utilisation du brevet sont utilisés sous licence de Pilot Pen Corporation of America.
Printed in China/Imprimé en Chine B1981pr-0820
eTo avoid damage to the drawing screen:
• Use only the magnetic pen included.
• Do not use regular pencils, pens, crayons, or markers.
• Keep this toy away from extreme heat sources such as ovens, heaters,
radiators and hot vehicles.
fPour éviter d’endommager l’écran :
• Utiliser seulement le crayon magnétique fourni
• Ne pas utiliser de crayons ou de stylos ordinaires ou encore de marqueurs.
• Tenir le jouet loin des sources de chaleur comme les cuisinières, les radiateurs
et les véhicules chauds.
eDo not apply heavy pressure or
force to the drawing screen. Heavy
pressure is not necessary and could
damage the drawing screen. A light
touch makes a black line.
fNe pas appliquer une pression
forte sur l’écran. Ce n’est pas
nécessaire et ça pourrait endom-
mager l’écran. Une pression légère
fait une ligne noire.
eUse only the special, magnetic
pen included. Do not use any
other object on the drawing screen.
fUtiliser seulement le crayon
magnétique spécial fourni. Ne pas
utiliser un autre objet pour dessiner
sur l’écran.
Questions? 1-800-567-7724. Mattel Canada Inc., 6155 Freemont Blvd., Mississauga,
Ontario L5R 3W2.
eImportant!
fImportant !
eConsumer Information
fService à la clientèle

Other Fisher-Price Toy manuals

Fisher-Price CBR25 User manual

Fisher-Price

Fisher-Price CBR25 User manual

Fisher-Price LIL KAWASAKI 76937 Use and care manual

Fisher-Price

Fisher-Price LIL KAWASAKI 76937 Use and care manual

Fisher-Price K0615 User manual

Fisher-Price

Fisher-Price K0615 User manual

Fisher-Price FGY72 User manual

Fisher-Price

Fisher-Price FGY72 User manual

Fisher-Price LINK-A-DOO C4503 User manual

Fisher-Price

Fisher-Price LINK-A-DOO C4503 User manual

Fisher-Price W9862 User manual

Fisher-Price

Fisher-Price W9862 User manual

Fisher-Price Imaginext DRM07 User manual

Fisher-Price

Fisher-Price Imaginext DRM07 User manual

Fisher-Price LittleMommy User manual

Fisher-Price

Fisher-Price LittleMommy User manual

Fisher-Price W9982 User manual

Fisher-Price

Fisher-Price W9982 User manual

Fisher-Price 71973 User manual

Fisher-Price

Fisher-Price 71973 User manual

Fisher-Price K6422 User manual

Fisher-Price

Fisher-Price K6422 User manual

Fisher-Price Laugh & Learn First Words Smart Puppy FFN33 User manual

Fisher-Price

Fisher-Price Laugh & Learn First Words Smart Puppy FFN33 User manual

Fisher-Price L3938 User manual

Fisher-Price

Fisher-Price L3938 User manual

Fisher-Price Baby Smartronics Learn-a-Bot User manual

Fisher-Price

Fisher-Price Baby Smartronics Learn-a-Bot User manual

Fisher-Price Laugh & Learn Press 'n Go Puppy User manual

Fisher-Price

Fisher-Price Laugh & Learn Press 'n Go Puppy User manual

Fisher-Price Fun2Learn CalcuBot User manual

Fisher-Price

Fisher-Price Fun2Learn CalcuBot User manual

Fisher-Price Peek a Blocks B4252 User manual

Fisher-Price

Fisher-Price Peek a Blocks B4252 User manual

Fisher-Price BFK51 User manual

Fisher-Price

Fisher-Price BFK51 User manual

Fisher-Price T7164 User manual

Fisher-Price

Fisher-Price T7164 User manual

Fisher-Price FYK56 User manual

Fisher-Price

Fisher-Price FYK56 User manual

Fisher-Price T4265 User manual

Fisher-Price

Fisher-Price T4265 User manual

Fisher-Price DFT28 User manual

Fisher-Price

Fisher-Price DFT28 User manual

Fisher-Price DPX80 User manual

Fisher-Price

Fisher-Price DPX80 User manual

Fisher-Price FXC66 User manual

Fisher-Price

Fisher-Price FXC66 User manual

Popular Toy manuals by other brands

LEGO 5767 Creator Assembly guide

LEGO

LEGO 5767 Creator Assembly guide

VQ 141A08 instruction manual

VQ

VQ 141A08 instruction manual

Hasbro Disney Frozen Little Kingdom Quick start quide

Hasbro

Hasbro Disney Frozen Little Kingdom Quick start quide

Trix B VI manual

Trix

Trix B VI manual

Atomik 18 Instruction manual and tuning guide

Atomik

Atomik 18 Instruction manual and tuning guide

Eduard USS Nimitz CVN-68 1/700 quick start guide

Eduard

Eduard USS Nimitz CVN-68 1/700 quick start guide

LEGO 76054 instructions

LEGO

LEGO 76054 instructions

marklin 59934 user manual

marklin

marklin 59934 user manual

Rail King AeroTrain Diesel Locomotive Operator's manual

Rail King

Rail King AeroTrain Diesel Locomotive Operator's manual

Knights of Dice CHINATOWN GATE Assembly instructions

Knights of Dice

Knights of Dice CHINATOWN GATE Assembly instructions

Hasbro 63589 instruction manual

Hasbro

Hasbro 63589 instruction manual

marklin 39484 user manual

marklin

marklin 39484 user manual

Eduard Zoom F-15E quick start guide

Eduard

Eduard Zoom F-15E quick start guide

Eduard Do 215B interior S.A. quick start guide

Eduard

Eduard Do 215B interior S.A. quick start guide

Lionel SD60-M owner's manual

Lionel

Lionel SD60-M owner's manual

AIR-GRAPHICS Aegean Hawk manual

AIR-GRAPHICS

AIR-GRAPHICS Aegean Hawk manual

Marvel Avengers Tornado Maker quick start guide

Marvel

Marvel Avengers Tornado Maker quick start guide

Canon CREATIVE PARK Bottlenose Dolphin Assembly instructions

Canon

Canon CREATIVE PARK Bottlenose Dolphin Assembly instructions

manuals.online logo
manuals.online logoBrands
  • About & Mission
  • Contact us
  • Privacy Policy
  • Terms and Conditions

Copyright 2025 Manuals.Online. All Rights Reserved.