manuals.online logo
Brands
  1. Home
  2. •
  3. Brands
  4. •
  5. Fisher-Price
  6. •
  7. Toy
  8. •
  9. Fisher-Price DORA TALKING KITCHEN H1581 User manual

Fisher-Price DORA TALKING KITCHEN H1581 User manual

Other manuals for DORA TALKING KITCHEN H1581

1

Other Fisher-Price Toy manuals

Fisher-Price Disney B9044 User manual

Fisher-Price

Fisher-Price Disney B9044 User manual

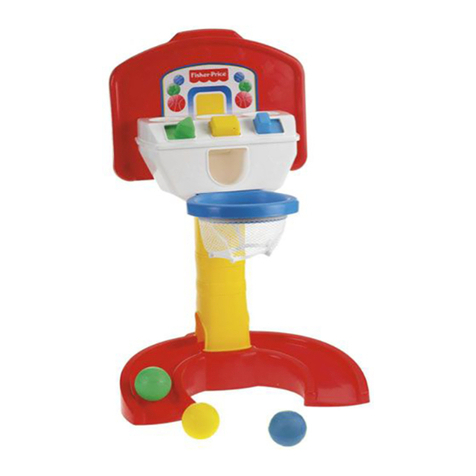
Fisher-Price Lil MUSIC Makers 2-in-1 Drum to Conga User manual

Fisher-Price

Fisher-Price Lil MUSIC Makers 2-in-1 Drum to Conga User manual

Fisher-Price See'n Say English-Spanish Phone User manual

Fisher-Price

Fisher-Price See'n Say English-Spanish Phone User manual

Fisher-Price J8999 User manual

Fisher-Price

Fisher-Price J8999 User manual

Fisher-Price 73462 User manual

Fisher-Price

Fisher-Price 73462 User manual

Fisher-Price BBF19 User manual

Fisher-Price

Fisher-Price BBF19 User manual

Fisher-Price BHX87 User manual

Fisher-Price

Fisher-Price BHX87 User manual

Fisher-Price HFT70 User manual

Fisher-Price

Fisher-Price HFT70 User manual

Fisher-Price IMAGINEXT B9774 User manual

Fisher-Price

Fisher-Price IMAGINEXT B9774 User manual

Fisher-Price L3133 Grand Central Station Geo Trax User manual

Fisher-Price

Fisher-Price L3133 Grand Central Station Geo Trax User manual

Fisher-Price Sparkling Symphony Giraffe 71674 User manual

Fisher-Price

Fisher-Price Sparkling Symphony Giraffe 71674 User manual

Fisher-Price CHM31 User manual

Fisher-Price

Fisher-Price CHM31 User manual

Fisher-Price Sparkling Symphony 71988 User manual

Fisher-Price

Fisher-Price Sparkling Symphony 71988 User manual

Fisher-Price Laugh & Learn L5846 User manual

Fisher-Price

Fisher-Price Laugh & Learn L5846 User manual

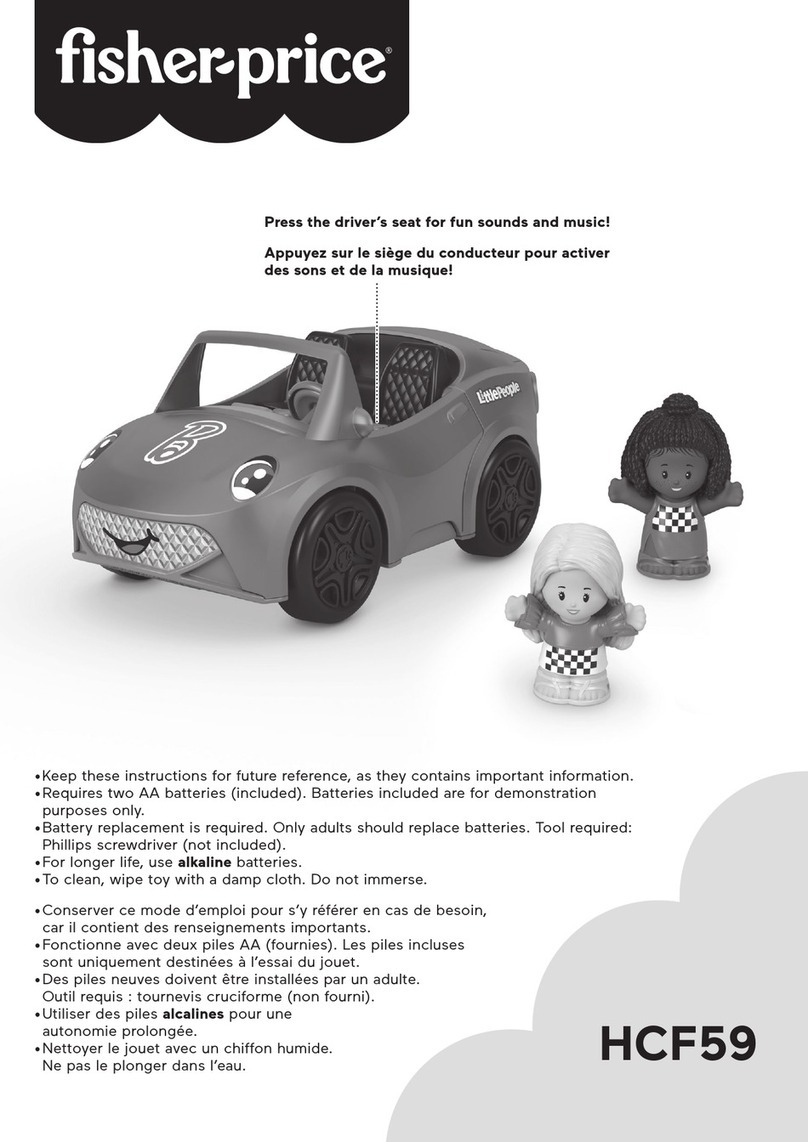
Fisher-Price LittlePeople Chase ‘n Race Police Car User manual

Fisher-Price

Fisher-Price LittlePeople Chase ‘n Race Police Car User manual

Fisher-Price C4284 User manual

Fisher-Price

Fisher-Price C4284 User manual

Fisher-Price HARLEY-DAVIDSON Motorcycle 74370 Use and care manual

Fisher-Price

Fisher-Price HARLEY-DAVIDSON Motorcycle 74370 Use and care manual

Fisher-Price DYM75 User manual

Fisher-Price

Fisher-Price DYM75 User manual

Fisher-Price DC*SUPER FRIENDS M6784 User manual

Fisher-Price

Fisher-Price DC*SUPER FRIENDS M6784 User manual

Fisher-Price Great Adventures Wild Western Town User manual

Fisher-Price

Fisher-Price Great Adventures Wild Western Town User manual

Fisher-Price Loving Family Musical Surprise Party User manual

Fisher-Price

Fisher-Price Loving Family Musical Surprise Party User manual

Fisher-Price GeoTrax V8488 User manual

Fisher-Price

Fisher-Price GeoTrax V8488 User manual

Fisher-Price T4654 User manual

Fisher-Price

Fisher-Price T4654 User manual

Fisher-Price 78319 User manual

Fisher-Price

Fisher-Price 78319 User manual

Popular Toy manuals by other brands

FUTABA GY470 instruction manual

FUTABA

FUTABA GY470 instruction manual

LEGO 41116 manual

LEGO

LEGO 41116 manual

Little Tikes LITTLE HANDIWORKER 0920 Assembly instructions

Little Tikes

Little Tikes LITTLE HANDIWORKER 0920 Assembly instructions

Eduard EF-2000 Two-seater exterior Assembly instructions

Eduard

Eduard EF-2000 Two-seater exterior Assembly instructions

USA Trains EXTENDED VISION CABOOSE instructions

USA Trains

USA Trains EXTENDED VISION CABOOSE instructions

Modellbau Laffont Z1601 Assembly instructions

Modellbau Laffont

Modellbau Laffont Z1601 Assembly instructions

NOCH 12905 instruction manual

NOCH

NOCH 12905 instruction manual

Eduard Ki-61-Id quick start guide

Eduard

Eduard Ki-61-Id quick start guide

Viessmann Vollmer 45616 Mounting instruction

Viessmann

Viessmann Vollmer 45616 Mounting instruction

Vollmer 42004 Mounting instruction

Vollmer

Vollmer 42004 Mounting instruction

Phoenix Model CLASSIC-EP instruction manual

Phoenix Model

Phoenix Model CLASSIC-EP instruction manual

H-KING Sopwith Camel British WW1 Fighter instruction manual

H-KING

H-KING Sopwith Camel British WW1 Fighter instruction manual

MODSTER Predator 4x4 Crawler user manual

MODSTER

MODSTER Predator 4x4 Crawler user manual

DHK Hobby 8136 User instruction manual

DHK Hobby

DHK Hobby 8136 User instruction manual

THUNDER TIGER Raptor 50 V2 kit manual

THUNDER TIGER

THUNDER TIGER Raptor 50 V2 kit manual

Timberkits Skateboarder instructions

Timberkits

Timberkits Skateboarder instructions

Hangar 9 Funtana 125 Assembly manual

Hangar 9

Hangar 9 Funtana 125 Assembly manual

QModeling XP Series instruction manual

QModeling

QModeling XP Series instruction manual

manuals.online logo
manuals.online logoBrands
  • About & Mission
  • Contact us
  • Privacy Policy
  • Terms and Conditions

Copyright 2025 Manuals.Online. All Rights Reserved.

H1581
e • This is an English and Spanish speaking toy.
• Please keep this instruction sheet for future reference, as it contains important information.
• Adult assembly is required. Tool needed for assembly: Phillips Screwdriver (not included).
• Requires three “AA” (LR6) alkaline batteries (not included) for operation.
f • Jouet d’expression anglaise et espagnole.
• Conserver ces instructions car elles contiennent des renseignements importants.
• Assemblage par un adulte requis. Outil nécessaire pour l’assemblage : un tournevis cruciforme (non inclus).
• Fonctionne avec trois piles alcalines AA (LR6), non fournies.
www.fisher-price.com
e Back Panel
f Panneau arrière
e Front Panel
f Panneau avant
2
e Base
f Base
e Arch
f Arche
e Countertop
f Plan de travail
e Refrigerator Door
f Porte du réfrigérateur
e Oven Door
f Porte du four
e Small Shelf
f Petite étagère
e Large Shelf
f Grande étagère
e Sink
f Évier
e Faucet
f Robinet
e Faucet Handle
f Poignée du robinet
e Oven Door Handle
f Poignée de la porte du four
e Refrigerator Door Handle
f Poignée de la porte
du réfrigérateur
e Dora Panel
f Panneau Dora
e Parts f Éléments
www.fisher-price.com
e Parts f Éléments
e CAUTION f MISE EN GARDE
e This package contains small parts in its unassembled state. Adult assembly
is required.
f Cet emballage contient des petis éléments destinés à l’assemblage du produit.
Ces éléments doivent être assemblés uniquement par un adulte.
3
e #6 x 1,27 cm (1/
2") Screw – 32 f Vis n° 6 1,27 cm - 32
e Fastener Shown Actual Size f Vis à taille réelle
e Note: Tighten or loosen all screws with a Phillips screwdriver. Do not over-tighten the screws.
f Remarque : Serrer ou desserrer toutes les vis avec un tournevis cruciforme. Ne pas trop serrer les vis.
e 2 Forks
f 2 fourchettes
e 2 Spoons
f 2 cuillères
e 2 Plates
f 2 assiettes
e 2 Cups
f 2 tasses
e 2 Cards
f 2 fiches de recette
e 2 Cookies
f 2 cookies
e Tomato
f Tomate
e Banana
f Banane
e Chocolate
f Chocolat
e Pan
f Poêle
e Spatula
f Spatule
e Chicken
f Poulet
e Cheese
f Fromage
e Banana Pie
f Gâteau à la banane
e Rice
f Riz
e Butter
f Beurre
e Empanada
f Chausson
e 2 Pancakes
f 2 crêpes
e Strawberry
f Fraise
e Telephone
f Téléphone
e Sugar
f Sucre
e Egg
f Oeuf
4
e Before Assembly
f Avant assemblage
e A plastic tab was attached to the toy for in-store demonstration
purposes. While the tab may have already been removed,
check to be sure it is removed. If the plastic tab is still attached,
pull and remove the tab from the product. Throw the plastic
tab away.
f Une languette en plastique a été fixée au jouet pour permettre
d’essayer celui-ci en magasin. Cette languette doit être retirée
pour une utilisation normale. Si cela n’a pas déjà été fait
(voir illustration), tirer sur la languette et la jeter.
e Please keep small parts such as the
plastic tab out of children’s reach.
Throw the plastic tab away.
f Veiller à tenir les petits éléments tels
que les languettes en plastique hors de
la portée des enfants. Jeter la languette
en plastique après l’avoir retirée.
e Tab
f Languette
e Battery Replacement
f
Remplacement des piles
1.5V x 3
“AA” (LR6)
e Shown Actual Size
f Dimensions réelles
e
For best performance, we recommend replacing
the batteries that came with this toy with three,
new alkaline “AA” (LR6) batteries.
• Locate the battery compartment on the back of the arch.
• Loosen the screw in the battery compartment door and
remove the battery compartment door.
• Insert three “AA” (LR6) alkaline batteries into the bat-
tery compartment.
Hint: We recommend using alkaline batteries for longer
battery life.
• Replace the battery compartment door and tighten the screw.
• When sounds became faint or stop, it’s time for an adult to
replace batteries!
f
Pour de meilleures performances, il est recommandé de
remplacer les piles fournies avec ce jouet par trois piles
alcalines neuves.
• Repérer le compartiment des piles au dos de l’arche.
• Desserrer la vis du couvercle avec un tournevis cruciforme
et retirer le couvercle du compartiment.
• Insérer trois piles alcalines AA (LR6) dans le compartiment
des piles.
Conseil :
il est recommandé d’utiliser des piles alcalines
car elles durent plus longtemps.
• Replacer le couvercle et serrer la vis.
• Lorsque les sons faiblissent ou s’arrêtent de fonctionner, il est
temps pour un adulte de remplacer les piles.
e Battery Compartment Door
f Couvercle du compartiment à piles
e CAUTION
f MISE EN GARDE
5
e Assembly
f Assemblage
3
e Fit the front panel to the shelves, as shown.
f Fixer le panneau avant aux étagères, comme illustré.
e Shelves
f Étagères
e Battery Safety Information
f
Mises en garde au sujet des piles
e In exceptional circumstances, batteries may leak fluids that
can cause a chemical burn injury or ruin your product.
To avoid battery leakage:
• Do not mix old and new batteries or batteries of different
types: alkaline, standard (carbon-zinc) or rechargeable
(nickel-cadmium).
• Insert batteries as indicated inside the battery compartment.
• Remove batteries during long periods of non-use.
Always remove exhausted batteries from the product.
Dispose of batteries safely. Do not dispose of product
in a fire. The batteries may explode or leak.
• Never short-circuit the battery terminals.
• Use only batteries of the same or equivalent type,
as recommended.
• Do not charge non-rechargeable batteries.
• Remove rechargeable batteries from the product
before charging.
• If removable, rechargeable batteries are used, they are
only to be charged under adult supervision.
f Lors de circonstances exceptionnelles, des substances
liquides peuvent s’écouler des piles et provoquer des
brûlures chimiques ou endommager le jouet. Pour éviter
tout écoulement des piles :
• Ne pas mélanger des piles usées avec des piles neuves ou
différents types de piles : alcalines, standard (carbone-zinc)
ou rechargeables (nickel-cadmium).
• Insérer les piles comme indiqué à l’intérieur du compartiment
des piles.
• Enlever les piles lorsque le produit n’est pas utilisé pendant
une longue période. Ne jamais laisser des piles usées dans
le produit. Jeter les piles usées dans un conteneur réservé à
cet usage. Ne pas jeter les piles au feu. Les piles pourraient
exploser ou couler.
• Ne jamais court-circuiter les bornes des piles.
• Utiliser uniquement des piles de même type ou de type
équivalent, comme conseillé.
• Ne pas recharger des piles non rechargeables.
• Les piles rechargeables doivent être retirées du produit avant
la charge.
• En cas d’utilisation de piles rechargeables, celles-ci ne doivent
être chargées que par un adulte.
e • Place the back panel face down on a flat surface.
• F
it the small shelf to the groove in the back panel with two tabs.
f • Poser le panneau arrière à plat, face avant contre le sol.
• Fixer la petite étagère dans la rainure du panneau arrière
avec les deux languettes.
1
e Small Shelf
f Petite étagère
e Back Panel
f Panneau arrière
e Tabs
f Languettes
2
e Large Shelf
f Grande étagère
e N
ow, fit the large shelf to the groove in the back panel with three tabs.
f À présent, fixer la grande étagère dans la rainure du panneau
arrière avec les trois languettes.
e Tabs
f Languettes
e ICES-003
f NMB-003
e This Class B digital apparatus complies with Canadian ICES-003.
f Cet appareil numérique de la classe B est conforme à la norme
NMB-003 du Canada.
e Front Panel
f Panneau avant
6
e Assembly f Assemblage
4
e • Stand the assembly upright.
• Insert five screws into the front panel and tighten.
f • Redresser l’assemblage réalisé.
• Insérer cinq vis dans le panneau avant et serrer.
e Front Panel
f Panneau avant
5
e Now, insert six screws into the back panel and tighten.
f À présent, insérer six vis dans le panneau arrière et serrer.
e Back Panel
f Panneau arrière
7
e Reach through the back panel and push down on each corner
of the main assembly to “snap” it to the base.
f Passer la main à travers le panneau arrière et appuyer
à chaque coin de l’assemblage pour bien les enclencher dans
la base.
6
e Groove
f Rainure
e Base
f Base
e Main Assembly
f Assemblage principal
e • Fit the main assembly into the groove around the base.
• Push down on the main assembly until it “snaps” into place.
f • Emboîter l’assemblage dans la rainure autour de la base.
• Appuyer sur l’assemblage pour l’enclencher dans la base.
e Front View
f Vue avant
e Back View
f Vue arrière
7
e Assembly f Assemblage
10
e Insert three screws through the pegs in the front of the main
assembly and into the countertop. Tighten the screws.
f Insérer trois vis dans les tiges sur le devant de l’assemblage
et le plan de travail. Serrer les vis.
e Countertop
f Plan de travail
e Main Assembly
f Assemblage principal
e Front View
f Vue avant
Back View
9
e • Place the countertop face down on a flat surface.
• Fit the main assembly to the countertop.
f • Poser le plan de travail à plat, face avant au-dessous.
• Placer l’assemblage sur le plan de travail.
e Countertop
f Plan de travail
e Main Assembly
f Assemblage principal
11
e • Turn the assembly around so that the back faces you.
• Insert three screws through the pegs in the back of the main
assembly and into the countertop. Tighten the screws.
f • Retourner l’assemblage de façon à avoir l’arrière face à soi.
• Insérer trois vis dans les tiges au dos de l’assemblage et dans
le plan de travail. Serrer les vis.
e Countertop
f Plan de travail
e Back View
f Vue arrière
e Main Assembly
f Assemblage principal
8
e Base
f Base
e • Turn the main assembly over so that the base is upright.
• Insert four screws into the base and tighten.
f • Retourner l’assemblage de façon à avoir la base sur le dessus.
• Insérer quatre vis dans la base et serrer.
8
e Assembly f Assemblage
12
e Slots
f Fentes
e • Turn the assembly upright.
• Fit the arch into the slots in the countertop.
f • Retourner l’assemblage et le poser sur sa base.
• Insérer l’arche dans les fentes du plan de travail.
e Countertop
f Plan de travail
e Arch
f Arche
13
e Insert two screws up throught the countertop and into the ends
of the arch. Tighten the screws.
Hint: You may want to tip the assembly forward and lean it
against a surface to complete this assembly step.
f Insérer deux vis dans le plan de travail et dans les extrémités
de l’arche. Serrer les vis.
Remarque : Si nécessaire, pencher la structure contre un
support pour réaliser cette étape de l’assemblage.
e Arch
f Arche
e Countertop
f Plan de travail
15
e Insert five screws into the back of the Dora panel and tighten.
f Insérer cinq vis à l’arrière du panneau Dora et serrer les vis.
e Dora Panel
f Panneau Dora
14
e Fit the Dora panel to the groove in the arch and main assembly,
as shown.
f Insérer le panneau Dora dans la rainure de l’arche et dans
l’assemblage, comme illustré.
e Arch
f Arche
e Dora Panel
f Panneau Dora
e Main Assembly
f Assemblage principal
9
e Assembly f Assemblage
e • Fit the faucet onto the post on the sink.
• Fit the faucet handle into the faucet. Push down on faucet
handle until it “snaps” into place.
f • Installer le robinet sur la tige de l’évier.
• Installer la poignée dans le robinet. Appuyer sur la poignée
pour l’enclencher dans le robinet.
16
e Sink Post
f Évier
e Faucet
f Robinet
e Faucet Handle
f Poignée du robinet
e • Fit the handle to the holes in the refrigerator door.
• Insert two screws through the refrigerator door and into
the handle. Tighten the screws.
f • Insérer la poignée dans les trous de la porte du réfrigérateur.
• Insérer deux vis dans la porte du réfrigérateur et dans
la poignée. Serrer les vis.
18
e Refrigerator Door
f Porte du réfrigérateur
e Refrigerator Door Handle
f Poignée de la porte du réfrigérateur
e • At an angle, fit the upper peg on the refrigerator door into
the hole in the upper hinge .
• Now, push to “snap” the lower peg on the refrigerator door
into the hole in the lower hinge .
f • Tenir la porte du réfrigérateur en biais et insérer la tige
supérieure de la porte dans la charnière supérieure .
• Puis pousser pour enclencher la tige inférieure de la porte du
réfrigérateur dans la charnière inférieure .
19


e Refrigerator Door
f Porte du réfrigérateur
17
e Fit the sink into the large opening in the countertop,
as shown.
f Insérer l’évier dans la grande ouverture du plan de travail,
comme illustré.
e Countertop
f Plan de travail
e Sink
f Évier
e Front View
f Vue avant
10
e Assembly f Assemblage
e
Hint: Y
ou can store the recipe cards inside the refrigerator door.
f
Remarque : Les fiches de recettes peuvent se ranger dans la
porte du réfrigérateur.
23
e Refrigerator Door
f Porte du réfrigérateur
e Cards
f Fiches de recettes
e • Hang the cups on the hooks.
• Fit the telephone into the receiver.
• Fit a card into the Map slot.
f • Accrocher les tasses aux crochets.
• Placer le téléphone sur le récepteur.
• Insérer une fiche dans la fente de la Carte.
22
e Receiver
f Récepteur
e Hooks
f Crochets
e Map Slot
f Fente de
la Carte
e Cups
f Tasses
e Telephone
f Téléphone
e Card
f Fiche de recette
21
e • At an angle, fit one of the pegs on the oven door into a hole
in the hinge .
• Now, push to fit the other peg on the oven door into the other
hole in the hinge .
f • Tenir la porte du four en biais et insérer une des tiges de la
porte dans la charnière .
• Puis pousser pour insérer l’autre tige de la porte du four dans
l’autre charnière .


e Oven Door
f Porte du four
20
e • Fit the handle to the holes in the oven door.
• Insert two screws through the oven door and into the handle.
Tighten the screws.
f • Insérer la poignée dans les trous de la porte du four.
• Insérer deux vis dans la porte du four et dans la poignée.
Serrer les vis.
e Oven Door
f Porte du four
e Oven Door Handle
f Poignée de la porte du four