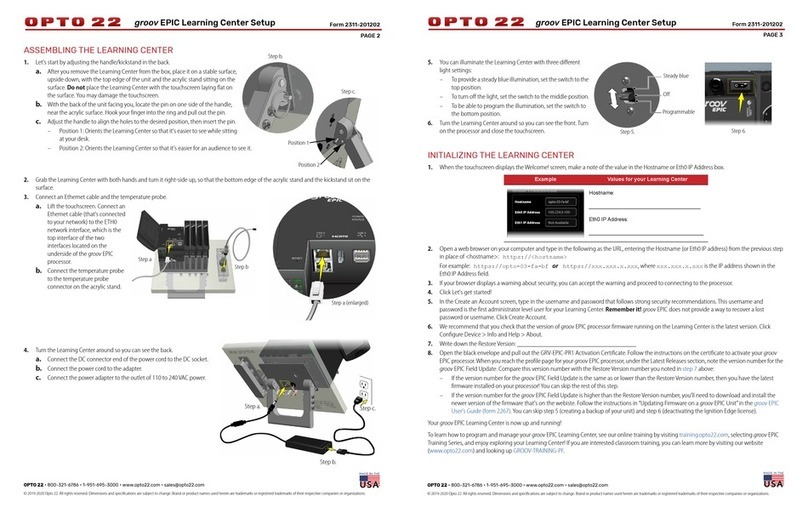
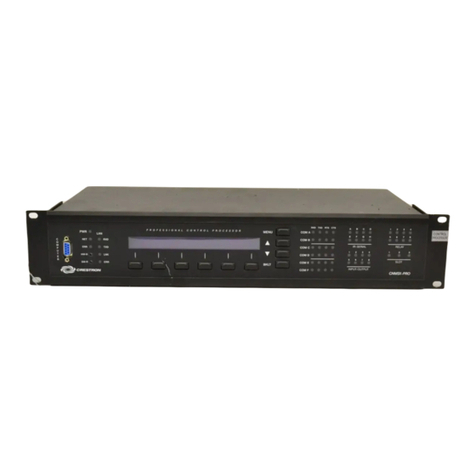
flame-tec WBECS Quick start guide

WEBCS-3 FT 06/21
1
Weather Beater Electronic
Control System (WBECS)
Natural Gas Installation Kit
Owner's Operation and
InstallationManual
Flame-Tec, LLC
136 Hillview Blvd.
Hendersonville, NC 28792
Phone: 844-352-6383 (844-FLAME-TEC)
Fax: 888-559-3612
www.flame-tec.com
WARNING: FOR OUTDOOR USE ONLY!
CARBON MONOXIDE HAZARD
This appliance can produce carbon monoxide, which has no odor.
Using it in an enclosed space can kill you.
Never use this appliance in an enclosed space such as a camper, tent, or home.
WARNING:Improperinstallation,adjustment,alteration,serviceormaintenancecancause
injury or property damage. Read the installation, operating and maintenance
instructions
thoroughly prior to installing or servicing this equipment.
WARNING:Donotstoreorusegasolineorotherflammablevaporsandliquidsinthe
vicinity of this or any other appliance.
WARNING: A propane cylinder not connected for use shall not be stored in the vicinity
of
this or any other appliance.
WARNING: For use with Natural or Propane gas only. NO SOLID FUELS TO BE USED
WITH
THIS SYSTEM.
FOR YOUR SAFETY
CALIFORNIA PROPOSITION 65
IF YOU SMELL GAS:
WARNING
1.
Shut off gas to appliance.
This product can expose you to
Chromium, which is known to the state of
California to cause cancer and birth
defects or other reproductive harm. (For
further information, please visit website:
www.p65warnings.ca.gov)
2.
Extinguish any open flame.
3.
Ifodorcontinues,keepaway
fromapplianceandimmediately
call your gas supplier or fire
department.
Installation must conform with local codes or, in the absence of local codes, with the National
Fuel Gas Code, ANSI Z223.1 / NFPA 54, or International Fuel Gas Code.
The appliance, when installed, must be electrically grounded in accordance with local codes
or,in the absence of local codes, with the National Electric Code,NFPA70, if applicable.
INSTALLER: Leave this manual with the appliance.
CONSUMER: Retain the manual for future reference.
Standard Capacity: WBECS
High Capacity: WBECS-HC

2
WEBCS-3 FT 06/21
WBECS COMPONENT DIAGRAM

WEBCS-3 FT 06/21
3
WBECS DIAGRAM REFERENCE TABLE
No.
Description
Notes
Certification
1
Ignition Control Module
Potted to protect against moisture and damage.
Operational Temperature Range = -20°F-175°F
Max Supplied Voltage= 12 VAC
CSA ANSI Z21.20-2014
2
Pilot Valve
Coils are encapsulated to protect against moisture.
All connectors are water resistant.
Max Pressure = 1/2 PSI
Max BTU = 8,000
Operational Temperature Range = -20°F-175°F
CSA 229521-1656058
3
Main Valve
Coils are encapsulated to protect against moisture.
All connectors are water resistant.
Max Pressure = 1/2 PSI
Max BTU = 265,000 Standard, 450,000 HC
Operational Temperature Range =-20°F-175°F
CSA 229521-1656058
4
Power Transformer
Includes 30 feet plug and play cable.
DO NOT EXCEED RATED 110/120 VAC AT PLUG.
Power Output Rating: 12 VAC, 5 Amp (60 Watt)
Power wire connector is waterproof.
Transformer meets NFPA 70 (NEC) requirements for
installation within 5 feet of water.
NFPA 70/NEC Article
680 compliant
5
Pilot Assembly
Pilot has robust, wind resistant flame pattern.
6
Pilot Cage
Stainless steel for heat and corrosion resistance.
7
2 Flame Pilot
Stainless steel for heat and corrosion resistance.
8
Pilot Orifice
Standard Capacity Orifice Size: #25 Natural Gas
High Capacity Orifice Size: #39 Natural Gas
Brass for corrosion resistance.
9
Pilot Adapter Nut
Adapter from 7/16-11 45° Flare to 7/16-18 45° Flare
Brass for corrosion resistance.
10
Thermocouple
Fast responding flame sense resistant to wind, moisture,
and corrosion.
Nickel plated for durability.
11
Hot Surface Igniter (HSI)
Provides stable burner ignition in harsh conditions.
Shielded with a protective cage.
Connection is waterproof.
12
LED
Diagnostics for field service and troubleshooting.
Note: Blinking under standard conditions does not
indicate an actual error. LED will blink as part of its
standard operating procedure. When an error occurs,
flashing will be consistent in a repeated blink pattern.
13
Valve Coupler
Stainless steel for heat and corrosion resistance.
1/8” NPT Nipple
14
Inlet Adapter
1/2” JIC 45° Flared Fitting
Stainless steel for heat and corrosion resistance.
15
Pilot Valve Outlet Nut
1/8” JIC 45° Flared Fitting
Brass for corrosion resistance.
16
Main Valve Outlet Adapter
1/2” Female NPT Fitting for Coupling to Main Orifice
Brass for corrosion resistance.
17
Pilot Tube
Stainless steel for heat and corrosion resistance.
Standard Length = 24”
Nominal Tube Size = 1/8” with Flared Connectors
18
WBECS Box
Stainless steel for heat and corrosion resistance.
19
Natural Gas Orifice
REQUIRED FOR NATURAL GAS APPLICATIONS
Drilled to #12 (0.189”) diameter.
Brass for corrosion resistance.

4
WEBCS-3 FT 06/21
TABLE OF CONTENTS
WBECS COMPONENT DIAGRAM....................................2
WBECS DIAGRAM REFERENCE TABLE........................3
WARRANTY INFORMATION.............................................4
WBECS SYSTEM OVERVIEW...........................................5
WBECS KIT CONTENTS ..................................................5
TOOLS/SUPPLIES REQUIRED FOR INSTALLATION....5
INSTALLATION REQUIREMENTS...................................6
GAS INSTALLATION REQUIREMENTS ........................6
GAS TYPE....................................................................6
GAS PRESSURE.........................................................6
GAS LINE SIZING........................................................6
GAS CONNECTION.....................................................6
GAS ORIFICE SIZING .................................................6
ELECTRICAL INSTALLATION REQUIREMENTS.........7
POWER SUPPLY REQUIREMENTS...........................7
POWER TRANSFORMER REQUIREMENTS.............7
WIRE SIZE REQUIREMENTS.....................................7
ELECTRICAL CONNECTIONS....................................8
WIRING OF MULTIPLE WBECS UNITS .....................8
PHYSICAL INSTALLATON REQUIREMENTS...............9
CLEARANCE REQUIREMENTS .................................9
PILOT INSTALLATION REQUIREMENTS.................. 9
MEDIA REQUIREMENTS.......................................... 10
VENTILATION REQUIREMENTS................................. 10
DETAILED INSTALLATION INSTRUCTIONS ............... 11
ELECTRICAL CONNECTIONS................................. 11
GAS CONNECTIONS...........................................11-12
ELECTRONIC IGNITION CONTROL TESTING ....... 13
WBECS OPERATION..................................................... 14
GENERAL OPERATION............................................ 14
BULLETED GENERAL OPERATION........................ 14
FIRE FEATURE START UP...................................... 14
FIRE FEATURE SHUTDOWN................................... 14
DESCRIPTION OF IGNITION & TIMINGS................ 15
MAINTENANCE .............................................................. 15
TROUBLESHOOTING................................................15-18
Electrical Current:....................................................... 16
LED Diagnostic Codes............................................... 16
TROUBLESHOOTING FLOW DIAGRAM ............18-20
PARTS LIST & ACCESSORIES...................................... 21
WARRANTY INFORMATION
Flame-tec warrants the Weather Beater Electronic Control
System (WBECS) to be free of manufacturing defects in materials
or workmanship when properly installed and operated for
residential use for a period of two (2) years from date of
installation. If installed in a commercial setting, this warranty
period is for one (1) year. Date of installation must be
documented, or the date of manufacture as shown on the
example label at right. The date of manufacture is shown above
the CSA logo with a two-digit year followed by a two-digit week shall be considered the warranty commencement date.
During the warranty period, Flame-tec will repair or replace any components, that in its sole discretion are considered
defective. This warranty covers parts only and does not cover costs of removal, reinstallation, shipping or inspection of said
parts.
Damage to the WBECS caused by installation error, accident, misuse, or abuse is not covered under this warranty. Any
modification to the WBECS or any of its components as supplied by the factory will void the warranty. Under no
circumstances will Flame-tec be responsible for incidental or consequential damages. Limitations to incidental and
consequential damages vary from state to state so some limitations may not apply to you.
To file a warranty claim, owner must contact Flame-tec or authorized dealer with:
Name, Address, Telephone Number, Date and Proof of Purchase, Date and Proof of Installation, and Model
Name/Part number
Please explain installation particulars and defect noted. Pictures of installation may be required.
Flame-tec reserves the right to inspect components and may require part(s) to be returned to the factory for inspection.
If in its sole discretion Flame-tec finds a component or system to be defective, it will repair or replace said components with
new or remanufactured parts as it deems appropriate. Transportation charges to and from Flame-tec are the responsibility
of the owner.
For questions or help in diagnosis or installation please call Flame-tec support at 844-352-6383 or visit the website at
www.flame-tec.com.

WEBCS-3 FT 06/21
5
WBECS SYSTEM OVERVIEW
The Weather Beater Electronic Control System utilizes CSA certified
components to supplement an outdoor product.
The WBECS unit is an electronic ignition control system certified to the latest standards for outdoor gas products. The
system utilizes a 12 VAC power source with a Hot Surface Ignitor (HSI), thermocouple flame sensing, and LED diagnostics
to provide a compact, fully functional, user-friendly experience. It is rated for a -20°F to 175°F temperature range with
robust connections designed to resist the outdoor elements. The standard and high capacity WBECS units are rated at
265,000 BTUs and 450,000 BTUs at a 1” pressure drop, respectively.
WBECS KIT CONTENTS
The WBECS kit includes the following items:
•WBECS Control Box
•Pilot Assembly
•Pilot Tube Flex Line
•Transformer
•Plug and Play Power Wire (30’ 18 AWG)
•Instruction Packet
oQuick Reference Guide
oInstruction Manual
oNatural Gas Main Orifice
TOOLS/SUPPLIES REQUIRED FOR INSTALLATION
•Pipe Wrench
•Crescent Wrench or Correct Size Combinations Wrenches
•Manometer/Pressure Tester
•Electrical Voltage Meter
•Wire Strippers (Necessary if Splicing Wires)
•Waterproof Wire Nuts (Necessary if Splicing Wires)
•Wire of Appropriate Gauge (Necessary if Splicing Wires)
Model: WBECS
Model: WBECS-HC

6
WEBCS-3 FT 06/21
INSTALLATION REQUIREMENTS
Only a certified gas installer, service agent, or local
gas supplier may install and service this product.
GAS INSTALLATION REQUIREMENTS
GAS TYPE
Prior to making gas connections, ensure appliance
being installed with WBECS unit is compatible with the
available gas type. Reference the label on the appliance
to confirm appliance gas type requirement.
GAS PRESSURE
Proper input/inlet gas pressures are required for optimum
appliance performance, which must fall in the ranges
found in the Gas Pressure Requirements table below.
Note: Minimum required pressure may vary dependent on
BTU output of the appliance.
GAS LINE SIZING
Gas line sizing requirements need to be made following
NFPA 54/ANSI Z223.1. Recommended pipe diameters
based on gas type, burner BTU output, and the pipe run
length can be found in the table on the subsequent page.
GAS CONNECTION
Gas supply line must be installed in accordance with
local building codes, if applicable. Supply line must include
drip leg and sediment trap. If no applicable building codes
are available, follow national fuel gas code NFPA 54/ANSI
Z223.1. Installation should be performed by an approved
and/or licensed, qualified installer as required by locality.
Note: A listed manual gas shutoff device must be
installed upstream from the appliance.
GAS ORIFICE SIZING
The WBECS unit includes a natural gas orifice sized to
#12 drill bit (0.189”) for the standard capacity and letter Q
drill bit (0.332”) for the high capacity. If your appliance falls
outside these values, reference chart below for suggested
drill sizes.
WARNING: Inspect all components before installation. If any parts are damaged, contact your supplier.
Do
not install damaged parts.
WARNING: RISK OF FIRE! Provide adequate clearances. Keep the appliance area clear and free from
combustible materials, gasoline, and other flammable vapors and liquids.
WARNING: The Weather Beater Electronic Control
System operates on 12 Volts AC power.
DO NOT attempt to power using 110 Volts AC Power!
DAMAGE WILL RESULT!
Consult the appliance manufacturers instructions for all gas installation requirements.
Use only joint compound, thread sealant, or tape specific to gas use that is resistant to all gases. Apply
joint compound, thread sealant or tape to all male pipe fittings only and DO NOT USE ON FLARED
FITTINGS. Be sure to tighten every joint securely. Note: A listed manual gas shutoff device must be
installed prior to the location of the appliance.
Gas Pressure Requirements
Inlet Pressure
Natural Gas
Propane Gas
Minimum
4" W.C.
8" W.C.
**Nominal**
7" W.C.
11" W.C.
Maximum
10.5" W.C.
14" W.C.
**Typical Appliance Pressure Requirements**

WEBCS-3 FT 06/21
7
ELECTRICAL INSTALLATION REQUIREMENTS
ALL ELECTRICAL SUPPLY CONNECTIONS AND
SPLICES SHOULD BE MADE BY A LICENSED
ELECTRICIAN OR CERTIFIED PROFESSIONAL
ACCORDING TO LOCAL CODES. IMPROPER
CONNECTIONS MADE BY UNTRAINED INDIVIDUALS
CAN RESULT IN ELECTRICUTION HAZARDS CAUSING
SERIOUS HARM OR EVEN DEATH.
POWER SUPPLY REQUIREMENTS
The WBECS unit requires a 110V ground fault circuit
interrupt (GFCI) protected power outlet to supply power to
the supplied transformer. Multiple conformations exist for
power supply installation upstream from the described outlet
including manual power shut off switch, timer shut off switch,
Bluetooth enabled shut off switch, etc. Any component
placed upstream from the power supply must be capable of
supplying the 5 AMP current draw necessary to power the
WBECS unit. If components are installed that cannot meet
this requirement, the WBECS unit will not function properly
and will randomly shut down with no error codes.
POWER TRANSFORMER REQUIREMENTS
The WBECS is supplied with a 12 Volt AC, all weather,
sealed transformer rated to a minimum of 60 Watts. WE DO
NOT SUGGEST USING AN ALTERNATIVE POWER
TRANSFORMER TO THE ONE SUPPLIED. CONTACT
SUPPLIER IF AN ALTERNATIVE TRANSFORMER IS
NEEDED TO ENSURE POWER REQUIREMENTS ARE
MET. If an alternative transformer is to be used, it is required
to meet Class II 12 VAC, 5-amp (60 Watt minimum)
specifications for proper unit operation. Use of anything
outside these specifications may void the Warranty.
WIRE SIZE REQUIREMENTS
The WBECS kit contains 30 feet of 18-gauge wire for direct
connection of the transformer to the WBECS unit, which
meets the minimum wire gauge requirements to maintain the
minimum 12 Volts at the unit at a distance of 30 feet. If the
distance of the WBECS unit from the supply power exceeds
30 feet, please reference the following table for gauge
requirements for the distance required.

8
WEBCS-3 FT 06/21
Wire Gauge (AWG)
Maximum Run Length (ft)
10
200
12
130
14
80
16
50
18
30
ELECTRICAL CONNECTIONS
Use of the supplied wire with keyed terminations to make
connections to the control box is highly recommended. If,
however, you require splices to be made for longer run
lengths, we suggest cutting the connectors from the supplied
18-gauge wire no more than 1 foot from the plug termination.
The pigtails resulting from the cut can then be spliced with
wire nuts into the larger size (smaller gauge) wire used in
making the run. It is also highly recommended to use
dielectric grease or silicon to fill any and all wire nuts used in
splicing/ installation of the WBECS to ensure
moisture/weather resistance. Note, as the connections being
made are AC, any splices made are not polarity sensitive,
meaning connections made can occur to either wire while
maintaining functionality.
WIRING OF MULTIPLE WBECS UNITS
Each WBECS unit has a waterproof, plug and play
terminated connector protruding from the control box for
power connection to the supplied transformer via the 30’
18AWG wire. Each transformer can run a max of two
WBECS units in parallel. Exceeding this number will result in
too low of operational current, and potentially too large of
power draw causing irreversible damage to the transformer,
thereby voiding the Warranty.
If wiring two units in parallel, reference the chart found on this
page for the gauge of wire you will need to run to each unit.
Note, you MUST use the distance from each unit to the
transformer for selecting proper wire gauge. DO NOT use the
distance between units as run length, this can result in too
low of Voltage rendering the unit non-functional. Reference
connection diagram below for visual understanding.
If you intend to wire greater than two units in parallel, you
must use multiple transformers to make the connections in
singular or paired conformations. If you desire using a single
transformer, it is required to procure a higher amperage
output 12VAC transformer conforming to Class II 12 VAC
specifications with 2.5 amps per unit connected (i.e, 3 units
would require 7.5 amps, whereas 5 units would require 12.5
amps).
Figure 1: Wiring of multiple units should be done in parallel, not in series or “Daisy Chained” together. All distance measurements
should be done from the transformer to the unit being connected. Ensure that proper gauge wires are used for the distance measured
per the table shown above.

WEBCS-3 FT 06/21
9
PHYSICAL INSTALLATON REQUIREMENTS
CLEARANCE REQUIREMENTS
Appliance must be installed in accordance with the
appliance manufacturer’s instructions, as well as local
building and fire codes. Horizontal and vertical clearance
from combustible materials is required and outlined in the
appliance manufacturer’s instructions.
Although the WBECS unit conforms to NEC regulations for
installation within 5 feet of water for installation with a water
feature, DO NOT INSTALL SUBMERGED WITHIN A
WATER FEATURE, as it is not waterproof and could result
in electrical shock causing physical harm or even death. If
installing near a water feature, ensure the WBECS unit is
away from potential, accidental submergence.
Furthermore, ensure the burner within the water feature
itself is not submerged allowing water to flow back into the
gas line causing damage to the system.
PILOT INSTALLATION REQUIREMENTS
Pilot assembly must be installed properly to ensure
appropriate function, as installation in the wrong location,
i.e. between two burners where it can get excessively hot,
can cause premature failure of the pilot assembly itself due
to overheating of the HSI filament or damage to the
thermocouple. Moreover, improper installation of the pilot
can result in elevated temperatures of the cold junction of
the thermocouple leading to erratic shutdowns of the
appliance/fire feature.
We recommend mounting the pilot assembly on top of the
burner pan and in that configuration, the pilot line,
thermocouple and igniter lead should be lowered through a
hole in the pan prior to connecting to the control box. Hole
for pilot installation should be outside the burner positioning
the pilot assembly at a distance no more than 1” from a
burner port to ensure quick gas ignition. Moreover, pilot
assembly must be installed at appropriate height to the
burner port intended for ignition. Please reference
installation diagrams for the appliance/burner type
corresponding to the installation being performed. Note:
Appliance burner pan may contain a pilot installation
location within the pan designed for ease of installation that
DOES NOT correspond to an appropriate installation
location. In the event this is the case, a new installation hole
must be cut in the pan to install the pilot appropriately.

10
WEBCS-3 FT 06/21
MEDIA REQUIREMENTS
Do not use any other material as media in the fire feature
other than those listed below.
•Lava rock no smaller than 1/2" average diameter.
•Fire glassspecifically designedandapprovedforfire features.
•Stonesofman-madematerials(refractory)designedforfirepits.
Media used in the fire feature enhances the look of the flame
and improves the fire pit performance.As gas is emitted from
the burner the media helps mix air with fuel resulting in a more
uniform flame and a cleaner burn. The media will also help
spread the flame across all areas of the burner resulting in a
faster and more even ignition. The media covering the burner
should never exceed 2" in depth. If using fire glass, we
recommend use of 1/2" diameter minimum to prevent
media from falling into gas orifices and blocking flow
of gas out of the jets. Moreover, only cover the burner
1/2"to3/4" depth.Withallmedia,the upper portion of the pilot
burner must be left open to the air for proper ignition. When
the media is placed correctly you should see the top of the
pilot burner shield, as shown in the diagram. Assuming
proper pilot installation, if
ignition is delayed or inconsistent
you may need to remove some media from the pilot burner
area. Whenusingpropane gas, it is important to check for
back pressure created by excessive use of media that could
result in gas being forced back through the air mixer leading
to buildup of gas within the appliance feature. Adjust the LP
main orifice nut accordingly.
VENTILATION REQUIREMENTS
Venting is required to dissipate heat and
any residual
fuel. Failure to provide proper
ventilation could result in overheating.
Proper cross ventilation is required to prevent the buildup of
combustible gases within the appliance enclosure, as well
as to provide cool, fresh air for a better overall gas burn. To
achieve adequate and appropriate cross ventilation, a
minimum of 36 square inches of total ventilated area must
exist. To achieve this appropriately, two opposing sides
of the enclosure must possess 18 square inches of
ventilated area, as shown in the diagram. Note, the grates
must be positioned on opposing sides to achieve best
ventilation. Ventilation on a single side can create vacuum
within the enclosure when wind blows across the ventilated
area.
The ventilation grates should also be aptly positioned
dependent on the type of gas you are using. Natural gas is
lighter than air and will escape through the upper portion of
the enclosure including holes in the burner pan, whereas
propane is heavier than air and will sink to the lower portion
of the enclosure. Ventilation position is more critical in
propane installations, as this gas is more likely to get
trapped and buildup inside the enclosure. In the event of
using propane, position the ventilation grates towards the
bottom of the enclosure to prevent excessive buildup. If
unsure of gas type to be used, a bottom position is
recommended, as natural gas can escape through holes in
the burner pan preventing excess buildup. Note: Do not
assume your gas can escape from the enclosure. Provide
adequate ventilation and perform proper leak testing to
ensure gas buildup is not an issue.

WEBCS-3 FT 06/21
11
DETAILED INSTALLATION INSTRUCTIONS
ELECTRICAL CONNECTIONS
ALL ELECTRICAL SUPPLY CONNECTIONS AND SPLICES SHOULD BE MADE BY A LICENSED ELECTRICIAN OR
CERTIFIED PROFESSIONAL ACCORDING TO LOCAL CODES. IMPROPER CONNECTIONS MADE BY UNTRAINED
INDIVIDUALS CAN RESULT IN ELECTRICUTION HAZARDS CAUSING SERIOUS HARM OR EVEN DEATH.
1. Verify that an appropriate ground fault circuit interrupt (GFCI) protected 110V supply exists upstream from the WBECS
unit in a protected location. IF AN APPROPRIATE POWER SUPPLY DOES NOT EXIST, DO NOT PROCEED WITH
INSTALLATION- CALL A LICENSED ELECTRICIAN FOR ASSISTANCE.
2. After verifying appropriate power supply, check that all components upstream from the supply (Timer Switches, Manual
Switches, etc.) will appropriately function with 5 AMP current draw of the WBECS unit(s). If installing multiple units,
reference Page 8 of this manual for requirements and general install diagram.
3. The WBECS unit is supplied with a 110V step down transformer that supplies the appropriate 12VAC, 5AMP power to
the WBECS unit. This will be plugged into an outlet connected to the 110V supply described above. Double check that
the supply is in a location conforming to local and federal NEC codes. IF LOCATION DOES NOT CONFORM TO
CODES, CONTACT A LICENSED ELECTRICICAN FOR ASSISTANCE PRIOR TO INSTALLATION.
4. After ensuring the upstream electrical supply conforms to codes and components are capable of supplying power to the
WBECS unit, the electrical supply lines should be run from the transformer location to the WBECS unit. Ensure the
gauge of wire being spliced in conforms to the length table found on Page 8 of this manual under the WIRE SIZE
REQUIREMENTS section.
5. Once the electrical supply lines have been run from the transformer location to the WBECS unit, the keyed Plug and
Play connections can be made to both the WBECS unit and the power transformer. DO NOT PLUG THE
TRANSFORMER INTO THE 110V OUTLET UNTIL ALL GAS CONNECTIONS HAVE BEEN MADE IN THE NEXT
SECTION, AS THE UNIT WILL POWER ITSELF ON AND TRY AN IGNITION CYCLE, WHICH SHOULD ONLY
OCCUR WHEN THE UNIT IS READY TO TEST.
GAS CONNECTIONS
ALL GAS CONNECTIONS SHOULD BE MADE BY A LICENSED PLUMBER OR CERTIFIED GAS PROFESSIONAL
ACCORDING TO LOCAL CODES. IMPROPER CONNECTIONS MADE BY UNTRAINED INDIVIDUALS CAN RESULT IN
GAS LEAKS THAT CAN RESULT IN EXPLOSION CAUSING SERIOUS HARM OR EVEN DEATH.
Use only joint compound, thread sealant, or tape specific to gas use that is resistant to all gases. Apply joint compound,
thread sealant or tape to all male pipe fittings only and DO NOT USE ON FLARED FITTINGS. Be sure to tighten every joint
securely. Note: A listed manual gas shutoff device must be installed prior to the location of the appliance.
(Input General Requirements Recap)
WARNING: Check for gas leaks after installation is complete.
•Check all fittings and connections.
•DO NOT USE OPEN FLAME TO CHECK FOR LEAKS.
•Check for leaks with a commercially available, non-corrosive leak check solution.
1. Verify gas supply is shut off at the accessible, upstream manual shutoff valve prior to any installation. DO NOT proceed
with installation if an accessible manual shutoff does not exist –call a licensed plumber for assistance. IF YOU
SMELL GAS, DO NOT PROCEED WITH INSTALLATION UNTIL SOURCE CAN BE IDENTIFIED AND RISK CAN BE
SAFELY MITIGATED. Note: A sediment trap is recommended in the gas piping to prevent moisture and debris
in the gas line from damaging the valve.
2. Validate the appliance/burner BTU rating DOES NOT EXCEED the rating of the WBECS unit (265,000 for Standard
Capacity, 450,000 for High Capacity).
3. Confirm that the gas supply line is appropriate diameter for the distance being run from the supply to the WBECS unit to
produce the BTU output confirmed above. Use the Table on page 7 of this manual to match the supply line internal
diameter to the length being run to find the maximum BTU output to substantiate proper diameter.
4. Corroborate the gas type, Natural Gas or Liquid Propane, matches the type identified in the appliance’s manual.
5. If using Natural Gas, remove the Natural Gas Orifice (Stamped #12 NG Orifice) from the packaging and apply joint
compound, thread sealant, or Teflon tape on the male side of the adapter.

12
WEBCS-3 FT 06/21
6. If using Liquid Propane, you will need to procure the FT-LPK Liquid
Propane Kit for installation. This kit contains 1/2" male NPT air mixer for
installation as well as a #21 pilot orifice. Upon procurement, apply joint
compound, thread sealant, or Teflon tape to the male sides of the air
mixer for installation.
7. Install the Natural Gas Orifice or air mixer on the outlet (OUT) side of the
WBECS unit ensuring that the gas flow arrow points away from the box.
Tighten the fittings securely (1-2.5 full turns past finger tight) using two
appropriate wrenches for install, one on the outlet fitting of the WBECS
unit and one on the adapter being installed. (See Fig. 1)
8. If possible, we suggest installing the WBECS unit on the burner next,
which should have 1/2" male NPT thread on the burner inlet. Apply joint
compound, thread sealant, or Teflon tape to the 1/2" burner inlet prior to
install. If the burner being used has any other thread/connection type,
an adapter must be acquired and installed on the burner. The burner
inlet now inserts through the burner pan, protruding through for installing
the WBECS unit onto the burner inlet threads. Thread the WBECS fitting
onto the burner inlet to finger tight. Tighten the fittings securely (1-2.5
turns past finger tight) using an appropriate wrench on the outlet adapter
and a pipe wrench on the inlet of the burner being installed. DO NOT
APPLY PRESSURE OR TORQUE TO THE CONTROL BOX ITSELF,
IT CAN CAUSE BROKEN FITTINGS. (See Figs. 2 & 3)
9. The pilot assembly should be installed into the burner pan next ensuring
that the pilot is positioned outside the burner in a location where it can
safely ignite the main burner. Refer to page 9 of this manual for proper
pilot installation position diagrams. If such a location does not exist from
the factory, an appropriate hole should be cut in the pan to properly
position the pilot assembly. Original pilot hole location should be covered
to ensure media does not drain from the pan into the enclosure below.
DO NOT COVER THE WEEP HOLES IN THE PAN THAT ALLOW
WATER DRAINAGE.
10. Prior to mounting the pilot assembly, if using Liquid Propane (LP), the
pilot orifice needs to be changed. This comes as part of the Liquid
Propane Kit discussed above. Contact Flame-Tec to procure this kit.
Part number information can be found on the accessories page at the
end of this manual. To change the pilot orifice, loosen and remove the
pilot adapter nut mounted to the orifice using a 1/2” wrench, 1/2” socket
wrench, or an adjustable crescent wrench. Next, using a Phillips head
screwdriver, loosen and remove the 10-32 screw securing the orifice
from turning. The orifice can then be removed using a 1/2" wrench, 1/2"
socket wrench, or adjustable crescent wrench. Install the LP orifice and
reassemble in reverse order from above.
11. Next, mount the pilot assembly in the pan with appropriate hardware to
hold it securely in its location.
12. After mounting the pilot in its location, connect the two ends of the 24”-
1/8” flare pilot gas tube supplied with the WBECS unit to the pilot outlet
port on the WBECS unit on one end and the pilot assembly on the other.
Securely tighten to ensure no gas leaks from tube. (See Fig. 2) DO NOT
ADD JOINT COMPOUND, THREAD SEALANT, OR TEFLON TAPE
TO THE CONNECTIONS BEING MADE.
13. Next, connect the hot surface igniter (HSI) plug into the box making sure
it securely clicks into the mating connector. Thread the thermocouple
connector into the mating plug on the box and finger tighten plus 1/4
turn. Make sure not to bend the thermocouple too sharply or force it into
tight positions that could bend and break it leading to a non-functional
WBECS unit. (See Fig. 2)
14. Now that the pan is assembled and ready to be installed into the fire
feature, it is a good time to confirm that the appliance possesses the
appropriate cross-ventilation ports to provide the air flow necessary for
the appliance and WBECS to function properly. Reference page 10 of
this manual for ventilation requirements.
Install Figure 1: Install natural gas orifice with thread
sealant finger tight. Using two wrenches, tighten the
orifice 1-2.5 turns past finger tight.
Install Figure 2: Install the supplied pilot tube onto
the WBECS box on one end and the pilot on the other.
Use a wrench to tighten until snug. Connect the
thermocouple lead into the receptacle on the control
box finger tight, then tighten 1/4 turn. Push the hot
surface igniter (HSI) connection into place firmly until
it clicks. DO NOT USE THREAD COMPOUND, PIPE
DOPE, OR TEFLON TAPE ON BRASS FLARE
FITTINGS OF THE PILOT OR WBECS UNIT.
Install Figure 3: Connect the supply gas line to the
1/2" flared connector on the bottom of the box.
Tighten with a wrench until snug. After securing the
gas line, perform a leak test. If no leaks are found,
connect the electrical supply plug and play connector
to the available connection on the WBECS box.

WEBCS-3 FT 06/21
13
15. After confirmation of proper ventilation, check that the gas supply line is free of water and debris that could damage the
gas valves if allowed to pass through the valves. Purge the gas lines of air and perform all leak tests with leak detector
or leak reactant on main gas supply and repair leaks as necessary. Turn off gas supply.
16. Once the gas supply line is free of water and debris, purged, and leak tested, the supply should be connected to the
WBECS unit inlet (IN) port and the gas supply line using a corrosive resistant 1/2" Flared Fitting Corrugated whistle free
Gas Appliance Line. If the gas supply line does not have a 1/2” flared fitting on the end, an adapter must be procured
and installed prior to installing the gas appliance line. Ensure all fittings are securely tightened. (See Fig. 3) DO NOT
TRY CONNECTING ANY OTHER FITTING TYPE TO THE FLARED FITTING. DO NOT ADD JOINT COMPOUND,
THREAD SEALANT, OR TEFLON TAPE TO THE FLARED CONNECTIONS BEING MADE.
17. Upon completion of gas supply line hookup, the unit is nearly ready to test. Verify gas inlet pressure is within the specified
minimum and maximum pressures. Consult Gas Inlet Pressures on page 6.
18. Turn on gas supply to preform leak tests on main gas supply and all connections to appliance and repair as needed.
19. DO NOT TEST/USE APPLIANCE IF THERE IS EVIDENCE OF LEAKING GAS. If leak is suspected, turn off main gas
supply immediately. Check and tighten all connections where leaks are evident. Perform leak test again, if still leaking,
pinpoint leak location. If leak appears to be coming from the WBECS box, contact Flame-Tec immediately for Warranty
consideration. If the leak appears to be coming from connections, inspect all connections with main gas off. Ensure
connection types are the same type of mating connections. Disconnect as necessary to check mating surfaces. If
connections are correct mating type and non-flared connections, replace/add joint compound, thread sealant, or Teflon
tape to the connections and test again. If leaks continue to occur, fittings may need to be replaced. Please contact Flame-
Tec if this appears to be the case.
20. If no gas leaks are present, the unit is fully ready to be tested, proceed to the next section.
ELECTRONIC IGNITION CONTROL TESTING
1. Plug the transformer into the 110V power supply outlet, and ensure any upstream switches are on and providing power
to the transformer.
2. The WBECS unit will run through its ignition cycle (Outlined on Page 15 of this manual), initially turning on the hot surface
igniter (HSI). The igniter should glow orange. If this is not the case, ensure the HSI connector is securely plugged into
the box. If the igniter is securely plugged in and does not glow orange, check that the indicator LED on the box is lighting
up indicating power to the unit. If the LED is not lit or blinking, unplug the plug and play electrical connection and check
that there is 12VAC being supplied to the box. If voltage is being supplied and control is not functional, contact Flame-
Tec immediately for Warranty consideration. If no voltage is supplied, remove the plug and play connector at the
transformer and check for voltage out of the transformer. If voltage is present out of the transformer, there is a problem
in your run wire. Consult an electrician to fix/repair the run line. If voltage is not present out of the transformer, check that
there is 110VAC coming out of the supply outlet. If the supply outlet has appropriate voltage, the transformer may be
damaged/faulty. Contact Flame-Tec for warranty consideration. If the supply outlet has no voltage, check that all
upstream switches, if any, are on and supplying power. If upstream components are on and supplying power, contact an
electrician to troubleshoot supply line issues.
3. Once the HSI is functional and glows orange, the pilot valve should open shortly after allowing gas flow to the pilot
assembly across the igniter. The gas may not light on the initial trial for ignition due to air in the lines. Allow 2-3 cycles of
the HSI to check for ignition. If ignition does not occur within 2-3 cycles and you can hear gas flowing from the pilot, you
may have to purge the line to remove any air from the line not purged previously. This is more likely to occur in longer
gas run lengths from the supply. If ignition does not occur, you can smell gas, and the igniter is glowing properly, the HSI
may be damaged/faulty, or the supply wire gauge may be too small. Check wire gauge table on page 8 to confirm proper
gauge. If wire gauge is correct, please contact Flame-Tec for Warranty Replacement consideration of the HSI.
4. Assuming no issues occur, and the pilot ignites, the thermocouple will sense flame and open the main valve. If the pilot
lights and cycles on/off several times without the main valve opening, check that the thermocouple connection on the
box is good and tight and no breaks exist in the thermocouple lead. Assuming the thermocouple is good with no breaks,
and the main valve still does not open, a two-flash lockout error code should occur indicating lack of flame sense. In this
case, the control may be faulty. Contact Flame-Tec for Warranty consideration.
5. If the main valve opens, and the main burner lights appropriately, leak check all connections. If any leaks exist, shut off
power to the unit and check that appropriate connections have been made. Tighten fittings if appropriate connections
have been made and retest the WBECS unit. If leaks still occur, pinpoint the source and replace fittings, as necessary.
If leaks appear to be from within the WBECS unit, contact Flame-Tec for Warranty consideration.
6. If no leaks are found, turn off the appliance and allow it to cool. Ignition test is complete. Assuming no issues arise,
review instruction manual with end user and instruct end user not to change/modify fire pit or media in any way.

14
WEBCS-3 FT 06/21
WBECS OPERATION
WARNING: Do NOT use this appliance if any part has been under water.
Immediately call a qualified service technician to inspect the appliance and to replace any part of the
control system and any gas control which has been under water.
WARNING: HOT SURFACES –DO NOT TOUCH - SEVERE BURNS MAY RESULT
•Supervise children in same area as the appliance.
•Alertchildrenandadultstodangersofhightemperatures.
•Flammable materials should not be hung from the appliance or placed on or near the appliance.
WARNING: The appliance must be inspected before use and at least annually by a qualified service
technician.
•Any guard or protective device removed for servicing must be replaced prior to operation.
•Keep the appliance area clear and free from combustible materials, gasoline and other flammable
vapors and liquids.
WARNING: If fire feature fails to turn off completely (small flames still visible) turn off gas supply using
the manual gas shutoff.
GENERAL OPERATION
The WBECS unit is designed for simplistic operation by the end-user. Simply, the end-user turns on the power supply. The
control runs through its ignition cycle by initially turning on the Hot Surface Igniter (HSI). The pilot valve is then opened
allowing gas to flow across the glowing orange igniter thereby producing a pilot flame. The pilot flame is directed toward both
the thermocouple and the main burner for flame sense and main burner ignition, respectively. The thermocouple senses the
pilot flame, turns off the HSI and opens the main valve allowing gas to flow out the primary burner of the appliance. The pilot
flame then ignites the main burner of the appliance as the final sequence of the automated operation. Both the main valve
and pilot valve remain open until power is removed from the control or a loss of flame is sensed by a cooling of the
thermocouple.
BULLETED GENERAL OPERATION
•Plug the transformer into the 110V power supply outlet, and ensure any upstream switches are on and providing
power to the transformer.
•Power is applied by end-user.
•Hot Surface Igniter (HSI) becomes hot, glowing orange and 4 seconds later the pilot gas valve opens.
•Assuming no air in the lines, a pilot flame should be visible (at night only) within 10 seconds of power application.
•Within 10 seconds of pilot flame ignition, burner (fire ring/ burner bar) should ignite.
FIRE FEATURE START UP
On initial startup, a small amount of air can exist in the
gas supply lines. When first lighting appliance it will take
a short time for air to purge from lines. Subsequent
lighting of the appliance should not require such purging.
Pilot must be kept clear of all media.
1. Before turning appliance on visually inspect fire
feature to ensure combustible materials have not
collected inside the feature which could burn once
turned on. Be sure anyone standing near the fire
feature is aware you will be turning the fire feature on
before actually turning it on.
2. Turn fire feature on by turning on the electrical
device used to power the fire feature.
FIRE FEATURE SHUTDOWN
The fire feature will remain hot for a long period after
operation. Use caution after turning the appliance off.
1. Turn fire feature off by turning off the electrical
device used to power the fire feature.

WEBCS-3 FT 06/21
15
DESCRIPTION OF IGNITION & TIMINGS
Exact timings described herein can be found in the table at right.
When powered, indicating a call for heat, the unit will wait for Pre-
Purge time. The HSI will be energized for warm up time, then the
pilot gas valve will energize for Trial-for-Ignition time. The HSI will
turn off after Ignition Time. If the flame is detected on the
thermocouple before the end of the trial for ignition time, the HSI
will turn off. The main valve will turn on and the pilot valve will
remain open until power is removed or flame signal is lost. If flame
is lost, the control will turn off the gas valves, and after the flame
loss recycle delay, restart the ignition sequence. If a flame is not
detected during the Trial-for-Ignition time and Trials-for-Ignition
remain, the pilot and HSI will turn off and wait for Inter-Purge time
before starting the next ignition attempt. If a flame is detected prior
to turning on the gas valve, the control will stop sequence and
remain in safety shutdown until the flame signal is below minimum
threshold or drops continuously by minimum threshold value
before continuing.
MAINTENANCE PRIOR TO EACH USE
Inspect for debris in fire feature –remove debris prior to use.
SEMI-ANNUALLY
1. Visually inspect pilot burner for debris/insect infestation
(spider webs).
2. Visually inspect burner holes to ensure they are clear.
3. Cleaneitheroftheaboveasnecessaryusingcompressedair.
ANNUALLY
1. Visually inspect pilot burner for excess corrosion due to
heat and moisture.
2. Turn fire feature on to ensure proper operation.
TROUBLESHOOTING
The WEBCS is installed but when turned on
nothing
happens:
The most common cause is an electrical wiring or power is-
sue. Inspect all electrical connections carefully to confirm all
wires from the transformer to the fire feature are connected
properly. If wiring is properly connected, disconnect the wires
atthe fire feature and use a multimeter to confirm a minimum
of 12 volts when the fire feature is turned on. If there is not
a minimum of 12 volts at the fire feature, conduct the same
test at the transformer to determine if the transformer is truly
producing a minimum of 12 volts. If you do have a minimum
of12voltsat thefirefeature,contactus forfurtherassistance.
The WBECS is turned it on, the igniter glows
orange
and gas can be heard flowing, but does
not ignite:
The two most common causes to this fault are Air in the Fuel
Line or low Electrical Current to the fire feature.
Air in the Gas Line:
New gas line installations often have air trapped inside that
must be removed or purged prior to installing the WBECS. If
the line has not been properly purged, it may take several
cycles of turning the fire feature on and off before the all the
air is purged from the gas line.
Understanding how the WBECS operates will help you go
through the purging process. When you turn on the WBECS,
the igniter will begin to glow, followed by the pilot gas valve
opening 4 seconds later. During next 3 minutes the igniter will
cycle on and off every 30 seconds while the pilot gas valve will
remain on the entire time. Accordingly, if you are attempting
to purge air from the gas line, engage the system and leave it
on for approximately 3 minutes. Next turn it off and then
back on. Let the system run for an additional 3 minutes. When
purging air from a new gas line, you may need to cycle the
power several times as described above before gas begins to
flow. If at any point you smell gas and still don't have ignition,
you should attempt to light the pilot flame with a handheld
lighter. If ignition occurs when you light it by hand, go to
Electrical Current section on Page 16.
WBECS IGNITION CONTROL TIMING
Pre-Purge Time
3.25 seconds
HSI Warm Up Time
5 seconds
Trial for Ignition Time
20 seconds
Flame Failure Response Time
10 seconds
Max
Inter-Purge Time
5 seconds
Flame Loss Recycle Time
15 seconds
Flame Loss Recycle Delay
Time
None
WARNING: Maintenance should only be
performed by a qualified service technician.
WARNING: The appliance must be inspected
beforeuse and at least annually by a qualified
service technician.
WARNING: Ensure gas and power are shut
off and
appliance is cool before servicing.
WARNING: Any guard or protective device
removed for servicing must be replaced
prior to operation

16
WEBCS-3 FT 06/21
Electrical Current:
If purging the gas line does not solve the problem, the ignition failure is most likely that the igniter is not getting hot
enough to light the gas. The main reason an igniter will not reach full temperature is low amperage. Electricians will
commonly check the electrical power, note there are a minimum of 12 volts and think everything is fine electrically, so there
must be a problem with the WBECS. The deficiency is not in the volts but rather the amps. Amperage reaching the fire
feature is dependent on the gauge wire used between the transformer and the fire feature. Our installation instructions
require no less than 18 gauge wire up to 30 feet and 10 gauge up to 200 feet. (See Page 8) Smaller wire size will often
be the problem in ignition.
Steps to check for sufficient amperage:
•CAUTION: Turn off the gas supply before proceeding.
•Utilizing clamp on ammeter, clamp the ammeter around one of the wires providing power to the WBECS.
•Turn on the fire feature.
•Amperage should range between 1.4 to 1.6 amps initially. Four seconds after being turned on the amperage will jump to
approximately 2.0 amps.
If the amperage listed previously is not present AND the wire gauge used was less than listed above, change the wiring.
Otherwise contact us for further assistance.
The fire feature was turned off, but small flames can still be seen flickering from the fire feature.
Turn the fire feature back on, let the main burner light and then turn it off again. You may need to do this several times.
Small pieces of debris in the gas line may get caught in the main or pilot valve preventing it from completely closing.
This is common in a new gas line. By cycling power you can oftendislodge thedebris.Ifcycling powerdoes notrectify the
problem, turn the gas off using the manual gas shutoff and contact us for further assistance.
TROUBLESHOOTING TABLE
Sequence of
Operation
Fault
Check
Result
Action(s)
Power ON
No Function/No LED
Checkfor12Vattrans-
former
Noorlowvoltage
Make sure transformer is powered. If
so, replace transformer.
Check for 12V at con-
trol box
Noorlowvoltage
Check wiring for continuity, replace if
broken.
Ensure wire is 30 feet long and
18AWG supplied wire. If splicing
reference page 8 of manual for proper
gauge selection.
Check fuse on HTC01
control module
Fuse OK
Replace control module
Fuse blown
Check wiring and replace fuse. If fuse
blows again, there is a short in the
wiring, igniter, gas valve or control
module. Locate shorted component
and replace.
Igniter warm-up
LED on, no igniter
Check for breaks in
igniter
Broken
Replace igniter.
Check igniter wiring
and connector
Damagedor
broken
Repair.
LED Diagnostic Codes
OFF
No Power / Internal fault
ON
Normal Operation
1 Flash
Hot Start, thermocouple hot at power up.
2 Flash
Trial Lockout, maximum Ignition trials exceeded without flame detection.
3 Flash
Flame Loss Lockout, exceeded maximum losses of flame after proving burner
on.
4 Flash
Flame Sense Fault
5 Flash
Valve Fault
Fast Flash
Safety Shutdown

WEBCS-3 FT 06/21
17
Trial for ignition
Igniter ON, does not light.
Control goes through all
ignition attempts then en-
ters 2 LED flash lockout
Is pilot valve opening?
No.Pilotgasflow
Check input gas pressure. Maximum
pressure 1/2 PSI. Install regulator if
higher.
Check voltage to pilot valve. Voltage
should read >10.2VDC. Check "No or
LowVoltage" above if less.
Check pilot coil for open circuit.
Replace
pilot valve if open.
Yes. Gas flow
at pilot. No
ignition/low
flame
Ensure air has been bled from gas line
Consult burner manufacturer for
minimum gas pressure.
If natural gas, ensure pilot jet is not for
LP
Check pilot injector for clogged jet.
Clean
or replace.
If pilot can be lit with a match, check
igniter position and adjust, or check
"No or Low Voltage" above.
Pilot lights but goes off at
end of trial without main
burner. 2 flash lock-out
after end of trials. Flame is
not detected.
Ensure pilot flame is
impinging on the
thermocouple
No
Checkforcloggedpilotorinjectorand
clean.
Check for correct pilot injector. (LP or
Nat)
Is the thermocouple
securely connected to
the control box?
No
Tighten connection
Yes
Replace thermocouple
Burner ON
Unit shuts down after
flame detected
LED flashing 1 time, no
recycle?
Yes
Slow flash, thermocouple hot wait for
recycle. Fast flash, internal safety
shutdown, cycle power off for 10
seconds before retrying ignition. If
problem persists, contact supplier.
LED flashing 2 times,
no recycle?
Yes
Ignition trial lock out. Exceeded 15
trial window without detecting flame.
Cycle power off for 10 seconds before
retrying ignition. If problem persists,
contact supplier.
LED flashing 3 times,
no recycle?
Yes
Maximum flame losses per heat cycle
exceeded. Recycle power to reset.
Ensure pilot flame is impinging on
the thermocouple and is adequately
sheltered from the wind. If
impingement is consistent andnowind
present,replacethermocouple.
LED flashing 4 times,
no recycle? (Flame
sense fault)
Yes
Turn power off for 10 seconds and
back on. If persistent, replace control
module
LED flashing 5 times,
no recycle? (Valve
Fault)
Yes
Turn power off for 10 seconds and back
on. If persistent, check "No or Low
Voltage" above. If voltage is okay,
replace control module.
Shuts down before
main burner lights
Yes
Check "No or Low Voltage" above
Shuts down after being
on for several minutes
or hours and does not
relight
Yes
Over temperature - ensure control
compartment remains under 175° F.
If continued operation above this
temperature, life of product will be
reduced.
Unit shuts down for 1
minute every 24 hours
Yes
This is normal operation for
validation of
safety circuitry.
LED fast flashing
Yes
Safety shutdown. Cycle power off for
10 seconds before retrying ignition. If
problem persists, contact supplier.

18
WEBCS-3 FT 06/21
TROUBLESHOOTING FLOW DIAGRAM
BEFORE YOU START TROUBLESHOOTING, CHECK IF YOUR UNIT HAS AN ERROR CODE ON
THE DIAGNOSTIC LED. NOTE THE CODE, AND THEN CYCLE POWER OFF FOR 10 SECONDS.

WEBCS-3 FT 06/21
19

20
WEBCS-3 FT 06/21
This manual suits for next models
1
Table of contents
