6. List of chords
10
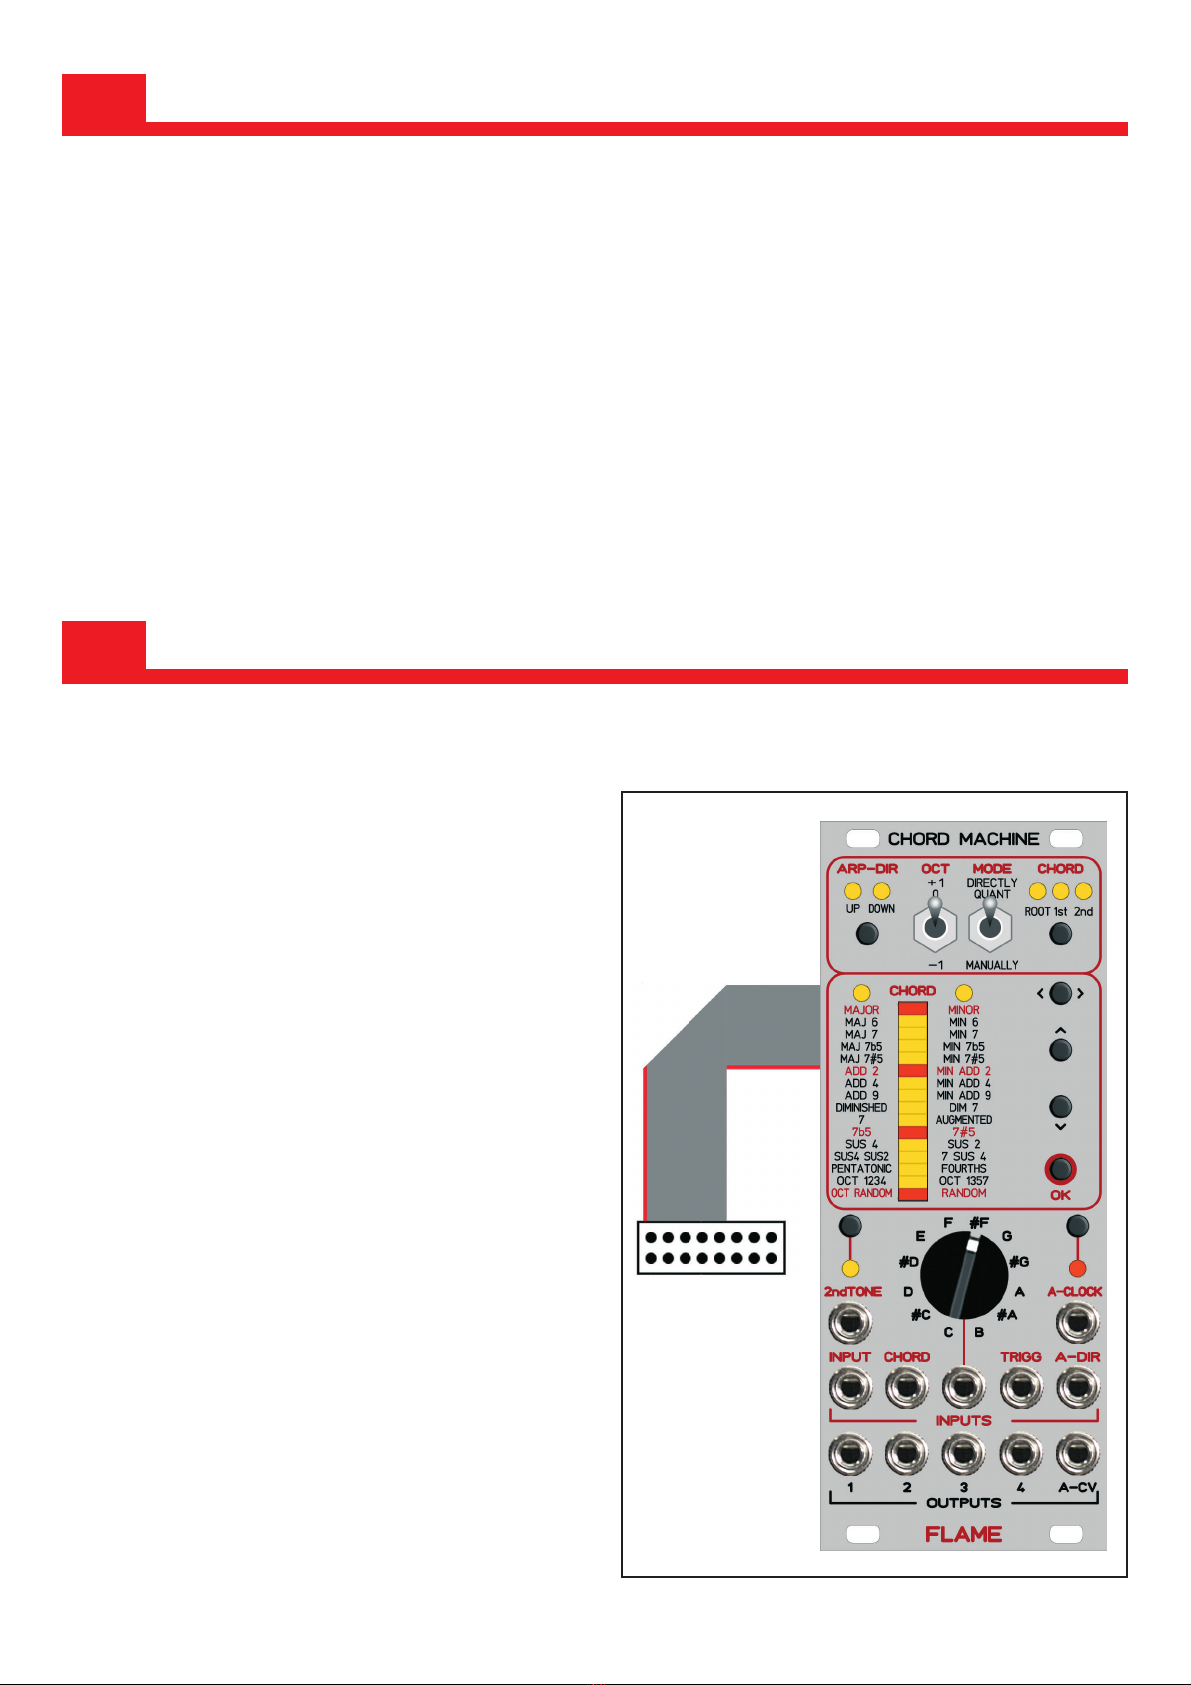
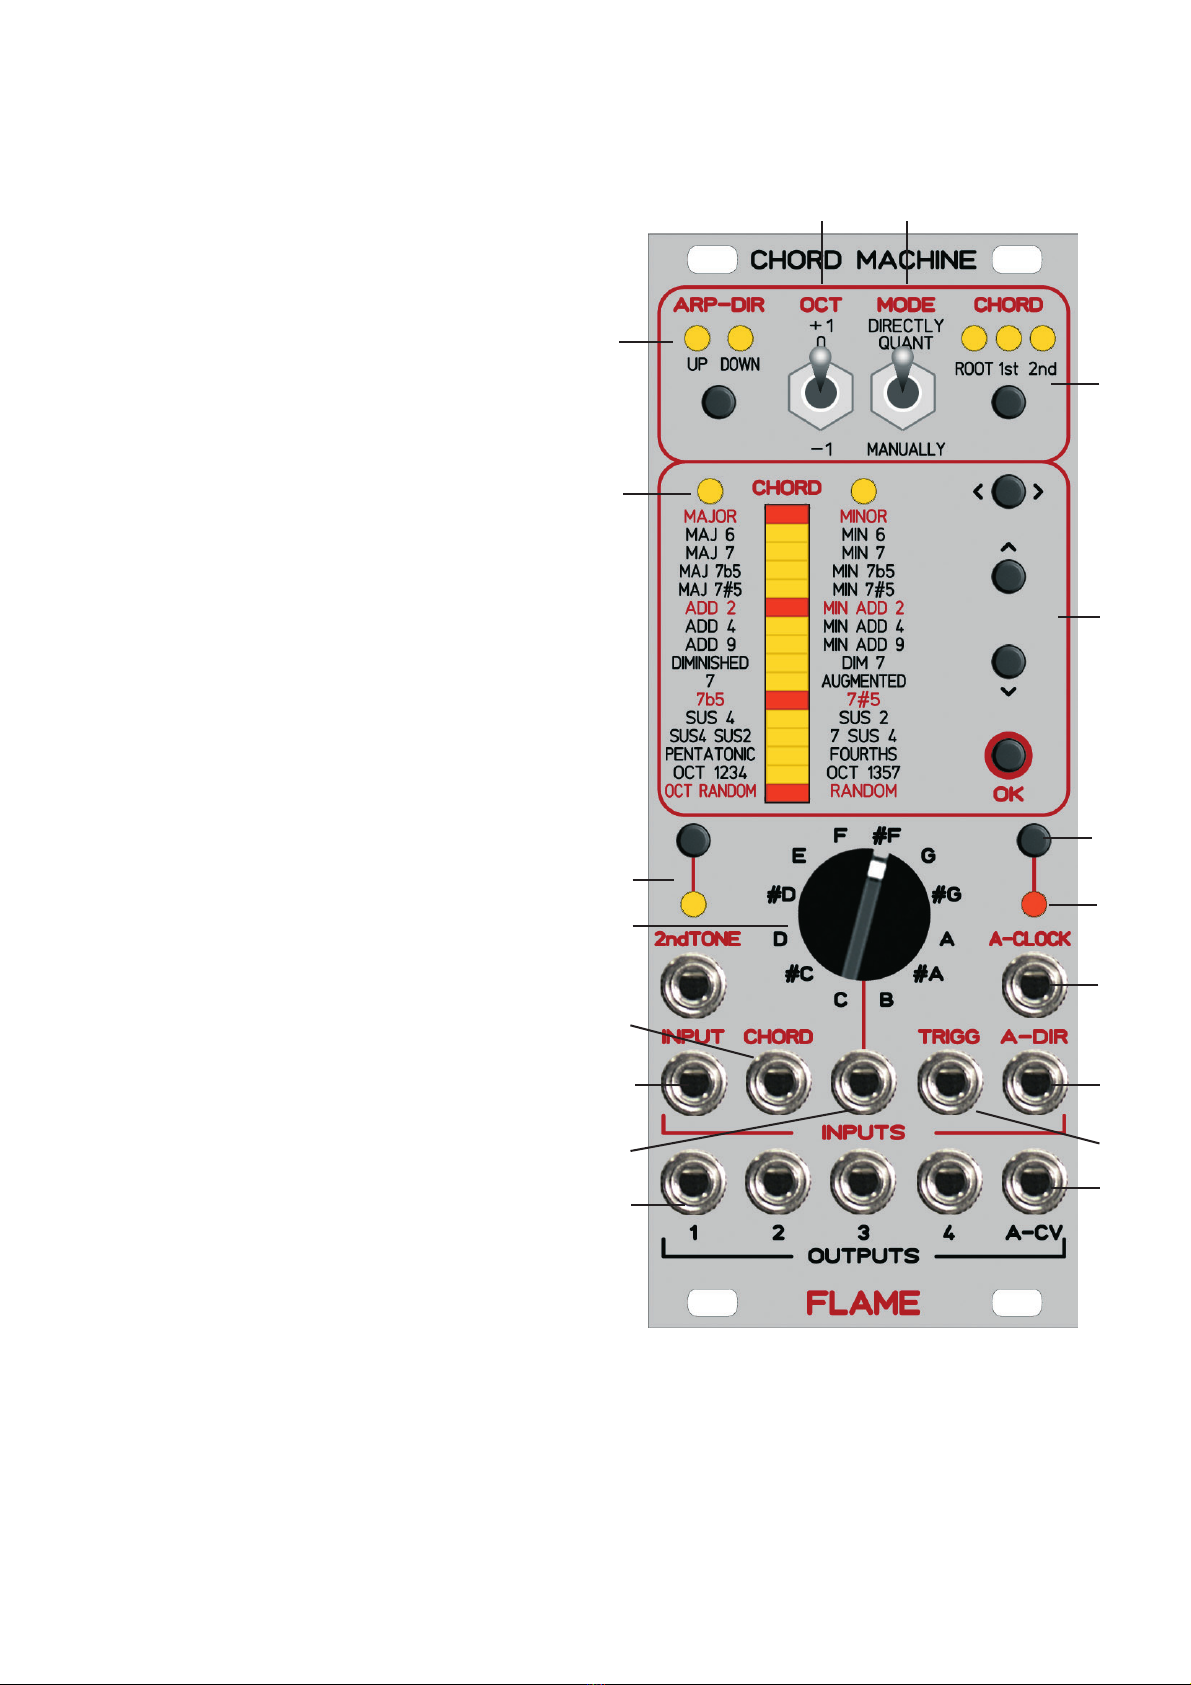
CHORD BANK LEFT
NR NAME ROOT 1.INVERSION 2.INVERSION SCALE
1 MAJOR 0,4,7,12 4,7,12,16 7,12,16,19 0,4,7,12
2 MAJ 6 0,4,7,9 4,7,9,12 7,9,12,16 0,4,7,9
3 MAJ 7 0,4,7,11 4,7,11,12 7,11,12,16 0,4,7,11
4 MAJ 7b5 0,4,6,11 4,6,11,12 6,11,12,16 0,4,6,11
5 MAJ 7#5 0,4,8,11 4,8,11,12 8,11,12,16 0,4,8,11
6 ADD 2 0,2,4,7 2,4,7,12 4,7,12,14 0,2,4,7
7 ADD 4 0,4,5,7 4,5,7,12 5,7,12,16 0,4,5,7
8 ADD 9 0,4,7,14 4,7,12,14 7,12,14,16 0,4,7,14
9 DIMINISHED 0,3,6,12 3,6,12,15 6,12,15,18 0,3,6,12
10 7 0,4,7,10 4,7,10,12 7,10,12,16 0,4,7,10
11 7b5 0,4,6,10 4,6,10,12 6,10,12,16 0,4,6,10
12 SUS 4 0,5,7,12 5,7,12,17 7,12,17,19 0,5,7,12
13 SUS4 SUS2 0,2,5,7 2,5,7,12 5,7,12,14 0,2,5,7
14 PENTATONIC 0,2,5,10 2,5,10,12 5,10,12,14 0,2,5,10
15 OCT 1234 0,12,24,36 12,24,36,0 24,36,0,12 0,12,24,36
16 OCT RANDOM randomized 0,12,24 or 36 0,1,2,3,4,5,6,7,8,9,10,11
CHORD BANK RIGHT
NR NAME ROOT 1.INVERSION 2.INVERSION SCALE
1 MINOR 0,3,7,12 3,7,12,15 7,12,15,19 0,3,7,12
2 MIN 6 0,3,7,9 3,7,9,12 7,9,12,15 0,3,7,9
3 MIN 7 0,3,7,10 3,7,10,12 7,10,12,15 0,3,7,10
4 MIN 7b5 0,3,6,10 3,6,10,12 6,10,12,15 0,3,6,10
5 MIN7#5 0,3,8,10 3,8,10,12 8,10,12,15 0,3,8,10
6 MIN ADD 2 0,2,3,7 2,3,7,12 3,7,12,14 0,2,3,7
7 MIN ADD 4 0,3,5,7 3,5,7,12 5,7,12,15 0,3,5,7
8 MIN ADD 9 0,3,7,14 3,7,12,14 7,12,14,15 0,3,7,14
9 DIM 7 0,3,6,9 3,6,9,12 6,9,12,15 0,3,6,9
10 AUGMENTED 0,4,8,12 4,8,12,16 8,12,16,20 0,4,8,12
11 7#5 0,4,8,10 4,8,10,12 8,10,12,16 0,4,8,10
12 SUS 2 0,2,7,12 2,7,12,14 7,12,14,19 0,2,7,12
13 7 SUS 4 0,5,7,10 5,7,10,12 7,10,12,17 0,5,7,10
14 FOURTHS 0,5,10,12 5,10,12,17 10,12,17,22 0,5,10,12
15 OCT 1357 0,24,48,72 24,48,72,12 48,72,12,36 0,24,48,72
16 RANDOM randomized 0,1,2,3,4,5,6,7,8,9,10 or 11 0,1,2,3,4,5,6,7,8,9,10,11