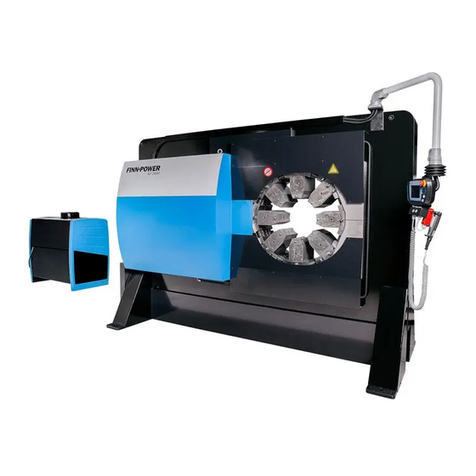
Flanger FL-DTHR-10 Operating instructions

DISCONNECT POWER BEFORE REMOVING THE GUARDS FOR ANY REASON 1
General Operating Instructions
Flagler Model H-2 ½-10 Equipped with Drive Turn Hemming Rolls
The Flagler Corporation
56513 Precision Dr.
Chesterfield, MI 48051
USA
www.flaglercorp.com
(586) 749-6300
Fax (586) 749-6363
info@flaglercorp.com

DISCONNECT POWER BEFORE REMOVING THE GUARDS FOR ANY REASON 2
Installation Instructions:
The machine was fully crated prior to shipping from Flagler. After the crate has
been removed from the machine, make sure that all foreign matter has been
removed from the machine which may have accumulated during transit.
Thoroughly inspect the machine for any physical damage.
Electrical Connection:
This machine is designed to run off of 230 Volt, 3 Phase, 60 Hertz Power. The
machine also requires a good source of clean, dry compressed air
It is recommended that a 30 amp breaker is mounted prior to the connection to the
machine is made. A licensed electrician should perform the machine connection.
The only connection to the machine is the 3 phases into the main disconnect
switch of the machine along with a ground. The machine will have to be checked
for rotation.
Once the electrical connection has been made, check to make sure that all of the
electrical functions of the machine are in working order.
The control devices are self explanatory and include the following:
POWER ON: Turns the panel ON.
START: Starts the Main Motor to the set speed.
E-STOP: Stops Main Motor
FIRST: Orange Illuminated Push Button setting the PLC to Hem the first
quadrant of the pre-notched duct. Or Hemming the first and
third quadrant of pre-notched duct.
SECOND: Orange Illuminated Push Button setting the PLC to Hem the
second quadrant of the pre-notched duct. Or Hemming the
second and forth quadrant of pre-notched duct.
FOOT PEDAL: The Foot Pedal will toggle the PLC between First and Second
settings
NOTE: The E-Stop on the machine is a pull to release type buttons. If the Power
On light does not illuminate when pressed then one or more of the E-Stop are
pressed in.

DISCONNECT POWER BEFORE REMOVING THE GUARDS FOR ANY REASON 3
Lubrication and Maintenance:
Bearings: All bearing points on this machine have a grease fitting. It is
recommended to use a #2 Lithium grease or equivalent. The bearing
locations should be greased every 40 hours of operation.
NOTE: Some hard guarding may have to be removed to access all of
the grease fittings.
Gears: A coating of open gear grease should be kept on the gears at all times.
This can be monitored when removing the guarding to grease the
bearings and apply when necessary.
All material run through this machine should be free of all foreign matter, such as
dirt and grime. This is important as it will minimize any unnecessary wear on the
roller dies. A preventative maintenance schedule should be set immediately. This
schedule should include the periodic lubrication of the machine and the periodic
cleaning of the entire roller die set to remove any foreign matter. In general, a
scheduled wiping off or cleaning of the entire machine.

DISCONNECT POWER BEFORE REMOVING THE GUARDS FOR ANY REASON 4
Capacities:
This machine has been designed and tested for forming 20-26 Ga. galvanized. If
heavier material is run through the machine it can cause damage to a number of
parts in the machine.
The machine is designed to form a 3/8”-1/2” Long Hem on Pre-notched blanks, see
notch diagram in the later part of the manual.
Hem lengths may vary from different gauges. Lighter gauges will have a slightly
larger hem than heavier gauges. If the hem is too short or long, simply move the
feed gauge over accordingly.
Drive Turn Knock Down
This machine is designed with a knockdown pneumatic cylinder and photo eye.
The photo eye will detect the sheet metal as it runs through the machine.
If the First Light on the panel is lit it will hem over the first section of the part to be
run through, skip the second, hit the 3rd, etc.
If the Second Light on the panel is lit it will skip over the first section of the part to
be run through, hem the second, skip the 3rd, etc.
The State or order (First or Second) can be accomplished by either pushing the
orange illuminated buttons on the panel OR with the foot pedal.
The logic of the micro PLC is designed for an even number of hits per piece, ie 2
sided duct or 4 sided duct. If a 1 sided piece or a 3 sided piece is run through the
machine it will through off the even sequence in the PLC. To reset the PLC, press
the stop button and then the start button and it will reset it.

DISCONNECT POWER BEFORE REMOVING THE GUARDS FOR ANY REASON 5
Laser Switch Location
The Drive Turn Hem Rolls are equipped with a laser switch to detect the notches in
the sheet. Using standard notches for HVAC, this laser switch (both sender and
receiver) are positioned 3” from the machine plate to the center line of the
switches. See Below:
Dependent on the notch type, this switch may need to be moved inward or
outward. If they need to be moved they must be moved the same, meaning top and
bottom switches moved together.

DISCONNECT POWER BEFORE REMOVING THE GUARDS FOR ANY REASON 6
Knock Down Cylinder Position
The previously mentioned laser switch, sends a signal to the PLC, and when turn
the hemmed quadrant, the cylinder shown below will activate, knocking down the
front corner of the quadrant. This directs the metal into the idler rolls. Using
standard notches for HVAC, this cylinder is positioned 2 5/8” from the machine
plate to the center line of the cylinder. See Below:
Dependent on the notch type, this switch may need to be moved inward or
outward.

DISCONNECT POWER BEFORE REMOVING THE GUARDS FOR ANY REASON 7
Idler Roll Locations
The Hemming is accomplished by idler rolls at stations 3, 4, and 5. These rolls are
all mounted on a common, adjustable bracket. The height of the bracket should be
approximately 15/16” from the top plate, see below:

DISCONNECT POWER BEFORE REMOVING THE GUARDS FOR ANY REASON 8
The Gap between the idler rolls and the bottom forming rolls should be 0.015 as
depicted by the drawings below:
Since these idler rolls are on a common bracket, measuring the location of station
3 and 5 is all that is needed, and station 4 will follow suit.
This manual suits for next models
2
Table of contents
