manuals.online logo
Brands
  1. Home
  2. •
  3. Brands
  4. •
  5. FlashPoint
  6. •
  7. Lighting Equipment
  8. •
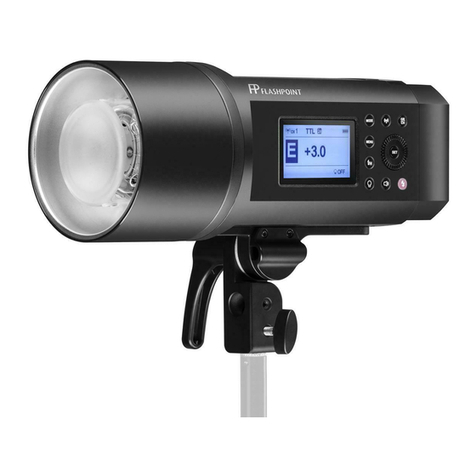
  9. FlashPoint MONOLIGHT 320M User manual

FlashPoint MONOLIGHT 320M User manual

MONOLIGHT 320M/620M/1220M AC/DC
Safety Precautions:
1. Before using the light, make sure that the electrical
outlet of your local power supplier matches the power
regulation
indicated on your lighting equipment.
2. Do not use any power supply other than the AC
specification indicated on your equipment.
3. Do not expose your lighting equipment to sunshine,
moisture, dust, dirt, rain, or water.
4. Any exposure to chemical solutions, gasoline, grease,
oil, paint, or detergents can result in permanent dam-
age to your equipment.
5. Do not insert metal parts into any lighting equipment.
6. Dry your hands before handling the equipment, as
touching your equipment with wet hands is dangerous
to both the equipment and to you.
7. Do not keep the power on when the light is not in use.
8. Do not attempt repairs to your lighting equipment
personally. If a problem arises, contact the store from
which you purchased the light.
9. This flash has an over frequency protection circuit, rap-
id continuous firing of your flash will cause an audible
alert. continued rapid firing after audible alert will cause
the flash to cease operation and trigger a “cool down”
period of approximately of 10 seconds. after this period,
the flash will resume operation. You may also reboot
the flash by cycling the power off and then on.
Light Body & Back Control Panel
(1) Power Inlet Include Fuse
(2) Power Selection AC DC
(3) Synch Cord Socket
(4) On/Off Switch for Modeling Lamp
(5) On/Off switch for recharge read y-beeper/
Modeling lamp off
(6) Recharge Ready-Light
(7) Slave Sensor
(8) Handle Grip
(9) Locking/Releasing Bolt for Reflector& Soft
Box Connector
(10) On/Off Switch for Sensor
(11) Test Button
(12) Output Power Setting: flash/ modeling lamp
(13) Handle for Angle Adjustable
(14) Stand Mounting
(15) Stand Mounting Bolt
(16) Umbrella Holder
(17) Replaceable Flash Tube
(18) Modeling Lamp
(19) Cable Socket (DC inlet)
Model FP320M FP620M FP1220M
1 Maximum Watt Seconds 150 ws 300 ws 600ws
2 Guide Number 118 ft 192 ft 230 ft
3 Flash Duration 1/600 to 1/1000 1/600 to 1/1000 1/600 to 1/1000
4 Flash Variability Stepless Control from Full Stepless Control from Full Stepless Control from Full
Power to 1/32 Power Power to 1/32 Power Power to 1/32 Power
5 Recycling Time 0.5 - 1 Second <1.5 Seconds <3 Seconds
6 Recycling Time - Battery <1.5 Seconds <3 Seconds <6 Seconds
7 Recycle confirm Yes Yes Yes
8 Flash Ready Indicator Ready Light & Audio Signal Ready Light & Audio Signal Ready Light & Audio Signal
9 Modeling Light Wattage 100 watts 150 watts 250 watts
10 Color Temperature 5600° K +- 5600° K +- 5600° K+-
11 Modeling Bulb Base E26 - E27 E26 - E27 E26 - E27
12 User replaceable flashtube yes yes yes
13 Built-In Slave Yes Yes Yes
14 Slave Sensitivity 30ft. Radius,360 Degree 30ft. Radius,360 Degree 30ft. Radius,360 Degree
15 Synch Terminal Yes Yes Yes
16 Synch Terminal Type 1/4" (6.35 mm) Phono Sync Terminal 1/4" (6.35 mm) Phono Sync Terminal 1/4" (6.35 mm) Phono Sync Terminal
17 Synch Voltage 5.6 5.6 5.6
18 Voltage Stabilization 110-130 ac +/- 0.5% 110-130 ac +/- 0.5% 110-130 ac +/- 0.5%
19 Fan Cooled No Yes Yes
20 Test Button Yes Yes Yes
21 Fuse 8A 10A 10A
22 Reflector/Removable 8" inch 8" inch 8" inch
23 Mount Flashpoint Flashpoint Flashpoint
24 Housing Type Rugged Metal Housing Rugged Metal Housing Rugged Metal Housing
25 Dimensions L 11" W 5.6" H 7.5" L 15" W 5.6" H 7.5" L 15" W 5.6" H 7.5"
26 Weight 3 Lbs (1.7kg) 4-1/2 Lbs (2.4kg) 7 Lbs (3.2kg)
16
15
14
13
14
13
2
4
6
58
12
7
3
11
10
9
1
17
18
9
POWER
MODEL
FULL
DIM
SOUND
TEST
SENSOR
DC
AC
SYNC
FUSE 10A
READY
OFF
19
Directions For Use:
AC Power Supply Operations:
1. Turn on the Light, Turn on the power by pressing the power switch(2) to"”––”"position, the charge indicator(6) will turn red when the
flash has been fully charged.
2. Test Flash, Press the test button (11) to make sure the flash is working.
3. Slave Sensor, Press the sensor button (10),then you can use the built-in slave sensor to trigger the light.
4. Synch Cord, Link the flash to your camera with a synch cord to trigger the light.
5. Audio Signal, Set the switch (5) to “I” position will activate an audio signal to remind you when the power has been fully recharged.
6. Modeling Lamp, To turn the lamp off, set the switch(4) to “0”;when set to “=”,the modeling lamp is on at full power; when set to”-“,the
modeling lamp varies in brightness as you turn the power setting controller(12).press the switch(5) to “DIM” position, the modeling
lamp will turn itself off when the flash is fired and then will turn on automatically when the flash is fully charged.
7. Adjust Output Power for Flash, Use the power setting controller(12) for the desired exposure. the power level can be set continuously
from 1/16 to full power.
8. Reflector Loading and Unloading, The reflector has 3 pins around the perimeter of it’s base. Line these pins up with the corresponding
notches in the strobe heads front collar. Then rotating the reflector clockwise until it locks into position. to remove the reflector, push
the locking bolt on the top of the strobe and rotate the reflector counterclockwise, then pull it way from the strobe.
9. Replace flash tube For safety purpose, please switch off the power for at least 10 minutes before changing the flash tube.
Do not touch the anode and cathode of the flash-tube.
10. Malfunction Alert When there is malfunction in your flash, the beeper will buzz to give you an alert. now please cut off the power
immediately and turn it on again. If the same situation repeats, send the strobe back to the store from which you buy it for technical
service.
DC Power Supply Operations:
1. Please first check if the battery pack switch is set to “off” position, then plug the cord into battery pack and connect it to the flash, then
tighten it.
2. Set the battery pack switch to “BATT” position, press down the power switch(2) to”=” ,when the charge indicator (6)is on indicating
your flash has been fully charged. Press test button to make sure your flash is working.
3. When use with the battery pack, the functions of Modeling lamp are not available.
4. For safety purpose, please don’t charge the flash through the AC power supply or battery pack at the same time, no mixing charge!
5. The battery pack will get hot during the use, please don’t continuously fire your flash rapidly over 6 times.
In The Box
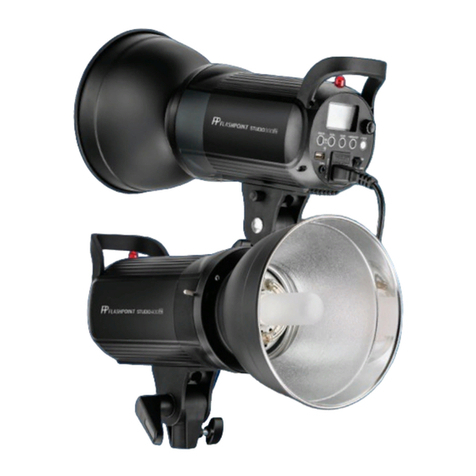
• Studio Strobe Body
• Power Cord
• Sync Cord
• Flashtube
• Modeling Light
• Standard 8” Reflector
• Built in Umbrella Holder
• Protective Cap
• Owner’s Manual
• 2 Year Warranty
Optional Accessories:
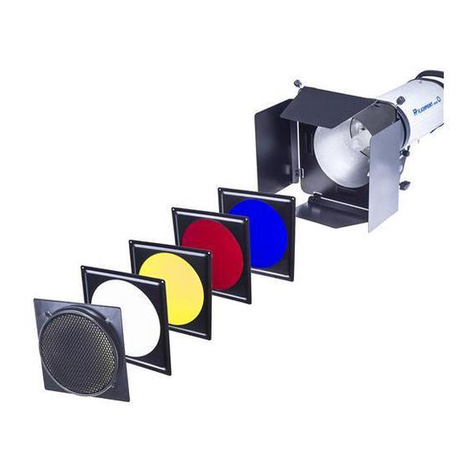
All reflectors that fit, Protective cover, Flashtubes and modeling lamps, Beauty
dishes, Grids for reflectors, Barn doors, Snoots, Spare sync cord and power
cord, Ifra red trigger, Battery pack to power light new version, Spare battery,
Flashpoint accessories, New soft boxes, Speed rings list, Flashpoint dedicated
soft box with ring, Egg crate, Stands, Boom stand, umbrellas

This manual suits for next models

2

Other FlashPoint Lighting Equipment manuals

FlashPoint MONOLIGHT DG-400 User manual

FlashPoint

FlashPoint MONOLIGHT DG-400 User manual

FlashPoint Studio 400 Monolight User manual

FlashPoint

FlashPoint Studio 400 Monolight User manual

FlashPoint XPLOR 600 Pro R2 User manual

FlashPoint

FlashPoint XPLOR 600 Pro R2 User manual

FlashPoint FPLFBD User manual

FlashPoint

FlashPoint FPLFBD User manual

Popular Lighting Equipment manuals by other brands

Ansell AFALED/ER/3NM/ST installation instructions

Ansell

Ansell AFALED/ER/3NM/ST installation instructions

LESS CHROMA user manual

LESS

LESS CHROMA user manual

Ikan iLED312-v2 quick start guide

Ikan

Ikan iLED312-v2 quick start guide

Philips Hue 1822511 quick guide

Philips

Philips Hue 1822511 quick guide

Mackwell XYVEX WALL Mounting instructions

Mackwell

Mackwell XYVEX WALL Mounting instructions

Heraeus HANAULUX blue 130 operating instructions

Heraeus

Heraeus HANAULUX blue 130 operating instructions

Bestway 65127 owner's manual

Bestway

Bestway 65127 owner's manual

Astera Lightdrop AL3-series user manual

Astera

Astera Lightdrop AL3-series user manual

Leroy Merlin 2128K-1.5M-WHE manual

Leroy Merlin

Leroy Merlin 2128K-1.5M-WHE manual

Omron FLV-DL Series instruction sheet

Omron

Omron FLV-DL Series instruction sheet

American DJ Mega Bar 50RGB User instructions

American DJ

American DJ Mega Bar 50RGB User instructions

Philips 17435/**/P7 Series user manual

Philips

Philips 17435/**/P7 Series user manual

HEITECH BIKE 180A manual

HEITECH

HEITECH BIKE 180A manual

Bolt VM-160-V2 user manual

Bolt

Bolt VM-160-V2 user manual

ONFORU BDJ55G-3 quick start guide

ONFORU

ONFORU BDJ55G-3 quick start guide

Qtx PB-COB user manual

Qtx

Qtx PB-COB user manual

German Light Product Mini Patend instruction manual

German Light Product

German Light Product Mini Patend instruction manual

Starway ParKolor 200DW user manual

Starway

Starway ParKolor 200DW user manual

manuals.online logo
manuals.online logoBrands
  • About & Mission
  • Contact us
  • Privacy Policy
  • Terms and Conditions

Copyright 2025 Manuals.Online. All Rights Reserved.