manuals.online logo
Brands
  1. Home
  2. •
  3. Brands
  4. •
  5. Fleurco
  6. •
  7. Bathroom Fixture
  8. •
  9. Fleurco N003 User manual

Fleurco N003 User manual

11/2011
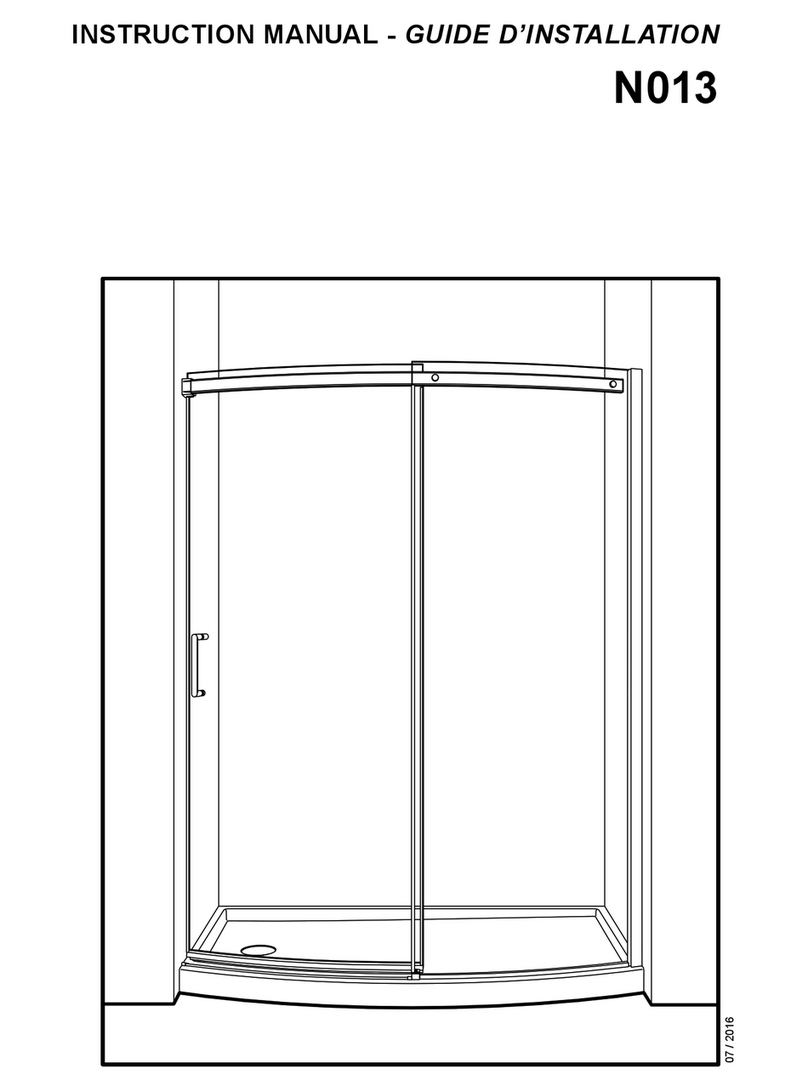
INSTRUCTION MANUAL - GUIDE D’INSTALLATION
N003
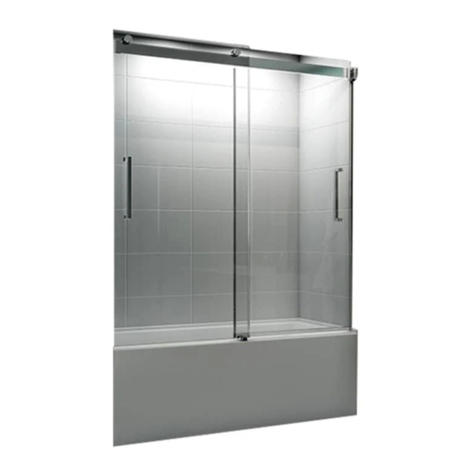
TUB DOOR - PORTE DE BAIN
2 PEOPLE REQUIRED
2 PERSONNES REQUIS
IT IS MANDATORY TO HAVE A WALL STUD ON EACH SIDE OF
THE TUB UNIT TO SECURELY FASTEN THE RAIL TO THE WALLS.
IL EST OBLIGATOIRE D’AVOIR UNE OSSATURE MURALE SUR
CHAQUE CÔTÉ DU BAIN POUR FIXER LA BARRE DE ROULEMENT.
2
INSTRUCTION MANUAL - GUIDE D’INSTALLATION
INSTRUCTIONS GÉNÉRALES
• Lireattentivementetcomplètementlemanueld’installationavantdeprocéder.
• Ilestrecommandédeporterdeslunettesdesécuritéentouttempslorsdel’installation.
INSTALLATION SUR LES TUILES EN CÉRAMIQUE
• Sivotreportedebaindoitêtreinstalléesurunebordureencéramique,lejambagedoitreposécompletementsurcettedernière.
• Lecalfeutragedoitêtreappliquésurlecôtéextérieurdeladoucheoùlepanneauxerencontrelabordureencéramique.
NOTE
• Calfeutrage:aucunscellantn’estnécessaireàl’intérieurdubain.
• Certainsmodèlessontdotésdejointsd’étanchéitéclaire.
L’ENTRETIEN DE VOTRE BAIN
• Nejamaisutiliserdepoudreoudetamponàrécurer,nid’instrumenttranchantsurlespartiesenmétalouenverre.Detempsà
autre,ilsuftdenettoyerlaporteavecunesolutiond’eauetdedétergentdouxpourconserverl’aspectneufdespanneauxde
verreetducadreenaluminium.
• Nousrecommandonsdepasseruneraclettededouchesurlespanneauxdeverreaprèschaqueutilisation.
GENERAL INSTRUCTIONS
• Read this manual carefully and completely before proceeding.
• It is recommended that you wear safety glasses at all times during the installation.
INSTALLATION OVER CERAMIC TILES
• If your tub door is to be installed over ceramic tiles, the tiles should lay completely under the wall jamb.
• Siliconeshouldbeusedtosealthegapwheretheceramictilesmeetthexedpanel.
NOTICE
• Caulking: no sealant is required inside the tub.
• Some models are equipped with clear sealing gaskets.
CARE FOR YOUR TUB DOOR
• Never use scouring powder pads or sharp instruments on metal pieces or glass panels. An occasional wiping down with a mild
soap diluted in water is all that is needed to keep the panels and aluminum parts looking new.
• We recommend wiping the glass panels with a squeegee after each use.
PRODUCT SPECIFICATIONS ARE SUBJECT TO CHANGE WITHOUT NOTICE.
DESCHANGEMENTSPEUVENTÊTREAPPORTÉSAUXPRODUITSSANSPRÉAVIS.
En
Fr
TOOLS AND MATERIAL REQUIRED / OUTILS ET MATERIAUX REQUIS
RUBAN DOUBLE FACE VHB
VHB DOUBLE SIDED TAPE
3
INSTRUCTION MANUAL - GUIDE D’INSTALLATION
DRILL
PERÇEUSE
SCREWDRIVERS
TOURNEVIS
LONG NOSE LOCKING PLIER
PINCE SERRE ÉTAU
SILICONE
SCELLANT
1/4˝ & 1/8˝ DRILL BITS
MÈCHE1/4˝&1/8˝
PENCIL
CRAYON
CUTTING PLIER
PINCECOUPANTE
LEVEL
NIVEAU
TAPE MEASURE
RUBANÀMESURER
MALLET
MAILLET
5/16” HEX NUT DRIVER
TOURNE-ÉCROU5/16”
TO INSTALL THE TUB DOOR ON CERAMIC TILES, USE A 1/4’’ DRILL BIT FOR CERAMIC TILES.
POURINSTALLERLAPORTEDUBAINSURDESTUILESENCÉRAMIQUE,UTILISERUNEMÈCHE1/4’’ÀCÉRAMIQUE.
20
21
22
24
25
26
23
2
3
6
4
INSTRUCTION MANUAL - GUIDE D’INSTALLATION
PARTS LISTING / LISTE DES PIÈCES
HARDWARE/QUINCAILLERIE/
11 16
1
9
5
12
15
13
13
19
10
417
18
7
14
8
ITEM PARTS- PIÈCES QTY
1WALL JAMB / JAMBAGE 1
2EXPANDER / EXTENSEUR 1
3EXPANDER GASKET / JOINTDEL’EXTENSEUR 1
4FIXED PANEL U CHANNEL / PROFILENALUMINIUM 1
5MIDGASKET / JOINTLATÉRAL 1
6DOOR SIDE GASKET / JOINTDEPORTE 1
7 BOTTOM DOOR GASKET/ JOINTINFÉRIEUREDEPORTE 1
8 ALUMINUM THRESHOLD / SEUILDERÉTENTION 1
9DOOR PANEL / PANNEAUDEPORTE 1
10 FIXED PANEL / PANNEAUFIX 1
11 ROLLERS / ROULETTES 2
12 RUNNING RAIL / BARREDEROULEMENT 1
13 WALL MOUNT BRACKET / SUPPORTMURAL 2
14 GLASS FASTENER / SUPPORTVITREAU 2
15 STOPPER / BUTOIR 1
16 ANTI-JUMP / ANTI-SAUT 2
17 BOTTOM GUIDE / GUIDEDUBAS 1
18 DOOR RECEIVER / RECEPTEURDEPORTE 1
19 DOOR HANDLE / POGNERDEPORTE 2
20 WALL PLUG / CHEVILLE 8
21 EXPANDER SCREW / VISPOURL’EXTENSEUR 6
22 WALL JAMB SCREW / VISPOURJAMBIÈRE 4
23 FLAT HEAD SCREW /VISÀTÊTEPLAT 2
24 SCREW CAP / CAPUCHONÀVIS 6
25 HEX SOCKET SET SCREW 8
26 HEX KEY 3mm 1
VvVV
DOOR PANEL ASSEMBLY / ASSAMBLLAGE DE LA PORTE COULISSANTE
1
3/8’’
11
19
5
INSTRUCTION MANUAL - GUIDE D’INSTALLATION
9
7
DOOR HANDLE HOLES
TROUS DE POGNER DE PORTES
Use a mallet to install bottom gasket (7) on the
bottom of the door panel (9). To facilitate installation
placedoorpaneloncardboardpackagingboxanduse
as platform. Notice the holes are situated at the top of
the panel.
Measure and cut 3/8” off the edge of the gasket.
Be sure to cut opposing side of door handle holes.
Install both rollers (11) through the top holes of the
door panel. Be sure that the ajustment wheel is turned
to position the minimum thickness of wheel towards
the bottom.
Intall door handle (19). Holes for screws are located on
the back handle and must be located on the inner side
of the tub door.
À l’aide d’une malette insérer le joint inférieur de la
portecoulissante(7)àlaportecoulissante(9).Pour
facilitélatacheveilleuzutilisélaboited’emballageen
cartoncommeplatforme.Notezbienquelestrousde
laportesontsituésàlapartiesupérieuredelaporte.
Mesureretcouperunboutde3/8”dujointinférieurde
laporteàpartirdubordinférieuropposéauxtrousde
pogner.
Installerlesdeuxroulettes(11)àtraverslesdeuxtrous
supérieuresdupanneauxdeporte.Assurez-vousque
l’épaisseur minimum de la roulette d’ajustement est
positionnéeverslebas.
Installezlapognerdeporte(19).Lestrousdevisse
trouvessurlapognéeintérieuredubain
1a
1c
1c
1c
1d
1d
1d
1a
1a
1b
1b
1b
MINIMUM THICKNESS
ORIENTED TOWARDS
THE BOTTOM
ÉPAISSEUR MINIMUM
ORIENTÉ VERS LE BAS
!
!
INSIDE OF TUB
INTÉRIEURDU
BAIN
INSIDE OF TUB
INTÉRIEURDU
BAIN
INSTRUCTION MANUAL - GUIDE D’INSTALLATION
6
2 WALL JAMB INSTALATION / INSATLLATION DES JAMBAGES
!
!
CARBOARD OR TOWEL
TO PROTECT TUB
CARTON OU SERVIETTE
POUR PROTÉGER BAIN
Place door panel (9) inside tub to simplify following
installation procedures. Place the panel on cushioned
surface, such as a towel or carboard, to prevent dam-
age either to the panel or the tub.
Temporarily place bottom guide (17) on tub base.
Thebackofthebottomguidemustbeplacedushwith
the inner edge of the shower base.
While keeping bottom guide in place at the edge of
the shower base, trace a line in the center of the front
channel. This can be recognized as the narrow part
facing the arc.
Continue to trace the center line at the same distance
up the side of the wall. This will locate the placement
of your wall jamb.
Introduire le panneau de porte coulissante (9) à
l’intérieurdubainandesimplierlesétapesàsuivre.
Poserlepanneausurunesurfaceplaneet
matelassé comme une serviette ou un carton. Cela
évitetoutdommagesaupanneauoulabaignoire.
Placez temporairement le guide du bas (17) sur la
base du bain.Assurez-vous que le dos du guide se
trouve au même niveau que le seuil intérieure de la
basedubain.
Avec le guide du bas en place contre le seuil de la
basedubaintracezuneligneducentredelapartiela
plusétroiteduguideverslemur.
Continuerensuitedetracerlalignedroiteverslehaut
devotremur.
9
17
2a
2b
2c
2d
2a
2b
2c
2d
2a
2d
2c
2b
!
!
!
THE BACK OF BOTTOM GUIDE (17) MUST BE FLUSH
WITH INNER PART OF THE TUB BASE.
LE DOS DU GUIDE DE BAS DOIT ETRE PLACÉ AU MEME NIVEAU
QUE LE SEUIL INTÉRIEURE DE LA BASE DU BAIN
INSIDE OF TUB
INTÉRIEURDU
BAIN
2f
2f
2f
2g
2g
2g 2h
1
1
INSTRUCTION MANUAL - GUIDE D’INSTALLATION
7
Place wall jamb against wall using centerline
previously marked as a guide. Be sure to center the
slotted holes with the centerline.
Level and mark locations of the four holes to be
drilled.
Remove the wall jamb.
Drill a hole in each location with a 1/4” drill bit.
Placezlejambagesurleseuilencentrantlestrous
delajambière aveclalignecentraletracée.Ceci
assureunepositiondroitedujambage
Niveller et tracez les quatres emplacements de
perçage.

Enlevezlejambage.
Percezlestrousavecunemèchede1/4”.

2 WALL JAMB INSTALATION / INSATLLATION DES JAMBAGES
2e
2e
2e
CERAMIC TILE INSTALLATION
USE A BIT FOR CERAMIC TILE.
POUR INSTALLATION SUR CARREAUXA DE CÉRAMIQUE,
UTILISEZ UNE MÈCHE POUR TUILE DE CÉRAMIQUE.
2h
2h
4
10 123
4
2i 2j
2l
2k
2 WALL JAMB INSTALATION / INSATLLATION DES JAMBAGES / INSTALACIÓN DE PERFILES DE SUJECIÓN
INSTRUCTION MANUAL - GUIDE D’INSTALLATION
8
PlaceU-chanel(4)temporarilyonbottomofxpanel
(10).
Slidethex panel (10)pre-assembledwithexpander
(2) and gasket (3) into the wall jamb (1).
Level the glass panel assembly with the wall jamb.
Lock into position by clamping the wall jamb and
expanderwithpliers.

Positionneztemporairementlarailinférieure(4)surla
partieinférieuredupanneauxxe(10).
Glissezlepanneauxe(10)prémontédel’extenseur(2)
etdujoint(3)danslejambage(1).
Assurerleniveaudupanneauxeàl’aided’unniveau.
Barrezlapositiondujambageetdel’extenseuràl’aide
depincesautobloquante.
FIXED PANEL / PANNEAUX FIXE
COVER THE PLIER’S TEETH BEFOREHAND TO AVOID
SCRATCHING THE ALUMINUM PARTS.
RECOUVREZ LES DENTS DE LA PINCE AFIN DE NE PAS
GRAFIGNER LES PIÈCES EN ALUMINIUM.
2 WALL JAMB INSTALATION / INSATLLATION DES JAMBAGES
Insert one drop of silicone in each hole in the wall
beforeinsertingthesuppliedwallplugs(4x)
Addsiliconetoexteriorbottomedgeofwalljamb.
Fasten the wall jamb to the wall with 1-1/4” screws (22)
throughthepreviouslyinstalledwallplugs.(x4)
Add silicone to interior bottom edge of wall jamb
Introduire une goutte de silicone dans chaque trou
percédanslemuravantd’yinsérerunecheville(x4).
Ajoutezdusiliconeàlabaseextérieuredujambage
Vissezlejambageaumuraveclesvisde1-1/4”(22)
dansleschevillesposer(x4).
Ajoutezdusiliconeàlabaseintérieuredujambage.
3a
3a
3a 3b
3c
3d
3b
3b
3c
3c
3d
3d
3
2i
2i
2j
2j
2k
2l
2l
2k
INSIDE OF TUB
INTÉRIEURDU
BAIN
INSTRUCTION MANUAL - GUIDE D’INSTALLATION
9
Align running rail holes with holes in x panel. Level
rail.
Installglassfasteners(14)throughthexpanelopen-
ings(x2).Besuretoplacegasketsbetweenallcontact
with glass and metal parts.
Fastenwithhex3mmkey.
Aligner les trous de la barre de roulement avec les
trousdupanneaux.Mettreaniveau.
Installezlessupportsvitreaux(14)traverslestrousdu
panneauxx(x2).Assurez-vousd’avoirunjointsituer
entretouscontactdelavitreetdumetal.
Serrezàl’aidedelaclefhex3mm
Unfastensetscrewsfromwallbracket(13).(x4)
Then remove back plate from the wall braket and set
aside
With back plates of wall brakets removed, slide the wall
brackets away from the ends of the running rail (12).
Déviserlesvisdusupportmurale(13).(x4)
Retirerlaplaquettedusupportmurale(x2),mettrede
côté.
Aveclesplaquettesretiréesdusupportmurale,glisser
lessupportmuraleaulongdelabarrederoulement.
GLASS FASTENERS/ SUPPORT VITREAUX
14
12
13
RUNNING RAIL / BARRE DE ROULEMENT
4
5b
5c
5c
5c
5a
5a
5a
5b
5b
4b
4a
5
4a
4a
4b
4b
INSIDE OF TUB
INTÉRIEURDU
BAIN
INSIDE OF TUB
INTÉRIEURDU
BAIN
INSTRUCTION MANUAL - GUIDE D’INSTALLATION
10
5 RUNNING RAIL / BARRE DE ROULEMENT
Pushwallbraketsagainstwall.(x2)
Traceoutersideofwallbraket.(x2)
Glisserlessupportsmurauxjusqu’aumur(x2)
Tracerlecontourextérieuredusupportmurale(x2)
5d
5d
5d
5e
5e
5e
INSIDE OF TUB
INTÉRIEURDU
BAIN
INSIDE OF TUB
INTÉRIEURDU
BAIN
4
1
INSTRUCTION MANUAL - GUIDE D’INSTALLATION
11
6 BOTTOM GUIDE / GUIDE INFÉRIEURE
Trace edge of U-channel (4) to determin location
of bottom guide.
Remove glass fasteners, running rail along with
wall brackets, xed panel and U-channel (4).
Put aside. Only the wall jamb (1) and previously
assembled door panel should stay in place.
Tracez le bout du prole en aluminium (4)pour
déterminerl’emplacementduguidedebas.
Enlever les supports vitreaux, la barre de
roulementaveclessupportsmuraux,ainsiquele
paneauxxetleproleenaluminium(4).Mettre
decôté.Seullejambage(1)etlaporteglissante
devraientdemeurerenplace.
Align back plate of wall braket to previously traced
mark on wall. Trace hole centers to determine drilling
location.(x2)
Drill marked holes in walls until wall stud is reached
with drill bit intended for ceramic tiles. Use the 1/4” drill
bit.
Insert one drop of silicone in each hole bored in the wall
before inserting the wall plugs.
Screwinatheadscrewsthroughholestosecureback
plateofbrakettowall(x2)
Aligné la plaquette inférieure du support mural à la
lignetracéantérieurement.(x2)
Percezdestrousavecunemècheàcéramiquede1/4”
jusqu’àvouzpercezlemontantmural.
Introduireunegoutedesiliconedanchaquetroupercé
avantd’yinsérerunecheville(x2)
Visezlaplaquetteinférieuredusupportmuralaumur
aveclesvisàtêteplat.
WALL BRAKET BACK PLATE / PLAQUETTE INFÉRIEURE DU SUPPORT MURAL
SAME PROCEDURE FOR OPPOSITE SIDE OF WALL
IDEM POUR BORD OPPOSÉ
6a
7a
7a
7a
7b
7b
7b
7c
7c
7c
7d
7d
7d
6a
6b
6b
6a
6b
7
INSIDE OF TUB
INTÉRIEURDU
BAIN
4
4
INSTRUCTION MANUAL - GUIDE D’INSTALLATION
12
8 U CHANNEL EMPLACMENT / EMPLACEMENT DU PROFIL EN ALUMINUM
Apply double sided VHB tape to bottom of U-channel
(4).
Align u-channel with previsouly marked line on base.
Make sure that the u-channel is straight (use level
or previsouly traced centerline if needed) then press
down to secure to base.
AppliquerdurubandoublefaceVHBaudessousdu
prolenaluminium(4).
Alignerleboutduprol en aluminium aveclaligne
tracée antérieurement.Assurez vous que le prole
estbiendroit(utilisésoitunniveauoulalignedecen-
tretracéantérieurement)appliquerunepressionau
prolepourbienlesécuriséenplace.
8a
8a
8a
8b
8b
8b
CLEAN BOTTOM OF U-CHANNEL AND BASE
BEFORE APPLYING DOUBLE SIDED VHB TAPE
TO UNDERSIDE OF U-CHANNEL.
NETTOYERLESDESSOUSDUPROFILENALU-
MINIUMAINSIQUELESEUILDELABASEAVANT
D’YAPPLIQUERLERUBAN.DOUBLEFACEVHB.
INSTALLATION DES PIÈCES DE FINITIONS / FINISHING PARTS INSTALLATION / INSTALACIÓN DE COMPONENTES
4
PLACE GASKET IN BOTTOM GUIDE
BEFORE INTALLING FIX PANEL.
INSÉRÉLEJOINTAVANTDEPOSERLE
PANNEAUFIX.
CERAMIC TILE INSTALLAITON, USE A
BIT FOR CERAMIC TILE.
INSTALLATIONPOURCARREAUXEN
CÉRAMIQUE,UTILISÉUNEMÈCHEPOUR
TUILEENCÉRAMIQUE.
INSTRUCTION MANUAL - GUIDE D’INSTALLATION
13
9 FIX PANEL INSTALLATION / INSTALLATION DU PANNEAU FIX
Align bottom guide to edge of U-Channel and center
it with center of U-Channel.
Once in place mark hole location.
Drill with 1/8” drill bit in marked location, then apply a
drop of silicone in hole.
Reposition bottom guide and secure in place with
screw provided. Top with screw cap.
Installxpanel.Besuretolevelpanelandalignedge
with end of bottom guide.
Placez le guide du bas avec le rebord du prol en
aluminiumalignerlecentredudevantduguideavec
lecentreduproleenaluminium.

Tracél’emplacementdutrou.Retirerleguidedubas.
Percer un trou avec une mèche de 1/4” et puis y
appliquerunegoutedesilicone.
RepositionerleguidedubasetlezaViseraveclevis
fournietyrajouterlecapuchonàvis.
Installerlepanneaux.Mettreaniveauenassurant
que le bout ne dépasse pas le rebord du guide de
bas.
9e
9a
9a
9a
9d
9d
9d
9b
9b
9b
9e
9e
9c
9c
9c
INSIDE OF TUB
INTÉRIEURDU
BAIN
INSIDE OF TUB
INTÉRIEURDU
BAIN INSIDE OF TUB
INTÉRIEURDU
BAIN
INSIDE OF TUB
INTÉRIEURDU
BAIN
INSIDE OF TUB
INTÉRIEURDU
BAIN
5c
14
INSTRUCTION MANUAL - GUIDE D’INSTALLATION
14
10 RUNNING RAIL/ BARRE DE ROULEMENT
Install running rail. Align holes in rail with glass
fasteners (14) level rail. Tighten glass fasteners with
key to hold rail in place. (see step 5)
Push wall brackets towards wall and lock in with back
plate previsouly secured to wall. Repeat on opposite
side.
Tighten set screws to secure in place with provided
allen key. (X8)
Installerlabarrederoulement.Alignerlestrousdela
barreaveclessupportsvitreaux.Mettreàniveau.Sér-
rerlessupportsvitreauxpourbiensécurisélabarre.
(voirétape5)
Glisserlessupportsmurauxcontrelemur.Insérésles
danslesplaquettesarrièresmontéesaumur.Idemdu
côtéopposé.
Sérrerlesvispoursécuriserl’emplacementdessup-
ports.(X8)

10a
10a
10a
10b
10b
10b
10c
10c
10c
INSIDE OF TUB
INTÉRIEURDU
BAIN
INSIDE OF TUB
INTÉRIEURDU
BAIN
5INSTALLATION DU PANNEAU DE PORTE / DOOR PANEL INSTALLATION / INSTALACIÓN DEL PANEL DE LA PUERTA
9
9
24
21
INSTRUCTION MANUAL - GUIDE D’INSTALLATION
15
11 WALL JAMB AND EXPANDER / JAMBAGE ET EXTENSEUR
Install door panel (9). Align and place roller (11) on
runing rail (12).
Align and place door panel (9) with inner side of
bottom guide (17). Slide door to insure a smooth sta-
ble glide.
Installerlepanneaudeporte(9).Aligneretplacerla
roulette(11)surlabarrederoulement(12).
Aligneretplacerlepanneaudeporte(9)aveclapartie
intérieureduguidebas(17).
Faireglisserlaportepourassurerl’aiseaveclaquella
porteglisesurlabarrederoulement.
DOOR PANEL INSTALLATION / INSTALLATION DU PANNEAU DE PORTE
9
17
11
Drill through wall jamb hole with 1/8” drill bit, to perce
throughtheexpander.(x3)
Screw 3/4” screws (21) through holes to hold expander
andwalljambtogetherinplace.(x3)Coverallscrewswith
screw caps (24).

Percer l’extenseur àtravers les trous du jambages avec
unemèchede1/8”.(x3)
Viser les vis de 3/4” (21) dans les trous pour tenir
l’extenseuretlejambageensemble.Couvriravecles
capuchonscouvre-vis(24).
12
11a
11b
11b
11a
12a
12a
12b
12b
12a
INSIDE OF TUB
INTÉRIEURDU
BAIN
INSIDE OF TUB
INTÉRIEURDU
BAIN
6
56
INSTRUCTION MANUAL - GUIDE D’INSTALLATION
16
13 DOOR GASKETS / JOINT DE PANNEAU DE PORTE
5
5
6
6
Temporarily install midgasket (5) and door side
gasket (6) to door panel.
Close door entirely, mark interference of gaskets with
running rail.
Cut gasket at marked locations with cutters. Note
that midgasket (5) needs only to be cut below
running rail. The top part is no longer required for
assembly.
Reinstall gaskets on door starting from bottom and
working your way up. Use a mallet to insure that the
gaskets are fully pushhed on to glass panel door.
Installertemporairementlejointlatéral(5)etlejoint
delaporte(6)surlepanneaudeporte.
Aveclaportebienfermer,tracerl’interferencedes
jointsaveclabarrederoulement.
Couperlesjointssurlalignetracer.Noterquele
jointlatéral suft d’être couper à lapartie inféri-
eure.Lapartiesupérieuredujointn’estpasrequis
pourl’assemblage.
Reinstallerlesjointssurlaporte,débuterparle
basetpuismonter.Utiliserunmailletpourassuré
quelesjointssoitbienxésaupanneaudeporte.

13a 13a
13b
13b
13c
13d
13a
13c
13c
13d
13d
13b
REMOVE GASKET FROM
PANEL BEFORE CUTTING.
RETIRERLEJOINTDUPANNEUX
AVANTDEPROCÉDÉÀLACOUPURE.
INSIDE OF TUB
INTÉRIEURDU
BAIN
INSIDE OF TUB
INTÉRIEURDU
BAIN
6
16
15
GASKETS
JOINTS
14a
INTERIOR
SHOWER SIDE
INTÉRIEURDE
LADOUCHE
INSTRUCTION MANUAL - GUIDE D’INSTALLATION
17
14 ANTI-JUMP & DOOR STOPPER / ANTI-SAUT & BUTOIR
6
Install Anti-Jump (16) in lower holes of door panel
located below the running rail. Be sure to place gas-
kets between contact of glass and aluminium parts.
(x2)
Install door stopper (15) located in the interior of
showernexttowalljamb.Useholeprovidedin
running rail.
Installerl’Anti-Saut(16)danslestrousinférieuresdu
panneau de porte se trouvant dessous la barre de
roulement.Assurez-vousd’avoirdesjointsentretout
contactd’aluminiumetdevitre.(x2)
Installerlebutoir(15)danslapartieintérieuredubain.
Celui-cisetrouvesàcôtédujambage.Utiliserletrou
situédanslabarrederoulement.


14a
14b
14b
14a
14b
INSIDE OF TUB
INTÉRIEURDU
BAIN
INSIDE OF TUB
INTÉRIEURDU
BAIN
INSIDE OF TUB
INTÉRIEURDU
BAIN
8
INSTRUCTION MANUAL - GUIDE D’INSTALLATION
18
Place door receiver (18) against wall, place so
that the door panel slides smoothly into receiver.
Mark hole location.
Drill in marked location with 1/8” drill bit. Use ce
ramic drill bit if drilling through ceramic tiles.
Insert one drop of silicone into hole.
Screw in place with provided screw and cap with
screw cap.
Placerlerecepteurdeporte(18)contrelemur,
placerensortequelaporteglisseaisementdans
lerecepteur.Tracerletroudurecepteur.
Percer à l’endroit indiqué avec une mèche de
1/8”.Utiliséunemècheàcarreauxencéramique
s’ilyalieu.
Insérerunegouttedesiliconedansletrou.
Viserlevispourtenirenplace.Rajouterlecapu-
chonàvis.


Place threshold (8) between wall and bottom
guideasshowningure16a.Cutoffanyexcess
length.
Apply a thin line on the bottom of threshold as
indicated in 16b. Secure threshold in place.
Placerleseuilderétentionentrelemuretleguide
du bas comme l’indique la gure 16a. Couper
l’excèsduseuilpourqueleseuilrentreparfaite-
mentenplace.
Appliquerunelignedesiliconesousleseuilede
rétentionetpuisinstallerenplace.
15 DOOR RECEIVER INTALLATION / INSTALATION RECEPTEUR DE PORTE
18
THRESHOLD / SEUIL DE RÉTENTION
16
15a
15a
16a
16a
15a
15b
15b
16b
16b
15b
15c
15c
16a
15c
15d
15d
16b
15d
CUT ONLY IF NECESSARY
COUPERSEULEMENTSI
NECESSAIRE INSIDE OF TUB
INTÉRIEURDU
BAIN
INSTRUCTION MANUAL - GUIDE D’INSTALLATION
19
17 SEALING / CALFEUTRAGE
SiliconetheoutsideofthetubalongthewalljambandtheexteriorsideofaluminumthresholdandU-channel.
Wait 24 hours before using the shower to allow silicon to dry.
Calfeutreravecdusiliconel’extérieurdel’unitéautourdujambageetàl’extérieurduseuilenaluminiumetduprolenaluminium.
Attendre24heuresavantdefairefonctionnerladouchelaisserlesiliconeséché.


HOURS
HEURES
17a
17a
17b
17b
17a
17b

Other manuals for N003

1

Other Fleurco Bathroom Fixture manuals

Fleurco MCS1519 User manual

Fleurco

Fleurco MCS1519 User manual

Fleurco R006 User manual

Fleurco

Fleurco R006 User manual

Fleurco ADT4836-3 User manual

Fleurco

Fleurco ADT4836-3 User manual
Fleurco S014 User manual

Fleurco

Fleurco S014 User manual

Fleurco Apollo STA40-11-40 User manual

Fleurco

Fleurco Apollo STA40-11-40 User manual

Fleurco B017 User manual

Fleurco

Fleurco B017 User manual

Fleurco Capri FAX363-11-40 User manual

Fleurco

Fleurco Capri FAX363-11-40 User manual

Fleurco Kara PLAKP57-11-40L-MA-79 User manual

Fleurco

Fleurco Kara PLAKP57-11-40L-MA-79 User manual

Fleurco ABTL48 User manual

Fleurco

Fleurco ABTL48 User manual

Fleurco Cordoba Plus CKU4832-11-40 User manual

Fleurco

Fleurco Cordoba Plus CKU4832-11-40 User manual

Fleurco B-REC ADA3863 User manual

Fleurco

Fleurco B-REC ADA3863 User manual

Fleurco K202 User manual

Fleurco

Fleurco K202 User manual

Fleurco ABF3739AD User manual

Fleurco

Fleurco ABF3739AD User manual
Fleurco Mercury NMST60 40L Series User manual

Fleurco

Fleurco Mercury NMST60 40L Series User manual

Fleurco HS101 User manual

Fleurco

Fleurco HS101 User manual

Fleurco FW05 User manual

Fleurco

Fleurco FW05 User manual

Fleurco NMS272R42L-11-40-79 User manual

Fleurco

Fleurco NMS272R42L-11-40-79 User manual

Fleurco ELERA EL05 User manual

Fleurco

Fleurco ELERA EL05 User manual

Fleurco Platinum Cube PMQ3632-11-40-79 User manual

Fleurco

Fleurco Platinum Cube PMQ3632-11-40-79 User manual

Fleurco Select Kara PMKP46-25-40-79 User manual

Fleurco

Fleurco Select Kara PMKP46-25-40-79 User manual

Fleurco Lexus PWJLR5836-11-40L-MC-65 User manual
Fleurco

Fleurco Lexus PWJLR5836-11-40L-MC-65 User manual

Fleurco Kinetik KNPR4532-35-40L User manual

Fleurco

Fleurco Kinetik KNPR4532-35-40L User manual

Fleurco Apollo STC32-11-40 User manual

Fleurco

Fleurco Apollo STC32-11-40 User manual

Fleurco AURA VA21105 User manual

Fleurco

Fleurco AURA VA21105 User manual
Popular Bathroom Fixture manuals by other brands

Hans Grohe ShowerTablet Select 300 13151 Series Instructions for use

Hans Grohe

Hans Grohe ShowerTablet Select 300 13151 Series Instructions for use

Blu INOX TOX901-S installation guide

Blu

Blu INOX TOX901-S installation guide

Pulse Shower Spas Aloha owner's manual

Pulse Shower Spas

Pulse Shower Spas Aloha owner's manual

DURAVIT SensoWash Slim 611000 00 1 10 1300 operating instructions

DURAVIT

DURAVIT SensoWash Slim 611000 00 1 10 1300 operating instructions

Hans Grohe Punto 14060000 manual

Hans Grohe

Hans Grohe Punto 14060000 manual

fidra antoniolupi BIKAPPA Series installation instructions

fidra

fidra antoniolupi BIKAPPA Series installation instructions

NORMBAU Cavere Care Directions for use

NORMBAU

NORMBAU Cavere Care Directions for use

Franke F5ST2023 Installation and operating instructions

Franke

Franke F5ST2023 Installation and operating instructions

Toto TX1EBV1 quick start guide

Toto

Toto TX1EBV1 quick start guide

Aquadart waifer Aqualavo Assembly guide

Aquadart

Aquadart waifer Aqualavo Assembly guide

Grohe 45 984 manual

Grohe

Grohe 45 984 manual

Panasonic DH-3JP2 Operating and installation instructions

Panasonic

Panasonic DH-3JP2 Operating and installation instructions

Gessi ORIGINI 66109 manual

Gessi

Gessi ORIGINI 66109 manual

Decor Star PL-006-SS Installation

Decor Star

Decor Star PL-006-SS Installation

Kalia KONCEPT DR1215 installation instructions

Kalia

Kalia KONCEPT DR1215 installation instructions

Glacier bay HD873X-4027D Installation and care guide

Glacier bay

Glacier bay HD873X-4027D Installation and care guide

Signature Hardware LENTZ 951346 quick start guide

Signature Hardware

Signature Hardware LENTZ 951346 quick start guide

Hans Grohe Square 04880 0 Series Installation/User Instructions/Warranty

Hans Grohe

Hans Grohe Square 04880 0 Series Installation/User Instructions/Warranty

manuals.online logo
manuals.online logoBrands
  • About & Mission
  • Contact us
  • Privacy Policy
  • Terms and Conditions

Copyright 2025 Manuals.Online. All Rights Reserved.