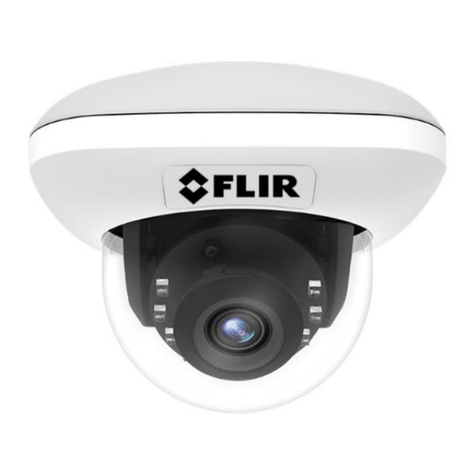
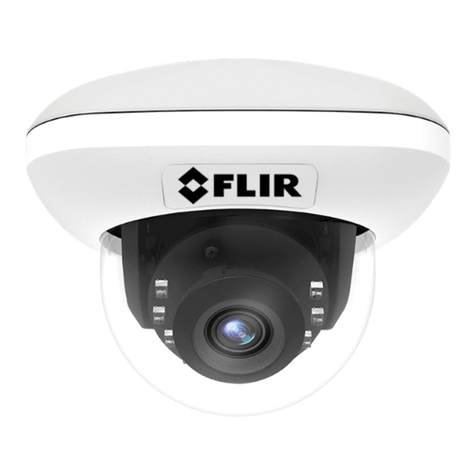
FLIR Saros User manual

The information contained herein does not contain technology as defined by EAR,15 CFR772, is publicly available, and therefore not subject to EAR.
Installation and
User Guide
SarosTM Dome
Camera

427-0100-00-12 Version 100 December 2018 2
The information contained herein does not contain technology as defined by EAR,15 CFR772, is publicly available, and therefore not subject to EAR.
© 2018 FLIR Systems, Inc. All rights reserved worldwide. No parts of this manual, in whole or in part, may be
copied, photocopied, translated, or transmitted to any electronic medium or machine readable form without the
prior written permission of FLIR Systems, Inc.
Names and marks appearing on the products herein are either registered trademarks or trademarks of FLIR
Systems, Inc. and/or its subsidiaries. All other trademarks, trade names, or company names referenced herein are
used for identification only and are the property of their respective owners.
This product is protected by patents, design patents, patents pending, or design patents pending.
Photographs and images appearing in this manual may have been modified for illustrative purposes using
commercial image editing software and may not always reflect an actual product configuration.
The contents of this document are subject to change without notice.
For additional information visit www.flir.com or write to FLIR Systems, Inc.
FLIR Systems, Inc.
6769 Hollister Avenue
Goleta, CA 93117
Support: https://www.flir.com/support-center/support-hq/.
Important Instructions and Notices to the User:
This device complies with part 15 of the FCC Rules. Operation is subject to the following two conditions: (1) This
device may not cause harmful interference, and (2) this device must accept any interference received, including
interference that may cause undesired operation.
Modification of this device without the express authorization of FLIR Systems, Inc. may void the user’s authority
under FCC rules to operate this device.
Note 1: This equipment has been tested and found to comply with the limits for a Class A digital device, pursuant to
part 15 of the FCC Rules. These limits are designed to provide reasonable protection against harmful interference
when the equipment is operated in a commercial environment. This equipment generates, uses, and can radiate
radio frequency energy and, if not installed and used in accordance with the instruction manual, may cause harmful
interference to radio communications. Operation of this equipment in a residential area is likely to cause harmful
interference in which case the user will be required to correct the interference at the user’s own expense.
Note 2: If this equipment came with shielded cables, it was tested for compliance with the FCC limits for a Class A
digital device using shielded cables and therefore shielded cables must be used with the device
Industry Canada Notice:
This Class A digital apparatus complies with Canadian ICES-003.
Avis d’Industrie Canada:
Cet appareil numérique de la classe A est conforme à la norme NMB-003 du Canada.
Proper Disposal of Electrical and Electronic Equipment (EEE)
The European Union (EU) has enacted Waste Electrical and Electronic Equipment Directive 2002/
96/EC (WEEE), which aims to prevent EEE waste from arising; to encourage reuse, recycling, and
recovery of EEE waste; and to promote environmental responsibility.
In accordance with these regulations, all EEE products labeled with the “crossed out wheeled bin”
either on the product itself or in the product literature must not be disposed of in regular rubbish bins,
mixed with regular household or other commercial waste, or by other regular municipal waste
collection means. Instead, and in order to prevent possible harm to the environment or human
health, all EEE products (including any cables that came with the product) should be responsibly
discarded or recycled.
To identify a responsible disposal method nearby, please contact the local waste collection or recycling service, the
original place of purchase or product supplier, or the responsible government authority in the area. Business users
should contact their supplier or refer to their purchase contract.
Document History
Version Date Comment
100 December 2018 Initial release of Saros Dome camera with video analytics intrusion detection
427-0100-00-12 Version 100 December 2018 1
The information contained herein does not contain technology as defined by EAR,15 CFR772, is publicly available, and therefore not subject to EAR.
Installation
1.1 Camera Overview 1-3
1.2 Installation Overview 1-4
1.2.1 Camera Connections 1-4
1.2.2 Supplied Components 1-4
1.2.3 Additional Supplies 1-5
1.2.4 Site Preparation 1-5
1.2.5 Configure for Networking 1-5
1.2.6 Camera Placement 1-9
1.2.7 Install the Wall Mount 1-9
1.2.8 Install the Back Box 1-10
1.3 Camera Connections 1-11
1.3.1 Grounding 1-11
1.3.2 Connecting Power 1-11
1.3.3 Aim the Camera 1-11
1.4 Camera Specifications 1-12
Operation
2.1 Accessing a Camera 2-14
2.2 View Settings Home Page 2-14
2.2.1 Video Page 2-14
2.2.2 Visible Page 2-18
2.2.3 Thermal Image Setup - Thermal Page 2-19
2.2.4 Input/Output (I/O) Page 2-20
2.2.5 Illumination Page 2-21
2.2.6 Video Analytics Setup 2-22
Configuration
3.1 System Settings Pages 3-28
3.1.1 Network Page 3-28
3.1.2 Date & Time Page 3-29
3.1.3 Users Page 3-30
3.1.4 Firmware & Info Page 3-31
3.1.5 Alarm Page 3-32
3.1.6 Audio 3-32
3.1.7 I/O Devices 3-33
3.1.8 Cyber 3-33

427-0100-00-12 Version 100 December 2018 3
The information contained herein does not contain technology as defined by EAR,15 CFR772, is publicly available, and therefore not subject to EAR.
1Installation
This chapter provides an overview of the Saros Dome security camera, and describes how to install
and configure it for networking.
1.1 Camera Overview
Saros Dome includes multiple thermal sensors, a 1080p visible light camera, IR and visible LED
illuminators, advanced on-board thermal video analytics, audio, and digital I/O. The thermal video
analytics provides tripwire, detection, and masking area configuration; human & vehicle detection and
classification; and manual and automatic scene analysis.
When the camera is connected to an IP network, it functions as a server, providing services such as
camera control, video streaming, network communications, and video analytics alarm capabilities. The
server uses an open, standards-based communication protocol to communicate with FLIR and third-
party video management system (VMS) clients, including systems that are compatible with ONVIFTM.
These clients can be used to control the camera and stream video during day-to-day operations. For a
list of supported VMS clients, refer to the individual product web page at https://www.flir.com/browse/
security/thermal-security-cameras/.
The video from the camera is viewed by streaming it over an IP network using M-JPEG and H.264
encoding.
The Saros cameras are components within the FLIR Thermal Fence, which combines FLIR thermal
security cameras with control and management software in a fully integrated perimeter security
solution. The FLIR Thermal Fence provides automated perimeter surveillance, intrusion detection, and
alert capabilities for perimeter security applications. The FLIR Thermal Fence gives you instant,
automated threat detection and visual threat assessment capability around the clock in one easy-to-
use package.
If help is needed during the installation process, contact the local FLIR service representative or call
the appropriate support number listed at: https://www.flir.com/support-center/support-hq/. All installers
and integrators are encouraged to take advantage of the training offered by FLIR; visit
https://www.flir.com/support-center/training/ for more information.
For safety, and to achieve the highest levels of performance from the Saros Dome camera system,
always follow the warnings and cautions in this manual when handling and operating the camera.
Warning!
Before drilling into surfaces for camera mounting, verify that electrical or other utility service lines are
not present. Serious injury or death may result from failure to heed this warning.
Caution!
Except as described in this manual, do not open the Saros Dome camera for any reason. Damage to
the camera can occur as the result of careless handling or electrostatic discharge (ESD). Always
handle the camera with care to avoid damage to electrostatic-sensitive components.
Prior to making any connections, ensure the power supply or circuit breaker is switched off.
Be careful not to leave fingerprints on the Saros Dome camera’s infrared optics.
Operating the camera outside of the specified input voltage range or the specified operating
temperature range can cause permanent damage.

427-0100-00-12 Version 100 December 2018 4
The information contained herein does not contain technology as defined by EAR,15 CFR772, is publicly available, and therefore not subject to EAR.
Installation
1.2 Installation Overview
The Saros Dome camera can be used for indoor or outdoor security applications.
1.2.1 Camera Connections
The camera can be powered using Power over Ethernet (PoE) or with conventional 24 Vac, 12 Vdc,
or 24 Vdc power supplies. To be powered using PoE, the camera must be connected to either a PoE
switch or a standalone PoE power supply (also called a PoE injector). The maximum Ethernet cable
run is 100 meters, including the PoE power supply. For installations using PoE power and IP video, a
single Ethernet cable is the only required connection. The Saros Dome camera is a Powered Device
compliant with the IEEE 802.3af-2003 standard.
Input/Output
The camera can receive one input signal and can provide one output signal. By default, the signals
are configured for normally open alarm switch circuits. Refer to Power & I/O Connector.
Input Signal—When an external alarm device closes a switch to complete the circuit for the
camera, an input signal is generated to cause an action or an alarm when configured on the Alarm
Page. See also Input/Output (I/O) Page.
Output Signal—When an output alarm is generated, the camera closes its internal switch to
complete the circuit for the receiving device.
1.2.2 Supplied Components
The Saros Dome camera kit includes these standard components:
Items Included in Kit
Back box cover
10-pin connector
Ethernet port
Sunshield
Torx
wrench
Camera ball
Back box
Screwdriver
RJ45 cover

427-0100-00-12 Version 100 December 2018 5
The information contained herein does not contain technology as defined by EAR,15 CFR772, is publicly available, and therefore not subject to EAR.
Installation
1.2.3 Additional Supplies
The installer might need to supply the following items as required (specific to the installation).
• PoE power supply or PoE switch for camera power.
• Cat5e or Cat6 Ethernet cable for digital video and PoE for system power.
• Ten-conductor accessory cable for auxiliary power and alarm in/out.
• Camera grounding strap, camera mount, electrical hardware, connectors, and tools.
1.2.4 Site Preparation
The following recommendations provide for proper installation and operation of the unit. Adhere to all
local and industry standards, codes, and best practices.
•Ambient Environment Conditions: Avoid positioning the unit near heaters or heating system
outputs. Avoid exposure to direct sunlight.
•Safety: Cables and electrical cords should be routed in a manner that prevents safety hazards.
Ensure that nothing rests on the unit’s cables or power cords.
•Ample Air Circulation: Leave enough space around the unit to allow free air circulation.
•Cabling Considerations: Using a cable longer than the manufacturer’s specifications for
optimal video signal may result in degradation of color and video parameters.
•Physical Security: The unit provides threat detection for physical security systems. In order to
ensure that the unit cannot be disabled or tampered with, the system should be installed with
security measures regarding physical access by trusted and untrusted parties.
•Network Security: The unit transmits over IP to security personnel for video surveillance.
Proper network security measures should be in place to assure networks remain operating and
free from malicious interference. Install the unit on the backbone of a trusted network.
•Electrostatic Discharge Safeguards: The unit and other equipment connected to it (relay
outputs, alarm inputs, racks, carpeting, etc.) shall be properly grounded to prevent electrostatic
discharge.
1.2.5 Configure for Networking
Ethernet
Camera
connector
Guide
pins
The Saros Dome camera ball and back box are shipped in
separate boxes. The camera ball can be configured for
networking while still in its shipping box using PoE, or after
installation. If you are configuring the camera for networking
before installation, power the camera using a PoE switch or
PoE injector.
By default, a Dynamic Host Configuration Protocol (DHCP)
server on your network dynamically sets the camera’s IP
address. If there is no DHCP server on the network,
192.168.0.250 is the camera’s default IP address.
You can specify another IP address for the camera and
configure it for networking with the FLIR Discovery Network
Assistant (DNA) software tool or the camera’s web page.

427-0100-00-12 Version 100 December 2018 6
The information contained herein does not contain technology as defined by EAR,15 CFR772, is publicly available, and therefore not subject to EAR.
Installation
To configure the camera for networking using the DNA tool:
Step 1 Make sure the PC and the camera are on the same network.
Step 2 On the PC, download the DNA software from the FLIR individual product web page at:
https://www.flir.com/browse/security/thermal-security-cameras/
Step 3 Un-zip the downloaded file, and then double-click and run DNA.exe. All camera units
on the VLAN are discovered.
Click IP Setup
Online manual
Step 4 Select the camera, and then click IP Setup.
Step 5 Set network parameters such as static IP or DHCP addressing, and then click Update.
Note
For instructions on other functions available using DNA, such as
updating the firmware for multiple cameras at the same time, click
the help icon while DNA is running.
To configure the camera for networking using the camera’s web page:
Step 1 Make sure the camera and the PC are on the same network.

427-0100-00-12 Version 100 December 2018 7
The information contained herein does not contain technology as defined by EAR,15 CFR772, is publicly available, and therefore not subject to EAR.
Installation
Step 2 Open the camera’s web page either by double-clicking the
camera in the DNA Discovery List or by typing the camera’s IP
address in the browser’s address bar (when the PC and the
camera are on the same network).
Step 3 In the Login area, type the user name (admin) and password
(default: admin).
The View Settings page appears.
Step 4 The first time you log in, you must change the password for the admin user and then log in
again using the new password.
Users can be added as well (refer to Users Page).

427-0100-00-12 Version 100 December 2018 8
The information contained herein does not contain technology as defined by EAR,15 CFR772, is publicly available, and therefore not subject to EAR.
Installation
Step 5 Click System Settings.
System Settings
Step 6 On the Network tab, set network parameters such as static IP or DHCP addressing, and
then click Save.

427-0100-00-12 Version 100 December 2018 9
The information contained herein does not contain technology as defined by EAR,15 CFR772, is publicly available, and therefore not subject to EAR.
Installation
1.2.6 Camera Placement
For installations with incorporating multiplecameras with on-board video analytics, the cameras’
fields of view of cameras should overlap to remove all dead zones in which a camera cannot see a
target “head to toe”, as demonstrated in the figure below. The camera’s on-board analytics must be
calibrated to detect targets. Refer to Video Analytics Setup.
4 m
• Install the camera at a height of approximately 4 m (13 ft) or more.
• Typically, you will direct the camera towards the ground with the maximum angle that still allows
the camera to image the area of interest. Include as little skyline as possible in the field of view.
• Ensure that cameras are on stable mounts with minimal vibrations and resistance to wind.
1.2.7 Install the Wall Mount
The wall mount bracket fits standard electrical boxes. For surface mounting, secure the bracket, and
route the conduit through the side cover on the back box.
Twist-lock screws
Step 1 Using the screwdriver, undo the three quarter-turn twist-lock assemblies to release the
wall mount bracket.
Step 2 Secure the wall mount bracket using the screw holes for the installed electrical box.

427-0100-00-12 Version 100 December 2018 10
The information contained herein does not contain technology as defined by EAR,15 CFR772, is publicly available, and therefore not subject to EAR.
Installation
1.2.8 Install the Back Box
Step 1 For each cable, use the Torx wrench to punch a hole in the center of the grommet from the
underside. Insert the cable from the conduit though the hole.
Punch through grommet
from underside here
For surface mount
remove with
Torx wrench
Step 2 Push cables back through the seal so the seal is extended out of the back box, as shown:
Wrong
Correct
Inside back box
Step 3 Seal all exposed connections. Cable connections are not waterproof.
Connection Purpose
Ethernet Power and IP communications
10-pin connector Power I/O terminal: alarm I/O, audio I/O, Vac or Vdc power
Step 4 Terminate cables and plug into connectors.
Power & I/O Connector
Pin Connection Notes
1Vac/Vdc power + 12 Vdc/24 Vdc/24 Vac optional power when PoE is not
available
2Vac/Vdc power -
3Alarm Output + Relay contact: 1A max at 24 Vac/30 Vdc
4Alarm Output -
5Alarm Input + Dry alarm contact
6Alarm Input -
7Audio In + Support in future firmware release
8Audio In -
9Audio Out + 1 V P-P line level, connect to amplified speaker
10 Audio Out -

427-0100-00-12 Version 100 December 2018 11
The information contained herein does not contain technology as defined by EAR,15 CFR772, is publicly available, and therefore not subject to EAR.
Installation
Step 5 Route the PoE cable as shown below. The PoE cable is all that is required.
Ethernet
10-pin
connector
port
Pin 1
Back box
connector
Step 6 Secure the back box onto the wall mount bracket using the screwdriver to tighten the three
quarter-turn twist-lock assemblies.
1.3 Camera Connections
All connections for the camera are made to the back box assembly. The camera is simply plugged
into the back box.
1.3.1 Grounding
Ensure the camera is properly grounded. Failure to properly ground the camera can lead to
permanent damage to the camera. Typical to good grounding practices, the camera back box
chassis ground should be connected to the lowest resistance path possible.
1.3.2 Connecting Power
The camera is powered over Ethernet using IEEE 802.3af-2003 standard PoE switch or PoE
injector. Conventional 24 Vac, 12 Vdc, or 24 Vdc power supplies can also be used to power the
camera. Prior to installing the camera onto the back box, ensure the power supply or circuit breaker
is off.
1.3.3 Aim the Camera
Ensure the camera ball set screws are loose so that the
camera ball can be pushed into its base slightly and rotated.
Camera ball
set screw (2)
Step 1 Set the camera ball into the back box aligning the
guide pins and screw the camera assembly onto
the back box.
Step 2 Aim the camera by manipulate the camera ball
while viewing the image on the camera’s web
page. (See the diagram in Camera Placement.)
Then tighten the two set screws.
Step 3 Attach the sunshield for outdoor applications where
required.

427-0100-00-12 Version 100 December 2018 12
The information contained herein does not contain technology as defined by EAR,15 CFR772, is publicly available, and therefore not subject to EAR.
Installation
1.4 Camera Specifications
DH-390 2MP
Camera Platform Type Dome
Array Format Native 320 × 120, 960 × 360 VividIR
Detector Type Long-Life, Uncooled VOx Microbolometer
Pixel Pitch 12 µm
Thermal Sensitivity <50 mK
Spectral Range 8 µm to 14 µm
Lens Athermalized, focus-free; f/1.1
Optical FoV 2X 57° × 40°, Stitched 102° × 40°
Thermal Video Controls for Brightness, Contrast, Colorization, and MSX video overlay
Thermal AGC Region of
Interest (ROI)
Default, Presets and User definable to ensure thermal viewing quality in
regions of interest
Image Uniformity
Optimization Automatic Flat Field Correction (FFC) - Thermal and Temporal Triggers
Camera Model
Thermal
Sensor
Specifications
Visible Light
Camera
Specifications
Sensor Type 1920 × 1080, 2.1 MP, 1/2.8”
Lens Type 3-9 mm, f/1.6, P-Iris
Frame Rate 30 FPS
Optical FoV 95° × 53°
Aspect Ratio 16:9
White Balance Automatic
Back Light Compensation Ye s
Day Night Mode Automatic with white light and NIR
PAL/NTSC Environ me nt Select either 50 Hz (PAL) or 60 Hz (NTSC) shutter timing to match indoor
lighting frequency in order to reduce flicker.
System
Integration
Ethernet 10/100 Mbps
Control Interfaces Nexus SDK for comprehensive system control and integration; Nexus
CGI for http command interfaces; ONVIF
External Analytics
Compatible Ye s
Measurement
and Analysis
Video Compression Independent channels of streaming H.264 or M-JPEG
Analytics Features
Region Entrance/Intrusion Detection, Crossover/Fence Trespassing;
Auto/Manual Depth Setup, Human and Vehicle Rules, Hand-off target to
autonomous PTZ tracking, Tampering Detection
Analytics Management Web-based configuration and management, Masking of detection areas,
adjustable sensitivity, automatic responses, remote I/O control

427-0100-00-12 Version 100 December 2018 13
The information contained herein does not contain technology as defined by EAR,15 CFR772, is publicly available, and therefore not subject to EAR.
Installation
General
Camera Platform Type Dome
Weight 4 lb (1.8 kg) configuration dependent
Dimensions (H,D) 5.75" x 6.35" (146 mm x 160 mm)
Power Input/Output One input dry alarm contacts;
One output relay contact 1A max at 24 Vac/30 Vdc
Input Voltage dc 12 Vdc (±10 %)
24 Vdc (±10 %)
Input Voltage ac 24 Vac (±10 %)
PoE Input Voltage IEEE 802.3af-2003 standard
Shipping weight 6.8 lb (3.1 kg)
Shipping Dimensions 15" x 11" x 7" (381 mm x 279 mm x 178 mm)
Environmental
IP rating
(dust and water ingress) IP66
Operating temperature range -40 °C to 50 °C (-40 °F to 122 °F) continuous operation
Storage Temperature range -50 °C to 85 °C (-58 °F to 185 °F)
Fog/Salt, Humidity NEMA 4X, Mil-Std-810G
Vibration IEC 60068-2-27
Shock MIL-STD-810F Transportation
Drop Testing FedEx drop test packaging
Approvals FCC Part 15 (Subpart B, Class A), CE mark, EN55032, EN55024, RoHS,
WEEE
Safety IEC/EN/UL 60950-1, IEC/EN 62471

427-0100-00-12 Version 100 December 2018 14
The information contained herein does not contain technology as defined by EAR,15 CFR772, is publicly available, and therefore not subject to EAR.
2Operation
This chapter describes how to operate the Saros Dome security camera using the camera’s web page.
2.1 Accessing a Camera
To access a camera, do one of the following:
• In the DNA tool, double-click the camera in the DNA Discovery List and then log in to the camera.
• Type the camera’s IP address in a browser’s address bar (when the PC and the camera are on the
same network), and then log in to the camera.
The View Settings home page appears.
2.2 View Settings Home Page
The View Settings page displays a live image from the selected video view and a view settings menu
along the left side banner, including Video, Visible, Thermal, I/O, Illumination, and Video Analytics.
Click System Settings to configure network and date/time parameters, user accounts and password
access, alarm settings, and to perform firmware updates (refer to System Settings Pages). The video
detection analytics can be armed/disarmed from this screen. Additional choices are for Help and
Logout.
Select view
Alarms
System Settings
View Settings menus
2.2.1 Video Page
In general, it is not necessary to modify the default parameters. In some cases, such as when a video
stream is sent over a wireless network, it may be useful to “tune” the video streams to reduce the
bandwidth requirements.
By default, three video streams are enabled for the camera: Visible 1 (V1), Visible 2 (V2), and
Thermal/Unified (T1). All video streams are available for viewing from a client program or third-party

427-0100-00-12 Version 100 December 2018 15
The information contained herein does not contain technology as defined by EAR,15 CFR772, is publicly available, and therefore not subject to EAR.
Operation
ONVIF systems. To modify parameters that affect a particular IP Video stream from the camera, click
the link.
Visible 1
The default parameters provide a 1920x1080, 30 FPS frame-rate stream. Codec options are H.264
or MJPEG.
Visible 2
The default parameters provide a 1280x720, 15 FPS frame-rate stream. Codec options are H.264 or
MJPEG.
Thermal/Unified
Options for the T1 stream are a 960x360 thermal image (T), a 960x720 unified image (U1), or a
1020x760 unified image (U2); default frame-rate is 10 FPS. Codec options are H.264 or MJPEG.

427-0100-00-12 Version 100 December 2018 16
The information contained herein does not contain technology as defined by EAR,15 CFR772, is publicly available, and therefore not subject to EAR.
Operation
Select Format for the T1 Stream
Thermal only
Unified 1
Unified 2
Codecs, Quality, and Bandwidth
The codec used determines which parameters you can set that have a significant impact on the
quality and bandwidth requirements of the video stream. Use the default values initially, and then

427-0100-00-12 Version 100 December 2018 17
The information contained herein does not contain technology as defined by EAR,15 CFR772, is publicly available, and therefore not subject to EAR.
Operation
individual parameters can be modified and tested incrementally to determine when bandwidth and
quality requirements are met.
With the H.264 codec, you can set Rate Control to:
• CBR (constant bit rate): The Bit Rate parameter defines the target bit rate; the camera attempts
to keep the video at or near the target bit rate.
• VBR (variable bit rate): The Bit Rate parameter defines the average bit rate.
The I-Frame Interval parameter controls the number of P-frames used between I-frames. I-frames
are full frames of video and the P-frames contain the changes that occurred since the last I-frame. A
smaller I-Frame Interval results in higher bandwidth (more full frames sent) and better video quality.
A higher I-Frame Interval number means fewer I-frames are sent and therefore results in possibly
lower bandwidth and possibly lower quality.
With the MJPEG codec, you can set the Quality parameter.
Network Options
By default, multicast is enabled. Multicast video packets are shared by streaming clients. Additional
clients do not cause bandwidth to increase as dramatically as with unicast. Video stream requests
for ch0/stream1 are unicast. Client-specific multicast requests vary according to the client.
If more than one camera is providing multicast streams on the network, make sure the Destination
Network/IP address is unique for each camera (the Destination Port can be reused). By default, the
port assignment is unique per stream.

427-0100-00-12 Version 100 December 2018 18
The information contained herein does not contain technology as defined by EAR,15 CFR772, is publicly available, and therefore not subject to EAR.
Operation
The time-to-live field controls the ability of IP packets to traverse network boundaries. A value of 1
restricts the stream to the same subnet. Greater values allow increasing access between networks.
The video streaming is done using a protocol generally referred to as Real-time Transport Protocol
(RTP), but there are actually many protocols involved, including Real-Time Transport Control
Protocol (RTCP) and Real Time Streaming Protocol (RTSP). The complete connection strings are:
rtsp://192.168.0.250:554/stream1 for Visible 1, rtsp://192.168.0.250:554/stream2 for Visible 2, and
rtsp://192.168.0.250:554/stream3 for Thermal/Unified 1
By default the video stream uses the IP address of the camera. To maintain compatibility with legacy
systems the stream names are aliased as: ch0 = stream1, ch1 = stream2, and ch2 = stream3.
Authentication is required when logging into the camera stream using any of the user/passwords
setup by an administrator (admin level login). Refer to Users Page.
2.2.2 Visible Page
After making adjustments to the visible video, click SAVE or RESET. When reset is selected you will
be given the choice to discard the changes or return to factory defaults. Scroll down to open the
Advanced Settings dialog.
Thermal sensor
detection region
Advanced Settings
• Focus
• Night Mode
This manual suits for next models
1
Table of contents
Other FLIR Security Camera manuals

FLIR
FLIR A3xx pt series User manual

FLIR
FLIR PTZ-35x140MS User manual

FLIR
FLIR P143E4 SERIES User manual

FLIR
FLIR C233BC User manual

FLIR
FLIR FC-Series ID User manual

FLIR
FLIR N258F5 Series User manual

FLIR
FLIR SV87-KIT User manual

FLIR
FLIR DPB34TLX User manual

FLIR
FLIR T4 Series User manual

FLIR
FLIR FXV101-W User manual

FLIR
FLIR DBV533TL User manual

FLIR
FLIR C243MT2 Series User manual

FLIR
FLIR Quasar Gen III Manual

FLIR
FLIR CF-5212 Manual

FLIR
FLIR FB-Series User manual

FLIR
FLIR DEZ06T10 User manual

FLIR
FLIR Lorex LNB3321 Series User manual

FLIR
FLIR LOREX LNE3162 Series User manual

FLIR
FLIR PT-606Z HD User manual

FLIR
FLIR MPX C234BC User manual