- 3 -
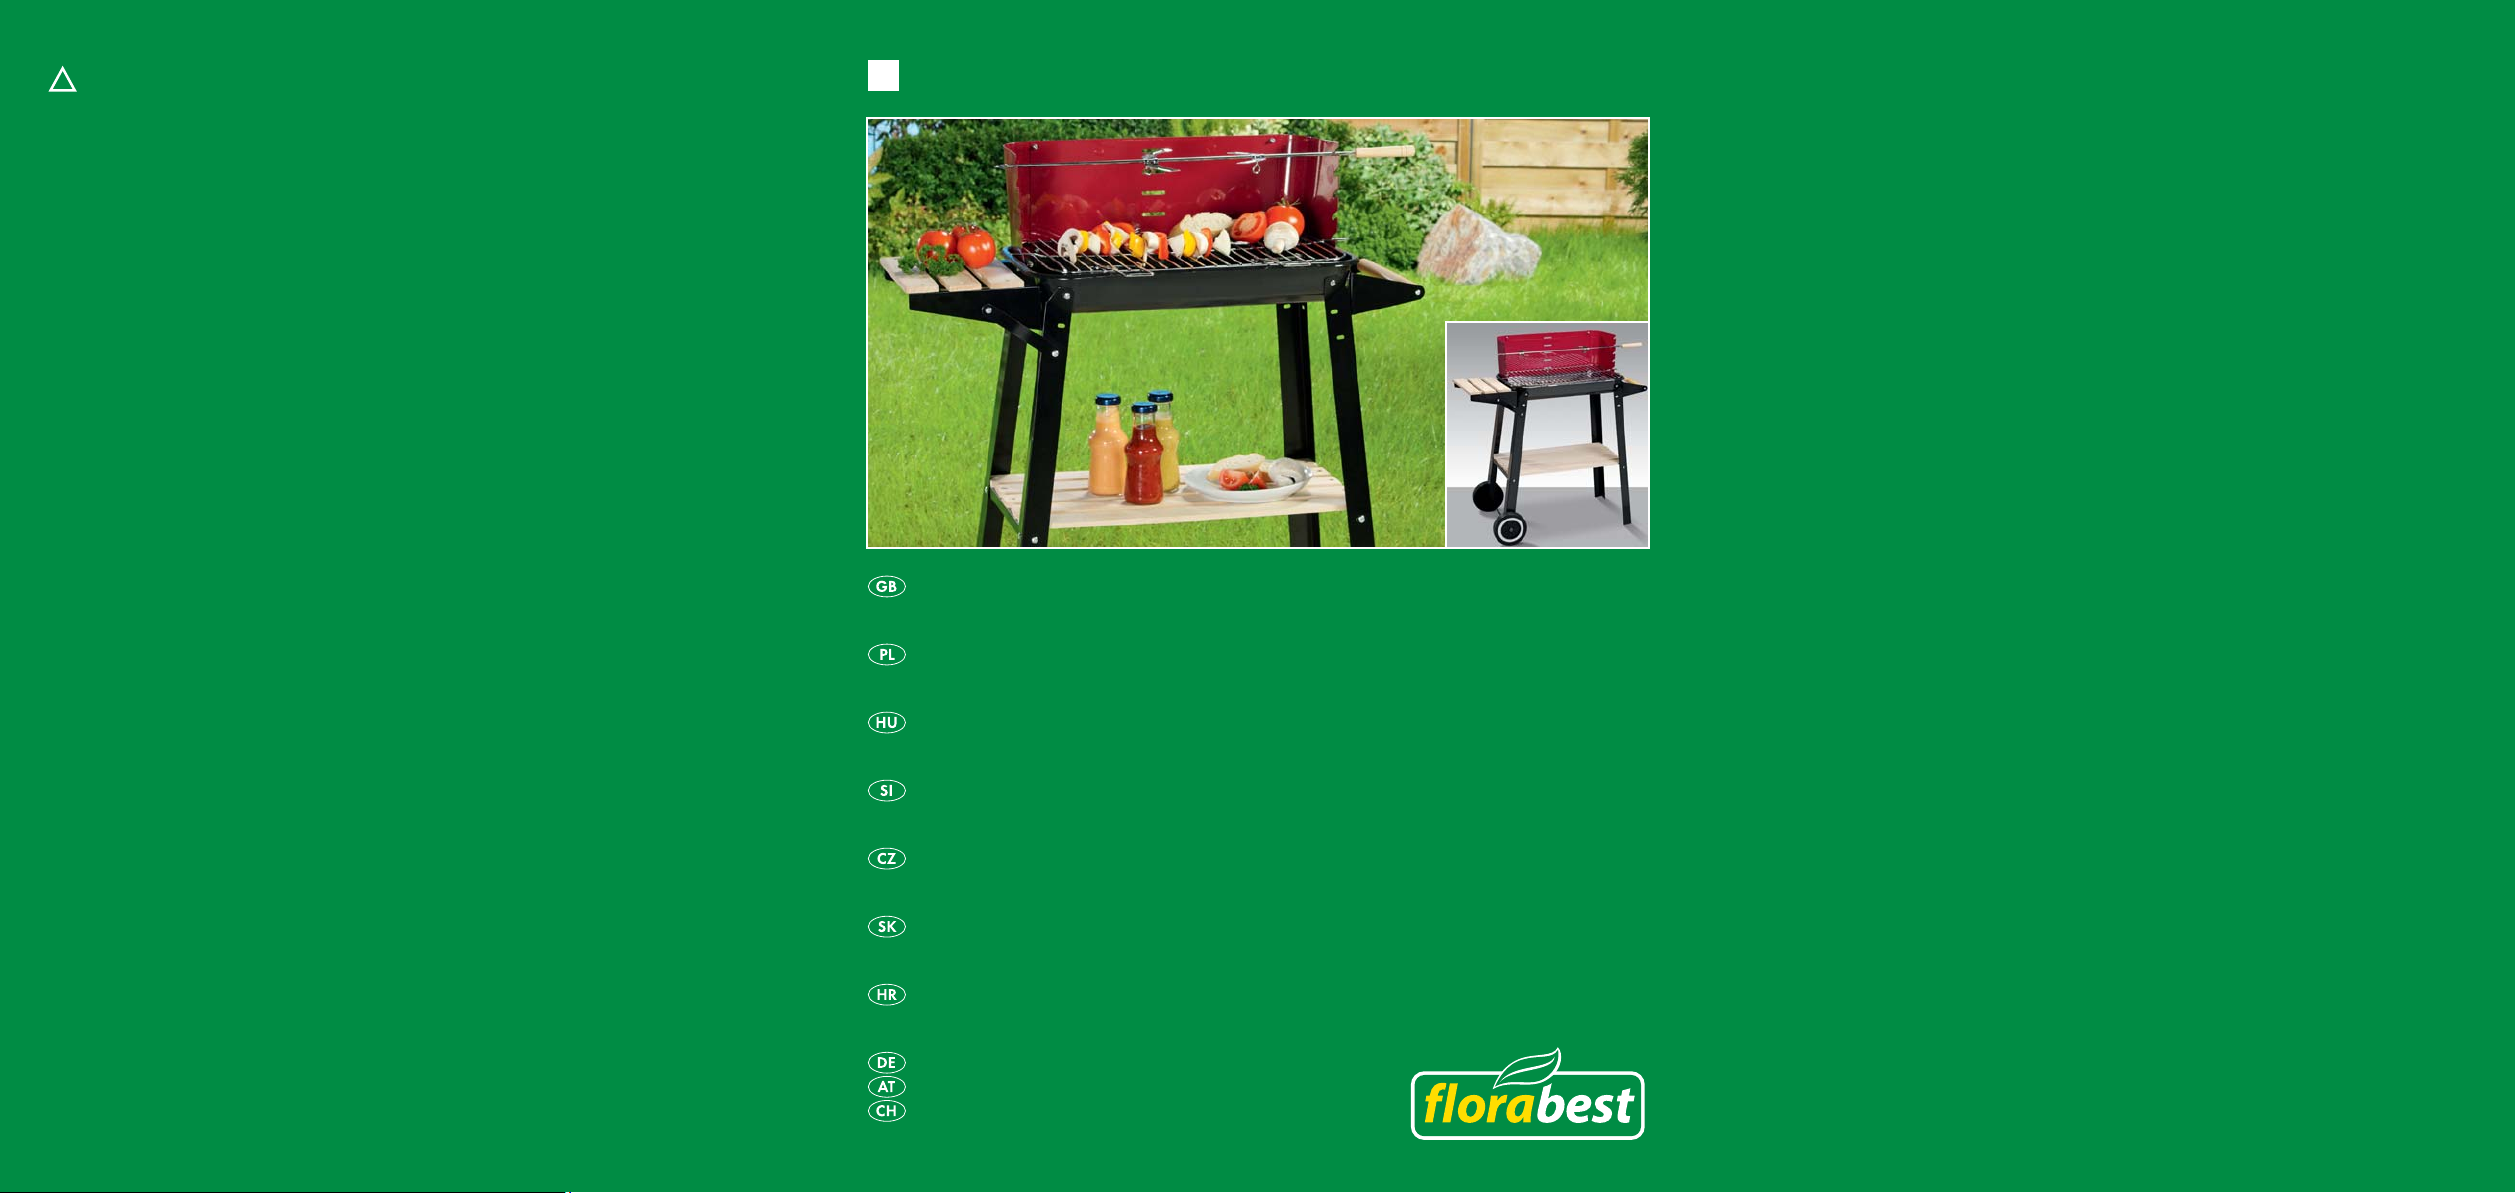
Items supplied
11 x Barbecue skewer
(incl. 2 x Barbecue racks and 1 x Wooden handle)
21 x Wind protector, left
31 x Wind protector, Middle
41 x Wind protector, right
51 x Grill
61 x Firebowl
71 x Handle
82 x Handle holder, short
92 x Stand braces
02 x Cross braces
q5 x Storage slats, long
w2 x Wheels
e1 x Axle
r2 x Wheel brace
t2 x Storage holder, long
z2 x Reinforcing braces
u3 x Storage slats, short
Connection elements
M5x10
25x
M5x12
22x
Ø4x10
2x
M5
47x
M8
2x
Ø5.4
47x
M4x10
2x
Assembly
Attention!
To avoid possible injury, the screw heads should
always face outwards. First tighten all screw
connections down when the assembly is complete,
this will help avoid undesirable material tensions.
1. Place the firebowl 6with the five holes the
longer sidewall to the rear, on the work surface.
2. Connect a long storage holder twith the wheel
braces rby means of the washers Ø 5.4,
M5 x 10 screws and nuts M5.
Please take note that only the lower holes are to
be used for the screws.
3. Assemble the wheel braces rwith the assem-
bled long storage holder tto the left on the
fire bowl 6by means of the washers Ø 5.4,
2 M5 x 12 screws, 2 M5 x 10 screws and
nuts M5. For this, use the upper hole in the
wheel braces r.
4. Secure the reinforcing braces zwith the
wheel braces rby means of the washers Ø
5.4, M5 x 10 screws and nuts M5. Connect
the reinforcing braces zwith the long storage
holder tby means of the washers Ø 5.4,
M5 x 10 screws and nuts M5.
5. Assemble the short handle holder 8and stand
braces 9as described in points 2. and 3.
Fix the handle 7between the short handle
holders 8and then secure them by means
of the wood screws Ø 4 x 10.
6. Place the cross braces 0, with the 5 holes
facing upwards, between the wheel braces r
and the stand braces 9. Screw these together
by means of the washers Ø 5.4, M5 x 10
screws and nuts M5.
7. Fix the five long storage slats qto the cross
brace 0. Secure them using washers Ø 5.4,
M5 x 12 screws and M5 nuts.
8. Assemble the short storage slats ufor the
storage holder tby means of the washers
Ø 5.4, M5 x 12 screws and M5 nuts.
9. Guide the axle ethrough the lower boreholes
on the wheel braces rand secure the placed-
on wheels wwith the self-securing nuts M8.
10. Join the wind protector elements 23 4
together with 2 M5 x 10 screws and M5 nuts
(only at the top). When done, secure the wind
protector element 23 4 from inside onto
the firebowl 6by means of the washers
Ø 5.4, 2 M5 x 12 screws, 3 M5 x 10 screw
and nuts M5.
11. Secure the wooden grip 1 onto the rear part
of the skewer 1, (straight edge) with light
hammer blows. Slide the barbecue racks 1
onto the skewer. Secure the barbecue racks
1with the eye screws M4 x 10.
12. Place the grill 5 and the skewer 1 inside the
wind protector 23 4.