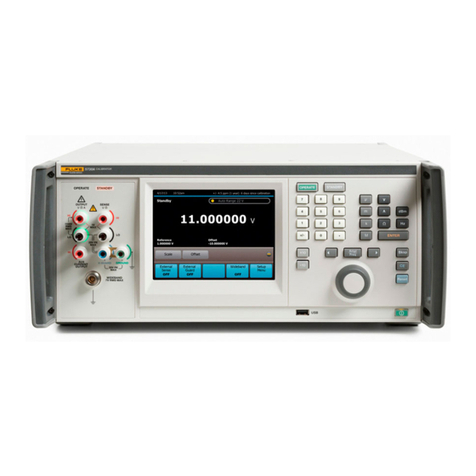
Fluke 3130 User manual

PN 4222409
February 2013
© 2013 Fluke Corporation. All rights reserved. Specifications are subject to change without notice.
All product names are trademarks of their respective companies.
3130
Portable Pressure Calibrator
Users Manual

LIMITED WARRANTY AND LIMITATION OF LIABILITY
Each Fluke product is warranted to be free from defects in material and workmanship under normal use and
service. The warranty period is one year and begins on the date of shipment. Parts, product repairs, and
services are warranted for 90 days. This warranty extends only to the original buyer or end-user customer of
a Fluke authorized reseller, and does not apply to fuses, disposable batteries, or to any product which, in
Fluke's opinion, has been misused, altered, neglected, contaminated, or damaged by accident or abnormal
conditions of operation or handling. Fluke warrants that software will operate substantially in accordance
with its functional specifications for 90 days and that it has been properly recorded on non-defective media.
Fluke does not warrant that software will be error free or operate without interruption.
Fluke authorized resellers shall extend this warranty on new and unused products to end-user customers
only but have no authority to extend a greater or different warranty on behalf of Fluke. Warranty support is
available only if product is purchased through a Fluke authorized sales outlet or Buyer has paid the
applicable international price. Fluke reserves the right to invoice Buyer for importation costs of
repair/replacement parts when product purchased in one country is submitted for repair in another country.
Fluke's warranty obligation is limited, at Fluke's option, to refund of the purchase price, free of charge repair,
or replacement of a defective product which is returned to a Fluke authorized service center within the
warranty period.
To obtain warranty service, contact your nearest Fluke authorized service center to obtain return
authorization information, then send the product to that service center, with a description of the difficulty,
postage and insurance prepaid (FOB Destination). Fluke assumes no risk for damage in transit. Following
warranty repair, the product will be returned to Buyer, transportation prepaid (FOB Destination). If Fluke
determines that failure was caused by neglect, misuse, contamination, alteration, accident, or abnormal
condition of operation or handling, including overvoltage failures caused by use outside the product’s
specified rating, or normal wear and tear of mechanical components, Fluke will provide an estimate of repair
costs and obtain authorization before commencing the work. Following repair, the product will be returned to
the Buyer transportation prepaid and the Buyer will be billed for the repair and return transportation charges
(FOB Shipping Point).
THIS WARRANTY IS BUYER'S SOLE AND EXCLUSIVE REMEDY AND IS IN LIEU OF ALL OTHER
WARRANTIES, EXPRESS OR IMPLIED, INCLUDING BUT NOT LIMITED TO ANY IMPLIED WARRANTY
OF MERCHANTABILITY OR FITNESS FOR A PARTICULAR PURPOSE. FLUKE SHALL NOT BE LIABLE
FOR ANY SPECIAL, INDIRECT, INCIDENTAL, OR CONSEQUENTIAL DAMAGES OR LOSSES,
INCLUDING LOSS OF DATA, ARISING FROM ANY CAUSE OR THEORY.
Since some countries or states do not allow limitation of the term of an implied warranty, or exclusion or
limitation of incidental or consequential damages, the limitations and exclusions of this warranty may not
apply to every buyer. If any provision of this Warranty is held invalid or unenforceable by a court or other
decision-maker of competent jurisdiction, such holding will not affect the validity or enforceability of any other
provision.
Fluke Corporation
P.O. Box 9090
Everett, WA 98206-9090
U.S.A.
Fluke Europe B.V.
P.O. Box 1186
5602 BD Eindhoven
The Netherlands
11/99
To register your product online, visit register.fluke.com
i
Table of Contents
Title Page
Introduction........................................................................................................ 1
How to Contact Fluke Calibration ..................................................................... 2
Safety Information ............................................................................................. 2
Standard Equipment........................................................................................... 3
Features.............................................................................................................. 4
Buttons........................................................................................................... 4
Display........................................................................................................... 5
Calibrator Interface........................................................................................ 6
Typical Connections...................................................................................... 7
Power Options.................................................................................................... 9
Product Startup .................................................................................................. 9
Product Menus ................................................................................................... 9
Top-Level Menu............................................................................................ 11
Main Menu .................................................................................................... 11
Display Configuration Menu......................................................................... 12
Zero Function..................................................................................................... 13
Internal Sensor and Pressure Module (non-absolute).................................... 13
Absolute Pressure .......................................................................................... 13
Other Menu Controlled Functions ..................................................................... 14
Contrast Main Menu...................................................................................... 14
Lock or Unlock the Display Configuration ................................................... 14
Save and Recall Menu Setups ....................................................................... 15
Automatic Shutdown ..................................................................................... 15
Activate and Deactivate a Display................................................................. 16
Damping ........................................................................................................ 16
HART Resistor .............................................................................................. 16
Pump Limits .................................................................................................. 16
Initial Setup and Basic Pressure Generation...................................................... 17
Pressure Measurement ....................................................................................... 17
Media Compatibility...................................................................................... 18
External Modules........................................................................................... 18
Measure and Source Current (4… 20 mA).................................................... 18
Measure Voltage............................................................................................ 20
Pressure Switch Test...................................................................................... 21
Calibrate Transmitters ................................................................................... 23
Use the mA Measurement Function.......................................................... 23

3130
Users Manual
ii
Calibrate a Pressure-to-Current Transmitter ............................................. 24
Calibrate a Pressure-to-Voltage Transmitter............................................. 25
%-Error Function ...................................................................................... 26
Storage Capability.............................................................................................. 29
Remote Operation .............................................................................................. 29
Set Up the RS-232 Port for Remote Control ................................................. 30
Change from Remote to Local Operation...................................................... 31
Command Use ............................................................................................... 31
Character Processing ..................................................................................... 32
Response Data Types .................................................................................... 32
Calibrator Status ............................................................................................ 33
Error Queue............................................................................................... 33
Input Buffer............................................................................................... 33
Remote Commands and Error Codes ............................................................ 33
Enter Commands ........................................................................................... 36
Common Commands................................................................................. 36
Calibrator Commands ............................................................................... 37
Maintenance....................................................................................................... 43
User-Replaceable Parts and Accessories ........................................................... 43
Specifications..................................................................................................... 44
Electrical Specification.................................................................................. 44
Pressure ......................................................................................................... 44
Accuracy........................................................................................................ 44
Loop Power ................................................................................................... 44
Mechanical Specification .............................................................................. 44
Environmental ............................................................................................... 44
Standards and Agency Approval ................................................................... 45
Power............................................................................................................. 45

iii
List of Tables
Table Title Page
1. Symbols.................................................................................................................. 3
2. Mode Concurrency................................................................................................. 13
3. Common Commands.............................................................................................. 33
4. Product Commands ................................................................................................ 34
5. Parameter Units...................................................................................................... 35
6. Error Codes ............................................................................................................ 36
7. Replaceable Parts ................................................................................................... 43

3130
Users Manual
iv

v
List of Figures
Figure Title Page
1. Buttons ................................................................................................................... 4
2. Display ................................................................................................................... 5
3. Controls.................................................................................................................. 6
4. External Pressure Supply ....................................................................................... 7
5. Pressure Supply with Internal Pump ...................................................................... 8
6. Pressure Measurement ........................................................................................... 8
7. Menu Map .............................................................................................................. 10
8. Top-Level Menu..................................................................................................... 11
9. Main Menu ............................................................................................................. 12
10. Display Configuration Menu.................................................................................. 12
11. Absolute Pressure................................................................................................... 13
12. Contrast Menu........................................................................................................ 14
13. Display Configuration Menu.................................................................................. 14
14. Setups Menu........................................................................................................... 15
15. Auto Shutdown Menu ............................................................................................ 15
16. Active Display Menu ............................................................................................. 16
17. Pressure Module..................................................................................................... 18
18. Measure and Sourcing Current............................................................................... 19
19. Measure Voltage .................................................................................................... 20
20. Switch Test Connections........................................................................................ 21
21. Switch Test Screen................................................................................................. 21
22. Switch Test Screen (Open)..................................................................................... 22
23. Opened Switch Reading......................................................................................... 22
24. Switch Test and Deadband Results ........................................................................ 23
25. Passive and Active Screens .................................................................................... 23
26. Calibrate a Pressure-to-Current Transmitter .......................................................... 24
27. Calibrate a Pressure-to-Voltage Transmitter.......................................................... 25
28. Connections with a Pressure Transmitter with % Error Function.......................... 26
29. Port Setting Screen................................................................................................. 27
30. Loop Power Screen ................................................................................................ 27
31. Set Unit Screen....................................................................................................... 27
32. Setting the Upper Limit.......................................................................................... 28
33. % ERROR Screen .................................................................................................. 28
34. Saved Upper and Lower Limits ............................................................................. 28
35. Remote Operation .................................................................................................. 29

3130
Users Manual
vi

1
Introduction
The Fluke 3130 (the Product) is a portable pressure calibrator that can use two methods
to source pressure:
•An internal, electronic pump that has a range of -12 psi to 300 psi (-0.8 bar to 20 bar)
•An external connection that lets you use externally-sourced, clean, dry air to regulate
pressures to a maximum of 300 psi
Product features include:
•A built-in needle valve for metering in pressure
•Variable volume for small pressure changes
•An internal pressure sensor
•Measurement of 0 V dc to 30 V dc and 0 mA to 24 mA from a unit under test (UUT).
•Sourcing current of 0 mA to 24 mA to a UUT also available
•A 24 V dc loop power supply that uses dedicated front panel jacks. For voltage
transmitters, a dedicated 24 V dc loop power supply is available in volts measure
mode. mA loop power is supplied from the left-most jacks.
•An internal, high-capacity NiMH battery
•A universal power supply (90 V ac to 250 V ac) that can charge the battery pack
while it powers the Product
•Pressure measurement with the internal pressure sensor or with a Fluke 700 Series
external pressure module
•The Product can show pressure units in these different values:
•psi
•MPa
•kPa
•inHg 0°C
•mmHg 0°C
•kg/cm2
•mmH2O 4°C
•mH2O20°C
•inH2O 4°C
•inH2O 60°C
•cmH2O 4°C
•cmH2O 20°C
•bar
•mbar

3130
Users Manual
2
How to Contact Fluke Calibration
To contact Fluke Calibration, call one of the subsequent telephone numbers:
•Technical Support USA: 1-877-355-3225
•Calibration/Repair USA: 1-877-355-3225
•Canada: 1-800-36-FLUKE (1-800-363-5853)
•Europe: +31-40-2675-200
•Japan: +81-3-6714-3114
•Singapore: +65-6799-5566
•China: +86-400-810-3435
•Brazil: +55-11-3759-7600
•Anywhere in the world: +1-425-446-6110
To see product information and download the latest manual supplements, visit Fluke
Calibration’s website at www.flukecal.com.
To register your product, visit http://flukecal.com/register-product.
Safety Information
A Warning identifies conditions and procedures that are dangerous to the user. A
Caution identifies conditions and procedures that can cause damage to the Product or the
equipment under test.
Warnings
To prevent possible electrical shock, fire, or personal injury:
•Read all safety Information before you use the Product.
•Use the Product only as specified, or the protection
supplied by the Product can be compromised.
•Do not use the Product around explosive gas, vapor, or in
damp or wet environments.
•Do not use and disable the Product if it is damaged.
•Only assemble and operate high-pressure systems if you
know the correct safety procedures. High-pressure liquids
and gases are hazardous and the energy from them can be
released without warning.
For safe operation and maintenance of the Product:
•Use only Fluke approved power adapters to charge the
battery. See the “User-Replaceable Parts and Accessories”
section.

Portable Pressure Calibrator
Standard Equipment
3
Symbols used on the Product and in this manual are in Table 1.
Table 1. Symbols
Symbol Meaning Symbol Meaning
Risk of danger. Important
information. See manual. Conforms to European Union
directives.
Pressure Battery
Hazardous voltage. Risk of electrical
shock.
This product complies with the
WEEE Directive (2002/96/EC)
marking requirements. The
affixed label indicates that you
must not discard this
electrical/electronic product in
domestic household waste.
Product Category: With
reference to the equipment types
in the WEEE Directive Annex I,
this product is classed as
category 9 "Monitoring and
Control Instrumentation” product.
Do not dispose of this product as
unsorted municipal waste. Go to
Fluke’s website for recycling
information.
Standard Equipment
Items included with the Product are in the list below. If the Product is damaged or
something is missing, immediately contact Fluke Calibration. See the “How to Contact
Fluke Calibration” section.
•Printed 3130 Safety Information
•3130 Manual CD-ROM with multilingual users manuals
•Six 1/8 inch NPT quick connectors for calibration hoses
•Two 3 foot sections of 1/8 inch O.D. hose
•One 1/8 inch NPT female on 1/4 inch NPT female fitting
•One 1/8 inch NPT female on 1/4 inch BSP female fitting
•Thread seal tape
•Test cables (two red, two black)
•Universal power supply
•Traceable calibration certificate

3130
Users Manual
4
Features
Product features and user interface information is in the subsequent sections.
Buttons
The Product buttons are on the left-side of the Product face and are shown in Figure 1.
F1 F2 F3
HOME
ZERO PUMP
hbb005.eps
Button Description
Push to turn on the Product.
, , Softkeys to configure the Product and move through the Product menus. The button
function changes in relation to the navigation menu.
Push to zero pressure measurements.
Push to start the electric pump.
, , , Push to control mA source/sim and to set pump and % error limits.
Push to go to the Product main screen.
Figure 1. Buttons

Portable Pressure Calibrator
Features
5
Display
The display can be made up of a maximum of three process measurement sections plus the
menu bar which is always at the bottom of the display. The sections of the display are
referred to by the Product and in this manual as UPPER, MIDDLE, LOWER,and menu bar.
Push the softkeys that correspond to items shown on the menu bar to move through the
Product menus. The arrow keys change values for some menu steps. See “Product Menus”.
The Display sections are shown in Figure 2.
2
1
3
4
5
6
7
8
hbb008.eps
Item Description
Menu Bar- Access the Product menus and parameters from the menu bar. See the “Product
Menus” section.
Active Display- On the main menu, the middle of the menu bar shows the active display. In
this image, the LOWER display is active. This section of the menu bar can also say UPPER
and MIDDLE. This depends on which section is active.
UPPER display section
MIDDLE display section
LOWER display section
Pressure Units- Pressure units are shown in this section of the display. Select from 14
pressure units.
Span Indicator- Percentage of the 4 mA to 20 mA span when the mA or mA loop functions
that are used show in this section of the display.
Primary Parameter- Shows the current measured parameter.
Figure 2. Display

3130
Users Manual
6
Calibrator Interface
The pressure controls are shown in Figure 3.
V mA
SWITCH TEST
COM
EXTERNAL
PRESSURE MODULE
24 V DC
30V MAX
LOOP
PORTABLE PRESSURE CALIBRATOR
3130
FLUKE CORPORATION
EVERETT,WA USA
www.flukecal.com
CHARGE
16V DC
5.6 A
SERIAL NO.
VENT LINE BEFORE MAKING SELECTION
CAUTION
OUTPUT
ISOLATION
VALVE
-12 PSI TO 300 PSI
(-8kPa TO 2 MPa)
AIR SUPPLY
330 PSI MAX
(2.3 MPa)
PRESSURE
CLOSED
VACUUM
PUMP
FINE
ADJUSTMENT
VENT
SUPPLY
METERING VALVE
FINE
ADJUSTMENT
VENT
FILTER
PRESSURE
SENSOR
CLOSE VALVE BEFORE
OPERATING PUMP
F1 F2 F3
HOME
ZERO PUMP
3
21
4
9
5
6
78
hbb006.eps
Item Description
Supply metering valve. Use the supply metering valve to regulate the incoming air supply.
See the “Typical Connections” section for more.
Isolation valve. This valve isolates the right-most port and pressure sensor from the
Vent/Fine adjust, pump, and Supply Metering Valve.
Pump Pressure/Vacuum. In the + position, the pump operates from 0 psi to 300 psi. In
the - position, the pump runs in vacuum mode, which is 0 psi to -12 psi.
Fine adjust/vent. Use the small silver knob of this valve to bleed off the pressure in a
controlled manner. If left open, it will vent all pressure off safely. The outer-most knob
(black) is a vernier control that varies the volume which finely reduces or increases the
pressure.
Power Adapter input.
24 V power for voltage transmitters. This jack only powered when in Voltage Measure
mode.
Common Jack.
Input Jacks. Use the input jacks for volts and milliamp functions. See the “Measure and
Source Current (4… 20 mA)” and “Measure Voltage” sections. Also used for switch test.
External pressure module connection. See the “External Modules” section.
Figure 3. Controls

Portable Pressure Calibrator
Features
7
Typical Connections
Typical connections of the pressure controls, connection port, and electrical inputs are
shown in Figures 4, 5, and 6.
V mA
SWITCH TEST
COM
EXTERNAL
PRESSURE MODULE
24 V DC
30V MAX
LOOP
PORTABLE PRESSURE CALIBRATOR
3130
FLUKE CORPORATION
EVERETT,WA USA
www.flukecal.com
CHARGE
16V DC
5.6 A
SERIAL NO.
VENT LINE BEFORE MAKING SELECTION
CAUTION
OUTPUT
ISOLATION
VALVE
-12 PSI TO 300 PSI
(-8kPa TO 2 MPa)
AIR SUPPLY
330 PSI MAX
(2.3 MPa)
PRESSURE
CLOSED
VACUUM
PUMP
FINE
ADJUSTMENT
VENT
SUPPLY
METERING VALVE
FINE
ADJUSTMENT
VENT
FILTER
PRESSURE
SENSOR
CLOSE VALVE BEFORE
OPERATING PUMP
F1 F2 F3
HOME
ZERO PUMP
0 psi to 300 psi
Air Supply
Fully Closed
hbb002.eps
Figure 4. External Pressure Supply

3130
Users Manual
8
V mA
SWITCH TEST
COM
EXTERNAL
PRESSURE MODULE
24 V DC
30V MAX
LOOP
PORTABLE PRESSURE CALIBRATOR
3130
FLUKE CORPORATION
EVERETT,WA USA
www.flukecal.com
CHARGE
16V DC
5.6 A
SERIAL NO.
VENT LINE BEFORE MAKING SELECTION
CAUTION
OUTPUT
ISOLATION
VALVE
-12 PSI TO 300 PSI
(-8kPa TO 2 MPa)
AIR SUPPLY
330 PSI MAX
(2.3 MPa)
PRESSURE
CLOSED
VACUUM
PUMP
FINE
ADJUSTMENT
VENT
SUPPLY
METERING VALVE
FINE
ADJUSTMENT
VENT
FILTER
PRESSURE
SENSOR
CLOSE VALVE BEFORE
OPERATING PUMP
F1 F2 F3
HOME
ZERO PUMP
Closed Silver Vent Knob
Fully Closed
hbb003.eps
Figure 5. Pressure Supply with Internal Pump
V mA
SWITCH TEST
COM
EXTERNAL
PRESSURE MODULE
24 V DC
30V MAX
LOOP
PORTABLE PRESSURE CALIBRATOR
3130
FLUKE CORPORATION
EVERETT,WA USA
www.flukecal.com
CHARGE
16V DC
5.6 A
SERIAL NO.
VENT LINE BEFORE MAKING SELECTION
CAUTION
OUTPUT
ISOLATION
VALVE
-12 PSI TO 300 PSI
(-8kPa TO 2 MPa)
AIR SUPPLY
330 PSI MAX
(2.3 MPa)
PRESSURE
CLOSED
VACUUM
PUMP
FINE
ADJUSTMENT
VENT
SUPPLY
METERING VALVE
FINE
ADJUSTMENT
VENT
FILTER
PRESSURE
SENSOR
CLOSE VALVE BEFORE
OPERATING PUMP
F1 F2 F3
HOME
ZERO PUMP
-12 psi to 300 psi
Pressure Source
hbb004.eps
Figure 6. Pressure Measurement

Portable Pressure Calibrator
Power Options
9
Power Options
The Product can be powered with the internal, high-capacity NiMH battery and/or the
universal power supply (90 V ac to 250 V ac) that charges the battery pack. The universal
power supply can power the Product at the same time it charges the battery pack. A fully-
discharged battery can take a maximum of 14 hours to recharge. When the Product is first
received, plug it into the universal power supply for that period to ensure the Product is
fully charged.
Product Startup
When you turn on the Product, it goes through a short self-test. The display shows the
current firmware version, auto-shutdown status, and the range of the internal pressure
sensor. The Product also shows the warning “FOR USE WITH DRY GAS ONLY”.
A minimum 5-minute warm-up is necessary to get the rated accuracy of the Product. If
there are large changes in ambient temperature, a longer warm-up is necessary.
Pressure ranges must be zeroed each time the Product is started. See the “Zero Function”
section for instructions to zero the pressure sensor displays.
Product Menus
The menu bar at the bottom of the display is controlled with the softkeys or arrow keys,
this depends on which menu is in use. Use the menu bar to navigate the Product menus.
The menus are explained in the subsequent sections. A menu map is shown in Figure 7.

3130
Users Manual
10
Active
Display
Active
Display
hbb001.eps
Figure 7. Menu Map

Portable Pressure Calibrator
Product Menus
11
Top-Level Menu
The top-level menu is shown in Figure 8. It has three levels.
hbb009.eps
Figure 8. Top-Level Menu
•MENU- Push the MENU softkey to get to the main menu. See the “Main Menu”
section.
•[Active Display]- The active display is shown in the middle field on the top-level
and main menu. In Figure 8 the active display is the LOWER display. This menu
item lets you assign the ZERO key to one of the three display sections. Push the
softkey that corresponds to the display named on the menu bar to change the active
display. If the chosen display is a pressure range, then the ZERO key becomes active.
•LIGHT- The Product has a backlight for low-light situations. To turn on or turn off
the backlight, push the LIGHT softkey on the main menu. The backlight cannot be
controlled by the serial interface.
Main Menu
To go to the main menu, push the MENU softkey from the top-level menu. From the
main menu, the submenus can be accessed. The main menus are:
•Config- Display Configuration menu
•% Error Main Menu
•MinMax Menu
•Contrast Main Menu
•Lock Config Menu
•Setups Main Menu
•Save/Recall Menu
•Auto Off Main Menu
•Setups Main Menu
•Display Main Menu
•Damp Main Menu
•HART Main Menu
•Pump Limit Main Menu
Some of these menus are broken up into more submenus.

3130
Users Manual
12
The main menu is shown in Figure 7 and has three levels.
hbb010.eps
Figure 9. Main Menu
•CONFIG (Configuration) - Push to access the config menu. Push again to go
to the Display Configuration menu. This will let you change the parameters for each
display section. See the Parameter Selection portion of the Figure 7.
•[Active Display] - See the “Top-Level Menu” section.
•MORE- Push to access the % Error Main Menu.
Display Configuration Menu
Use the display configuration menu to set the parameters of the active display. Push the
SELECT softkey to move through this menu. See Figure 13.
hbb011.eps
Figure 10. Display Configuration Menu
The first parameter is Mode. Since voltage, current, and switch test modes all use the
same jacks, two of these functions cannot be used at the same time. What can be selected
depends on what is already selected in another display.
Push the NEXT softkey to change the second parameter. Pressure can be read in 14
different engineering units. Only Pressure mode has a second parameter.
These modes are available with a single display:
•P[1] = Pressure internal sensor
•[EXT] = Pressure with external pressure module
•P[1] ST = Switch Test with internal sensor
•[EXT] ST = Switch Test with external pressure module
Note
mA functions are only available on the lower section of the display.
•mA Measure = Milliamps measure.
•mA Source = Milliamps source.
•SIM-2W = Milliamps simulate using an external supply from the UUT.
•VOLTS = Voltage Measure.
•mA MEAS/24v
Table 2 shows which functions are available concurrently.
An X in a column indicates that the mode in the active display is not available for
selection if the mode in that row is in use in a different display.
Use the MORE option on the main menu to access other menu functions.
Table of contents
Other Fluke Test Equipment manuals

Fluke
Fluke 753 Use and care manual

Fluke
Fluke Micro-Bath 7102 User manual

Fluke
Fluke 709 User manual

Fluke
Fluke 715 User manual

Fluke
Fluke 39 User manual

Fluke
Fluke PRV240FS User manual

Fluke
Fluke IT100 IntelliTone Toner User manual

Fluke
Fluke 7526A Use and care manual

Fluke
Fluke 154 HART User manual

Fluke
Fluke A40B User manual

Fluke
Fluke 154 HART User manual

Fluke
Fluke 718 30G User manual

Fluke
Fluke 726 Instruction manual

Fluke
Fluke OMNIScanner 2 User manual

Fluke
Fluke i1000s User manual

Fluke
Fluke 9103 User manual

Fluke
Fluke i400 Use and care manual

Fluke
Fluke CertiFiber Pro User manual

Fluke
Fluke 1625 User manual

Fluke
Fluke A40B User manual