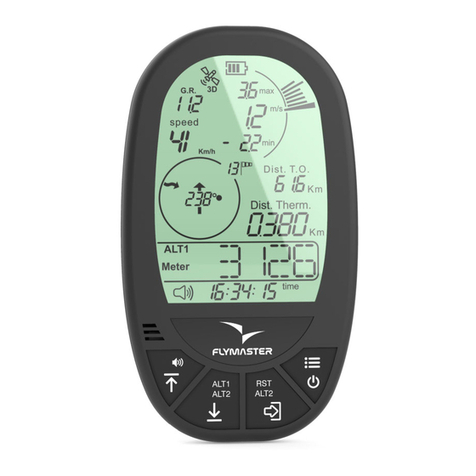
Flymaster N Series User manual

ENG
FRA
DE
ITA
RU
PT
Read before use
A lire avant utilisation
Vor Benutzung lesen
Leggere prima dell’uso
Прочитайте перед
использованием
Ler antes de usar

ENG
Main Specications
Display Type Grayscale: 320x240px
Battery Capacity (Lithium-Ion) GPS M - 3000 mAh VARIO M - 1800 mAh
Autonomy Usually +24 hours (environment conditions may alter this value)
Pressure Sensor High resolution barometric sensor 10 – 1200 mbar
Audio Piezo onboad speaker for Vario and alerts
Memory expansion Micro SD card
GPS 72-channel BeiDou, Galileo, GLONASS, GPS / QZSS
Microprocessor Microprocessor with proprietary RTOS
FLARM® Flarm beacon included as option (GPS M only)
Native USB Type C Connection to PC (Windows and Mac OS)
Battery Charging From wall adapter or standard usb port
Firmware updates by USB (upgrades are free)
Size 152x90x16 mm
Weight Aprox 200 g.
2

ENG
STEP 1 - We recommend the reading of the following documents:
- Warranty terms and conditions.
- Complete user manual of your instrument.
To do that, please use the following links:
https://dnl.flymaster.net/Flymaster_Standard_Limited_Warran-
ty_EN.pdf
https://www.ymaster.net/downloads
STEP 2 - Create a Flymaster Cloud account if you don’t already
have one.
After the account creation go to:
https://livetrack360.com/login
3

ENG
4
STEP 3 - Register the instrument in your account.
https://livetrack360.com/devices/register
STEP 4 - Install “Flymaster Instrument Manager” to manage your
Vario M or GPS M.
F.I.M. will allow you to send new airspaces to the instrument, sending
waypoints, building page layouts, update firmware, sync to Flymaster
Cloud Flights, etc.
https://www.ymaster.net/downloads
STEP 5 - OPTIONAL FLARM AWARE SERVICE ACTIVATION

ENG
1 - Flarm beacon Antenna (OPTION
on GPS M only)
2 - Monochrome display
3 - Vario speaker
4 - Sound (short press) / Power
(long press)
5 - Enter
6 - Cursor UP, DOWN, LEFT, RIGHT
7 - Menu/Esc (short press)/zoom
mode (long press)
8 - Micro SD slot (GPS M only)
9 - USB Type C port
5
1
2
8 9
4
3
7
5
6

Getting started
Power ON - Short press Power button and confirm with Enter.
Power OFF -Long press Power button. Choose yes using the cursor but-
tons in the pop-up menu, and press Enter.
Enter in the main menu - In any page, Short press Menu/esc button
to access main menu.
Navigate in main menu -Use cursor buttons to navigate on the Menu.
Press ENTER to choose the desired option. To exit from any option Short press
Esc.
Set sound volume - Short press Sound button, use left and right cursor
to adjust the sound level. Press Enter to confirm, or wait 4 seconds.
Check GPS Status (GPS M only) - Use cursor buttons to navigate
on the Menu. Press ENTER to choose the GPS from the main menu. Short
Press Esc to exit.
Calibrate compass - Use the cursor buttons to navigate the Menu.
Press ENTER to choose Calibrate Compass from the main menu. Press EN-
TER to calibrate. Rotate the instrument slowly in all possible axes freely. A 20
second countdown will be visible as the calibration status. During and after
the process, the result of the calibration quality is shown, which varies from
low, medium or high. The process ends with the message “calibration ended”.
Repeat as many times as necessary until you possibly get a better result, which
will be HIGH.
Set altimeter - Use cursor buttons to navigate on the Menu. Press ENTER
to choose the SET ALTIMETER from the main menu. On the pop-up menu use
Right and Left buttons from the cursor to choose from QNH, Get from GPS,
Altitude 1 (main altimeter) or Altitude 2. Use Up and Down buttons to change
the values. Press ENTER to accept. Keep pressing ENTER to accept all values
and exit or press ESC to a Quick exit.
Hardware reset - Press both Sound/Power button and Menu/esc at same
time for about 2 seconds. The instrument should reset it self showing a quick
progress bar.
Zoom in maps page (GPS M only) - In any page containing a map,
Long press Menu/Esc/Zoom button. In the right left hand corner of the map, a
magnifier icon will be shown, indicating the zoom mode is set. Use UP (zoom
in) and DOWN (zoom out) keys. If no key is pressed the zoom mode will auto-
matically be disabled after 5 seconds.
Change page - In flight mode, short press ENTER button to switch pages.
Route Navigator (GPS M only) - Use cursor buttons to navigate
on the Menu. Press ENTER to choose the ROUTE NAVIGATOR from the main
menu. Use the Up and Down buttons to choose the Waypoint that you want to
navigate. Press Enter to confirm.
ENG
6

7
Getting started
Add Waypoints (GPS M only) - Use FLYMASTER INSTRUMENT
MANAGER (PC or MAC) to add waypoints to the instrument. You can also
add waypoints manually. Adding Waypoints Manually: Use cursor
buttons to navigate on the Menu. Press ENTER to choose the WAYPOINTS/
ROUTE from the main menu. Press Enter in one of the waypoints or in the
empty list. Use Up and down buttons to Select “Insert New WP”. Use Up and
Down buttons to change the values. Press ENTER to accept. Keep pressing
ENTER to accept all values and exit or press ESC to a Quick exit.
Nearby Airspaces (GPS M only) - Use cursor buttons to navigate
on the Menu. Press ENTER to choose the NEARBY AIRSPACES from the main
menu. Use Up and Down buttons to choose the airspace. In the lower part of
the display the airspace info and status will be visible. Pressing Enter button
in each airspace will give you options to disable it permanently or temporary
using the UP and DOWN buttons. Press ENTER to accept.
Nearby Landings (GPS M only) - Use cursor buttons to navigate
on the Menu. Press ENTER to choose the NEARBY LANDINGS from the main
menu. The list will show the waypoints with “landing -YES” definition, sorted
by distance.
Current GPS position (GPS M only): Use cursor buttons to navi-
gate on the Menu. Press ENTER to choose the GPS from the main menu. The
current position will be displayed.
Time Settings: Use cursor buttons to navigate on the Menu. Press ENTER
to choose the Time from the main menu. This settings will allow to set the vario
integration time and the UTC offset.
Sync to Flymaster Cloud ights- To send your flights and store
them in your Flymaster Cloud Flights account, turn ON the instrument, connect
it via USB to the FLYMASTER INSTRUMENT MANAGER, using the supplied
USB C to USB Type A to the computer and use the “sync to cloud” tool.
Flight Log - Use cursor buttons to navigate on the Menu. Press ENTER to
choose the Flight Log from the main menu. Navigate in the flight log list using
up and down buttons. Select the flight and press enter to get the options for the
flight, like generate IGC, delete the flight or delete all flights.
Generate IGC le to Micro SD card - Use cursor buttons to navi-
gate on the Menu. Press ENTER to choose the Flight Log from the main menu.
Navigate in the flight log list using up and down buttons. Select the flight and
press enter to get the options for the flight, press ENTER on Generate IGC. The
IGC file will be stored in the SD card that can be accessed using the computer
Windows Explorer or Mac OS finder.
ENG

FRA
Spécications principales
Type d’affichage : Niveaux de gris: 320x240px
Capacité de la batterie (Lithium-Ion) GPS M - 3000 mAh VARIO M - 1800 mAh
Autonomie Généralement +24 heures (les conditions environnementales
peuvent modifier cette valeur)
Capteur de pression Capteur barométrique haute résolution 10 – 1200 mbar
L’audio Système haut-parleur Piezo pour Vario et alerts
Extension de mémoire Carte Micro SD
GPS 72-channel BeiDou, Galileo, GLONASS, GPS / QZSS
Microprocesseur Microprocesseur avec RTOS propriétaire
FLARM® Flarm beacon inclus en option (GPS M seulment)
Connexion USB de type C native Permet la connexion au PC
Charger la batterie À partir d’un adaptateur mural ou d’un port USB standard
Mise à jour du firmware par USB (les mises à jour sont gratuites)
Taille 152x90x16 mm
Poids Aprox 200 g.
8

FRA
ÉTAPE 1 - Nous recommandons la lecture des documents suiv-
ants :
- Conditions de garantie.
- Manuel d’utilisation complet de votre instrument.
Pour ce faire, veuillez utiliser les liens suivants :
https://dnl.ymaster.net/Flymaster_Standard_Limited_Warranty_EN.pdf
https://www.ymaster.net/downloads
ÉTAPE 2 - Créez un compte Flymaster Cloud si vous n’en avez
pas déjà un.
Après la création du compte allez sur :
https://livetrack360.com/login
9

FRA
10
ÉTAPE 3 - Enregistrez l’instrument dans votre compte.
https://livetrack360.com/devices/register
ÉTAPE 4 - Installez « Flymaster Instrument Manager » pour
gérer votre Vario M ou GPS M.
F.I.M. vous permettra d’envoyer de nouveaux espaces aériens à l’instru-
ment, d’envoyer des waypoints, de créer des mises en page, de mettre à
jour le micrologiciel, de synchroniser avec Flymaster Cloud Flights, etc.
https://www.ymaster.net/downloads
STEP 5 - OPTIONAL FLARM AWARE SERVICE ACTIVATION

FRA
1 - Antenne Flarm (OPTION sur GPS
M uniquement)
2 - Afchage monochrome
3 - Haut-parleur vario
4 - Son (appui court) / Alimentation
(appui long)
5 - Enter
6 - Curseur HAUT, BAS, GAUCHE,
DROITE
7 - Menu/Esc (appui court)/mode
zoom (appui long)
8 - Emplacement Micro SD (GPS M
uniquement)
9 - USB Type C port
11
1
2
8 9
4
3
7
5
6

FRA
Premiers pas
Allumer - Appuyez brièvement sur le bou-
ton d’alimentation et conrmez avec Entrée.
Éteindre - Appuyez longuement sur le bouton d’alimen-
tation. Choisissez oui à l’aide des boutons du curseur
dans le menu contextuel, puis appuyez sur Entrée.
Entrez dans le menu principal - Dans n’importe quelle page, appuyez
brièvement sur le bouton Menu/esc pour accéder au menu principal.
Naviguer dans le menu principal -Utilisez les boutons du curseur pour
naviguer dans le menu. Appuyez sur ENTER pour choisir l’option sou-
haitée. Pour quitter n’importe quelle option, appuyez brièvement sur Esc.
Régler le volume sonore - Appuyez brièvement sur le bouton
Son, utilisez les curseurs gauche et droit pour régler le niveau so-
nore. Appuyez sur Entrée pour conrmer ou attendez 4 secondes.
Vérier l’état du GPS (GPS M uniquement) - Utilisez les boutons du
curseur pour naviguer dans le menu. Appuyez sur ENTER pour choisir le
GPS dans le menu principal. Appuyez brièvement sur Esc pour quitter.
Étalonner la boussole - Utilisez les boutons du curseur pour nav-
iguer dans le menu. Appuyez sur ENTER pour choisir Calibrate
Compass dans le menu principal. Appuyez sur ENTER pour cal-
ibrer. Faites pivoter l’instrument lentement dans tous les axes possi-
bles librement. Un compte à rebours de 20 secondes sera visible
comme état d’étalonnage. Pendant et après le processus, le résul-
tat de la qualité de l’étalonnage est afché, qui varie de faible, moy-
en ou élevé. Le processus se termine par le message « étalonnage
terminé ». Répétez autant de fois que nécessaire jusqu’à ce que
vous obteniez éventuellement un meilleur résultat, qui sera ÉLEVÉ.
Régler l’altimètre - Utilisez les boutons du curseur pour navigu-
er dans le menu. Appuyez sur ENTER pour choisir SET ALTIMETER
dans le menu principal. Dans le menu contextuel, utilisez les bou-
tons Droite et Gauche du curseur pour choisir entre QNH, Obte-
nir du GPS, Altitude 1 (altimètre principal) ou Altitude 2. Utilisez les
boutons Haut et Bas pour modier les valeurs. Appuyez sur ENTER
pour accepter. Continuez à appuyer sur ENTER pour accepter toutes
les valeurs et quitter ou appuyez sur ESC pour une sortie rapide.
Réinitialisation du hardware - Appuyez à la fois sur le bou-
ton Sound/Power et sur Menu/esc en même temps pen-
dant environ 2 secondes. L’instrument devrait se réinitialis-
er lui-même en afchant une barre de progression rapide.
Zoom sur la page des cartes (GPS M uniquement) - Dans n’importe
quelle page contenant une carte, appuyez longuement sur le bouton
Menu/Esc/Zoom. Dans le coin droit gauche de la carte, une icône de
loupe s’afche, indiquant que le mode zoom est déni. Utilisez les touches
HAUT (zoom avant) et BAS (zoom arrière). Si aucune touche n’est enfon-
cée, le mode zoom sera automatiquement désactivé après 5 secondes.
Changer de page - En mode avion, appuyez briève-
ment sur le bouton ENTER pour changer de page.
Navigateur du route (GPS M uniquement) - Utilisez les boutons du
curseur pour naviguer dans le menu. Appuyez sur ENTER pour choisir
le ROUTE NAVIGATOR dans le menu principal. Utilisez les boutons
Haut et Bas pour choisir le waypoint vers lequel vous souhaitez navigu-
er. Appuyez sur Entrée pour conrmer.
12

FRA
13
Premiers pas
Ajouter des waypoints (GPS M uniquement) - Utilisez FLYMAS-
TER INSTRUMENT MANAGER (PC ou MAC) pour ajouter des way-
points à l’instrument. Vous pouvez également ajouter des waypoints
manuellement. Ajout manuel de waypoints : utilisez les boutons
du curseur pour naviguer dans le menu. Appuyez sur ENTER pour
choisir WAYPOINTS/ROUTE dans le menu principal. Appuyez sur En-
trée dans l’un des waypoints ou dans la liste vide. Utilisez les boutons
Haut et Bas pour sélectionner “Insérer un nouveau WP”. Utilisez les
boutons Haut et Bas pour modier les valeurs. Appuyez sur ENTER
pour accepter. Continuez à appuyer sur ENTER pour accepter toutes
les valeurs et quitter ou appuyez sur ESC pour une sortie rapide.
Espaces aériens à proximité (GPS M uniquement) - Utilisez
les boutons du curseur pour naviguer dans le menu. Appuyez sur
ENTER pour choisir les ESPACES AÉRIENS PROCHES dans le
menu principal. Utilisez les boutons Haut et Bas pour choisir l’es-
pace aérien. Dans la partie inférieure de l’écran, les informations
et le statut de l’espace aérien seront visibles. En appuyant sur le
bouton Entrée dans chaque espace aérien, vous aurez la possibil-
ité de le désactiver de manière permanente ou temporaire à l’aide
des boutons UP et DOWN. Appuyez sur ENTER pour accepter.
Atterrissages à proximité (GPS M uniquement) - Utilisez les boutons
du curseur pour naviguer dans le menu. Appuyez sur ENTER pour choisir les
ATTERRISSAGES A PROXIMITE dans le menu principal. La liste afchera
les waypoints avec la dénition “atterrissage -OUI”, triés par distance.
Position GPS actuelle (GPS M uniquement) : utilisez les boutons
du curseur pour naviguer dans le menu. Appuyez sur ENTER pour
choisir le GPS dans le menu principal. La position actuelle sera afchée.
Réglages de l’heure : utilisez les boutons du curseur
pour naviguer dans le menu. Appuyez sur ENTER pour
choisir l’heure dans le menu principal. Ce réglage permet-
tra de régler le temps d’intégration du vario et le décalage UTC.
Synchronisation avec les vols Flymaster Cloud - Pour envoyer
vos vols et les stocker dans votre compte Flymaster Cloud Flights,
allumez l’instrument, connectez-le via USB au FLYMASTER IN-
STRUMENT MANAGER, en utilisant l’USB C vers USB Type A fourni
à l’ordinateur et utilisez le outil de “synchronisation avec le cloud”.
Journal de vol - Utilisez les boutons du curseur pour navigu-
er dans le menu. Appuyez sur ENTER pour choisir le journal
de vol dans le menu principal. Naviguez dans la liste des jour-
naux de vol à l’aide des boutons haut et bas. Sélectionnez le vol
et appuyez sur Entrée pour obtenir les options du vol, comme
générer un IGC, supprimer le vol ou supprimer tous les vols.
Générer un chier IGC sur une carte Micro SD - Utilisez les bou-
tons du curseur pour naviguer dans le menu. Appuyez sur ENTER pour
choisir le journal de vol dans le menu principal. Naviguez dans la liste
des journaux de vol à l’aide des boutons haut et bas. Sélectionnez le
vol et appuyez sur Entrée pour obtenir les options pour le vol, appuyez
sur ENTRÉE sur Générer IGC. Le chier IGC sera stocké sur la carte
SD accessible à l’aide de l’Explorateur Windows de l’ordinateur ou du
Finder de Mac OS.

DE
Hauptspezikationen
Display Type Zweifarbig: 640x480px
Batteriekapazität GPS M - 3000 mAh VARIO M - 1800 mAh
Betriebsdauer +24 Stunden (Äußere Einflüsse können diesen Wert beeinflus-
sen)
Druckmesser High resolution barometric sensor 10 – 1200 mbar
Audio Getrenntes Audio Dual Lautsprecher System für Vario und Stimme
Memory expansion Erweiterte Speicherfunktion mit Micro SD card
GPS 72-channel BeiDou, Galileo, GLONASS, GPS / QZSS
Microprozessor Microprozessor mit geschütztem RTOS
FLARM® Flarm beacon als eine Option (GPS M only)
Native USB Type C Verbindung zum PC (Windows and Mac OS)
Batterie aufladen Über die Steckdose oder Standard USB
Firmware updates über USB (Upgrades sind kostenlos)
Größe 152x90x16 mm
Gewicht Aprox 200 g.
14

DE
SCHRITT 1 - Wir empfehlen das sorgfältige Lesen dieser In-
formationen:
- Garantiebestimmungen
- Bedienungsanleitung ihres Gerätes
Folgen Sie hierfür dem folgenden Link
https://dnl.ymaster.net/Flymaster_Standard_Limited_Warranty_EN.pdf
https://www.ymaster.net/downloads
SCHRITT 2 - Kreieren Sie einen Account in der Flymaster
Cloud, wenn Sie noch keinen haben.
Nachdem Sie Ihren Account eingerichtet haben, gehen Sie auf:
https://livetrack360.com/login
15

DE
16
SCHRITT 3 - Registrieren Sie das Instrument in Ihrem Konto.
https://livetrack360.com/devices/register
SCHRITT4- Installieren Sie „Flymaster Instru-
ment Manager“, um Ihr Vario M oder GPS M zu verwalten.
F.I.M. ermöglicht es Ihnen, neue Lufträume an das Instrument zu senden,
Wegpunkte zu senden, Seitenlayouts zu erstellen, Firmware zu aktualis-
ieren, mit Flymaster Cloud Flights zu synchronisieren usw.
https://www.ymaster.net/downloads
STEP 5 - OPTIONAL FLARM AWARE SERVICE ACTIVATION

DE
1 -Flarm-Beacon Antenne (OPTION
nur bei GPS M)
2 - Monochromes Display
3 - Vario-Lautsprecher
4 - Ton (kurz drücken) / Power (lang
drücken)
5 - Enter-Taste
6 - Enter-/Markierungstaste AUF, AB,
LINKS, RECHTS
7 - Menü/Esc (kurzes Drücken)/
Zoom-Modus (langes Drücken)
8 - Micro-SD-Steckplatz (nur GPS M)
9 - USB-Typ-C-Anschluss
17
1
2
8 9
4
3
7
5
6

DE
Kurzanleitung
Einschalten - Drücken Sie kurz die Einschalttaste und bestätigen Sie mit Enter.
Ausschalten - Langes Drücken der Netztaste. Wählen Sie mit der Enter-/Marki-
erungstaste im Pop-up-Menü Ja und drücken Sie Enter.
Zugang zum Hauptmenü - Drücken Sie auf einer beliebigen Seite kurz die Taste
Menü/esc, um das Hauptmenü aufzurufen.
Navigieren im Hauptmenü - Verwenden Sie die Enter-/Markierungstaste, um
im Menü zu navigieren. Drücken Sie ENTER, um die gewünschte Option auszu-
wählen. Um eine Option zu verlassen, drücken Sie kurz Esc.
Tonlautstärke einstellen - Drücken Sie kurz die Taste Ton, stellen Sie mit der
Enter-/Markierungstaste links und rechts die Lautstärke ein. Drücken Sie zur
Bestätigung Enter oder warten Sie 4 Sekunden.
GPS-Status prüfen (nur GPS M) - Verwenden Sie die Enter-/Markierungstaste,
um im Menü zu navigieren. Drücken Sie ENTER, um das GPS aus dem Haupt-
menü auszuwählen. Drücken Sie kurz Esc, um das Menü zu verlassen.
Kompass kalibrieren - Verwenden Sie die Enter-/Markierungstaste, um im Menü
zu navigieren. Drücken Sie ENTER, um im Hauptmenü Kompass kalibrieren
auszuwählen. Drücken Sie ENTER, um die Kalibrierung durchzuführen. Drehen Sie
das Instrument langsam in allen möglichen Achsen frei. Ein 20-Sekunden-Count-
down zeigt den Status der Kalibrierung an. Während und nach dem Vorgang wird
das Ergebnis der Kalibrierungsqualität angezeigt, die zwischen niedrig, mittel und
hoch variiert. Der Vorgang endet mit der Meldung “Kalibrierung beendet”. Wie-
derholen Sie den Vorgang so oft wie nötig, bis Sie möglicherweise ein besseres
Ergebnis erhalten, das dann HIGH ist.
Höhenmesser einstellen - Verwenden Sie die Enter-/Markierungstaste, um im
Menü zu navigieren. Drücken Sie ENTER, um SET Höhenmesser aus dem Haupt-
menü auszuwählen. Im Pop-up-Menü wählen Sie mit den Tasten Rechts und
Links der Enter-/Markierungstaste QNH, Höhe über GPS, Höhe 1 (Haupthöhen-
messer) oder Höhe 2. Verwenden Sie die Tasten Auf und Ab, um die Werte zu
ändern. Drücken Sie ENTER zum Bestätigen. Halten Sie ENTER gedrückt, um alle
Werte zu akzeptieren und das Menü zu verlassen, oder drücken Sie ESC, um es
schnell zu verlassen.
Hardware-Reset - Drücken Sie die Tasten Ton/Power und Menu/esc gleichzeitig
für etwa 2 Sekunden. Das Gerät sollte sich selbst zurücksetzen und einen schnel-
len Fortschrittsbalken anzeigen.
Zoomen in der Kartenseite (nur GPS M) - Drücken Sie auf einer beliebigen
Kartenseite lange die Taste Menu/Esc/Zoom. In der rechten linken Ecke der Karte
wird ein Lupensymbol angezeigt, das angibt, dass der Zoom-Modus eingestellt
ist. Verwenden Sie die Tasten AUF (Vergrößern) und AB (Verkleinern). Wenn keine
Taste gedrückt wird, wird der Zoom-Modus nach 5 Sekunden automatisch deak-
tiviert.
Seite wechseln - Drücken Sie im Flugmodus kurz die ENTER-Taste, um die Seite
zu wechseln.
Aufgaben Navigator (nur GPS M) - Verwenden Sie die Enter-/Markierungstaste,
um im Menü zu navigieren. Drücken Sie ENTER, um den AUFGABEN NAVIGATOR
aus dem Hauptmenü auszuwählen. Wählen Sie mit den Tasten Auf und Ab den
Wegpunkt, zu dem Sie navigieren möchten. Drücken Sie zur Bestätigung Enter.
18

DE
19
Kurzanleitung
Wegpunkte hinzufügen (nur GPS M) - Verwenden Sie FLYMASTER INSTRU-
MENT MANAGER (PC oder MAC), um dem Instrument Wegpunkte hinzuzufü-
gen. Sie können Wegpunkte auch manuell hinzufügen. Manuelles Hinzufügen
von Wegpunkten: Verwenden Sie die Enter-/Markierungstaste, um im Menü zu
navigieren. Drücken Sie ENTER, um WEGPUNKT/AUFGABE aus dem Hauptmenü
auszuwählen. Drücken Sie Enter bei einem der Wegpunkte oder in der leeren Liste.
Verwenden Sie die Tasten Auf und Ab, um “Neuen WP einfügen” auszuwählen.
Verwenden Sie die Tasten Auf und Ab, um die Werte zu ändern. Drücken Sie
ENTER zum Bestätigen. Halten Sie die Taste ENTER gedrückt, um alle Werte zu
übernehmen und das Programm zu verlassen, oder drücken Sie ESC, um es sch-
nell zu verlassen.
Lufträume in der Nähe (nur GPS M) - Verwenden Sie die Enter-/Markierung-
staste, um im Menü zu navigieren. Drücken Sie ENTER, um NAHGELEGENE
LUFTRÄUME aus dem Hauptmenü auszuwählen. Wählen Sie mit den Tasten Up
und Down den gewünschten Luftraum. Im unteren Teil des Displays werden die
Luftrauminformationen und der Status angezeigt. Durch Drücken der Enter-Taste
in jedem Luftraum haben Sie die Möglichkeit, ihn mit den Tasten AUF und AB dau-
erhaft oder vorübergehend zu deaktivieren. Drücken Sie ENTER zum Bestätigen.
Landeplätze in der Nähe (nur GPS M) - Verwenden Sie die Enter-/Markierung-
staste, um im Menü zu navigieren. Drücken Sie ENTER, um NAHGELEGENE LAN-
DEPLÄTZE aus dem Hauptmenü auszuwählen. Die Liste zeigt die Wegpunkte mit
der Denition “Landeplatz - JA”, sortiert nach Entfernung.
Aktuelle GPS-Position (nur GPS M): Verwenden Sie die Enter-/Markierungstaste,
um im Menü zu navigieren. Drücken Sie ENTER, um das GPS aus dem Haupt-
menü auszuwählen. Die aktuelle Position wird angezeigt.
Zeiteinstellungen: Verwenden Sie die Enter-/Markierungstaste, um im Menü zu
navigieren. Drücken Sie ENTER, um im Hauptmenü die Option Zeit zu wählen. Mit
diesen Einstellungen können Sie die Vario-Integrationszeit und den UTC-Offset
einstellen.
Sync to Flymaster Cloud Flights - Um Ihre Flüge zu senden und in Ihrem Flymas-
ter Cloud Flights Konto zu speichern, schalten Sie das Instrument ein, verbinden
Sie es über USB mit dem FLYMASTER INSTRUMENT MANAGER, indem Sie das
mitgelieferte USB C auf USB Typ A an den Computer anschließen und das Tool
“Sync to Cloud” verwenden.
Flight Log - Verwenden Sie die Enter-/Markierungstaste, um im Menü zu navi-
gieren. Drücken Sie ENTER, um das Flugbuch aus dem Hauptmenü auszuwählen.
Navigieren Sie in der Flugbuchliste mit den Auf- und Ab-Tasten. Wählen Sie ei-
nen Flug aus und drücken Sie die Eingabetaste, um die Optionen für den Flug
aufzurufen, z. B. IGC generieren, den Flug löschen oder alle Flüge löschen.
IGC-Datei auf Micro SD-Karte erzeugen - Navigieren Sie mit der Enter-/Marki-
erungstaste im Menü. Drücken Sie ENTER, um das Flugbuch aus dem Hauptmenü
auszuwählen. Navigieren Sie in der Flugbuchliste mit den Auf- und Ab-Tasten.
Wählen Sie den Flug aus und drücken Sie ENTER, um die Optionen für den Flug
aufzurufen, drücken Sie ENTER bei Generate IGC. Die IGC-Datei wird auf der SD-
Karte gespeichert, auf die Sie mit dem Windows Explorer oder dem Mac OS
Finder zugreifen können

ITA
20
ITA
Speciche principali
Tipo Display Scala di grigio: 320x240px
Capacità Batteria (Ioni di Litio) GPS M - 3000 mAh VARIO M - 1800 mAh
Autonomia Normalmente +24 ore (le condizioni ambientali possono
alterare questo valore)
Sensore di Pressione Sensore barometrico ad alta risoluzione
10 – 1200 mbar
Audio Altoparlante Piezo integrato per Vario e allarmi
Espansione di memoria Scheda Micro SD
GPS 72-canali BeiDou, Galileo, GLONASS, GPS / QZSS
Microprocessore Microprocessore Flymaster con RTOS proprietario
FLARM® Segnalatore FLARM incluso (solo GPS M)
USB Tipo C Connessione al PC (Windows e Mac OS)
Carica batteria Con adattatore da muro o porta USB standard
Aggiornamenti Firmware tramite USB (aggiornamenti gratuiti)
Dimensioni 152x90x16 mm
Peso Circa 200 g.
20
This manual suits for next models
2
Table of contents
Languages:
Other Flymaster GPS manuals

Flymaster
Flymaster F1 User manual

Flymaster
Flymaster LIVE SD User manual

Flymaster
Flymaster SD+ User manual

Flymaster
Flymaster GPSm User manual
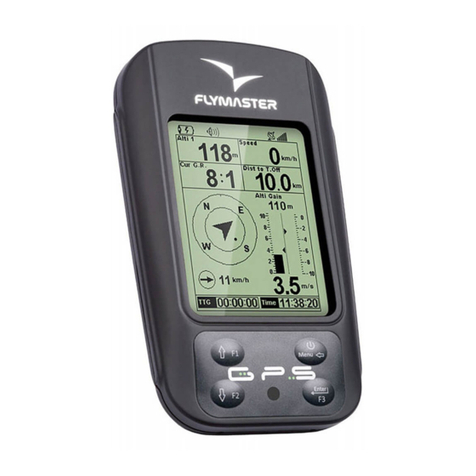
Flymaster
Flymaster GPS User manual
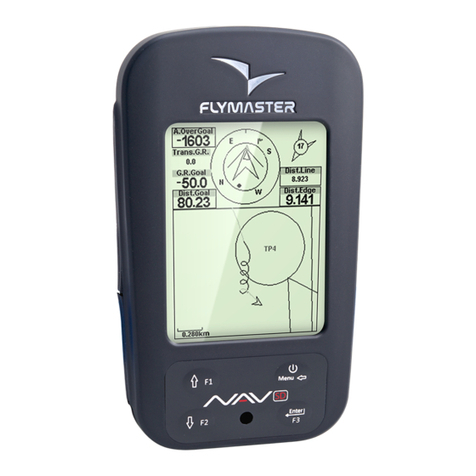
Flymaster
Flymaster Nav SD User manual

Flymaster
Flymaster Vario User manual

Flymaster
Flymaster LIVE SD User manual

Flymaster
Flymaster GPS SD User manual
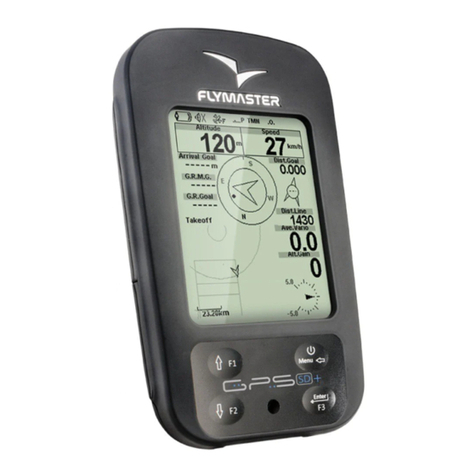
Flymaster
Flymaster LIVE SD User manual

