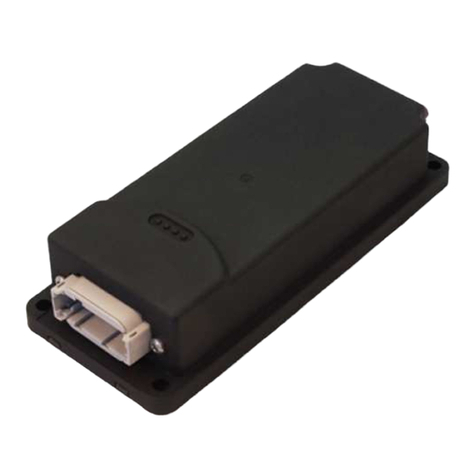
CalAmp LMU-1300 Setup guide

LMU-1300
CalAmp LMU-1300 Training Guide
CalAmp reserves the rights to these documents and any information contained therein. Reproduction use
or disclosure to third parties without express permission is strictly prohibited. ©2020 CalAmp

COMPANY CONFIDENTIAL: CalAmp reserves all rights to these documents and any information contained therein. Page
Reproduction use or disclosure to third parties without express permission is strictly prohibited. ©2020 CalAmp 2of 35
LMU-1300 Training Guide Revision & Date
0.8–09/22/2020
Table of Contents
1. Scope..................................................................................................................................................... 5
Platform Introduction.................................................................................................................... 5
Highlights and Features................................................................................................................. 5
Embedded Software Architecture................................................................................................. 5
2. LMU-1300 Hardware Specifications ...................................................................................................... 6
3. LMU-1300™ Connectors........................................................................................................................ 8
3.1 Primary Connector ........................................................................................................................ 8
4. Getting Started ...................................................................................................................................... 9
4.1 The Basics...................................................................................................................................... 9
SIM Card................................................................................................................................ 9
USB Cable .............................................................................................................................. 9
Accessing Serial Port ...........................................................................................................10
4.5 Log File ........................................................................................................................................11
4.6 Backup Logs.....................................................................................................................................11
4.7 File Components.............................................................................................................................. 11
4.8 Software & Script Updates ..............................................................................................................12
5. PEG2 .................................................................................................................................................... 12
5.2 PEG2 File.......................................................................................................................................... 12
Header................................................................................................................................. 13
Configuration Parameters...................................................................................................13
Script Section ......................................................................................................................14
End of File (EOF) and CRC.................................................................................................... 14
5.3 PEG2 TAG Definitions ......................................................................................................................15
5.4 Multiple Modifiers...........................................................................................................................16
5.5 PEG1 -> PEG2 Conversion................................................................................................................ 17
5.6 PEG2 Native Editor ..........................................................................................................................18
Load PEG2 file: ....................................................................................................................18
PEG2 Readable Text ............................................................................................................19
Single Line Editor................................................................................................................. 19
6. LMU32 vs EdgeCore Platform Differences ..........................................................................................20
3-Axis Accelerometer + 3-Axis Gyroscope ..........................................................................20

COMPANY CONFIDENTIAL: CalAmp reserves all rights to these documents and any information contained therein. Page
Reproduction use or disclosure to third parties without express permission is strictly prohibited. ©2020 CalAmp 3of 35
LMU-1300 Training Guide Revision & Date
0.8–09/22/2020
6.3 Vehicle Bus PID Polling Rate ............................................................................................................ 21
6.4 PEG2 “Lines”....................................................................................................................................21
6.5 Event Index Field .............................................................................................................................22
6.6 Remote Debug PEG Action ..............................................................................................................22
6.7 Modem/GPS Reset ..........................................................................................................................22
6.8 SIM Form Factor.............................................................................................................................. 23
6.9 Boot Reason ....................................................................................................................................23
6.10 Peg Resources ................................................................................................................................. 23
6.11 GPS ..................................................................................................................................................23
6.12 Motion Logs (1hz vs 5hz GPS Sample Rate)..................................................................................... 24
6.13 Time Sync Precedence..................................................................................................................... 24
6.14 Version String in ID Reports............................................................................................................. 24
ID Reports: ..........................................................................................................................24
6.15 Firmware Revision Convention........................................................................................................ 25
6.16 Status LEDs ......................................................................................................................................25
Status LED Behavior ............................................................................................................25
6.17 Version Reports (App Message 111) ...............................................................................................26
7. Preparing for Installation..................................................................................................................... 26
7.1 Plan the Installation...............................................................................................................................26
7.2 Size and Placement of LMU unit...................................................................................................... 26
Protection from Hear ..........................................................................................................27
Visibility of Diagnostic LEDs ................................................................................................ 27
Cable Length........................................................................................................................27
Moisture and Weather Protection...................................................................................... 27
Preventing Accidental of Unauthorized Modification ........................................................27
7.3 Installing the LMU in a Vehicle ........................................................................................................ 27
Place the LMU in the Vehicle ..............................................................................................28
Connect Power, Ignition, and Ground ................................................................................ 28
Typical Connection Sequence ............................................................................................. 28
8. Installation Verification ....................................................................................................................... 28
8.1 Comm Verification....................................................................................................................... 29
7.2 GPS Verification................................................................................................................................. 30
COMPANY CONFIDENTIAL: CalAmp reserves all rights to these documents and any information contained therein. Page
Reproduction use or disclosure to third parties without express permission is strictly prohibited. ©2020 CalAmp 4of 35
LMU-1300 Training Guide Revision & Date
0.8–09/22/2020
7.3 Inbound Verification..........................................................................................................................30
7.4 Verification via SMS...........................................................................................................................31
9. Certification.........................................................................................................................................34
10. Version History ................................................................................................................................35

COMPANY CONFIDENTIAL: CalAmp reserves all rights to these documents and any information contained therein. Page
Reproduction use or disclosure to third parties without express permission is strictly prohibited. ©2020 CalAmp 5of 35
LMU-1300 Training Guide Revision & Date
0.8–09/22/2020
1.Scope
This document provides an overview of CalAmp’s Telematics EdgeCore platform, referred as EdgeCore
hereafter, the associated products, its highlights and major features. It also serves as a training manual
on ‘how-to’ get started with an EdgeCore device (e.g. LMU-1300). Lastly, this document serves to
describe the major differences between EdgeCore and the LMU32 predecessor platforms.
Platform Introduction
CalAmp’s next-generation EdgeCore platform features a new embedded architecture and revamped
hardware featuring significant advanced capability, reliability, and security. EdgeCore is agnostic to
operating system (OS) and Hardware underneath. This section highlights the major features and
benefits of the new platform.
Highlights and Features
•A new embedded architecture & framework designed to be adapted on new technologies,
hardware chipsets, and operating systems
•Support of Next-Generation PEG2 scripting environment
•Power Management down to sub-milliamp levels during sleep
•BLE Asset Tag scanner and aggregator
•3 axis - Accelerometer (MEMS) and 3 axis Gyroscope
•Extensive RAM/Flash memory space to avoid code space constraints.
•Delta file upgrade capability
Embedded Software Architecture
The new software architecture deployed on the EdgeCore platform moves the CalAmp LMU
application functionality into a multi-threaded/multi-tasking environment. While the initial
deployment for this architecture is in a Linux environment, the architecture is specifically designed
to be portable across many other multi-tasking environments.
The fundamental goal of this architecture is to not only achieve a powerful and extensible software
platform, but also a platform that easily supports for scalability across other hardware designs in
order to meet different market segments. This is achieved by re-using common code built on a
common framework that can be ported onto different operating systems and hardware chipsets by
leveraging the use of abstraction layers.
The design and architecture of this software platform achieve the intended benefits by following
these principles:
1. Modularity and compactness of system. One module envelops one concept and/or
task.
2. Commonality across modules to allow more efficient methods to understand code
across different platforms and developers.
3. Adaptability to allow for easier changes within the product or platform, with the goal
that one module is applicable to other modules.

COMPANY CONFIDENTIAL: CalAmp reserves all rights to these documents and any information contained therein. Page
Reproduction use or disclosure to third parties without express permission is strictly prohibited. ©2020 CalAmp 6of 35
LMU-1300 Training Guide Revision & Date
0.8–09/22/2020
4. Portability that allows for streamlined ports of application code base on different
operating systems and hardware chipsets using both OS and Hardware abstraction
layers.
2.LMU-1300 Hardware Specifications
Cellular/Network
Global Variant:
LTE Cat M1: 2100 (B1)/1900 (B2)/1800 (B3)AWS 1700 (B4)/850 (B5/B26)/900 (B8)/700
(B12/B13/B28)/800 (B18/B19/B20) MHz
GSM/GPRS: 850/900/1800/1900 MHz
Data Support
SMS, UDP Packet Data
Satellite Location (GNSS)
Constellation Support:GPS/GLONASS/BeiDou/Galileo/QZSS
Tracking Sensitivity: -163 dBm
Acquisition Sensitivity: -156 dBm (hot start) -148 dBm (cold start)
Location Accuracy: ~2.0m CEP Open Sky (GPS SBAS 24 hours static)
Location Update Rate: Up to 5 Hz
Comprehensive I/O
Digital Inputs: 1 (high/low selectable 0-32 VDC)
Linux
(OpenWRT)
Linux
(Barracuda)
FreeRtos
(Bluefin)
Th readX
(Parana)
HAL / OSAL (POSIX)
Barracuda Framework
MBus
GPS MDM Motion GPS CM VBU Etc.
PEG Cal Am p
Services
Downloader
(OTA)
LMDirect
Third Party Apps

COMPANY CONFIDENTIAL: CalAmp reserves all rights to these documents and any information contained therein. Page
Reproduction use or disclosure to third parties without express permission is strictly prohibited. ©2020 CalAmp 7of 35
LMU-1300 Training Guide Revision & Date
0.8–09/22/2020
Digital Outputs:1 (open collector relay 150mA)
Serial Interface: 1 USB Port
Status LEDs: 2 (Cellular, GPS)
Sensors:Gyroscope: Triple-axis, tilt, yaw, roll detection
Accelerometer: Triple-axis, impact, motion sense
Certifications:
Industry Certifications:FCC, IC, PTCRB, CE/RED/CE SAFETY Applicable Carriers
Device Management
PULS™: Monitor, manage, upgrade firmware, configure and troubleshoot devices
remotely
Embedded Intelligence Engine
PEGII™: Behavioral scripting (PEG2 on RTOS)
Geo-Fences: 32 built-in
Buffered Messages:20,000
Electrical
Operating Voltage:12-24 VDC Vehicle Systems
9-30 VDC (start-up, operating)
7-32 VDC (momentary)
Power Consumption: Typical <500uA @ 12V (low power sleep)
Typical <1mA @ 12 V (sleep)
Typical <15mA @ 12 V (radio-active sleep)
Typical <60mA @ 12 V (GPS tracking and cell idle)
Battery
Battery Capacity:180 mAH
Battery Technology: Lithium-Ion
Charging Temperature:0° to +45° C
Certifications: IEEE 1725-2011, UL 1624, UN 38.3

COMPANY CONFIDENTIAL: CalAmp reserves all rights to these documents and any information contained therein. Page
Reproduction use or disclosure to third parties without express permission is strictly prohibited. ©2020 CalAmp 8of 35
LMU-1300 Training Guide Revision & Date
0.8–09/22/2020
Environmental:
Temperature: -30° to +60° C (connected to primary power)
-20° to +60° C (operating on internal battery)
-10° to +25° C ≤ 6 months (long term storage with battery)
Humidity: 90% RH @ 50° C non-condensing
Shock and Vibration:U.S. Military Standards 202G, 810F SAEJ1455
ESD: IEC 61000-4-2 (4KV Test)
Ingress Protection: IP65 (CalAmp Assembled)
Physical/Design
Dimensions:3.50 x 1.97 x 0.75” (89 x 50.1 x 19.2 mm)
Weight: 3.53 oz. (100g)
Connectors/SIM Access
GPS Antenna Internal
Cellular Antenna Internal
SIM Access Internal (4FF SIM)
BLE Antenna Internal
3.LMU-1300™ Connectors
3.1 Primary Connector
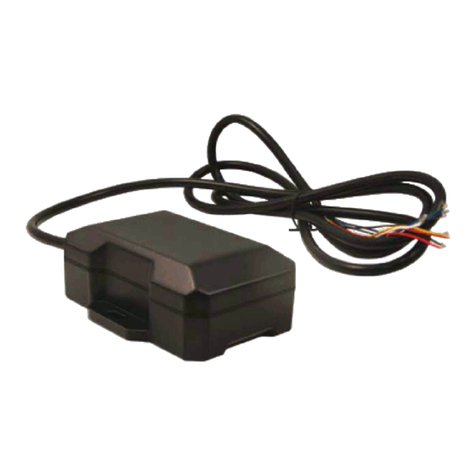
The LMU-1300 equips a 4-wire captive harness to receive power, ground and supply input and output
signals.
Wire Color Description Input or Output AWG
1 Red VCC Power 22
2 Black Ground Ground 22
3 White (Selectable Bias)
Input 22
4 Green Output_0
Output 22

COMPANY CONFIDENTIAL: CalAmp reserves all rights to these documents and any information contained therein. Page
Reproduction use or disclosure to third parties without express permission is strictly prohibited. ©2020 CalAmp 9of 35
LMU-1300 Training Guide Revision & Date
0.8–09/22/2020
4.Getting Started
With any new platform, there are some changes in the form, fit, and function when compared to the
predecessor product line. This section highlights pertinent changes compared to the LMU32 platform to
help users get started with an EdgeCore device:
4.1 The Basics
SIM Card
EdgeCore products (including LMU-1300, LMU-3040, and LMU-3240) use a 4FF (nano) SIM card,
which is smaller than the 2FF (mini) SIM card commonly used in prior LMUs.
USB Cable
LMU-1300 does not require a serial adapter cable, but rather a stand-alone USB cable. The
required cable type is a MICRO USB B cable (male). Example: StarTech P/N: UUSBHAUB3

COMPANY CONFIDENTIAL: CalAmp reserves all rights to these documents and any information contained therein. Page
Reproduction use or disclosure to third parties without express permission is strictly prohibited. ©2020 CalAmp 10 of 35
LMU-1300 Training Guide Revision & Date
0.8–09/22/2020
Accessing Serial Port
After installing the quectel drivers, you would see 2 ports in device manager.
To access the serial port customer should chose NMEA port, Serial port settings
115200,8,N,1,none

COMPANY CONFIDENTIAL: CalAmp reserves all rights to these documents and any information contained therein. Page
Reproduction use or disclosure to third parties without express permission is strictly prohibited. ©2020 CalAmp 11 of 35
LMU-1300 Training Guide Revision & Date
0.8–09/22/2020
4.5 Log File
Engineering and LMU logs can be found in the Linux file system. You can find the most recent log
file in a specific /var/log/ directory, in a file named messages
If you would like to view new information that is written to this log file, Linux offers a way to do
this through the command line.
•Enter: tail –F /var/log/messages
This command will open the messages file and display the latest written lines of the file. It will
continue to display the most updated lines you quit.
Helpful Tip: Linux allows the option to create multiple instances of SSH windows so you can have
one SSH session viewing a log while the other is being used to send AT commands. Other Linux
options such as parsing specific debug using a grep command can also be utilized. For example,
the command: tail –F /var/log/messages | grep VBU will display lines in the log that have VBU in
the string.
Important Note: The log file stored in ‘messages’ gets overwritten on every device wake-up.
4.6 Backup Logs
There is a method to store a current log file into a backup directory. This can be programmed in
the PEG Script by using PEG Action 144.
•PEG Action 144 modifier 1 will save the current log into the /data/backup/ folder
•PEG Action 144 modifier 2 will save the current log and also send it to the set remote debug
server defined in param 2328.
Important Note: Only one backup file can be stored at a time
4.7 File Components
Devices have several components on the EdgeCore platform that are provisioned at the factory.
These components are described below:
File
Description
~Size
LMU Delta Image
This image includes Modem and GPS software in
addition to Application software.
12-18Mb
PEG2 Script
This file controls and defines all the business logic and
configuration settings on the device. PEG2 script file
sizes will vary from application to application
50-150Kb (avg)
All file sizes are subject to change.
Important Note: Data plans may be impacted due to the larger size of FW delta files.

COMPANY CONFIDENTIAL: CalAmp reserves all rights to these documents and any information contained therein. Page
Reproduction use or disclosure to third parties without express permission is strictly prohibited. ©2020 CalAmp 12 of 35
LMU-1300 Training Guide Revision & Date
0.8–09/22/2020
4.8 Software & Script Updates
All of these files can be updated Over-The-Air if subscribed to Calamp’s Device Management
Service (PULS).
These files can also be updated with physical access to the device as well. Below are the steps
and options below:
1. Transfer Firmware/Script (e.g. WINScp, ADB Push) to /data/configs/files directory.
First, change directory to /data/configs/files directory.
Enter command: cd /data/configs/files/
a) PEG2: dnld_cli prog_file 0 22 <
PEG2 File>.pg2
b) LMU: dnld_cli prog_file 0 0 >
LMU Binary>.bin
c) VBU: dnld_cli prog_file 25 0 <
VBU Binary File>.bin
d) BLE: dnld_cli prog_file 26 0
<BLE Binary File>.bin
2. Option 2: Using AT Console: Change the file name to update to “ota_file.bin”
a) PEG2: at$app fprog 0 22
b) LMU: at$app fprog 0 0
c) VBU: at$app fprog 25 0
d) BLE: at$app fprog 26 0
5.PEG2
PEG2 is the next-generation scripting environment with enhancements that allow you to build more
efficient scripts with easier maintenance and unrestricted feature growth. These benefits are made
possible by features such as:
•Multiple Triggers, Conditions and Actions per line
•Expanded modifier fields
•Complex boolean Condition logic
•Labels for Jumps and Calls (i.e. PEG line indexing will not change no matter where a line is
added)
•In-line comments
5.2 PEG2 File
In next generation devices supporting PEG2, the file containing the PEG script and the configurations
parameters has an updated format. The new file has the following characteristics:
•Format
oHeader - Time/Date, Signature, ID

COMPANY CONFIDENTIAL: CalAmp reserves all rights to these documents and any information contained therein. Page
Reproduction use or disclosure to third parties without express permission is strictly prohibited. ©2020 CalAmp 13 of 35
LMU-1300 Training Guide Revision & Date
0.8–09/22/2020
oConfiguration Parameters - same format as existing Config Param file (File Type 1)
oPEG2 Script - ASCII Text Lines delimited with <CR><LF>
oEnd-Of-File marker
oCRC - Usual 2-byte CRC is appended to the file by PULS or file generation tool
•Configuration Parameter section (if present) is merged with configuration parameters on target
device
•Script section (if present) overwrites script on target device.
•New File Type: 22
•File Extension: 'PG2'
The sections 5.1.1 through 5.1.4 below describe the content of each file section. Tags are used
to identify the start of each section.
Header
TAG Definition
Example
!TD: UTC Date and Time the file was generated or
uploaded to the maintenance server (PULS)
!SIG:
File Signature is a MD-5 Hash generated
from the file contents (anything after the
signature). This is generated by LMU Manager and
PULS during upload.
!ID:
User defined identification field. Up to 60
characters allowed. This field is displayed on
PULS.
!TD:10:47:38 12-27-2018
!SIG:2a944f7d34857d99e4b39ce50069dcf0
!ID:v10.41_12_27_18_FAEPilot
Configuration Parameters
TAG Definition
Example
!CP: Following this tag, this is where all the Config
Parameters start until the PEG2 script section
starts or the EOF is detected.
Important Notes:
•Config Parameters use the same format
as in a PEG1 file
•Config Parameters are still a union of the
file contents and what already resides on
the target device
!CP:
256,0,00
256,1,01
256,2,00
256,3,00
257,0,15D4
259,3,00
260,0,00
260,1,00
....

COMPANY CONFIDENTIAL: CalAmp reserves all rights to these documents and any information contained therein. Page
Reproduction use or disclosure to third parties without express permission is strictly prohibited. ©2020 CalAmp 14 of 35
LMU-1300 Training Guide Revision & Date
0.8–09/22/2020
Script Section
TAG Definition
Example
!SCR: Script Section starts here. This section must
immediately follow the Configuration Parameter
(!CP) section.
•PEG Lines are no longer parameterized.
•!SCR will overwrite the entire PEG2 script
on the device (no longer a union of PEG
lines)
•You can delete the PEG2 script on the
target device by including the !SCR tag
without any lines following.
•The generic line number references can
be replaced with custom names or named
sub-routines
!SCR:
L512000;T1,0;A51,512225
L512001;T2,0;A51,512225
L512002;T3,0;C39,7;A51,512185
L512003;T5,2;A51,512185
L512004;T11,0;C17,15;A31,15
L512005;T18,5;C17,15;A31,15
L512006;T48,0;C16,15;^C17,16;A31,16
L512007;T5,2;C8,0;^C16,16;A32,16
L512008;T12,0;A124,28
L512009;T12,0;A125,29
LCustomLabel;T5,2;!C44,0;A51,512195
End of File (EOF) and CRC
TAG Definition
Example
!EOF: End-of-file marker (this tag) must be
included
!CRC:
Following EOF marker, a 2-byte binary CRC
value must be appended to validate integrity of
file during transit. This is needed for OTA and
Serial transfers
Important Note:
If !SIG or !CRC is incorrect, PULS
will re-calculate upon upload. However, this
means while the file has been corrected for OTA,
your original file will not be valid or usable for
serial updates until fixed.
...
L514014;T18,35;A112,0,0
L514015;T15,0;A112,0,0
L514250;T0,0;A0,0
!EOF:
%P

COMPANY CONFIDENTIAL: CalAmp reserves all rights to these documents and any information contained therein. Page
Reproduction use or disclosure to third parties without express permission is strictly prohibited. ©2020 CalAmp 15 of 35
LMU-1300 Training Guide Revision & Date
0.8–09/22/2020
5.3 PEG2 TAG Definitions
Definitions of the PEG2 Tag Characters with examples are listed below:
Tag
Char
Name
Description
Example
L
Label
Defines a unique label to be used as a
“virtual line”. Used as reference for Jump &
Call PEG Actions
L514013
T
Trigger
Define one or more Triggers on the same
line.
T<TrigCode>,<Mod0>,T<TrigCode>,<Mod0>
T18,0;T17;A8,4
C
Conditi
on
Define one or more Conditions on the same
line.
C<CondCode>,<Mod0>,
C<CondCode>,<Mod0>
T13;C16,11;^C16,10;!+!C16,12;A
1,24
A
Action
Defines one or more PEG Actions. Actions
executed in order of appearance.
A<ActionCode>,<Mod0>,A<ActionCode>,<M
od0>
T13;C16,11;^C16,10;!+!C16,12;A
1,24
:
Comm
ent
The comment tag ‘:’ is immediately followed
by free text and is only terminated by the
end-of-line delimiter (<CR>)
T18,0;T17;A8,4;:This is a
comment
+
OR
Boolean operator that combines result with
next Condition results using ‘OR’ operation
^
AND
Boolean operator that combines result with
next Condition results using ‘AND’ operation
!
NOT
Boolean operator that inverts results of
following Condition or previous Boolean
state depending on placement.

COMPANY CONFIDENTIAL: CalAmp reserves all rights to these documents and any information contained therein. Page
Reproduction use or disclosure to third parties without express permission is strictly prohibited. ©2020 CalAmp 16 of 35
LMU-1300 Training Guide Revision & Date
0.8–09/22/2020
5.4 Multiple Modifiers
PEG2 offers the ability to use multiple modifiers for specific Triggers, Conditions or Actions. This
makes it easier to use some existing PEG actions where there was a need to bit mask one
modifier, or use two PEG actions to satisfy one function (like copy accumulator). See below for a
few examples of how multiple modifiers can be utilized in a PEG2 script.
Trigger/Cond/Action
Definition
Modifier 0
Modifier 1
Update End Trigger
(Code 61)
An update has completed.
PEG1 single modifier mapping: Bits
0-3=File Type, bits 4-7 = Device
Type
Device Type
File Type
Zone State
Condition (Code 40)
True when current location is
inside (0) or outside (1) the Zone
identified by Zone# and the Zone is
enabled.
PEG1 single modifier mapping:
Inside (bit7 of is 0), Outside (bit7 is
1), Zone Identifier (bits 0-6).
Current Location
(inside/outside Zone)
Zone#
Copy Accumulator
Action (103)
Copies value in Accum Source into
Accum Destination
PEG1 single modifier mapping:
Upper 4 bits = Source, Lower 4 bits
= Destination
Source Accum
Destination
Accum

COMPANY CONFIDENTIAL: CalAmp reserves all rights to these documents and any information contained therein. Page
Reproduction use or disclosure to third parties without express permission is strictly prohibited. ©2020 CalAmp 17 of 35
LMU-1300 Training Guide Revision & Date
0.8–09/22/2020
Example: “I want to copy Accumulator 10 into Accumulator 22 every second”
PEG1
PEG2 Example
Not possible using PEG Action 103 (Copy Accum).
Limited to 4 bits (accum 0-15)
Possible with this PEG2 line:
T18,5;A103,10,22
Using PEG Action 124 (Select Dest.) & 125 (Copy to
Dest.):
120500007C160000
120500007D0A0000
Possible with one PEG2 line:
T18,5;A103,10,22
5.5 PEG1 -> PEG2 Conversion
The latest version of LMU Manager offers a PEG1-PEG2 conversion export feature so that an
existing PEG1 script can be easily converted into a PEG2 script to avoid the need of re-writing an
existing script.
Note: A PEG1->PEG2 conversation does not optimize how PEG resources would be used if the
script were to be written natively in PEG2. For example, the ability to have a complex set of
conditions on one PEG2 line is not able to be leveraged unless done manually by the script writer.
As a result, no PEG lines are being saved during the conversion.
Converting from PEG1 to PEG2, it is a two-step process.
Step1: Convert PEG1 script file to an LMU 8-Bit PEG1 script file:
oLoad PEG1 Script to Convert
oSelect “Export” -> “Convert (*.csv)” selection
oPress OK on dialog boxes and Save File as CSV
Step2: Convert a PEG1 script file into an PEG2 script file
oLoad PEG1 script to convert (from Step 1)
oSelect “Export” -> “PEG2 format (*.pg2)” selection
oPress OK and Save File

COMPANY CONFIDENTIAL: CalAmp reserves all rights to these documents and any information contained therein. Page
Reproduction use or disclosure to third parties without express permission is strictly prohibited. ©2020 CalAmp 18 of 35
LMU-1300 Training Guide Revision & Date
0.8–09/22/2020
Note: A more detailed step-by-step PEG1->PEG2 conversion user guide can be made available
5.6 PEG2 Native Editor
The latest LMU Manager also offers a way to create or edit PEG2 files natively, without requiring
a PEG1 to PEG2 conversion. High level features are introduced below:
Load PEG2 file:
In LMU Manager, go to FILE -> IMPORT - > PEG2 (.pg2) or start from a blank script with any App ID that
supports PEG2 (e.g. 1001, 1002, 1011, 1012):

COMPANY CONFIDENTIAL: CalAmp reserves all rights to these documents and any information contained therein. Page
Reproduction use or disclosure to third parties without express permission is strictly prohibited. ©2020 CalAmp 19 of 35
LMU-1300 Training Guide Revision & Date
0.8–09/22/2020
PEG2 Readable Text
To switch from PEG2 ASCII to readable text, you can toggle the blue cross bar icon on top left.
Single Line Editor
Double click on any line to open the Single Line Editor screen to add, edit, delete or insert a PEG2

COMPANY CONFIDENTIAL: CalAmp reserves all rights to these documents and any information contained therein. Page
Reproduction use or disclosure to third parties without express permission is strictly prohibited. ©2020 CalAmp 20 of 35
LMU-1300 Training Guide Revision & Date
0.8–09/22/2020
6.LMU32 vs EdgeCore Platform Differences
I/O Mapping
I/O
LMU 8-Bit
LMU-1300
Input-0
Ignition
Ignition
Input-1
Motion Wake
Motion
Input-2
Pwr State Wake
Pwr State
Input-3
Vbatt Low Wake
Vbatt Low
Input-4
Batt Virt Ign
Batt Virt Ign
Input-5
Input-6
Input-5
Input-6
Input-7
Input-8
Input-9
Input-10
Input-11
Input-12
Input-13
Input-14
Pure Virt Ign
Pure Virt Ign
Input-15
Input-16
N/A
Motion Wake
Input-17
Input-18
N/A
Power State Wake
Input-19
Input-20
Input-21
Input-22
Input-23
N/A
Radio Active Wake
Input-24
N/A
BLE Wake
Input-25
N/A
N/A
Input-26
Input-27
N/A
Crank Detect Wake
Input-28
N/A
RTC Wake
3-Axis Accelerometer + 3-Axis Gyroscope
The LMU-1300™ supports an internal 3 Axis Precision Accelerometer as one of its discreet inputs. When
the LMU is moved in any direction, the associated input will be in the High state. If the LMU’s
accelerometer does not detect motion, then the input will be in the Low state. No external connections
are required for this functionality to be operational.
Table of contents
Other CalAmp GPS manuals

CalAmp
CalAmp LMU-3000 Manual

CalAmp
CalAmp TTU-4531 User manual

CalAmp
CalAmp HMU-3640 Manual

CalAmp
CalAmp LMU-5000 Manual

CalAmp
CalAmp LMU-2x30 User manual

CalAmp
CalAmp TTU-2820 User manual

CalAmp
CalAmp LMU-4200 User manual

CalAmp
CalAmp LMU-2000 Manual

CalAmp
CalAmp LMU-3030 User manual

CalAmp
CalAmp LMU-5541 Manual

CalAmp
CalAmp LMU-3 Series Manual

CalAmp
CalAmp TTU-4530 User manual

CalAmp
CalAmp LMU-2 30 Series User manual

CalAmp
CalAmp LMU 2600 Series Manual

CalAmp
CalAmp TTU-7 Series User manual

CalAmp
CalAmp SC1205V User manual

CalAmp
CalAmp CVF-200-23 Datasheet

CalAmp
CalAmp Safe Fleet LMU 2630 LV User manual

CalAmp
CalAmp LMU-3050 User manual

CalAmp
CalAmp LMU 26 User manual