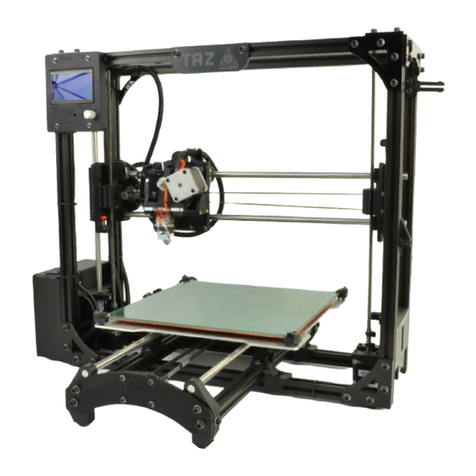
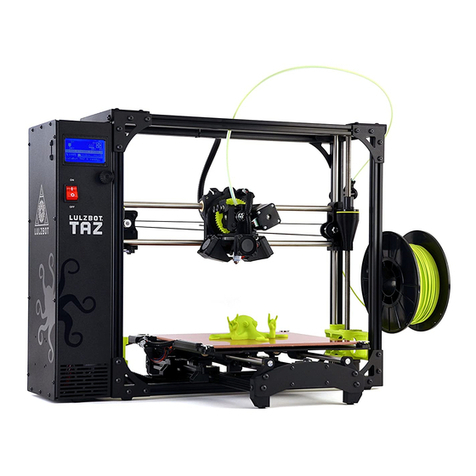
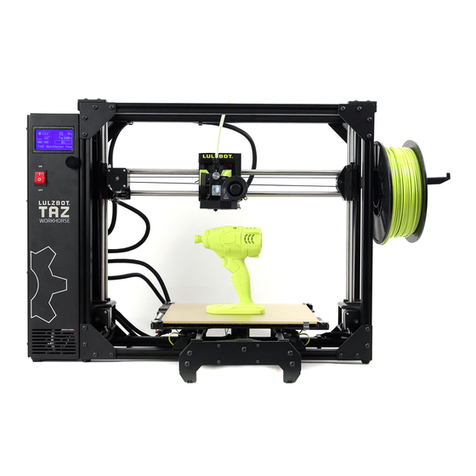
LulzBot TAZ 5 User manual

TAZ 5 User Manual
Aleph Objects, Inc.

LulzBot™TAZ 5 User Manual
by Aleph Objects, Inc.
Copyright © 2015 Aleph Objects, Inc.
Permission is granted to copy, distribute and/or modify this document
under the terms of the Creative Commons Attribution 4.0 International
Public License (CC BY-SA 4.0).
Published by Aleph Objects, Inc., 626 W 66th Street, Loveland, Colorado,
80538 USA.
For more information, call +1-970-377-1111 or go to www.LulzBot.com and
www.AlephObjects.com.
ISBN: 978-0-9893784-7-5 5.0-20150602

Contents
WARNINGS
Safety Information · · · · · · · · ix
ReadMeFirst! ················ x
Hazards and Warnings · · · · · · · · · · · · · · x
1 3D Printer Software · · · · · · · 13
1.1 Software Overview · · · · · · · · · · · · · 14
1.2 Software Types · · · · · · · · · · · · · · 14
1.3 Installing Drivers · · · · · · · · · · · · · · 15
1.4 Cura ·················· 15
1.5 Quick Print Settings · · · · · · · · · · · · · 16
1.6 View Options · · · · · · · · · · · · · · · 20
1.7 Starting Your First Print · · · · · · · · · · · 24
1.8 Removing Your First Print · · · · · · · · · · 26
1.9 Full Settings · · · · · · · · · · · · · · · 27
1.10 Basic Tab Options · · · · · · · · · · · · · 28
1.11 Advanced Tab Options · · · · · · · · · · · · 32
1.12Plugins ················· 35
1.13 Start and End Gcode Settings · · · · · · · · · 37
1.14 Expert Settings · · · · · · · · · · · · · · 37
1.15 Retraction · · · · · · · · · · · · · · · · 38
1.16Skirt ·················· 38
1.17Cool ·················· 39
1.18Support ················· 40
1.19 Black Magic · · · · · · · · · · · · · · · 41
1.20Brim ·················· 41
1.21Raft ·················· 42
1.22 Fix Horrible · · · · · · · · · · · · · · · 43
1.23 Dual Extrusion · · · · · · · · · · · · · · 44
iii

CONTENTS
1.24Printrun················· 48
1.25 Using Printrun · · · · · · · · · · · · · · 51
1.26 CAD and 3D Modeling Software · · · · · · · · 54
1.27 Alternative Printer Host Software · · · · · · · · 56
2 Slic3r · · · · · · · · · · 57
2.1 Introduction · · · · · · · · · · · · · · · 58
2.2 Getting Slic3r · · · · · · · · · · · · · · · 59
2.3 First Print · · · · · · · · · · · · · · · · 60
2.4 Simple Mode · · · · · · · · · · · · · · · 77
2.5 Expert Mode · · · · · · · · · · · · · · · 86
2.6 Configuration Organization · · · · · · · · · · 115
2.7 Repairing Models · · · · · · · · · · · · · · 117
2.8 Advanced Topics · · · · · · · · · · · · · · 118
2.9 Troubleshooting · · · · · · · · · · · · · · 131
2.10 Slic3r Support · · · · · · · · · · · · · · · 136
3 Printing with the Graphic LCD · · · · · 139
3.1 GLCD Controller, Cura or Printrun Host? · · · · · 140
3.2 Multiple Connections · · · · · · · · · · · · 140
3.3 Putting Print Files on the SD Card · · · · · · · 141
3.4 Printing With the Graphic LCD · · · · · · · · · 142
4 Maintaining Your 3D Printer · · · · · · 145
4.1 Overview · · · · · · · · · · · · · · · · 146
4.2 Smooth Rods · · · · · · · · · · · · · · · 146
4.3 Lead Screw Drive Rods · · · · · · · · · · · · 146
4.4 PEI Surface · · · · · · · · · · · · · · · 146
4.5 Hobbed Bolt · · · · · · · · · · · · · · · 147
4.6 Belts ·················· 147
4.7 HotEnd················· 147
4.8 Electronics · · · · · · · · · · · · · · · · 147
5 Advanced Usage · · · · · · · · 149
5.1 Intro ·················· 150
5.2 Changing nozzles · · · · · · · · · · · · · · 150
5.3 ABS/Acetone Glue · · · · · · · · · · · · · 150
5.4 Using 1.75mm filament · · · · · · · · · · · · 151
6 Hardware and Software Source Code · · · · 153
iv

CONTENTS
7 3D Printer Support · · · · · · · 155
7.1 LulzBot ················· 156
7.2 Community · · · · · · · · · · · · · · · · 156
8 Contact Information · · · · · · · 157
8.1 Support ················· 158
8.2 Sales ·················· 158
8.3 Websites················· 158
Index · · · · · · · · · · · 159
Glossary · · · · · · · · · · 165
v

List of Figures
1.1 Quick Print Settings · · · · · · · · · · · · · · 16
1.2 Options after selecting model · · · · · · · · · · · 18
1.3 Rotating your Model · · · · · · · · · · · · · · 19
1.4 Scaling your Model · · · · · · · · · · · · · · 20
1.5 View in Normal Mode · · · · · · · · · · · · · 21
1.6 View in Overhang · · · · · · · · · · · · · · · 21
1.7 View in Ghost · · · · · · · · · · · · · · · · 22
1.8 View in Xray · · · · · · · · · · · · · · · · 22
1.9 View in Layers · · · · · · · · · · · · · · · · 23
1.10 Viewing Cumulative Layers · · · · · · · · · · · 23
1.11 Viewing Specific Layers · · · · · · · · · · · · · 24
1.12 Control Screen · · · · · · · · · · · · · · · · 25
1.13 Differences in Layer Height · · · · · · · · · · · 27
1.14 Differences in Layer Height · · · · · · · · · · · 29
1.15 Support Types · · · · · · · · · · · · · · · · 31
1.16 Cutoff Example · · · · · · · · · · · · · · · 34
1.17 View of Plugins · · · · · · · · · · · · · · · 36
1.18 View Expert Settings · · · · · · · · · · · · · 37
1.19 After Merge · · · · · · · · · · · · · · · · · 47
1.20 Before Merge · · · · · · · · · · · · · · · · 48
1.21 Printrun application for 3D printer control · · · · · · 49
1.22Printrun ·················· 51
1.23 Printrun Functions · · · · · · · · · · · · · · 52
1.24 Movement Controls · · · · · · · · · · · · · · 53
2.1 Configuration Wizard: Welcome Screen · · · · · · · 62
2.2 Configuration Wizard: Firmware Type · · · · · · · · 63
2.3 Configuration Wizard: Bed Size · · · · · · · · · · 64
2.4 Configuration Wizard: Nozzle Diameter · · · · · · · 65
2.5 Configuration Wizard: Filament Diameter · · · · · · 66
2.6 Configuration Wizard: Extrusion Temperature · · · · · 67
2.7 Configuration Wizard: Bed Temperature · · · · · · · 68
2.8 Configuration Wizard: End · · · · · · · · · · · 69
2.9 Shapesmith online CAD tool. · · · · · · · · · · · 73
vi

List of Figures
2.10Plater··················· 74
2.11 Minimug model. · · · · · · · · · · · · · · · 75
2.12 STL file loaded. · · · · · · · · · · · · · · · 75
2.13 Preferences. · · · · · · · · · · · · · · · · · 77
2.14 Simple Mode: Print Settings. · · · · · · · · · · · 78
2.15 An example of insufficient top layers. · · · · · · · · 79
2.16 Creating a vase from a solid model. · · · · · · · · · 80
2.17 An example of an object printed with support material. · · 81
2.18 An example of brim. · · · · · · · · · · · · · · 82
2.19 Simple Mode: Filament Settings. · · · · · · · · · 83
2.20 Simple Mode: Printer Settings. · · · · · · · · · · 84
2.21 Expert mode speed options. · · · · · · · · · · · 87
2.22 Infill pattern settings. · · · · · · · · · · · · · 90
2.23 Infill pattern: Line (344.51mm / 5m:20s) · · · · · · · 90
2.24 Infill pattern: Rectilinear (350.57mm / 5m:23s) · · · · · 90
2.25 Infill pattern: Concentric (351.80mm / 5m:30s) · · · · · 91
2.26 Infill pattern: Honeycomb (362.73mm / 5m:39s) · · · · 91
2.27 Infill pattern: Hilbert Curve (332.82mm / 5m:28s) · · · · 91
2.28 Infill pattern: Archimedean Chords (333.66mm / 5m:27s) · 91
2.29 Infill pattern: Octagram Spiral (318.63mm / 5m:15s) · · · 92
2.30 Infill pattern comparison in a complex object. Left to Right:
honeycomb, line · · · · · · · · · · · · · · · 92
2.31 Infill patterns at varying densities. Left to Right:
20%,40%,60%,80%. Top to Bottom: Honeycomb, Concentric,
Line, Rectilinear, Hilbert Curve, Archimedean Chords,
Octagram Spiral · · · · · · · · · · · · · · · 93
2.32 Infill advanced settings. · · · · · · · · · · · · · 94
2.33 Retraction settings. · · · · · · · · · · · · · · 95
2.34 Skirt settings. · · · · · · · · · · · · · · · · 97
2.35 Cooling strategy. · · · · · · · · · · · · · · · 99
2.36 Cooling advanced settings. · · · · · · · · · · · · 100
2.37 Support structure options. · · · · · · · · · · · · 102
2.38 Minimug model, tilted 45°. · · · · · · · · · · · · 103
2.39 Support infill pattern: Rectilinear · · · · · · · · · 103
2.40 Support infill pattern: Rectilinear Grid · · · · · · · 103
2.41 Support infill pattern: Honeycomb · · · · · · · · · 104
2.42 Example of pattern angle rotated 45°. · · · · · · · · 104
vii
List of Figures
2.43 Multiple extruder options - Printer Settings Tab (General).
Note the two extruders defined in the left-hand pane. · · · 105
2.44 Multiple extruder options - Printer Settings Tab (Extruder). 105
2.45 Plater with multiple filament options. · · · · · · · · 106
2.46 Multiple extruder options - Print Settings Tab. · · · · · 107
2.47 Multiple extruder options - Tool change G-code. · · · · 107
2.48 Extrusion widths options. · · · · · · · · · · · · 109
2.49 Example model highlighting use case for variable layer heights. 110
2.50 Example with normal layer height. · · · · · · · · · 111
2.51 Variable layer height options - Info. · · · · · · · · · 112
2.52 Variable layer height options - Layers. · · · · · · · · 113
2.53 Example with variable layer height. · · · · · · · · · 113
2.54 Example print with variable layer height. · · · · · · · 114
2.55 Example with skipped layers. · · · · · · · · · · · 114
2.56 Saving a profile. · · · · · · · · · · · · · · · 116
2.57 Deleting a profile. · · · · · · · · · · · · · · · 116
2.58 FreeCAD part repair. · · · · · · · · · · · · · 117
2.59 Sequential printing options. · · · · · · · · · · · 118
2.60 The clearance cylinder around an extruder. · · · · · · 119
2.61 Post-processing script option. · · · · · · · · · · · 125
2.62 Example post-processing script to display Slic3r environment
variables.·················· 125
2.63 Example post-processing script to print each line to output. 126
2.64 Extrusion Width. · · · · · · · · · · · · · · · 127
2.65 Bridging filament shape. · · · · · · · · · · · · 128
2.66 Extrusion shape. · · · · · · · · · · · · · · · 129
2.67 No path overlap · · · · · · · · · · · · · · · 129
2.68 Holes made through polygonal segments. · · · · · · · 132
2.69 Z wobble changing layer stacking. · · · · · · · · · 133
2.70 Variable filament diameter changing layer stacking. · · · 133
3.1 GLCD Info Screen · · · · · · · · · · · · · · 141
3.2 MainMenu ················· 143
viii

WARNINGS
Safety Information

WARNING!
Read Me First!
READ THIS MANUAL COMPLETELY BEFORE UNPACKING AND
POWERING UP YOUR PRINTER.
Hazards and Warnings
The TAZ 3D printer has motorized and heated parts. Always be aware of
possible hazards when the printer is operational.
Electric Shock Hazard
Never open the electronics case when the printer is powered on. Before
removing the electronics case cover always power down the printer and
completely turn off and unplug the power supply. Allow the power supply
to discharge for at least one minute.
Burn Hazard
Never touch the extruder nozzle or heater block without first turning off
the hot end and allowing it to completely cool down. The hot end can take
up to 20 minutes to completely cool. Never touch recently extruded plastic.
The plastic can stick to your skin and cause burns. The heated bed can
reach high temperatures that are capable of causing burns.
Fire Hazard
Never place flammable materials or liquids on or near the printer when
it is powered on or operational. Liquid acetone and vapors are extremely
flammable.
Pinch Hazard
When the printer is operational take care to never put your fingers in
any moving parts including belts, pulleys, or gears. Tie back long hair or
clothing that can get caught in the moving parts of the printer.
x

HAZARDS AND WARNINGS
Static Charge
Make sure to ground yourself before touching the printer, especially its
electronics. Electrostatic discharge can damage electronic components.
Ground yourself by touching a grounded source like your computer case.
Age Warning
For users under the age of 18, adult supervision is recommended. Beware
of choking hazards around small children.
Federal Communications Commission Statement
This device complies with part 15 class A of the FCC Rules. Operation is
subject to the following two conditions:
1. This device may not cause harmful interference and
2. This device must accept any interference received, including interfer-
ence that may cause undesired operation.
FCC Warning: Changes or modifications not approved by the party
responsible for compliance could void the users authority to operate the
equipment.
xi


3D Printer Software

3D Printer Software
1.1 Software Overview
Aleph Objects, Inc., the maker of the LulzBot™TAZ, completely supports
free/libre hardware and software. Along with the TAZ being a free/libre
hardware design, it has been tested to work with 100% free/libre software.
Our source code and design files are hosted on our development server found
at http://devel.lulzbot.com. To operate your desktop 3D printer you
will need to install a few software packages onto your PC. You will need
a 3D printer host, an .STL to .gcode generator, and optional CAD or 3D
modeling software.
1.2 Software Types
Printer Hosts
Printer Host software is used to control the 3D printer. The program
not only allows you to manually move the printer along all the axes,
but set temperatures manually, send commands and receive feed-
back/error messages from the onboard electronics. We recommend
that new users start with Cura as it includes a slicing engine as well.
Common Printer Hosts:
• Cura
• Printrun (Pronterface)
• MatterControl
• OctoPrint
• Botqueue
Slicers
These programs take the 3-Dimensional model (typically
STL/OBJ/etc) and determine the 3D printer toolpath based
on the options selected. The slicing engine uses the nozzle diameter,
printing and movement speeds, layer height and other variables to
determine the coordinates where it needs to move and the rates
at which it will do so. This information is exported out of the
program as a gcode file. The gcode file is a plain-text file with a
series of text-based codes and a list of the complete X,Y and Z axis
14

1.3. INSTALLING DRIVERS
coordinates used for printing the 3D model. We recommend that
new users start with Cura as it includes the printer host as well.
Recommended Slicers:
• Cura
• Slic3r
All of the following free/libre software packages are available for
GNU/Linux, Windows, and Apple OS X. However, we highly recommend
using these programs on GNU/Linux.
The required software can be found in the Support/Downloads section
at LulzBot.com/support/downloads. You will also find instructions there
for installing each program onto your PC. You can also find downloads
specific to the LulzBot™TAZ 3D printer on the LulzBot™TAZ product
page.
1.3 Installing Drivers
Linux and Mac OSX users will not need to install a driver to commu-
nicate with the TAZ 3D printer. Windows users will need to install
the drivers. Using Cura as your printer host and slicing software is
recommended, as the drivers will automatically be installed during the
Cura installation process. The drivers can also be downloaded from
LulzBot.com/support/downloads. A visual guide showing the driver
installation process can be found in our download section as well.
1.4 Cura
Setup Cura
Cura is available for download on our website at lulzbot.com/cura. When
installing, it is recommended to uninstall any previous versions of Cura you
may have been using. When first opening Cura, you will be prompted to go
through the First run wizard. This will consist of selecting your printer
and then your nozzle size.
15

3D Printer Software
It is important to select the correct printer and nozzle size, as Cura uses
custom profiles and machine settings based upon which printer and nozzle
you are running.
• Download the appropriate installer for your computer operating
system. Instructions on installation for each operating system is
available at http://LulzBot.com/cura.
• Install Cura by double clicking on the installer.
• Select LulzBot TAZ.
• Once the proper printer is selected, select Next.
• Choose the appropriate nozzle size for your TAZ, select Next.
Once the installation wizard finishes you can move forward with your
first print!
1.5 Quick Print Settings
Figure 1.1: Quick Print Settings
16

1.5. QUICK PRINT SETTINGS
After setting up Cura for the first time, you will be shown the main interface
screen. (Fig. 1.1, page 16):
Selecting a Quick Print Profile
The print quality settings can be found in the top left-hand corner of the
window. For most filaments, there will be High Quality, Normal Quality,
or Fast Quality options. Some of the more exotic filaments may only have
a Normal Quality profile.
High Quality
Designed to give greater detail and finer objects. This will have a
smaller layer height, which will make each layer thinner, so that curves
seem more natural and walls seem less noticable. This setting will
also require more layers to be laid down, increasing overall print time.
Medium Quality
Designed to give a medium resolution, by increasing the layer height
and print speeds. This will make the organic curves slightly more
step-like than the fine setting, but will reduce printing time.
Fast Quality
Designed for the fast prints, where overall model finish is not of
concern. Most commonly used for quick iteration of designs found
in rapid prototyping.
Material Selection
Choose your desired filament. The TAZ ships with a 1 meter sample of
ABS, that should be used in your first print.
Printing Support Material
The TAZ 3D printer is able to print models that have angles and overhangs,
even without support material depending on the overhang distance and
angle. Turn this option on if your model could benefit from support
material.
17

3D Printer Software
Brim
Brim is used to increase surface area of the part you’re printing, thereby
ensuring proper part adhesion. This will print a single layer high edge
around the outside of the part, helping first layer adhesion and minimizing
warping.
Load Model File
Select the STL model you would like to print. Either use the Load Model
button or select File >Load Model. Once the file has been loaded, you
will see a 3D rendering of your object on the build platform. Select the
model to see the various options.
Model Orientation
Move your model to change where it is printed on the build plate. Do this
by left clicking on the model and dragging it to the desired location. The
black outlined corner of the 3d print bed view represents the front left
hand corner of the build plate on your printer. By holding down the right
mouse button and dragging, you can view your model from different angles.
Figure 1.2: Options after selecting model
18

1.5. QUICK PRINT SETTINGS
Rotate
The Rotate button will give you the ability to orient your model in along
all three axes. Once you click the rotate button, three circles will surround
your model. The red circle will allow you to rotate around the Z axis. The
Yellow circle will rotate around the Y axis. The Green circle will rotate
around the X axis. Cura defaults to 15 degree incriments. Hold Shift to
rotate by One Degree Incriments.
Figure 1.3: Rotating your Model
Lay Flat
The Lay Flat button will ensure that the flat portion of your print is
securely attached to the bed. It is highly recommended to use this option
after rotating your model in the Z direction, as it will help prevent adhesion
issues during the print.
Reset
The Reset button will return your model to the original orientation as
defined by the CAD program used to create the model.
19

3D Printer Software
Scale
The Scale button displays the model dimensions, along with the ability to
scale along the X Y or Z axes. Anything below the number 1.0 will reduce
the objects size, while anything above the number 1.0 will increase the
objects size. As a default, it will be set to uniform scaling. This will cause
the X Y and Z axes to be scaled by the same amount when you make a
change to any of them. To disable this, select the lock in the lower section
of the scaling window.
Figure 1.4: Scaling your Model
1.6 View Options
This mode allows you to view your model in a variety of different ways.
This can be helpful for spotting issues before the print even starts.
Normal
This is the standard view and shows the solid outer surfaces of the model.
(Fig. 1.5, page 21):
20
Other manuals for TAZ 5
3
Table of contents
Other LulzBot 3D Printer manuals

LulzBot
LulzBot TAZ 5 User manual

LulzBot
LulzBot TAZ 5 User manual

LulzBot
LulzBot TAZ User manual

LulzBot
LulzBot TAZ 6 User manual

LulzBot
LulzBot TAZ 4 User manual

LulzBot
LulzBot Mini User manual

LulzBot
LulzBot Mini User manual

LulzBot
LulzBot TAZ Instruction Manual

LulzBot
LulzBot TAZ 5 User manual

LulzBot
LulzBot Mini User manual

LulzBot
LulzBot TAZ User manual

LulzBot
LulzBot Mini User manual

LulzBot
LulzBot TAZ Pro S Instruction Manual

LulzBot
LulzBot TAZ 6 User manual

LulzBot
LulzBot TAZ User manual

LulzBot
LulzBot TAZ User manual

LulzBot
LulzBot Mini 2 User manual

LulzBot
LulzBot TAZ 6 Instruction Manual

LulzBot
LulzBot TAZ 6 Instruction Manual

LulzBot
LulzBot TA Instruction Manual