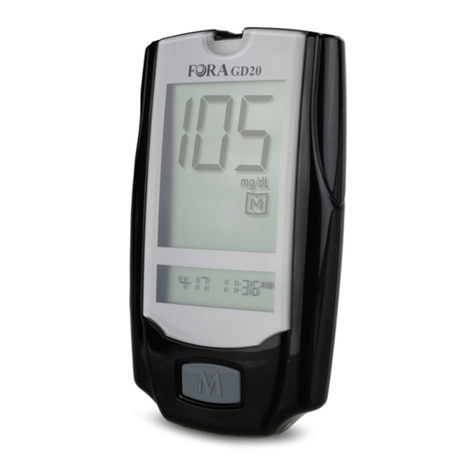
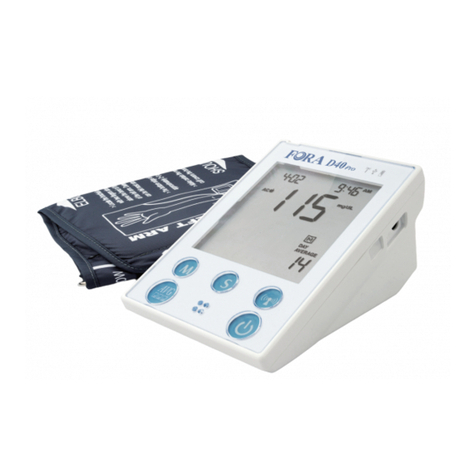
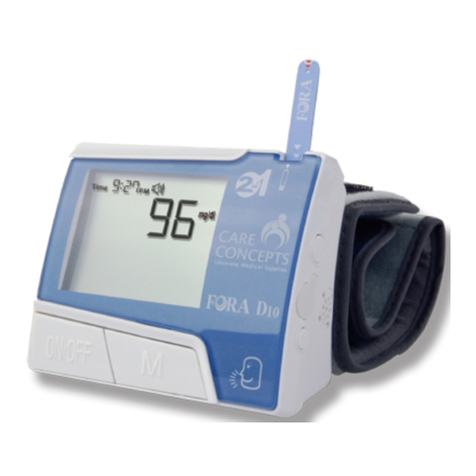
FOR-A Advanced pro GD40g User manual

ADVANCED pro GD40g Owner’s Manual

ADVANCED pro GD40g Owner’s Manual

ADVANCED pro GD40g Owner’s Manual
(a) (b)
(c) (g)
(e)(d)
(f)
ver 1.0 2015/01
311-4272700-001
832
Code 832 Code 832

ADVANCED pro GD40g Owner’s Manual
(h)
(112 mg/dL = 6.2 mmol/L,
100−165 mg/dL = 5.6−9.2 mmol/L))
(100 mg/dL = 5.6 mmol/L))
(300 mg/dL = 16.7 mmol/L; 200 mg/dL = 11.1 mmol/L)
(i)
(j)
(k) (l)
(m)
(n)
(p)
(q)
(r)
(t)
(s)
(o)
(100 mg/dL = 5.6 mmol/L)
100~165

ADVANCED pro GD40g Owner’s Manual
EN-1
Safety Information
Read the following Safety Information throughly before using the device.
• Use this device ONLY for the intended use described in this manual.
• Do NOT use accessories which are not specied by the manufacturer.
• Do NOT use the device if it is not working properly or damaged.
• Do NOT use the equipment where aerosol sprays are being used or
where oxygen is being administered.
• This device does NOT serve as a cure for any symptoms or diseases.
The data measured is for reference only.
• Before using this device to test blood glucose, read all instructions
thoroughly and practice the test. Carry out all the quality control
checks as directed.
• Keep the device and testing supplies away from young children.
Small items such as the battery cover, batteries, test strips, lancets
and vial caps are choking hazards.
• Use of this instrument in a dry environment, especially if synthetic
materials are present (synthetic clothing, carpets etc.) may cause
damaging static discharges that may cause erroneous results.
• Do NOT use this instrument in close proximity to sources of strong
electromagnetic radiation, as these may interfere with the correct
operation.
• Proper maintenance and timely calibration with the control solution
are essential to the longevity of your device. If you are concerned
about the accuracy of the measurement, please contact the place of
purchase or customer service representative for assistance.
KEEP THESE INSTRUCTIONS IN A SAFE PLACE
Important Information
• Severe dehydration and excessive water loss may cause readings
which are lower than actual values. If you believe you are suering
from severe dehydration, consult a healthcare professional
immediately.
• If your blood glucose results are lower or higher than usual, and you
do not have symptoms of illness, rst repeat the test. If you have
symptoms or continue to get results higher or lower than usual,
follow the treatment advice of your healthcare professional.
• Use only fresh whole blood sample to test your blood glucose. Using
other substances will lead to incorrect results.
• If you are experiencing symptoms that are inconsistent with your
blood glucose test results and you have followed all instructions
described in this owner’s manual, call your healthcare professional.
• We do not recommend using this product on severely hypotensive
individuals or patients in shock. Readings which are lower
than actual values may occur for individuals experiencing a
hyperglycaemic-hyperosmolar state, with or without ketosis. Please
consult the healthcare professional before use.
• The measurement unit used for indicating the concentration
of blood or plasma glucose can have mg/dL or mmol/L. The
approximate calculation rule for conversion of mg/dL in mmol/L is:
For example:
1) 120 mg/dL ÷ 18 = 6.6 mmol/L
2) 7.2 mmol/L x 18 = 129 mg/dL approximately.
mg/dL Divided by 18 = mmol/L
mmol/L Times 18 = mg/dL
EN-2
ADVANCED pro GD40g Owner’s Manual
Introduction
Intended Use
This system is intended for use outside the body (in vitro
diagnostic use) by people with diabetes at home as an aid to
monitoring the eectiveness of diabetes control. It is intended to
be used for the quantitative measurement of glucose (sugar) in
fresh capillary. It should not be used for the diagnosis of diabetes,
or screening for diabetes mellitus.
The test for hematocrit (HCT) as part of the system, is intended
for use in the in vitro quantication of packed red blood cell
volume fraction in capillary whole blood as an aid in monitoring
the status of total volume of red blood cells. The reading of HCT is
only for determination of whether the blood test sample is within
the acceptable range for the blood glucose system. It should not
be used for the diagnosis of anemia or erythrocytosis.
Test Principle
Your system measures the amount of sugar (glucose) in whole
blood. The glucose testing is based on the measurement of
electrical current generated by the reaction of glucose with the
reagent of the strip. The meter measures the current, calculates
the blood glucose level, and displays the result. The strength of
the current produced by the reaction depends on the amount of
glucose in the blood sample
Product Overview (a)
1.Test Slot 5.Data Port
2.MAIN Button 6.SET Button
3.Display Screen 7.Battery Compartment
4.Test Strip Ejector
Screen Display (b)
1.Blood Drop Symbol 9.Measurement Mode
2.Code 10. Measurement Unit
3.Ketone Warning 11. HCT Symbol
4.Test Result 12. HCT Result
5.Warning Symbol 13. Hb Symbol
6.Low Battery Symbol 14. Date/Time/Hb Result
7.Day Average
8.Memory Symbol

ADVANCED pro GD40g Owner’s Manual
EN-3
Getting Started
Initial Setup
Before using the device for the rst time or after you changed the batteries, do the following initial setup:
Step 1: Enter the Setting Mode
Open the battery cover and press SET. The display turns on.
Step 2: Conguring the Settings (Date, Time Format, Time, Memory Deletion)
Press MAIN repeatedly to adjust the value or enable/disable the setting. Then press SET to conrm the setting and switch to another
eld.
Set [Year] Set [Month] Set [Day] Set [Time Format] Set [Hour] Set [Minute] Memory Deletion
Deletion
Completed
Note:
• During memory deletion, select no to keep all saved results.
• If the device is idle for 3 minutes during the setting mode, it will turn
o automatically.

EN-4
ADVANCED pro GD40g Owner’s Manual
Before Testing
Calibration
You must calibrate the deviced every time you begin to use a new
vial of test strips by setting the meter with the correct code. To
ensure test accuracy, make sure the code number displayed on
the display screen matches the number printed on the strip vial.
How to Code Your Meter
1.Insert the code strip into the test slot of the device. Wait for the
device to display the code number.
Important!
• Make sure the code number on display, code strip, and test strip
vial are the same. (c)
2.Remove the code strip, the display will show “OFF”indicating
the device has nished coding and is ready for blood glucose
testing.
Checking the Code Number
Make sure that the code number displayed on the device matches
the number on the test strip vial before you proceed. (d)
If it matches, you can proceed with your test. Otherwise, please
stop testing and repeat the calibration procedure.
If the problem persists, contact Customer Service for further
assistance.
Important!
• It is important to make sure that the LCD displayed code is the same
as the code on the test strip vial before testing. Failure to do so will
get inaccurate results.
Control Solution Testing
Our Control Solution contains a known amount of glucose that
reacts with test strips and is used to ensure your device and test
strips are working together correctly.
Do a control solution test when:
you rst receive the device.
at least once a week to routinely check the device and test strips.
you begin using a new vial of test strips.
you suspect the device or test strips are not working properly.
your blood glucose test results are not consistent with how
you feel, or if you think the results are not accurate.
you have dropped or think you may have damaged the device.
To perform the control solution test, do the following:
1.Insert the test strip into the test slot of the device. Wait for the
device to display the test strip and blood drop symbol. (e)
2.Press MAIN to mark this test as a control solution test.
With“QC” displayed, the device will store your test result in
memory. If you press again, the “QC” will disappear and this test
is no longer a control solution test. (f)
Important!
• When doing the control solution test, you have to mark it so that
the test result will not be stored in the memory. Otherwise, it will
mix up the blood glucose test results with the control solution test
results in memory.

ADVANCED pro GD40g Owner’s Manual
EN-5
1.Apply the control solution.
Shake the control solution vial thoroughly before use. Squeeze
out a drop and wipe it o, then squeeze another drop and
place it on the tip of the vial cap. Hold the device to move
the absorbent hole of test strip to touch the drop. Once the
conrmation window lls completely, the device will begin
counting down. (g)
Note:
• To avoid contaminating the control solution, do not directly apply
control solution onto a strip.
2.Read and compare the result. (h)
After counting down to 0, the test result of control solution
will appear on the display. Compare this result with the range
printed on the test strip vial and it should fall within this range.
If the test result is out of range, read the instructions again and
repeat the control solution test.
Note:
• Do NOT test your blood.
• The control solution range printed on the test strip vial is for
control solution use only. It is not a recommended range for your
blood glucose level.
• Refer to the Maintenance section for important information about
your control solutions.
• Out-of-range results:
• If you continue to have test results falling outside the range
printed on the test strip vial, the meter and strips may not be
working properly.
• There is no HCT and HB display functions while the meter is in QC
mode.
Testing Your Blood Glucose
Test Strip Appearance
Absorbent Hole
Apply a drop of blood
here. The blood will be
automatically absorbed.
Conrmation Window
This is where you conrm
if enough blood has been
applied to the absorbent hole
in the strip.
Test Strip Handle
Hold this part to insert
the test strip into the slot.
Contact Bars
Insert this end of the test strip
into the meter. Push it in rmly
until it will go no further.
Inserting a Test Strip
Insert the test strip into its slot.
Important!
The front side of test strip should face up when inserting test strip.
Test results might be wrong if the contact bar is not fully inserted
into the test slot.

EN-6
ADVANCED pro GD40g Owner’s Manual
Important!
To reduce the chance of infection:
• Never share a lancet or the lancing device.
• Always use a new, sterile lancet. Lancets are for single use only.
• Avoid getting hand lotion, oils, dirt, or debris in or on the lancets and
the lancing device.
Preparing the Lancing Device
1.Remove the cap. (i)
2.Insert a new lancet rmly into the white lancet holder cup.
3.Remove the protective disk on the lancet. (j)
Hold the lancet rmly in place and twist o the protective disk.
4.Replace the cap until it snaps or clicks into place.
5.Rotate the dial to set the desired lancing depth. (k)
6.Pull the cocking control out until the orange bar appears on the
release button window. (l)
Obtaining the Blood Sample
Please follow the suggestions below before obtaining a drop of
blood:
• Wash and dry your hands before starting.
• Select the puncture site at ngertips.
• Clean the puncture site using cotton moistened with 70%
alcohol and let it air dry.
• Rub the puncture site for about 20 seconds before penetration.
Blood from the ngertip
1.Press the lancing device’s tip rmly against the lower side of
your ngertip.
2.Press the release button to prick your nger, then a click
indicates that the puncture is complete. (m)
Note:
• Choose a dierent spot each time you test. Repeated punctures at
the same spot may cause soreness and calluses.
• It is recommended to discard the rst drop of blood as it might
contain tissue uid, which may aect the test result.

ADVANCED pro GD40g Owner’s Manual
EN-7
Measuring Blood Glucose Test
1.Insert the test strip into its slot.
Wait for the device to display the test strip and blood drop symbol.
2.Select the appropriate measuring mode by pressing MAIN.
• General Tests ( ) - any time of day without regard to time
since last meal.
• AC ( ) - no food intake for at least 8 hours.
• PC ( ) - 2 hours after a meal.
• QC ( ) - testing with the control solution.
3.Obtain a blood sample. (n)
Use the pre-set lancing device to puncture your desired site.
After penetration, discard the rst drop of blood with a clean
tissue or cotton. Gently squeeze the punctured area to obtain
another drop of blood. Be careful NOT to smear the blood
sample. The volume of blood sample must be at least 1.1
microliter (μL) of volume.
4.Apply the blood sample. (o)
Hold the blood drop to touch the absorbent hole of the test
strip. Blood will be drawn in and after the conrmation window
is completely lled, the device begins counting down. Do not
remove your nger until you hear a beep sound.
5.Read your result. (p)
The results of your blood glucose test with hematocrit (HCT)
and hemoglobin (Hb) levels will appear after the meter counts
down to 0. The results will be stored in meter’s memory
automatically.
Disposing Used Test Strip and Lancet
To remove the used test strip, simply press the Test Strip Ejector
to eject the used test strip. The device will automatically turn o
after the test strip is ejected.
To remove the used lancet, remove the lancet from the lancing
device after you have nished testing.
Discard your used strip and lancet properly in a puncture resistant
container.
Important!
The used lancet and test strip may be biohazards. Please consult
your health care provider for proper disposal complying with your
local regulations.
Reviewing Test Results
Your device stores the 200 most recent test results along with
respective dates and times in its memory.
To review all test results, do the following:
1.Press and release MAIN. The“ ” icon appears on the screen.
2.Press MAIN to review the test results stored in the device. Press
MAIN repeatedly to review other test results stored in the
device. (q) After the last test result, press MAIN again and the
device will be turned o.
To review the day-average test results, do the following:
1.Press and hold MAIN for 3 seconds until the“ ”icon
appears. Release MAIN and then your 7-day average result
measured in general mode will appear on the display.

EN-8
ADVANCED pro GD40g Owner’s Manual
1.
2. Press MAIN to review 14-, 21- and 30- day average results stored in
each measuring mode in the order of Gen, AC, then PC. (r)
Note:
• Press and hold MAIN for 5 seconds to exit the memory mode or
leave it without any action for 3 minutes. The device will turn o
automatically.
• If using the device for the rst time, the“---” icon appears when you
recall the test results or review the average result. This indicates that
there is no test result in the memory.
• Control solution results are NOT included in the day average.
Appendix
Transferring Data
Data transmission via cable
You can use the meter with the RS-232 cable and the Health Care
Software System to view test with HCT/Hb levels on your personal
computer. To learn more about the Health Care Software System
or to obtain the RS-232 cable separately, please contact local cus-
tomer services or the place of purchase for assistance.
Data transmission via cable
i. Install the software on your computer
Download Health Care System Software and instruction
manual provided on ForaCare Suisse AG, website:
http://www.foracare.ch to your computer. Follow the
instructions to install the software on your computer.
ii. Connect the device with your computer
“PC” will appear on the display, indicating that the device is
ready to transmit data. (s)
iii. Transfer data to your computer
Follow the software on-screen instructions to transmit data.
Data transmitted will include results with date and time.
Remove the cable and the device will automatically turn o.
Note:
• When the device is connected to the PC, it is unable to perform any
blood glucose test.
ADVANCED pro GD40g Owner’s Manual

ADVANCED pro GD40g Owner’s Manual
EN-9
Maintenance
Changing Battery
When the battery is low, the “ “ icon appears with E-b. (t)
To change the batteries, do the following:
1.Press the edge of the battery cover and lift it up to remove the
cover.
2.Remove the old batteries and replace with two 1.5V AAA size
alkaline batteries.
3.Close the battery cover.
When you will hear a“beep”sound, this indicates the batteries
are inserted correctly.
CAUTION
RISK OF EXPLOSION IF BATTERY IS REPLACED BY AN
INCORRECT TYPE.
DISPOSE OF USED BATTERIES ACCORDING TO THE
INSTRUCTIONS.
Note:
• Replacing the batteries does not aect the test results stored in
memory.
• Keep away these batteries from small children. If swallowed,
promptly seek medical assistance.
• Batteries may leak chemicals if unused for a long time. Remove the
batteries if you are not going to use the device for an extended
period.
• Properly dispose of the used batteries according to your local
environmental regulations.
Caring for Your Device
• To clean the device exterior, wipe it with a cloth moistened with tap
water or a mild cleaning agent, then dry the device with a soft dry
cloth. Do NOT ush with water.
• Do NOT use organic solvents to clean the device.
Device Storage
• Storage condition: -20°C to 60°C (-4°F to 140°F), below 95% relative
humidity.
• Always store or transport the device in its original storage case.
• Avoid dropping and heavy impact.
• Avoid direct sunlight and high humidity.
Caring for Your Test Strips
• Storage condition: 2°C to 32°C (35.6°F to 89.6°F), below 85% relative
humidity. Do NOT freeze.
• Store your test strips in their original vial only. Do not transfer to
other container.
• Store test strip packages in a cool and dry place. Keep away from
direct sunlight and heat.
• After removing a test strip from the vial, immediately close the vial
cap tightly.
• Touch the test strip with clean and dry hands.
• Use each test strip immediately after removing it from the vial.
• Write the opening date on the strip vial label when you rst opened
it. Discard remaining test strips after 6 months.
• Do not use test strips beyond the expiry date. This may cause
inaccurate results.
• Do not bend, cut, or alter a test strip in any way.

EN-10
ADVANCED pro GD40g Owner’s Manual
• Keep the strip vial away from children since the cap and the test
strip may be a choking hazard. If swallowed, promptly see a doctor
for help.
For further information, please refer to the test strip package insert.
Important Control Solution Information
• Use only our control solutions with your device.
• Do not use the control solution beyond the expiry date or 3 months
after rst opening. Write the opening date on the control solution
vial and discard the remaining solution after 3 months.
• It is recommended that the control solution test be done at room
temperature 20°C to 25°C (68°F to 77°F). Make sure your control
solution, device, and test strips are at this specied temperature
range before testing.
• Shake the vial before use, discard the rst drop of control solution,
and wipe o the dispenser tip to ensure a pure sample and an
accurate result.
• Store the control solution tightly closed at temperatures between
2°C to 30°C (35.6°F to 86°F). Do NOT freeze.
Reference Values
The device provides you with plasma equivalent results.
Time of day Normal plasma glucose range for
people without diabetes (mg/dL)
Fasting and before meal < 100 mg/dL (5.6 mmol/L)
2 hours after meals < 140 mg/dL (7.8 mmol/L)
Source: American Diabetes Association (2012). Clinical Practice
Recommendations. Diabetes Care, 35 (Supplement 1): S1-100.
Normal results vary of Hematocrit, but in general are as follows:
• Male: 40.7 to 50.3%
• Female: 36.1 to 44.3%
If the test result of hematocrit is more than 70%, or hemoglobin is
more than 23.8 (g/dL), the blood glucose test may be invalid, please
redo the test, and consult your doctor if the result is repeatedly
invalid.
Please consult your doctor to determine a target range that
works best for you.
Symbol Information
Symbol Referent Symbol Referent
For in vitro diagnostic
use
Use within 6 months
after rst opening
Do not reuse Batch code
Consult instructions
for use Manufacturer
Keep away from
sunlight Serial number
Keep dry
Caution, consult
accompanying
documents
Temperature limitation Sterilized using
irradiation
Use by Do not use if package
is damaged
6M

ADVANCED pro GD40g Owner’s Manual
EN-11
Troubleshooting
If you follow the recommended action but the problem persists,
or error messages other than the ones below appear, please call
your local customer service.
Result Readings
Message What it Means
< 10 mg/dL (0.5 mmol/L)
≥ 240 mg/dL (13.3 mmol/L)
> 600 mg/dL (33.3mmol/L)
Error Message
Error Message Cause What To Do
The batteries cannot
provide enough power
for a test.
Replace the batteries
immediately.
Strip has been used. Repeat the test with a
new strip.
Problem in operation.
Review the instructions
and repeat the test with
a new strip. If problem
persists, contact the local
customer service for
assistance.
You may have removed
the strip after applying
blood, or insucient
blood volume.
Review the instructions
and repeat test with a
new test strip.
HCT>75
Wrong code strip
is inserted or other
coding errors.
Make sure to insert the
right code strip for the
meter. Check if the code
numbers on the code strip
and the strip vial label are
the same.
Expired code strip. Repeat the test with a
new code strip.

EN-12
ADVANCED pro GD40g Owner’s Manual
Ambient temperature
is below the system’s
operation range.
System operational range
is 10°C to 40°C (50°F to
104°F). Repeat the test
after the device and test
strip have reached the
above temperature.
Ambient temperature
is above the system’s
operation range.
Blood Glucose Measurement
Symptom Cause What To Do
The device
does not
display a
message after
inserting a test
strip.
Batteries exhausted. Replace the batteries.
Test strip inserted
upside down or
incompletely.
Insert the test strip with
contact bars end rst and
facing up.
Defective device or
test strips.
Please contact customer
service.
The test does
not start after
applying the
sample.
Insucient blood
sample.
Repeat the test using a new
test strip with larger volume
of blood sample.
Defective test strip.
Repeat the test with a new
test strip.
Sample applied
after the device
is automatically
turned o.
Repeat the test with a new
test strip. Apply sample only
when ashing“ “ appears
on the display.
Defective device. Please contact customer
service.
The control
solution
testing result is
out of range.
Error in performing
the test.
Read instructions
thoroughly and repeat the
test again.
Control solution vial
was poorly shaken.
Shake the control solution
vigorously and repeat the
test again.
Expired or
contaminated
control solution.
Check the expiration date of
the control solution.
Control solution
that is too warm or
too cold.
Control solution, device, and
test strips should be at room
temperature (20°C to 25°C /
68°F to 77°F) before testing.
Defective test strip. Repeat the test with a new
test strip.
Device malfunction. Please contact customer
service.

ADVANCED pro GD40g Owner’s Manual
EN-13
Specications
Memory 200 measurement results with respective
date and time
Dimensions 110 (L) x 57 (W) x 25 (H) mm
Power Source Two 1.5V AAA alkaline batteries
Weight 71g
External output RS-232 Serial Cable
Features
Auto electrode insertion detection
Auto sample loading detection
Auto reaction time count-down
Auto switch-o after 3 minutes without
action
Temperature warning
Operating Condition 10°C to 40°C (50°F to 104°F), below 85%
R.H. (non-condensing)
Storage/Transportation
Condition
-20°C to 60°C (-4°F to 140°F), below 95%
R.H
Measurement Units mg/dL or mmol/L
Measurement Range 10 to 600mg/dL (0.5 to 33.3mmol/L)
Hematocrit range 0~70%
Test Sample Capillary whole blood
Test Result Glucose measurements are reported as
plasma equivalents
This device has been tested to meet the electrical and safety
requirements of: IEC/EN 61010-1, IEC/EN 61010-2-101, EN 61326-1, IEC/
EN 61326-2-6, EN 301 489-17, EN 300 328.
WARRANTY TERMS AND CONDITIONS
With respect to disposable products, ForaCare Suisse warrants
to the original purchaser that, at time of delivery, each standard
product manufactured by ForaCare Suisse shall be free of defects
in material and workmanship and, when used for the purposes
and indications described on the labeling, is t for the purposes
and indications described on the labeling. All warranties for a
product shall expire as of the product expiration date, or if none,
after one (1) year from the date of shipment from ForaCare
Suisse. ForaCare Suisse warranty hereunder shall not apply if:
(i) a product is not used in accordance with its instructions or
if it is used for a purpose not indicated on the labeling; (ii) any
repairs, alterations or other work has been performed by Buyer
or others on such item, other than work performed with ForaCare
Suisse’s authorisation and according to its approved procedures;
or (iii) the alleged defect is a result of abuse, misuse, improper
maintenance, accident or the negligence of any party other than
ForaCare Suisse. The warranty set forth herein is conditioned upon
proper storage, installation, use and maintenance in accordance
with applicable written recommendations of ForaCare Suisse.
The warranty furnished hereunder does not extend to damage to
items purchased hereunder resulting in whole or in part from the
use of components, accessories, parts or supplies not furnished by
ForaCare Suisse.

Manuel de l’utilisateur du ADVANCED pro GD40g
FR-1
Consignes de sécurité
Veuillez lire attentivement les Consignes de sécurité suivantes avant
d'utiliser l'appareil.
• N’utilisez cet appareil que SEULEMENT pour l'usage prévu, tel décrit
dans ce manuel.
• N’utilisez aucun accessoire non recommandé par le fabricant.
• N’utilisez pas l'appareil s'il ne fonctionne pas correctement ou s'il est
endommagé.
• Ne PAS utiliser l'appareil dans les endroits où des aérosols sont
utilisés et où de l'oxygène est administré.
• Cet appareil ne sert PAS de remède pour les symptômes ou les
maladies. Les données mesurées sont fournies à titre indicatif.
• Avant d'utiliser cet appareil pour tester la glycémie, lisez
attentivement toutes les instructions et faites le test. Procédez à tous
les contrôles de la qualité comme indiqué.
• Gardez l'appareil et les accessoires de test hors de portée des jeunes
enfants. Les petits objets tels que le couvercle de la batterie, les
batteries, les bandelettes de test, les lancettes et les bouchons des
acons posent un risque d'étouement.
• L'utilisation de cet appareil dans un environnement sec, surtout
si des matières synthétiques sont présentes (des vêtements
synthétiques, des tapis, etc.) peut provoquer des décharges statiques
susceptibles de fausser les résultats.
• N’utilisez pas cet appareil à proximité de sources de rayonnement
électromagnétique intense, car elles peuvent interférer avec le
fonctionnement.
• Grâce à un entretien approprié et un calibrage adéquat avec la
solution de contrôle, la longévité de votre appareil est prolongée.
Si vous avez des doutes quant à la précision des résultats, veuillez
contacter votre revendeur ou le service client qui se fera un plaisir
de vous aider.
CONSERVEZ CES INSTRUCTIONS DANS UN ENDROIT SÛR
Informations importantes
• Une déshydratation sévère et une perte d'eau excessive peut
provoquer des mesures qui sont inférieures aux valeurs réelles. Si
vous croyez que vous sourez de déshydratation sévère, consultez
immédiatement un professionnel de la santé.
• Si vos résultats de glycémie sont inférieurs ou supérieurs à la
normale, et que vous n'avez pas de symptômes de maladie, essayez
en premier de répéter le test. Si vous avez des symptômes ou si vous
continuez à obtenir des résultats plus ou moins élevé que la normale,
suivez les conseils de traitement de votre professionnel de la santé.
• Utilisez uniquement un échantillon de sang frais entier pour tester
votre glycémie. L'utilisation d'autres substances va donner des
résultats incorrects.
• Si vous éprouvez des symptômes qui sont incompatibles avec les
résultats de vos tests de glycémie et que vous avez suivi toutes les
instructions décrites dans ce manuel, contactez votre professionnel
de la santé.
• Nous ne recommandons pas d'utiliser ce produit sur les personnes
très hypotensives ou les patients en état de choc. Des valeurs
inférieures aux valeurs réelles peuvent être obtenues chez les
personnes subissant un état hyperglycémique - hyperosmolaire, avec
ou sans cétose. Veuillez consulter un professionnel de la santé avant
l'utilisation.
• L'unité de mesure utilisée pour indiquer la concentration de glucose
du sang ou du plasma peut être en mg/dL ou en mmol/L. La règle
approximative de calcul pour la conversion de mg/dL en mmol/L est :
mg/dL Divisé par 18 = mmol/L
mmol/L Fois 18 = mg/dL
Par exemple :
1) 120 mg/dL ÷ 18 = 6,6 mmol/L
2) 7,2 mmol/L x 18 = 129 mg/dL
environ

Manuel de l’utilisateur du ADVANCED pro GD40g
FR-2
Introduction
Utilisation prévue
Prévu pour un usage externe (diagnostic in vitro), ce système
s’adresse aux personnes diabétiques qui veulent contrôler
l’évolution de leur diabète à domicile. Il sert à mesurer la quantité
de glucose (sucre) prélevé dans des échantillons de sang
capillaire, veineux, artériel, et néonatal, mais en aucun cas, il ne
sert à poser un diagnostic de diabète ou à dépister le diabète
sucré.
Partie intégrante du système, le test d’hématocrite (HTC) sert à
quantier in vitro le volume de globules rouges par rapport au
volume sanguin total. La lecture du taux d’HTC sert uniquement à
déterminer si le sang prélevé dans l’échantillon présente un taux
acceptable pour le système. Il ne sert en aucun cas à poser un
diagnostic d’anémie ou d’érythrocytose.
Principe du test
Votre système mesure la quantité de sucre (glucose) totale dans
le sang. Le test de glucose est basé sur la mesure du courant
électrique généré par la réaction du glucose avec le réactif de
la bandelette. L'appareil mesure le courant, calcule le niveau de
glucose dans le sang et ache le résultat. L'intensité du courant
produit par la réaction dépend de la quantité de glucose dans
l'échantillon de sang.
Présentation du produit (a)
1.Fente de bandelette
de test
2.Bouton Principal
3.Écran d’achage
4.Éjecteur de la bandelette
de test
5.Port de données
6.Bouton Régler
7.Compartiment de la batterie
Achage à l’écran (b)
1. Symbole de goutte de sang
2.Code
3.Avertissement de kétone
4.Résultat du test
5.Symbole d’avertissement
6.Symbole de piles faibles
7.Moyenne de la journée
8.Symbole de mémoire
9.Mode de mesure
10. Moyenne de la journée
11. Symbole de HCT
12. Résultat du HCT
13. Symbole de Hb
14. Date/Heure/Hb

Manuel de l’utilisateur du ADVANCED pro GD40g
FR-3
Pour commencer
Conguration initiale
Avant d'utiliser l'appareil pour la première fois ou après avoir changé les batteries, faites la conguration initiale suivante :
Étape 1 : Entrez dans le mode Réglage
Ouvrez le couvercle de la batterie et appuyez sur SET. L’écran s’allume.
Étape 2 : Conguration des paramètres (Date, Format de l’heure, Heure, et Eacer la mémoire)
Appuyez plusieurs fois sur MAIN pour ajuster la valeur ou activer / désactiver le réglage. Puis appuyez sur SET pour conrmer le
réglage et aller à un autre champ.
Réglez [Année] Réglez [Mois] Réglez [Jour] Réglez [Format de
l'heure]
Réglez [Heure] Réglez
[Minute]
Eacement de la
mémoire
Eacement
terminé
Remarque :
• Pendant la suppression de la mémoire, sélectionnez non pour garder
tous les résultats enregistrés.
• Si l'appareil est inactif pendant 3 minutes en mode de réglage, il
s'éteint automatiquement.
Other manuals for Advanced pro GD40g
1
Table of contents
Languages:
Other FOR-A Blood Glucose Meter manuals

FOR-A
FOR-A DM40 User manual

FOR-A
FOR-A GD20 User manual

FOR-A
FOR-A Diamond GD50 User manual

FOR-A
FOR-A MD User manual

FOR-A
FOR-A COMFORT plus G30a User manual

FOR-A
FOR-A D15 User manual

FOR-A
FOR-A Diamond GD50 User manual

FOR-A
FOR-A D40 Pro Reference guide

FOR-A
FOR-A GD40 User manual

FOR-A
FOR-A Diamond CUFF BP User manual

FOR-A
FOR-A D40 Series User manual

FOR-A
FOR-A Diamind VOICE User manual

FOR-A
FOR-A Diamond Mini User manual

FOR-A
FOR-A D40 DUO ultima User manual

FOR-A
FOR-A GD20FM01 Reference guide

FOR-A
FOR-A MD User manual

FOR-A
FOR-A TD-3261G User manual

FOR-A
FOR-A G20 User manual

FOR-A
FOR-A V30a Instruction sheet

FOR-A
FOR-A Premium V10BLE User manual