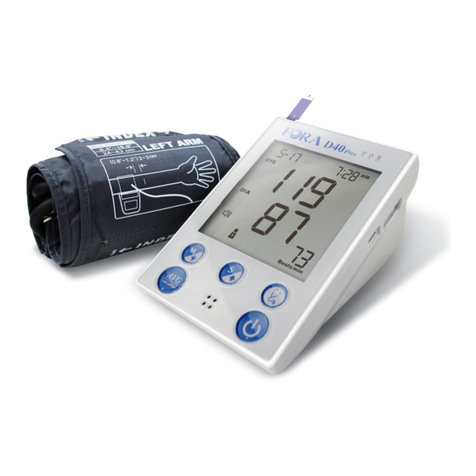
FOR-A DUO ultima D40 User manual

Owner’s Manual / Bedienungsanleitung /
Manuel de l’utilisateur / Manuale del Proprietario /
Blood Glucose Plus Blood Pressure Monitoring System/
System zur Überwachung von Blutzucker und Blutdruck/
Système de Contrôle de la Glycémie et de la Pression Artérielle/
Sistema di Controllo della Glicemia e della Pressione Sanguigna/
Sistema de supervisión de glucosa en sangre y presión arterial
Σύστημα παρακολούθησης σακχάρου αίματος και αρτηριακής πίεσης/
DUO ultima D40
Εγχειρίδιο χρήσης / Manual del propietario

D40 Owner’s Manual
EN-ii

D40 Owner’s Manual
EN-1
Safety Information
Read the following Safety Information throughly before using the device.
• Use this device ONLY for the intended use described in this manual.
• Do NOT use accessories which are not specified by the manufacturer.
• Do NOT use the device if it is not working properly or damaged.
• Do NOT use the equipment where aerosol sprays are being used or where oxygen is being
administered.
• Do NOT use under any circumstances on newborns or infants.
• This device does NOT serve as a cure for any symptoms or diseases.The data measured is
for reference only.Always consult your physician to have the results interpreted.
• Before using this device to test blood glucose, read all instructions thoroughly and practice
the test. Do all quality control checks as directed.
• Keep the device and testing supplies away from young children. Small items such as the
battery cover, batteries, test strips,lancets and vial caps are choking hazards.
• Keep the equipment and its flexible cord away from hot surfaces.
• Do NOT apply the cuff to areas other than the place directed.
• Use of this instrument in a dry environment,especially if synthetic materials are present
(synthetic clothing,carpets etc.) may cause damaging static discharges that may cause
erroneous results.
• Do NOT use this instrument in close proximity to sources of strong electromagnetic
radiation, as these may interfere with the correct operation.
• Proper maintenance and periodically calibration are essential to the longevity of your
device.If you are concerned about your accuracy of measurement,please contact local
customer service for help.
Important Information
• Severe dehydration and excessive water loss may cause readings which are lower than
actual values.If you believe you are suffering from severe dehydration, consult a healthcare
professional immediately.
• If your blood glucose results are lower or higher than usual,and you do not have symptoms
of illness,first repeat the test. If you have symptoms or continue to get results higher or
lower than usual,follow the treatment advice of your healthcare professional.
• Use only fresh whole blood sample to test your blood glucose.
• Using other substances will lead to incorrect results.
• If you are experiencing symptoms that are inconsistent with your blood glucose test
results and you have followed all instructions described in this owner’s manual, call your
healthcare professional.
• We do not recommend using this product on severely hypotensive individuals or patients
in shock. Please consult the healthcare professional before use.
• The measurement unit used for indicating the concentration of blood or plasma glucose
can have mg/dL or mmol/L.The approximate calculation rule for conversion of mg/dL in
mmol/L is:
mg/dL Divided by 18 = mmol/L
mmol/L Times 18 = mg/dL
English
D40 Owner’s Manual
EN-2
Introduction
Intended Use
This system is a 2 in 1 system designed to measure blood glucose outside the human
body (in vitro diagnostic use) and to measure blood pressure non-invasively. It is
intended for use in the home and in clinical settings as an aid to monitoring the
effectiveness of diabetes control.
It is intended to be used for the quantitative measurement of glucose (sugar) in fresh
whole blood samples drawn from the finger, palm, forearm, upper arm, calf and thigh.
It should not be used for the diagnosis of diabetes,or testing on newborns.This system
is also intended to be used to measure non-invasively the systolic and diastolic blood
pressure and pulse rate of an adult individual at home.The blood pressure is measured
by using an inflatable cuff wrapped around the arm.
Product Overview
10 11
8
9
7
2
3
4
5
1
6
12
13
14
15
16
18
19
17
16
Pressure Cuff

D40 Owner’s Manual
EN-3
No. Item Description
1 Test Slot Insert test strip here to turn the device on for
testing.
2 Display Screen • During power off: Display the date and time.
• During power on: Display the selected setting
or test result.
3 Average Button
(For D40a model)
Press to measure your blood pressure in average
mode.
RF Button
(For D40b/D40g model)
Press to activate the wireless data transmission.
4 S Button Press to enter and confirm the settings.
5 M Button Press to enter the device memory.
6 Power Button Press to turn on the device and start a single blood
pressure measurement.
7 User Selection Button Press to select the desired user number.
8 Speaker Emit sound or voice broadcast.
9 RF Indicator Indicate a wireless data transmission status.
10 USB Indicator Indicate a USB connection status.
11 Power Indicator Indicate the power status of the device.
12 Battery Compartment Open the cover to install the batteries.
13 AC/DC Adapter Port Connect to a power supply.
14 USB Port Connect to a micro USB cable.
15 Strip Ejector Push upward to eject the used strip.
16 Air Jack Connect to an air plug.
17 Pressure Cuff Measure blood pressure.
18 Air Tube Inflate the pressure cuff.
19 Air Plug Connect to air jack.

D40 Owner’s Manual
EN-4
Screen Display
18
19 20
8
7
2
3
4
5
1
6
9
10
11
12
13
14
15
16
17
No. Item No. Item
1Date 11 Unit for Blood Pressure
2 Systolic Pressure Symbol 12 Memory Mode Symbol
3 Measurement Mode 13 Battery Symbol
4Systolic Pressure Value 14 Result Indicator
5 Diastolic Pressure Symbol 15 Day Average Result
6Diastolic Pressure Value 16 Pulse Rate
7 Volume Symbol 17 Blood Drop Symbol
8 Special Message 18 Test Strip Symbol
9 Time 19 User Number
10 Unit for Blood Glucose 20 Heart Symbol - for IHB
Detection (Irregular Heart Beat)

D40 Owner’s Manual
EN-5
Voice Function
This device is equipped with voice function to guide you through the process of blood
glucose and blood pressure testing.
The following table tells you when and what the device“speaks”.
Situation Spoken sentence(s)
When the device is
turned on to begin
a blood pressure
measurement.
Thank you for using this product.
The user’s number is one, please select the user’s number.
The user’s number is (number), please relax during
measurement.
When room temperature
is outside operating
range of 10°C to 40°C
(50°F to 104°F).
Room temperature out of range, unable to measure.
When the glucose test
is completed (the result
appears on display).
The blood glucose is (number) milligram per deciliter.
When the device is in the
setting mode.
You are now in setting mode.
The year is (number).
The month is (month).
The day is (number).
The hour is (number).
The minute is (number).
The time is (12/24) hour mode.
Voice volume is (number).
When the device is in the
setting mode.
Delete memory record function, press M key to clear all the
records.
The year is (number).The month is (month).The day is
(number).The hour is (number).The minute is (number).The
time is (12/24) hour mode.Voice volume is (number).
Have a nice day.
When the test strip is
inserted into the device.
Thank you for using this product.
Test strip is inserted.Today’s day is (number), the time is
(number), the user’s number is one, please apply blood onto
the test strip.
Now testing.
The user’s number is one.Your blood glucose is (number)
milligram per deciliter.

D40 Owner’s Manual
EN-6
Situation Spoken sentence(s)
When the glucose
test result is outside
measurement range of 20
to 600 mg/dL (1.1 to 33.3
mmol/L).
The blood glucose is out of range,unable to measure.
When power is
insufficient.
Battery is dead, please replace.
When the device
is in blood glucose
measurement mode.
You are now in testing mode.
This is before meal measurement.
This is after meal measurement.
You are now in control solution mode.
When the blood pressure
test is completed (the
result appears on display).
Your systolic blood pressure is (number) millimeter of mercury,
the diastolic blood pressure is (number) millimeter of mercury
and the heart rate is (number) beats per minute.
When the device is in
memory mode.
Thank you for using this product.
Today’s date is (number), the time is (number), you are now
in memory mode, the user’s number is one, please select the
user’s number.
When the device is in
memory mode.
Memory record for (time), your blood glucose is (number)
milligram per deciliter.Your memory record for (time).Your
systolic blood pressure is (number) millimeter of mercury, the
diastolic blood pressure is (number) millimeter of mercury and
the heart rate is (number) beats per minute.
When the device is in day
average mode.
Thank you for using this product.
You are now in day average mode,the user’s number is one,
please select the user’s number.
The user’s number is (number), the 7-,14-,21-,28,,60-,90- day
blood glucose average is (number)

D40 Owner’s Manual
EN-7
Getting Started
Initial Setup
Before using the device for the first time or after you changed the
batteries,do the following initial setup:
Step 1: Enter the Setting Mode
Press and hold until the display turns on.
Step 2: Configuring the Settings
(Date,Time,Time Format,Volume Level,Auto-send and Memory Deletion)
Press repeatedly to adjust the value or enable/disable the setting.Then press to
confirm the setting and switch to another field.
Set [Year] Set [Month] Set [Day]
Set [Time
Format]
Set [Minute] Set [Hour]
Set [Volume
Level]
Set [Auto-Send] Memory
Deletion
After all settings are complete, the device will automatically repeat all settings before
shutdown.

D40 Owner’s Manual
EN-8
Note:
• During memory deletion, do the following:
To keep all saved results, press to keep the saved result.
To delete all results,press twice to delete all memory.
To delete memory individually, press to select specific user. Press twice to delete
all results for the specified user.
• If the device is idle for 3 minutes during the setting mode,it will turn off automatically.
User Number Selection
This system provides up to four (4) users for both measuring functions. Each user’s test
results are stored separately under each user number.
1. Press repeatedly to select the desired user number.
The flashing icon indicates the currently selected user.
2. Press to confirm the selection.
The device will repeat the selected user number and then turn off
automatically.

D40 Owner’s Manual
EN-9
Testing Your Blood Pressure
Fitting the Cuff
Pressure Cuff
Air Tube
Air Plug
1. Connect the air plug of the tubing to the air jack of the device.
2. Assemble the cuff as shown in the illustration.
The smooth surface should be inside the cuff loop
and the metal D-ring should not touch your skin.
Note:
• Before using the cuff, be sure the cuff size fits with your
upper arm circumference.
3. Stretch your left (right) arm in front of you with your
palm facing up.
Slide and place the cuff onto your arm with the air
tube and artery mark region (in red) toward the
lower arm.
Wrap and tighten the cuff above your elbow.The
red line on the edge of the cuff should be approximately 0.8 to 1.2 inches (2 to 3 cm)
above your elbow. Align the tube over the main arteries on the inside.
4. Leave a little free space between the arm and the cuff.You should be able to fit 2
fingers between them.
5. Press the hook material firmly against the pile material.The top and bottom edges of
the cuff should be tightened evenly around your upper arm.
Proper Measurement Position
1. Sit down for at least 10 minutes before measuring.
2. Place your elbow on a flat surface. Relax your hand with the
palm facing up.
3. Make sure the cuff is about the same height as the location of
your heart.
4. After the device is turned on,the cuff will begin to inflate
automatically.
Remain still and do not talk or move during the measurement.
INDEX
RED LINESHOULD BE AT THE INSID
INDEX MUST
2
~3cm
(0.8”~1.2”)

D40 Owner’s Manual
EN-10
Measuring Blood Pressure
This device provides you two different ways to measure your blood pressure.
When the device detects an irregular heart beat, the pulse rate symbol is shown as“
”instead of“ ”. If the problem still persists,please consult your doctor.
Important!
Always apply the pressure cuff before turning on the device.
A. Single Measurement
Perform an individual blood pressure measurement.
1. Press . All the LCD symbols will appear.
2. Press to select the desired user number and then press .Then the cuff will
begin to inflate automatically.
A pulse is detected. Displays the systolic pressure, diastolic
pressure,and pulse rate.
3. Press to turn the device off.
Note:
• If the device is idle for 3 minutes,it will turn off automatically.
B. Average measurement
Automatically perform three (3) consecutive blood pressure measurements and
display the final average result.
1. Enter the Average mode.
Press and hold for 3 seconds (for D40b/D40g model),or just press (for D40a
model).
2. Press to select the desired user number and then press .Then the cuff will
begin to inflate automatically.
After the first measurement is complete, the
device will start counting down before the second
measurement begins.The device will take three (3)
measurements consecutively with an interval of 20
seconds.
After taken three measurements,the results are averaged to produce
the blood pressure measurement.
3. Press to turn the device off.

D40 Owner’s Manual
EN-11
Control Solution Testing
FORA Control Solution contains a known amount of glucose that reacts with test strips
and is used to ensure your device and test strips are working together correctly.
Do a control solution test when:
you first receive the device.
at least once a week to routinely check the device and test strips.
you begin using a new vial of test strips.
you suspect the device or test strips are not working properly.
your blood glucose test results are not consistent with how you feel,or if you think
the results are not accurate.
you have dropped or think you may have damaged the device.
To perform the control solution test, do the following:
1. Insert the test strip into the test slot of the device.
Wait for the device to display the test strip and blood drop symbol.
2. Press to select the desired user number.
3. Press to mark this test as a control solution test.
With“QC”displayed,the device will store your test result in memory.
If you press again, the“QC”will disappear and this test is no longer a
control solution test.
Important!
• When doing the control solution test,you have to mark it so that the test result will not
be stored in the memory.Otherwise,it will mix up the blood glucose test results with the
control solution test results in memory.
4. Apply the control solution.
Shake the control solution vial thoroughly
before use.Squeeze out a drop and wipe
it off, then squeeze another drop and
place it on the tip of the vial cap.
Hold the device to move the absorbent
hole of test strip to touch the drop. Once the confirmation window fills completely,
the device will begin counting down.
Note:
• To avoid contaminating the control solution, do not directly apply control solution onto
a strip.
5. Read and compare the result.
After counting down to 0,the test result of control solution will
appear on the display. Compare this result with the range printed
on the test strip vial and it should fall within this range.If the test
result is out of range,read the instructions again and repeat the
control solution test.
(110 mg/dL= 6.1 mmol/L, 109~165 mg/dL = 6.0~9.1 mmol/L) 109~165
Normal

D40 Owner’s Manual
EN-12
Testing Your Blood Glucose
Test Strip Appearance
Absorbent Hole
Apply a drop of blood here. Confirmation Window
An area where you confirm
if enough blood has been
applied to the absorbent hole
in the strip.
Test Strip Handle
Hold this part to insert
the test strip into the slot.
Contact Bars
Insert this end of the test strip
into the meter.Push it in firmly
until it will go no further.
Inserting a Test Strip
Insert the test strip as shown in the illustration.
Important!
The front side of test strip with FORA Logo should face up when
inserting test strip.Test results might be wrong if the contact bar is not
fully inserted into the test slot.
Preparing the Lancing Device
1. Remove the cap.
2. Insert a new lancet firmly into the white lancet holder cup.
3. Remove the protective disk on the lancet.
Hold the lancet firmly in place and twist off the protective disk.

D40 Owner’s Manual
EN-13
4. Replace the cap until it snaps or clicks into place.
5. Rotate the dial to set the desired lancing depth.
6. Pull the cocking control out until the orange bar appears on the
release button window.
Obtaining the Blood Sample
Please follow the suggestions below before obtaining a drop of blood:
• Wash and dry your hands before starting.
• Select the puncture site either at fingertips or another body parts.
• Clean the puncture site using cotton moistened with 70% alcohol and let it air dry.
• Rub the puncture site for about 20 seconds before penetration.
• Use a clear cap (included in the kit) while setting up the lancing device.
Wait for the device to display the test strip and blood drop symbol.
Blood from the ngertip
1. Press the lancing device’s tip firmly against the lower
side of your fingertip.
2. Press the release button to prick your finger, then a click
indicates that the puncture is complete.
Blood from sites other than the ngertip
Important!
• Avoid lancing areas with obvious veins to avoid excess bleeding.
1. Replace the lancing device cap with the clear cap.
2. Pull the cocking control out until the orange bar appears
on the release button window.
Note:
• Choose a different spot each time you test. Repeated
punctures at the same spot may cause soreness and calluses.
• Please consult your health care professional before you begin AST(Alternative Site Testing).
• It is recommended to discard the first drop of blood as it might contain tissue fluid, which
may affect the test result.
1
2

D40 Owner’s Manual
EN-14
Measuring Blood Glucose Test
1. Insert the test strip into its slot.
Wait for the device to display the test strip and blood drop symbol.
2. Select the appropriate measuring mode by pressing .
• General Tests (not display) - any time of day without regard to time since last meal.
• - no food intake for at least 8 hours.
• - 2 hours after a meal.
• - testing with the control solution.
3. Obtain a blood sample.
Use the pre-set lancing device to puncture your desired site. After
penetration, discard the first drop of blood with a clean tissue or
cotton.Gently squeeze the punctured area to obtain another drop of
blood.Be careful NOT to smear the blood sample.
The volume of blood sample must be at least 0.5 microliter (μL) of
volume.
4. Press to select the desired user number.
5. Apply the blood sample.
Hold the blood drop to touch the
absorbent hole of the test strip.Blood will
be drawn in and after the confirmation
window is completely filled, the device
begins counting down.
6. Read your result.
The result of your blood glucose test will appear after the device
counts down to 0.This result will automatically be stored in the
memory.
(104 mg/dL = 5.7 mmol/L)

D40 Owner’s Manual
EN-15
Disposing Used Test Strip and Lancet
To remove the used test strip,simply push the Strip
Ejector button upward to eject the used test strip.
The device will automatically turn off after the test
strip is ejected.
To remove the used lancet, remove the lancet from
the lancing device after you have finished testing.
Discard your used strip and lancet properly in a
puncture resistant container.
Reviewing Test Results
Your device stores the 864 most recent test results along with respective dates and
times in its memory.
To review all test results, do the following:
1. Press .The“ ” icon appears on the screen.
2. Press to select the desired user number.
3. Press to review the test results stored in the device.Press to search the result
forwards, and press to search the result backwards.
(109 mg/dL = 6.0 mmol/L)
To review the day-average test results, do the following:
1. Press and hold for 3 seconds until the“ ”icon appears on the screen.Your
blood glucose 7-day average result will appear on the display.
2. Press to select the desired user number.
(115 mg/dL= 6.3 mmol/L)
3. Press to review your 14-, 21-, 28-, 60- and 90-day average.
4. Press to review your blood pressure 7-, 14-, 21-, 28-, 60- and 90-day
average.

D40 Owner’s Manual
EN-16
Note:
• If you wish to review the results of different user numbers or the blood glucose and blood
pressure for each user number, press or .
• Press to exit the memory mode or leave it without any action for 3 minutes.The device
will turn off automatically.
• If using the device for the first time,the“---” icon appears when you recall the test results or
review the average result.This indicates that there is no test result in the memory.
• Control solution results are NOT included in the day average.
• The blood glucose test results of and will NOT be calculated in the day average
results.
Appendix
Transferring Data
There are three types of connection to transfer results, please check your meter box for
the transmission method of your meter. For USB Continua,Bluetooth or GPRS methods,
please contact service providers for more information.
1. Data Transmission Via Cable (For D40a model only)
a. USB
i. Install the software on your computer
Download Health Care System Software and instruction manual provided on
ForaCare Suisse AG, website:http://www.foracare.ch to your computer. Follow the
instructions to install the software in your computer.
ii. Connect the device with your computer using a USB
cable
“USb”will appear on the display and the USB indicator
will light up in green, indicating that the meter is ready
to transmit data.
iii. Transfer data to your computer
Follow the software on-screen instructions to transmit
data. Data transmitted will include results with date
and time.Remove the cable and the device will
automatically turn off.
b. Continua
Please identify the device (agent) connects to manager side (host,hub or gateway)
has followed the Continua certification, and please contact your service provider for
account registration and procedure.

D40 Owner’s Manual
EN-17
2. Data Transmission Via Bluetooth (For D40b model only)
a.Type 1
i. Activate Bluetooth
To enable the Bluetooth function, do one of the following:
(a) with the device turned off, press to turn on the Bluetooth function.
(b) if Auto-send is set to On,the device will turn on the Bluetooth function after
the system completes a measurement.
ii. Pair with your computer
Your computer will prompt you to enter the the
Bluetooth pin code.Enter the correct pin code (111111).
“PCL”will appear on the display and the RF indicator will
light up in blue.
When the RF indicator is blinking,this indicates that
the device is pairing mode.Once the connection is
established, the RF indicator shows a steady blue light,
and it is ready for data transmission.
BT Indicator
Status
BT Indicator
Status
Flash Connectable for pairing. Lit Solid The connection is established.
iii. Transfer data to your computer
The transmission procedure is controlled by software,the device will turn off by
software after completion of data transmission. If the device is still on, press
and the device will turn off.
b.Type 2
i. Activate Bluetooth
To enable the Bluetooth function, do one of the following:
(a) Pairing mode:
With the device turned off, press and hold for 5~10
seconds until the screen shows“PCL”and then ”dEL”
will flash twice,the RF indicator will light up in blue and
blink fast. For the first time connection,your computer
will prompt you to enter the pin code (111111) and the
pairing starts.
(b) Connection mode:
• with the device turned off, press to turn on the
Bluetooth function.
• if Auto-send is set to On,the device will turn on the Bluetooth function after the
system completes a measurement.
After measurement or short press , the RF indicator will blink slowly and the
device is in connection mode,only paired host can connect to the device.When
the RF indicator shows a steady blue light, the device is online and ready for data
transmission.

D40 Owner’s Manual
EN-18
BT Indicator
Status
BT Indicator
Status
Flash Fast Pairing mode. Lit Solid The connection is established.
Flash Slowly Connection mode.
ii. Transfer data to your computer
The transmission procedure is controlled by software,the device will turn off by
software after completion of data transmission. If the device is still on, press
and the device will turn off.
c. Continua
With regard to how to process the pairing, please refer to Bluetooth Type 2.
Note:
• Make sure your PC has Bluetooth before transmitting the data and the device is within the
receiving range.
• When the device is connected to the PC,it is unable to perform any test.
3. Data transmission via GPRS (For Fora D40g only)
Before initiating GPRS transmission,insert the SIM card at the bottom of the device
battery compartment to transmit data. Please contact service providers for more
information on SIM card, server information and data transmission.
i. Initiate GPRS transmission
To initiate GPRS transmission, do one of the following:
(a) with the device turned off, press to initiate GPRS transmission of batch
upload for current user with test results which have not been uploaded,
(b) if Auto-send is set to On,the device will initiate GPRS after measurement to
send the current new data,
(c) in memory mode, press to initiate GPRS to upload data shows on the
screen.
ii. During transmission
With the device turned off, press to initiate the data transmission from the
device.“PCL”will appear on the display first and the RF indicator will light up in
blue.Then the test result under transmission will show on the screen.
When the RF indicator is blinking in blue,the data transmission has started.When
the RF indicator shows an orange light,the GPRS service is online.
Press and the device will turn off.
Table of contents
Languages:
Other FOR-A Blood Glucose Meter manuals

FOR-A
FOR-A DM40 User manual

FOR-A
FOR-A D10 User manual

FOR-A
FOR-A TD-3261G User manual

FOR-A
FOR-A Diamond GD50 User manual

FOR-A
FOR-A D30 User manual

FOR-A
FOR-A COMFORT plus G30a User manual

FOR-A
FOR-A Diamind VOICE User manual

FOR-A
FOR-A V12 User manual

FOR-A
FOR-A GD40 User manual

FOR-A
FOR-A Diamond Mini User manual

FOR-A
FOR-A Diamond GD50 User manual

FOR-A
FOR-A Diamond Mini User manual

FOR-A
FOR-A MD User manual

FOR-A
FOR-A Diamond CUFF BP User manual

FOR-A
FOR-A Diamond Mini User manual

FOR-A
FOR-A COMFORT pro GD40 User manual

FOR-A
FOR-A G71a User manual

FOR-A
FOR-A G20 User manual

FOR-A
FOR-A TNG VOICE Setup guide

FOR-A
FOR-A MD Reference guide