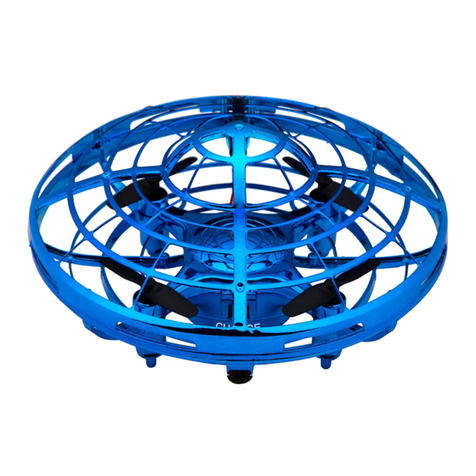
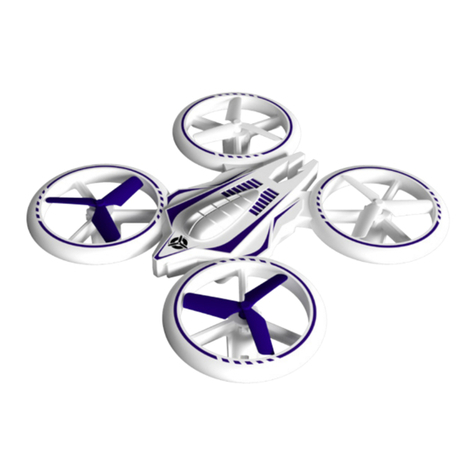
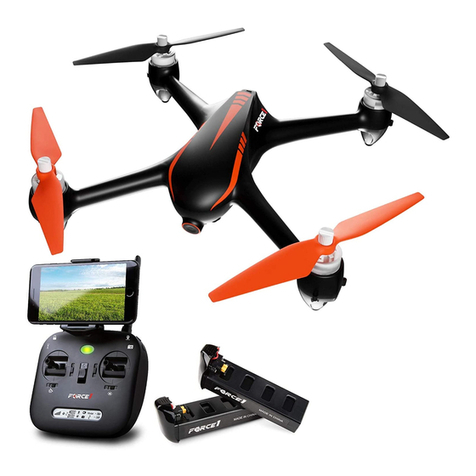
Force1 UFO5000 User manual

14+
3-SPEED LED STUNT DRONE
USER MANUAL

2www.force1rc.com
WARNINGS AND SAFETY PRECAUTIONS
All users must read this manual in entirety before
operating the drone. Improper installation, ying in
bad conditions or unfamiliar operation by the user
may cause crashing, damage to the aircraft, property
damage or personal injury; none of which Force1RC
can be held liable for.
1. Fly a safe distance from people, animals and obstacles
During ight, this drone may change in speed
or sensitivity and may cause potential hazards.
Use common sense and stay away from crowds,
buildings, trees, power lines, and other hazards.
Avoid using the drone under weather conditions such
as rain, storms or wind and snow. Make sure others
around you are aware you are operating this drone.
2. Keep away from humidity
The drone is composed of electronic and
mechanical parts. Avoid exposing the drone to
humidity, water and moisture. Doing so may cause
damage and cause the drone to malfunction and
cause an accident.
3. Only use included parts and genuine replacement parts
Only use original parts for replacement and
modication to ensure ight safety. Operate the drone
within range allowed by product function. Use of
unapproved parts will void any warranty. Do not use the
drone beyond the scope of local laws and regulations.
4. Fly with experienced users
Beginner drone pilots should be supervised or
guided by an experienced drone user or adult
if they are a minor. Learning how to pilot a drone
successfully takes time and practice.
5. The pilot should never operate the drone under
the inuence of alcohol/drugs.
Never operate the drone if you are feeling fatigued
or in poor mental state. Doing so increases your
risk for an accident, causing property damage or
personal injury.
6. Store in a cool, dry place
The drone is made of plastic, metal and electronic
components. To avoid deformation, overheating
and damage, store it out of direct sunlight and in a
cool dry place.
Note: According to Part 15 or the FCC Rules, this device
has been tested and meets the limits or Class B digital
devices. These limits are designed to provide reasonable
protection against harmful interference from residential
equipment. This equipment generates, uses, and can
radiate radio frequency energy, and if it is not installed
and used in accordance with the instructions, it may
cause harmful interference to radio communications.
However, there is no guarantee that interference will
not occur in a particular installation. If this device
does cause harmful interference to radio or television
reception, you can conrm by turning the device on
and o. It is recommended that users try to correct the
interference by one or more of the following measures:
• Relocate or adjust the receiving antenna.
• Increase the distance between the equipment and
the receiver.
• Please note that changes or modications not
expressly approved by the responsible party may
invalidate the user’s operating authority
7. Keep this manual. This manual contains important
information, keep it for future reference.
8. The pilot is solely responsible for ensuring this drone
won’t cause injury or property damage. If the drone
is coming towards you move out of its path.
9. During ight or landing keep a distance of 1-2
meters from the drone to avoid injuries caused by
collision of the drone with face or body. Tie hair back,
wear a hat or hood to avoid hair entanglement
with the propellers.
10. Force1 and resellers or distributors of this drone
are not responsible for physical loss, damage or
injury caused.
11. This product contains small parts. Keep out of
reach of children to avoid suocation or choking by
swallowing parts.
12. Keep away from motors and propellers to avoid
injury of pinching, burns or cuts. The motors do heat
up when used.
13. Do not bring the drone close to your ears as it may
damage hearing.

UFO5000 | USER MANUAL 3
14. In order to comply with the command of the
magnetic environment requirements of the Aviation
Radio Administration and related departments,
stop using drones when there are control orders
during the control period in certain areas.
15. Always y the drone back when the battery is
running low.
BATTERY CARE
1. Lithium battery life will decrease over long periods
of time. To extend lifetime of the battery, keep 20%
of the power remaining in the drone battery rather
than completely draining it.
2. The battery may be warm to the touch after use
and charging. The battery will fail if not given time
to cool down between uses and charging.
3. Do not short circuit the battery, put it in re, leave in
high temperatures or direct sunlight and do not put
it under pressure to avoid explosion.
4. Do not immerse in water or allow the battery to get
wet. Keep the battery out of reach of children and
pets.
5. If the battery is not going to be used for a period of
time, remove the battery from the drone to prevent
potential damage or battery leakage and store in
a re-safe lithium battery bag.
6. The battery charger should be plugged into the
designated power source with the same product
identication.
7. Charge the battery under supervision of an adult
and keep it away from combustibles. Keep the
battery in sight while charging. Store in a reproof
bag for lithium batteries.
8. Install batteries in the correct orientation. Incorrect
installation of the battery may cause a short circuit.
9. Use the USB charging cable that comes with the
drone to charge the battery.
10. Do not mix lithium-ion batteries with other types of
batteries.
11. Do not over charge the battery or leave it on the
charger for extended periods.
12. Do not charge batteries that are damaged,
cracked, swelling or discolored and safely discard
immediately. Check battery connections after
every crash. Do not put batteries in household
trash. Contact your local waste agency for more
information.
13. Remove the drone battery from the drone before
charging it.

4www.force1rc.com
DRONE BATTERY CHARGING
1. Attach the USB cable to the battery then plug the
USB into your preferred charging source. 2. When the battery is charging, the USB indicator
light will be on. When the battery is fully charged,
the USB indicator light will turn o. The battery
charging time is approximately 120 minutes.
Drone Battery USB Charging Cable Charging Sources
• Take-out and put the battery in the correct way
• Non-rechargeable batteries cannot be charged
• Dierent types of batteries or old and new batteries
cannot be mixed
• Only batteries of the same model or equivalent to
the recommended model can be used
• Insert the battery with the correct polarity
• Exhausted batteries should be removed from the
drone before charging
• The power terminals shall not be short circuited
• Do not plug the battery cable into the battery charger
upside down. This will render the charger inoperable.
CHARGER CAR CHARGER
POWER BANKCOMPUTER

UFO5000 | USER MANUAL 5
UFO5000 DRONE
TRANSMITTER
2 x MODULAR BATTERIES
USB CHARGER
4 x PROPELLERS
(2 x A & 2 x B)
SCREWDRIVER
SPANNER
INSTRUCTION MANUAL
BOX CONTENTS
DRONE OVERVIEW
FRONT
PROPELLER A
CLOCKWISE
PROPELLER A
CLOCKWISE
PROPELLER B
COUNTER CLOCKWISE
PROPELLER B
COUNTER CLOCKWISE
MOTOR (FORWARD)
MOTOR (FORWARD)MOTOR (REVERSE)
MOTOR (REVERSE)
REAR

6www.force1rc.com
TRANSMITTER OVERVIEW
ON/OFF
SPEED MODE BUTTON
LONG PRESS: AUTOROTATION
1-KEY LIFT/LAND
(LONG PRESS DIRECTION TRIM) HEADLESS MODE
(LONG PRESS: EMERGENCY STOP)
Open the battery cover
and insert 3 AAA batteries as
shown below (not included).
LED MODE BUTTON
LONG PRESS: 360° FLIP
THROTTLE
ROTATE
LEFT/RIGHT
FORWARD/BACKWARD
LEFTWARD/RIGHTWARD

UFO5000 | USER MANUAL 7
DRONE ASSEMBLY
PROPELLER INSTALLATION/REMOVAL
BATTERY INSTALLATION
Place the battery on the center underside of the
drone and slide the battery into place (Fig.1).
Ensure the battery is rmly installed so it won’t fall
out during ight.
BATTERY REMOVAL
Turn o the drone before removing the battery.
Press and hold the tab circled in (Fig.2). Slide the
battery to the right side to release it from the drone.
• To remove a propeller, use the spanner to lift
the propeller up until it comes o (Fig.3)
• The replacement propeller should have the
same rotational direction; place on the correct
motor pin, and apply pressure until it snaps into
place (Fig.4)
Note: Installing the wrong propeller in the wrong
quadrant will cause the drone to ip over, not lift or
go in circles on the ground when trying to take o.
Fig.1 Fig.2
Fig.3 Fig.4
Fig.5
A B
AB
PRESS AND
HOLD THE TAB
AND MOVE THE
BATTERY TO THE
RIGHT SIDE

8www.force1rc.com
QUICK-START GUIDE
• Insert the drone battery and turn the drone on
by pressing and holding the power button on the
bottom of the drone.
• The transmitter will beep once to indicate it’s turned
on and beep a second time when it’s paired with the
drone. The red light will almost immediately turn solid.
• If you turn the transmitter on before you turn the
drone on, the transmitter will beep twice and the
red light will ash until you turn the drone on and the
transmitter pairs with the drone.
• Once the drone and transmitter are paired, the light
on the transmitter and the drone LEDs turn solid to
indicate pairing was successful.
• Push the throttle and joystick to the inner bottom
corners at the same time to calibrate the drone
(Fig.7). The drone lights will ash green and once
successful the front LEDs will turn blue and the back
LEDs will turn white.
• Press the 1-Key lift/land button and the drone will
immediately start lifting (Fig.8).
• When you are done ying. Press the 1-Key lift/land
button again to land the drone. (Fig.8).
NOTE:
Follow the Preight Checklist steps below if your drone
doesn’t start or isn’t performing properly.
• Before ying your drone, carefully review the quick
start guide above and the rest of the ight controls
and functions outlined in this manual.
• See the troubleshooting guide on
pg.14
and
pg.15
• Make sure your drone and remote control batteries
are fully charged.
• Make sure the connection between the drone and
transmitter is solid.
• Make sure the propellers are installed correctly and
the motors are working normally after unlocking.
Fig.6
Fig.7
Fig.8

UFO5000 | USER MANUAL 9
FLIGHT CONTROLS
HOVER UP AND DOWN FLY FORWARD OR
BACKWARD
FLY LEFT OR RIGHT ROTATE LEFT OR RIGHT
Push the THROTTLE
STICK up to y the
drone up and pull the
THROTTLE STICK down
to y the drone down.
Push the DIRECTION
CONTROL STICK up to
y the drone forward
and pull DIRECTION
CONTROL STICK
down to y the drone
backward.
Move the DIRECTION
CONTROL STICK to
the left and move the
DIRECTION CONTROL
STICK to the right to y
the drone to the right.
Move the THROTTLE
STICK to the left to
rotate the drone to
the left and move the
THROTTLE STICK to
the right to rotate the
drone to the right.

10 www.force1rc.com
TRIM ADJUSTMENTS
Long press the button pointed out on the
transmitter in (Fig.9) to adjust trim. When your
drone drifts in an unwanted direction, long press
the DIRECTION TRIM button (Fig.9/10) and move
the direction stick to make the adjustments.
LEFT/RIGHT TRIM
When the drone drifts left while ying, press and
hold the DIRECTION TRIM button and push the
direction stick to the right.
When the drone drifts right while ying, press and
hold the DIRECTION TRIM button and push the
direction stick to the left.
FORWARD/BACKWARD TRIM
When the drone drifts forward while ying press
and hold the DIRECTION TRIM button and push the
direction stick on the right downward.
When the drone drifts backwards while ying,
press and hold the DIRECTION TRIM button and
push the direction stick on the right upward.
Fig.10Fig.9
PRESS AND HOLD
PRESS AND HOLD

UFO5000 | USER MANUAL 11
Fig.11
Fig.12
360°FLIP
Long Press the 360° Flip button to ip the drone.
The remote control will beep twice, indicating the
drone is in Flip Mode.
Next, move the direction stick up or down, and the
drone will ip up or down (Fig.12)
Move the direction stick to the right or left, and the
drone will ip left or right (Fig.12)
Note:
• Only execute ips when you have plenty of
airspace. The drone can only perform ips when
it is at least 7 feet in the air.
• The drone will drop in altitude when performing
the ip.
• This function can not be used when the drone is
in a low power state.
FUNCTIONS
ONE KEY LIFT/LAND
Place the drone on a at surface. Press the 1-Key
Lift/Land Button (Fig.11)-the drone propellers will
start spinning, and it is ready to y. Push the left
stick up to y the drone upwards.
Press the 1-Key Lift/Land button while the drone is
aloft to land it (Fig.11).

12 www.force1rc.com
SPEED MODES
The drone has three speed modes: Low, Middle
and High. To switch speed modes, press the Speed
Mode button (Fig.14). The remote control will beep
thrice to indicate that it is in High Speed Mode,
twice for Middle Speed Mode or once for Low
Speed Mode. The speed mode may be changed
during ight.
FUNCTIONS
ROTATION
Long press the rotation button to start the
automatic rotation function (Fig.13). If you want to
end the rotation, just push the direction control stick.
Note:
• Only execute rotations when you have plenty of
airspace. The drone can only perform rotations
when it is at least 7 feet in the air.
• The drone will drop in altitude when performing
a rotation.
• This function cannot be used when the drone is
in a low power state.
Fig.13
Fig.14

UFO5000 | USER MANUAL 13
FRONT FRONT
RIGHT RIGHTLEFT LEFT
REAR REAR
Note: do not change the
orientation of remote control
after entering Headless
Mode. Otherwise, you will
lose the set orientation.
LOW BATTERY WARNING
Your drone’s LED lights will keep ashing red when the power is low. This means
you have 30 seconds to land your drone before you lose power
FUNCTIONS
HEADLESS MODE
Headless Mode allows you to y your drone without knowing its
orientation, because it will be xed in the direction you set it.
Press the Headless Mode button to enter Headless Mode before
take o (Fig.15). The remote control will beep continuously and
the drone lights will begin to ash to indicate mode selection.
You must now set the Headless Mode drone direction.
Fig.15

14 www.force1rc.com
TROUBLESHOOTING GUIDE
Problem Reason Solution
The LED indicator on the drone
ashes continuously after
connecting the battery, there
is no response from the remote
control.
The remote control and the
drone are not paired.
Refer to page 8 to pair again.
The drone is not responding. 1. The drone or the remote
control is turned o.
2. The batteries of the drone
or remote control are out of
power or damaged.
3. The batteries are not inserted
properly.
1. Turn on the remote and drone,
and ensure that the battery is
inserted properly.
2. Charge the batteries, use fully
charged batteries.
3. Insert the battery again
and ensure that they are
connected properly.
The motor does not respond to
the throttle lever and the LED
indicator on the drone ashes.
The drone battery level is too
low.
Charge the battery or replace it
with a fully charged battery.
The propellers spin but the
drone does not take o.
1. The propellers are damaged.
2. The drone battery level
is too low.
3. Propellers are installed in the
wrong drone quadrant.
1. Replace the damaged
propeller(s).
2. Charge the battery or replace
it with a fully charged battery.
3. Check the propeller
orientation and install the
propellers in the correct
quadrant on (pg. 5)

UFO5000 | USER MANUAL 15
For fast, friendly service contact us at
support@force1rc.com
Problem Reason Solution
The drone shakes or tilts
sideways during ight.
The propellers are damaged. Replace the damaged
propeller(s).
The drone continues to spin
after making trim adjustments or
the left/right yaw speed is not
consistent.
1. The propellers are damaged.
2. The drone battery level is too
low.
1. Replace the damaged
propeller(s).
2. Charge the battery or replace
it with a fully charged battery.
The drone keeps drifting in one
direction.
The gyroscope is not calibrated
properly.
Make trim adjustments to the
drone after turning it on (pg. 10)

LEARN MORE ABOUT FORCE1
www.force1rc.com
3-SPEED LED STUNT DRONE
Table of contents
Other Force1 Drone manuals

Force1
Force1 MONARCH User manual

Force1
Force1 rogue F72 User manual

Force1
Force1 F200 Shadow Dimensions

Force1
Force1 F200C SPECTER User manual

Force1
Force1 U49C RED HERON User manual

Force1
Force1 halo3000 User manual

Force1
Force1 F200W SHADOW User manual

Force1
Force1 Scoot User manual

Force1
Force1 F200C SPECTER User manual