Forest GEORGIAN WALL User manual
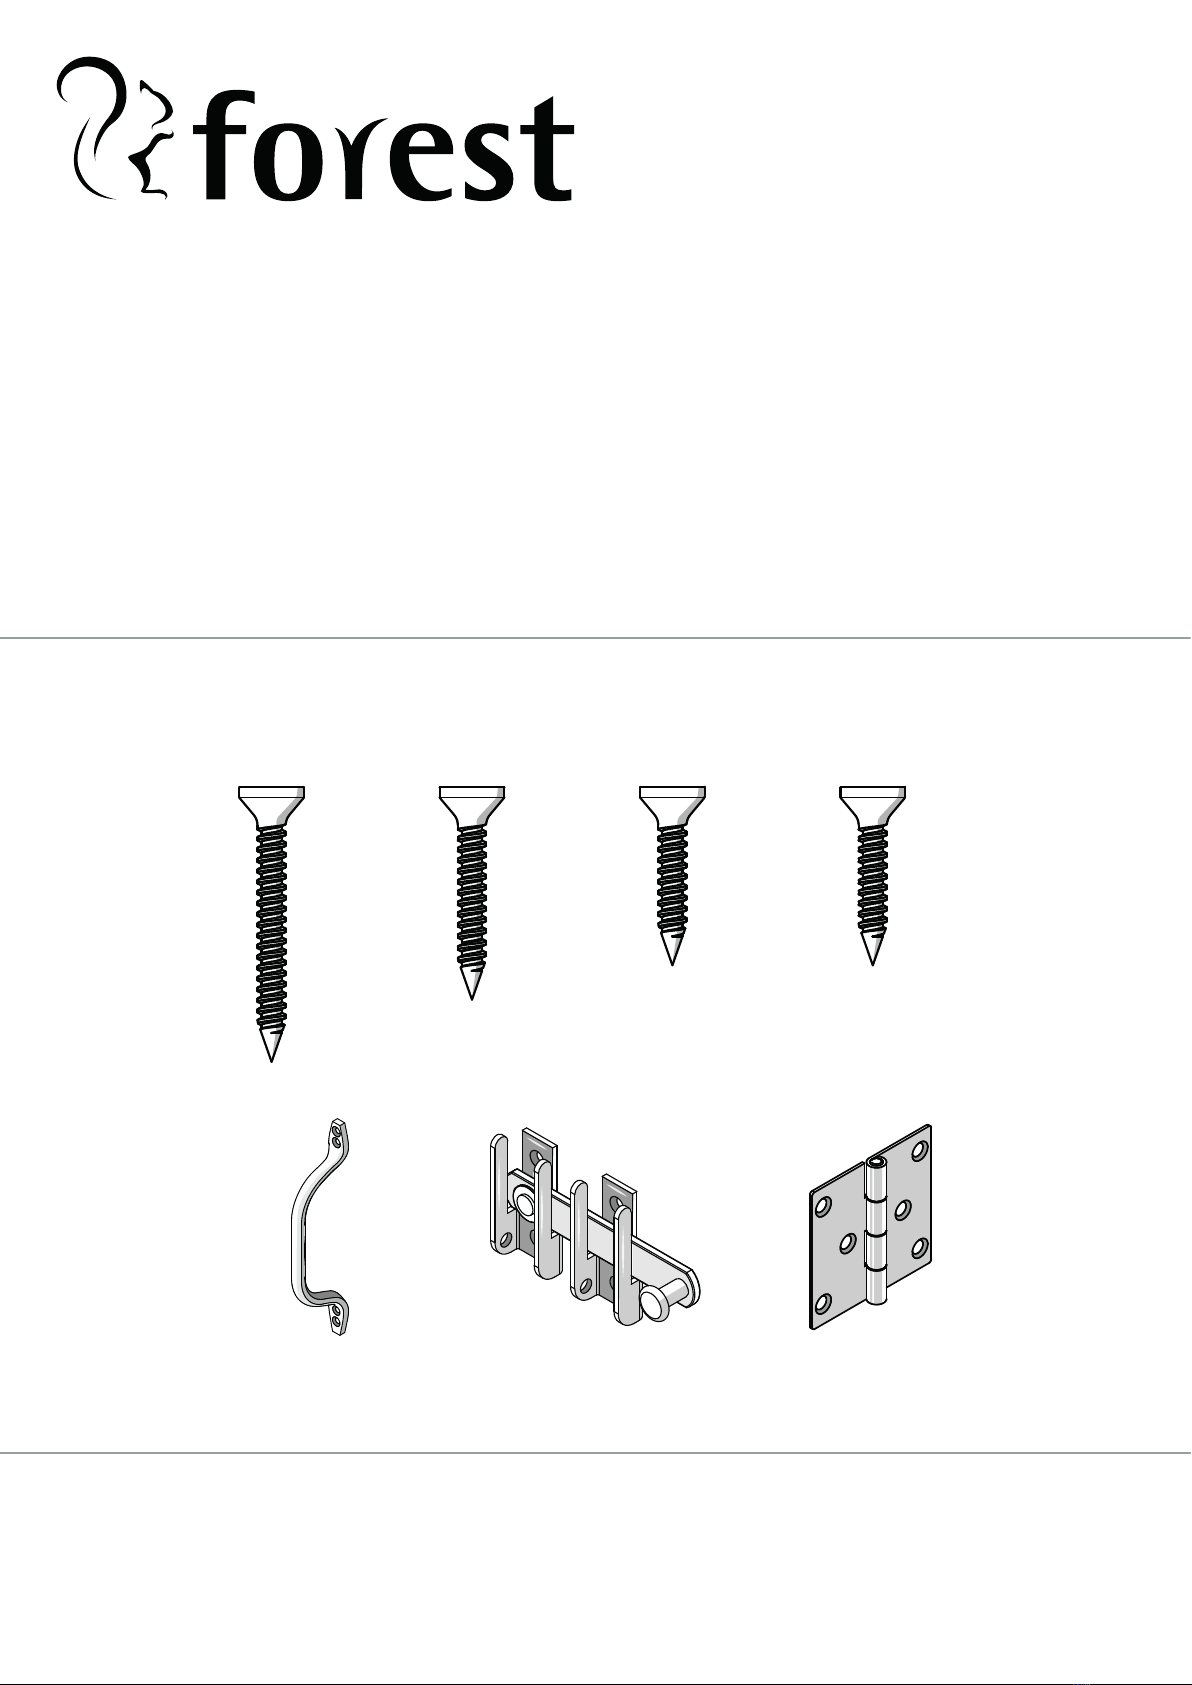
FIXING PACK CODE: GEORGEWGHFP
Making British gardens great
Forest Garden, Oak Drive, Hartlebury Trading Estate, Hartlebury, Worcestershire, DY10 4JB
ISSUE: 0121
GEORGIAN WALL
GREENHOUSE INSTRUCTIONS
Missing something or need more information?
Call our aftersales team on
0333 321 3142
Visit our website for spare instructions and
more information
www.forestgarden.co.uk
4 x 40mm Screws
QTY: 13
3.5 x 25mm Screws
QTY: 28
Butt Hinges
QTY: 4
FIXING PACK CONTAINS:
5 x 70mm Screws
QTY: 20
5 x 25mm Screws
QTY: 4
Drop Latch
QTY: 1
Hotbed Handle
QTY: 1
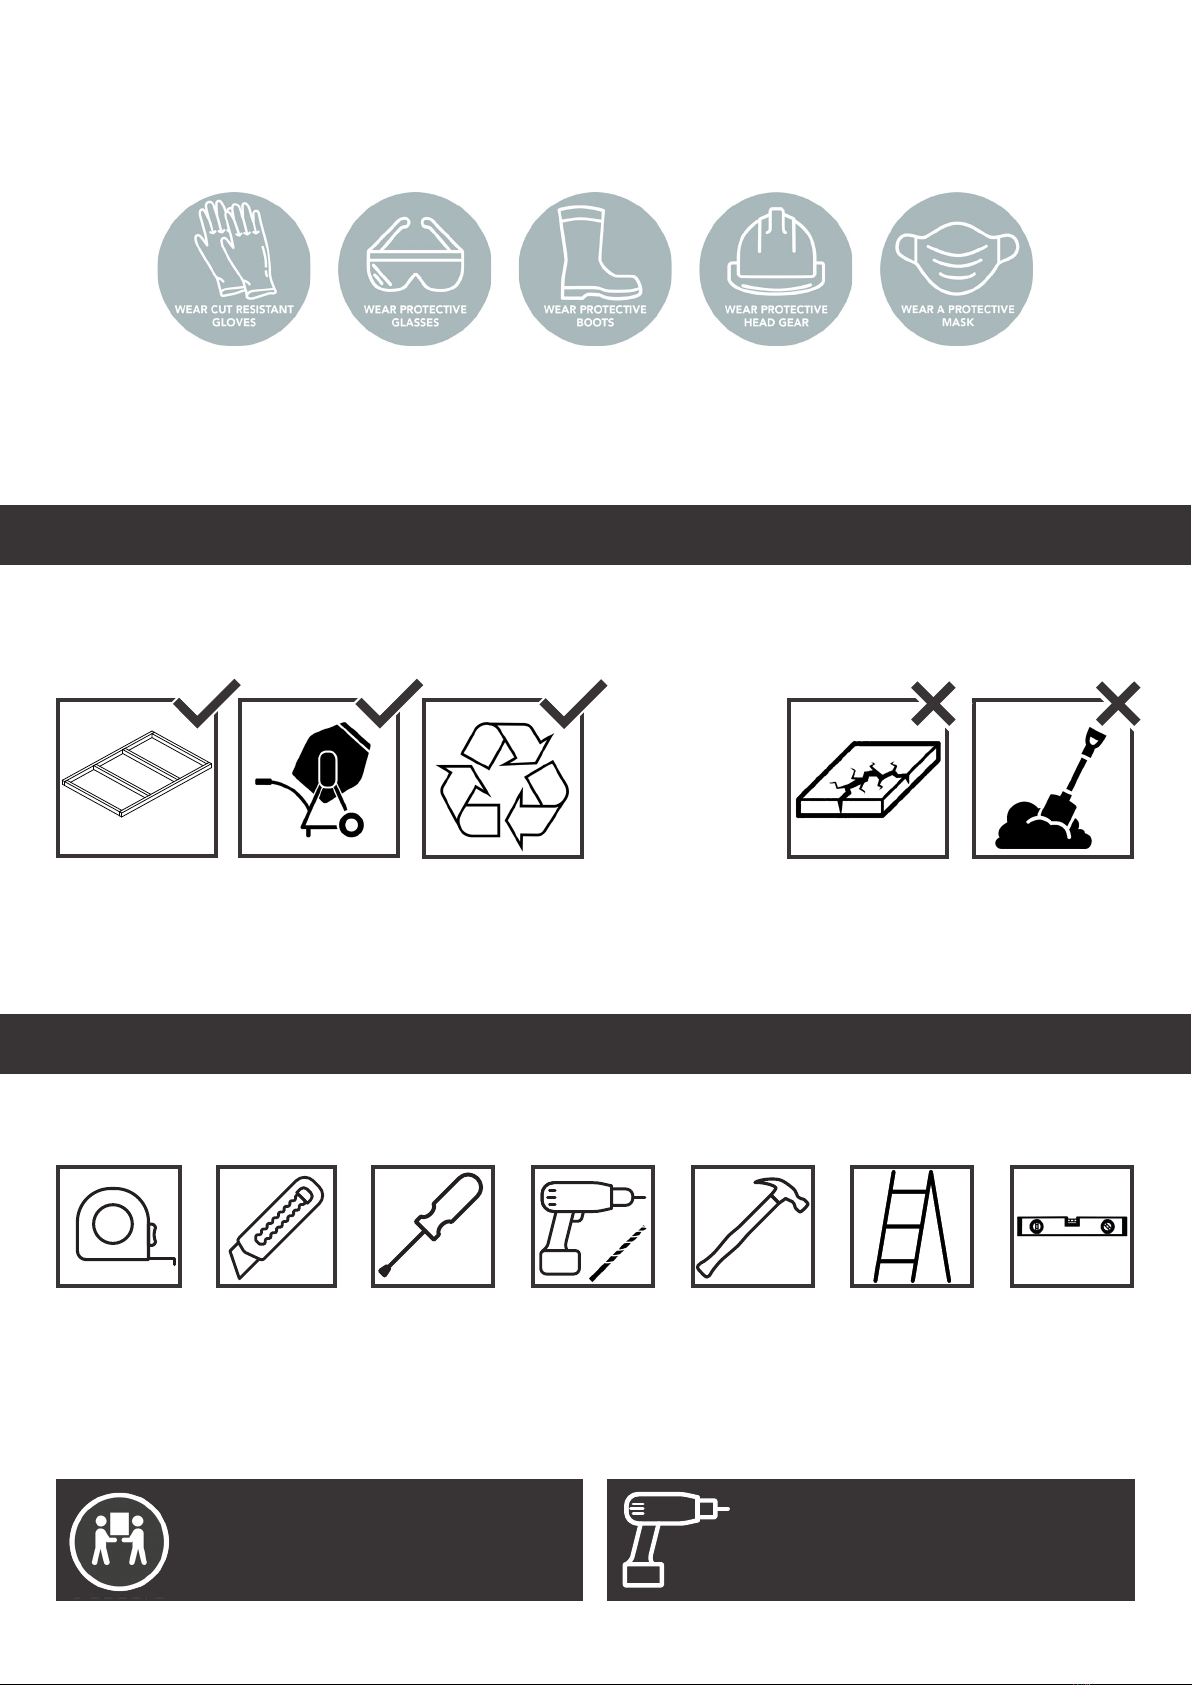
We recommend using the following tools (not supplied):
Assembly is relatively straightforward if you follow these step-by-step instructions.
We recommend aligning components properly before securing them together and pre-drilling
screw holes to avoid splitting the timber.
TOOLS NEEDED
Tape
Measure
Sharp Knife Pozidrive
Screwdriver
Drill & 2mm
Drill Bit
Hammer
REMINDER
Always pre-drill before
screwing.
IMPORTANT
Assembly requires 2+
adults.
Ladder Spirit Level
PLEASE KEEP PLASTIC BAGS AND SMALL PARTS AWAY FROM CHILDREN
Timber is a natural material and will shrink and swell as a result of varying moisture content.
It is vital that you build your new greenhouse on a solid, level base. Timber or plastic bases are
ideal, as are concrete slabs or solid concrete.
BASE PREPARATION
Timber Base
Self-constructed/
Buy pre-made
Concrete
Concrete surface/
Concrete slabs
Plastic Pro Base
Interlocking
eco-friendly base
Soil
A base of soil or
grass only
Broken Slabs/Gaps
Uneven slab sizes
with no cement
TO AVOID DANGER OF SUFFOCATION, PLEASE KEEP THIS FILM AWAY FROM BABIES AND CHILDREN
2
HEALTH & SAFETY
We strongly recommend that PPE (Personal Protective Equipment) is used throughout your build to
ensure you are protected from any potential health and safety risks. Do not exempt yourself from
wearing PPE.
Please note that your window’s have a coloured protective lm on them. We advise to keep the
protective lm on, until the build is complete to prevent any possible damages to the windows
during assembly.

1
Attach the Back Panel to the Side Panels. Screw into the
framework, using 70mm screws.
70MM
SCREWS
2
Attach the Front Panel to the Side Panels. Secure to the
framework, using 70mm screws.
5
Further Fix the Fixed Window into place from the inside,
underneath. Screw through the strips that are attached to
the Front Panel and Back Panel into the window frame.
3
Insert the 2 x Apex Ridge’s using the strips for them to
sit onto. Ensure they are butt up and secured to the Front
Panel and Back Panel with 1 x 70mm at each end.
6
Position and attach the 2 x Hinges to the Opening
Window. Use the measurement provided above as a guide
for the hinge position at each end.
4
Position the Fixed Window and secure to the Side Panel
underneath using 1 x 40mm screw. The Fixed Window can
be secured to either Side Panel.
3
70MM
SCREWS
BACK PANEL
SIDE PANEL
SIDE PANEL
APEX RIDGE
APEX RIDGE
FIXED WINDOW
OPENING WINDOW
40mm
FRONT PANEL
INSIDE BACK PANEL INSIDE FRONT PANEL
70MM
SCREWS 70MM
SCREWS
Position and secure the Opening Window to the Apex
Ridge. Ensure the window can open with ease.
8
Fix the Auto Vent to the Opening Window and Side
Panel. Follow the instructions provided with the Auto Vent.
9
Simply place the shelves onto the ledge attached to the
Side Panels internally.
Attach 2 x Hinges to the Door. Use the measurement
provided above as a guide for the hinge position at each
end.
11
Position and secure the Door in the opening provided.
Fix the 2 x Hinges to the Front Panel framework. The Door
can be hung either side of the opening.
4
7
200mm
200mm
10 DOOR
INSIDE
12
Position and mark out the Latch on the Door and Front
Panel. Fix in place using the screws provided.

REMOVING THE PROTECTIVE FILM
5
13
Attach the Door Handle above the Latch and in your
desired position. Ensure the latch and handles are tted in
a position where the Latch can operate.
14
Position the Fascias before securing into place. Ensure
the edge of the Fascia’s are ush to the apex framework as
shown above.
15
Secure the Fascias to the apex framework onto the Front
Panel.
1
2
PEEL THE PROTECTIVE FILM OFF BY HAND
Simply nd a loose edge or corner around the frame and peel back to completely
remove the lm on that surface. There will be protective lm on the front and back
surface of each window.
APPLY WARM SOAPY WATER
We recommend applying warm soapy water to the surface to help loosen the lm and
rub rmly with a sponge or cloth to remove the adhesive residue. We advise warm
soapy water as many solvents and harsh chemicals can damage the styrene window’s.
3STANLEY KNIFE
If the previous options are unsuccessful, we advise to carefully use a Stanley Knife in
a corner of the frame to provide a starting point to peel the protective lm. Use the
window frame as a guide. Be careful not to scratch the window’s surface. We strongly
advise to use cut-resistant gloves to prevent any harm to yourself. Remove the rest
of the protective lm by hand.
We cannot be held responsible for damages incurred when not following the outlined
procedure.
CHECK & TIGHTEN ALL FIXINGS APPLIED TO THE PRODUCT ON A REGULAR BASIS
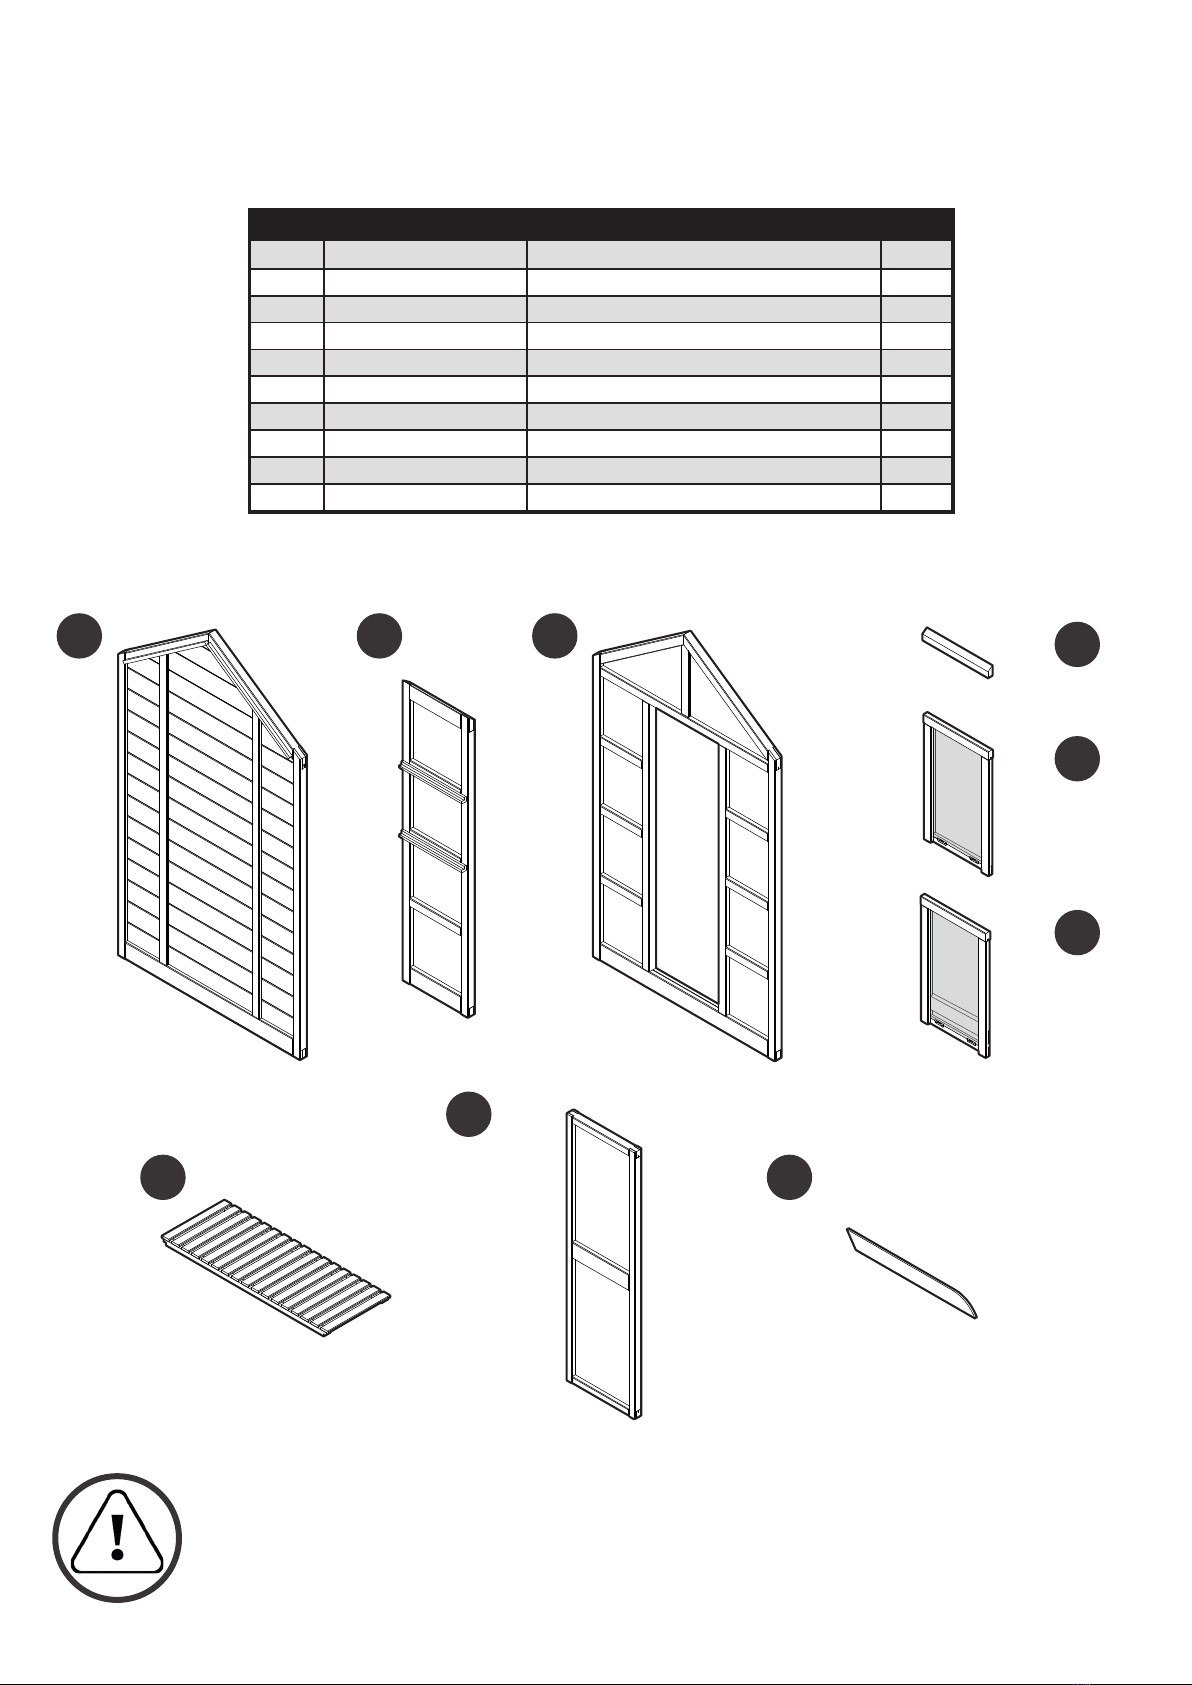
Label Part Code Description No.
AGWGHBACK Back Panel 1110x1972x61mm 1
BGWGHSIDE Side Panel 400x1580x73mm 2
CGWGHFRONT Front Panel 1110x1972x61mm 1
D54280400AII55PPT Apex Ridge 54x28x400mm 2
EGWGHFIXWIN Fixed Window 396x655x28mm 1
FGWGHOPWIN Opening Window 396x655x28mm 1
GGWGHSHELF Shelf 1013x380x40mm 2
HGWGHDR Door 415x1405x45mm 1
I80120781FASCIA Fascia 80x12x781mm 2
Georgian Wall Greenhouse (GEORGEWGH)
TREATED TIMBER CONTAINING A BIOCIDAL PRODUCT
CONTROL OF WOOD DESTROYING ORGANISMS
Active Ingredients - Propiconazole, Tebuconazole, IPBC, Permethrine, Benzyl-C12-16-Alkyldimethyl Chlorides. (Dip Treated)
Basic Copper Carbonate, DDA Carbonate, DDA Chloride. (Pressure Treated)
Wear gloves when handling. Avoid inhalation of sawdust. Do not use in contact with drinking water or food. Do not use for animal
bedding or in sh ponds. Dispose of treated wood responsibly.
6
CHECK YOU HAVE ALL YOUR PARTS.
(The parts do not have codes on them. They are listed below should you need to order one.)
The components provided may be heavy. Please lift with caution and with a minimum of 2 people.
ABCD
E
F
G
H
I
Use the labelled components to help identify the part code and description.
Table of contents
Other Forest Greenhouse Kit manuals


