manuals.online logo
Brands
  1. Home
  2. •
  3. Brands
  4. •
  5. Grandio
  6. •
  7. Greenhouse Kit
  8. •
  9. Grandio GRA-ASC-VENT User manual

Grandio GRA-ASC-VENT User manual

(GRA-ASC-VENT) ASCENT ROOF VENT PACKING LIST
615
616
618
W04
Z02
22 3/4 in / 578 mm
22 3/4 in / 578 mm
19 11/16 in / 500 mm
CONNECTOR FOR 603
SCREWS FOR ROOF VENT
GRAPHIC PART NAME SIZE/LOCATION QUANTITY
1
1
2
2
5
GREENHOU S E S
GRANDIO
2015 GRANDIO ASCENT ADDITIONAL ROOF VENT KIT
FOR NEW AND EXISTING GREENHOUSE CUSTOMERS
© 2013 Grandio Greenhouses, Backyard Living Source Inc. All rights reserved
2015 Manual Edition Extra Roof Vents for Ascent Greenhouses
HQC01
HQC02
Z04, S04/ML01
S04/ML01
603B
ROOF VENT ARM
ROOF VENT LATCH
ROOF VENT HARDWARE
COMBOS FOR 603B/W04
21 7/8 in / 555 mm
GRAPHIC PART NAME SIZE/LOCATION QUANTITY
1
1
2 EACH
8
1
1
L21
Top Left
Profile View
603A
L28
S04/
ML01
J602A-E
Z03
J602B-E
Z03
Z03
J602B-E
Z03
J602B-E
Z03
J602A-E Z03
1.1 Detach the L28 from only the top L21 as shown, let it fall to the side out of the way of the end caps on the side with the
doors. See .
1.2 Detach all J602B,J602A and J601 end caps from the gutters on both front and back of your greenhouse as shown below.
Set aside the end caps and hardware in a safe place for reinstallation later.
REMOVING GUTTER INSTRUCTIONS
Warning: This section is only for already built greenhouses. If you are just building your green-
house for the first time skip ahead to page 3 for roof vent assembly.
J601
1.3 Slide 610 out of 609’s groove only as many panel sections as are needed to access the panel you would like to swap out for
the roof vent of as shown in diagram . Window positions are your discretion however, must be in the middle for support, do
not place nearest the front or back as you will need a 602B support to keep in window vent in place. Remove the Y7 panels, be
sure to note which side should face the sun, if not marked, mark an “X” with a permanent marker in a lower corner. Repeat on
other side if you are installing more panels on that side.
Y7
601B
601A
610
609
610
610
2
609
Y7
REMOVING GUTTER INSTRUCTIONS
Clear Transparent Film
Opal White Film
Polycarbonate
Panels
Sun
The UV-Protected side is covered with clear lm and
must face toward the sun. The side covered in white lm
will always face the interior of the greenhouse. We
suggest you peel all lm o completely prior to assem-
bly and use a permanent marker to place a small “X” on
the lower right corner of each panel on the clear side
that faces the sun, each panel has a sticker labeling the
panel number and this side always faces the sun or
outward as well. DO NOT REMOVE LABELS UNTIL
YOU INSTALL PANELS. The “X” is suggested in case
you dis-assemble your greenhouse in the future so you
may identify which side has the UV coating. Always use
gloves when handling the polycarbonate panels as the
edges can be very sharp.
IMPORTANT: POLYCARBONATE PANELS
1.4 Locate your Y7 Panel from your original greenhouse or in the panel box if just beginning building now. You will need a utility
knife, straight edge ruler or square, a tape measure and a permanent marker for the next steps. You will need to mark a small “x”
on the side of the panel that should face outwards to the sun.
1.5 You will need to cut (1) of the Y7 Panels which measure 22 3/4” x 58 1/8“ to the dimensions of a Y8 Roof Vent Panel
which is 22 3/4” x 19 1/8”. See .
1.6 You will need to cut what is left over of the Y7 Panel which now should measure 22 3/4” x 39“ to the dimensions of a Y9
Roof Vent Panel which is 22 3/4” x 36 7/8”. See .
19 1/8”
58 1/8“
Y7
Y8
1477mm
486mm
3
Y9
36 7/8“
937mm
22 3/4”
578mm
22 3/4”
578mm
Cut
Cut
ROOF VENT ASSEMBLY
SUN
616 615
PC sheet
1.7 Assemble the roof window vents as shown below in and , using
the Z02 screws attach the 615, 616, and 618’s with the Y8 panel as
shown. Be careful not to strip screw heads. Pay attention to the Y8 panel,
stickers or “x” face the sun. If you are a rst time builder refer to your
assembly manual for installation and discard this manual, proceed with
this manual for existing greenhouse users only.
1.8 Insert assembled window into the end of ridge of 607 and slide into
position. See . Window positions are your discretion however, must be
in the middle for support, do not place nearest the front or back as you will
need a 602B support to keep in window vent in place. Place directly across
from each other for best cross draft ventilation, see for optional
placement. Attach the 602B’s as shown between and , after all roof
vents are positioned.
1.9 You may need to remove some 602B’s to slide into place then replace
after roof vents are positioned.
GRANDIO
TIP Place roof windows in
desired location before
attaching all 602B’s, if
already partially built you will need to
loosen and re attach after installation. .
Y8
618
Z02
Z02
Z02
Z02
Z02
618
Screwdriver Outside View
615
616
618
616
Z02
Note Correct Orientation
616
618
615
607
SUN
Y8
Y8
4
602B
602B
602B
Inside View of
Roof Vent
ROOF VENT ASSEMBLY
607
1.10 To ensure there is no gap in roof vent
position 603B as shown in . Connect
603B to middle of 602B’s using W04
bracket as shown in .
1.11 Attach HQC01 to 616 with the Z04
screws see , close roof vent and attach
the handle onto HQC02 middle pin (the
rst two holes of the handle to the second
and third pins of HQC02). Then attach
HQC02 into 603C’s track with S04/ML01
(nuts and bolts), see .
603B
618
616
616
603C
616
Z04
HQC02
Y8
Y8
HQC01
Handle
Inside view of 603B
603B
602B
W04
Note: If you are installing automatic roof vent openers
follow those directions for correct installation.
SAVE MANUAL OPENERS FOR WINTER SWITCH OUT.
HQC01
Handle
603B
HQC02
HQC01
Handle
ML01/S04
HQC01
Handle
Y8
Y8
Inside View
Inside View
5
ROOF VENT ASSEMBLY & INSTALLATION
Y8
Y8
Outside
inside
Inside
Outside
607
609-WS
609-WS
PC Sheet PC Sheet
609-WS
PC Sheet
1.12 Attach 609-WS to the inner roof line of the 607 and on
both top and bottom of 609 as shown in and .
1.13 Insert polycarbonate sheets Y7’s and Y9’s into the lower
roof of your greenhouse. Panels may slide out before gutters are
in place. You may want to place a piece of tape on the panel to
prevent sliding as shown in the diagram once the panels are in
place.
1.14 Slide 610 Gutters into 609’s groove as shown in the
diagrams and . Repeat on both sides.
GRANDIO
TIP Note that there are two
parts labeled 609 &
609-WS, one is the gutter support, the
other is a clip that ts under poly-
carbonate panels inside greenhouse.
609
Y7
Y9 Y7
Y7
601B
601A
610
609
609
610
Gutter
Outside View
6
ROOF VENT ASSEMBLY & INSTALLATION
J602A-E
Z03
J602B-E
Z03
Z03
J601
J602B-E
Z03
J602B-E
Z03
J602A-E Z03
J601
610
1.15 Attach end caps to the ridge and gutters on both front and back as shown below.
Squeeze a small amount of rubberized silicone or construction adhesive into the ends of
ridge to secure pressure t end caps. It is recommended to caulk any areas that may allow
water penetration such as at the gutter end caps and at the base corners to seal against
water as shown in . Reattach the L28 Brackets.
1.16 It is recommended to apply silicone caulk to the seams where panels meet the
frame for water resistance, or see the moisture control kit on our website to maintain
panel clarity.
7
ROOF VENT ASSEMBLY & INSTALLATION

Other Grandio Greenhouse Kit manuals

Grandio GRA-ELI88 User manual

Grandio

Grandio GRA-ELI88 User manual

Grandio GRA-ELEM-VEN User manual

Grandio

Grandio GRA-ELEM-VEN User manual

Grandio GRA-88BR-GR User manual

Grandio

Grandio GRA-88BR-GR User manual

Grandio Grandio Element 6x8 with Base Kit User manual

Grandio

Grandio Grandio Element 6x8 with Base Kit User manual

Grandio Ascent 8x8 KIT User manual

Grandio

Grandio Ascent 8x8 KIT User manual

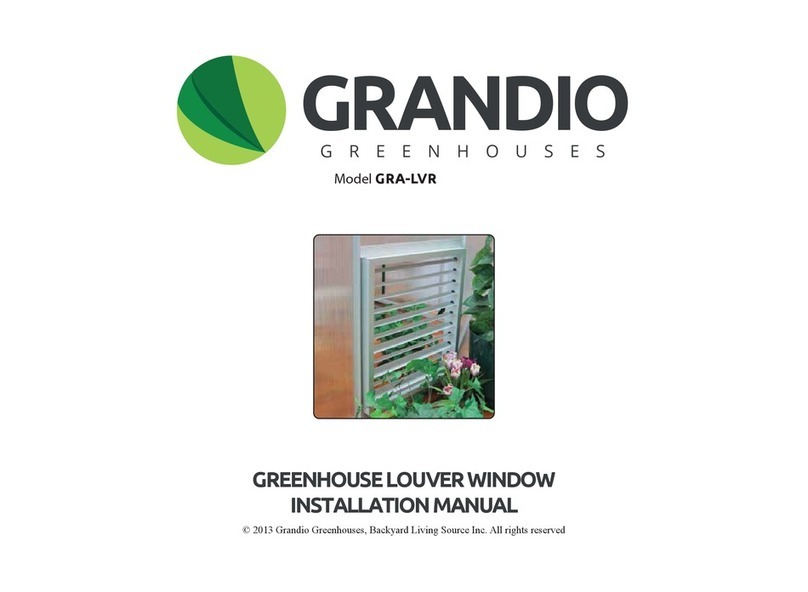
Grandio GRA-LVR User manual

Grandio

Grandio GRA-LVR User manual

Grandio GRA-ASC-812 User manual

Grandio

Grandio GRA-ASC-812 User manual

Grandio ASCENT GRA-812-GR User manual

Grandio

Grandio ASCENT GRA-812-GR User manual

Grandio ELITE User manual

Grandio

Grandio ELITE User manual

Grandio GRANDIO ELITE 8x12 2015 User manual

Grandio

Grandio GRANDIO ELITE 8x12 2015 User manual

Grandio 2015 EARTH & GRASS L-BOLT ANCHORING KIT User manual

Grandio

Grandio 2015 EARTH & GRASS L-BOLT ANCHORING KIT User manual

Grandio ELITE 8x12 User manual

Grandio

Grandio ELITE 8x12 User manual

Grandio BA-A1 User manual

Grandio

Grandio BA-A1 User manual

Grandio 2015 User manual

Grandio

Grandio 2015 User manual

Grandio Summit Series User manual

Grandio

Grandio Summit Series User manual

Grandio GP-EZ1 User manual

Grandio

Grandio GP-EZ1 User manual

Grandio GRA-ASC-88 User manual

Grandio

Grandio GRA-ASC-88 User manual

Grandio GRA-812BR-GR User manual

Grandio

Grandio GRA-812BR-GR User manual
Popular Greenhouse Kit manuals by other brands

OLT 8x8 Cedar Assembly manual

OLT

OLT 8x8 Cedar Assembly manual

Robinsons Royale Assembly instructions

Robinsons

Robinsons Royale Assembly instructions

Velcom CAMELLIA R Technical manual

Velcom

Velcom CAMELLIA R Technical manual

VOLYA DACHNAYA STRELKA 2020 Assembly manual

VOLYA

VOLYA DACHNAYA STRELKA 2020 Assembly manual

GrowSpan 500 Series manual

GrowSpan

GrowSpan 500 Series manual

FarmTek 106310PC manual

FarmTek

FarmTek 106310PC manual

OCTOPOT Hybrid Grow System manual

OCTOPOT

OCTOPOT Hybrid Grow System manual

ClearSpan PB00556R3S manual

ClearSpan

ClearSpan PB00556R3S manual

GrowSpan 500 Series manual

GrowSpan

GrowSpan 500 Series manual

Palmen Tropic Plusser manual

Palmen

Palmen Tropic Plusser manual

ACF Greenhouses Grow More GM8 Assembly instructions

ACF Greenhouses

ACF Greenhouses Grow More GM8 Assembly instructions

Exaco VI23 Assembly instructions

Exaco

Exaco VI23 Assembly instructions

Palram CANOPIA TURINO 3x4,25 How to assemble

Palram

Palram CANOPIA TURINO 3x4,25 How to assemble

OPCOM Farm GROW BOX Quick guide manual

OPCOM Farm

OPCOM Farm GROW BOX Quick guide manual

FRAME IT ALL Alamo 8x8 manual

FRAME IT ALL

FRAME IT ALL Alamo 8x8 manual

Serranova 24 manual

Serranova

Serranova 24 manual

Quictent 1302 manual

Quictent

Quictent 1302 manual

Vitavia DIANA Assembly instructions

Vitavia

Vitavia DIANA Assembly instructions

manuals.online logo
manuals.online logoBrands
  • About & Mission
  • Contact us
  • Privacy Policy
  • Terms and Conditions

Copyright 2025 Manuals.Online. All Rights Reserved.