roost&root Slant-Roof Greenhouset User manual

Spring '21
Standard Model Show
Assembly Instructions
Slant-Roof Greenhouset™
Assembly Overview...
Help Text-line: 512-596-5200
EMAIL: support@roostandroot.com
VOICE: 877-741-2667
Assembly Support ext 3
V1
Copyright ® Roost & Root, all rights reserved. This document is provided to you for your own personal limited use as a paying customer to assemble your greenhouse. We consider these instructions company
intellectual property and are granting you limited personal use only. Do not copy or distribute without written permission of Roost & Root. We claim all available federal protection for the name Slant-Roof Greenhouse™,
our protected designs and trade dress as is allowed by any and all federal intellectual property protection laws. We invest heavily in your product and work very hard to do a good job and it is only fair that our workers
and management benefit from their hard work. Your purchase of this product is governed by applicable laws and our websites terms and conditions agreement.

Assembly Instructions
Slant-Roof Greenhouse™
V1 Spring 2021
Copyright ® Roost & Root all rights reserved.
Dimensions
Page 01
71-1/2"
26-1/2"
Shown With Optional Solar Panel
125"
96"
130"
143"
113"
60"

Assembly Instructions
Slant-Roof Greenhouse™
V1 Spring 2021
Copyright ® Roost & Root all rights reserved.
Conventions
Page 02
Front
Back
Right
Left

Assembly Instructions
Slant-Roof Greenhouse™
V1 Spring 2021
Copyright ® Roost & Root all rights reserved.
Notices
Page 03
Understanding these concepts / conventions will help guide you
through the instructions.
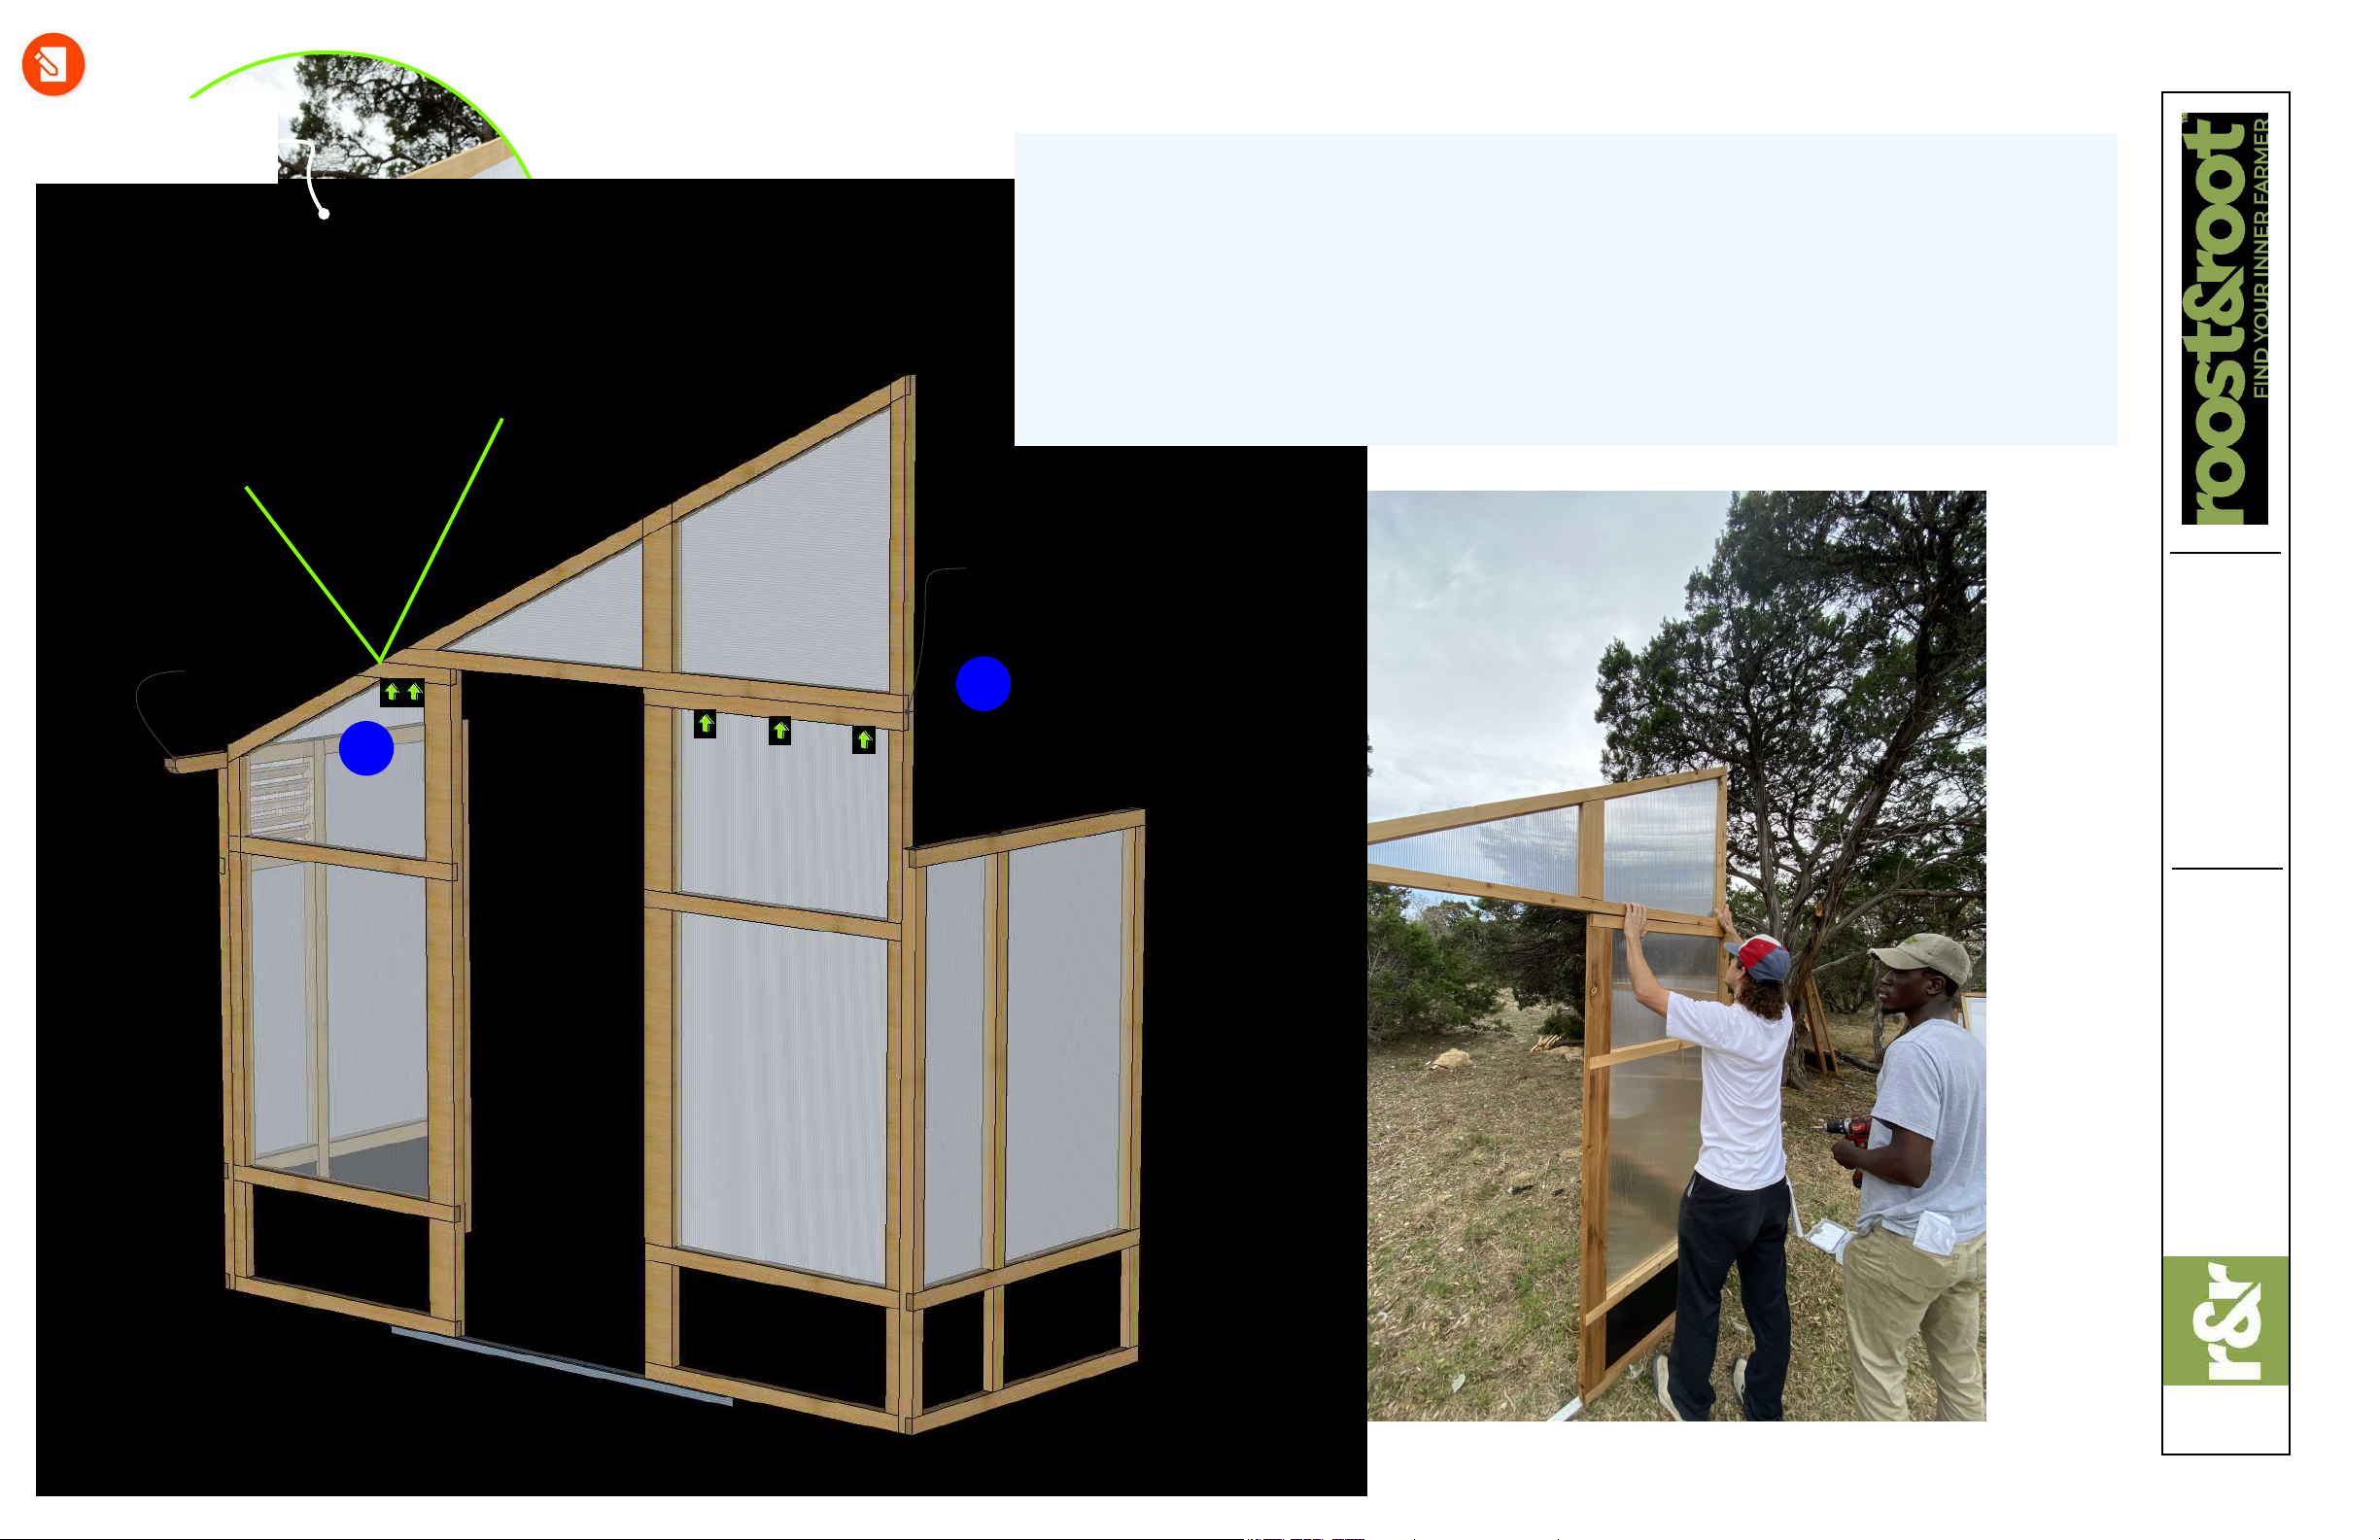
�Mating edges of parts to be flush and tight (when called for) will
keep measurements in tolerance as the greenhouse grows in
size. By flush we mean to align edges.
�Having a flat area is required for the greenhouse to assemble
properly. Any humps will telegraph into wall straightness.
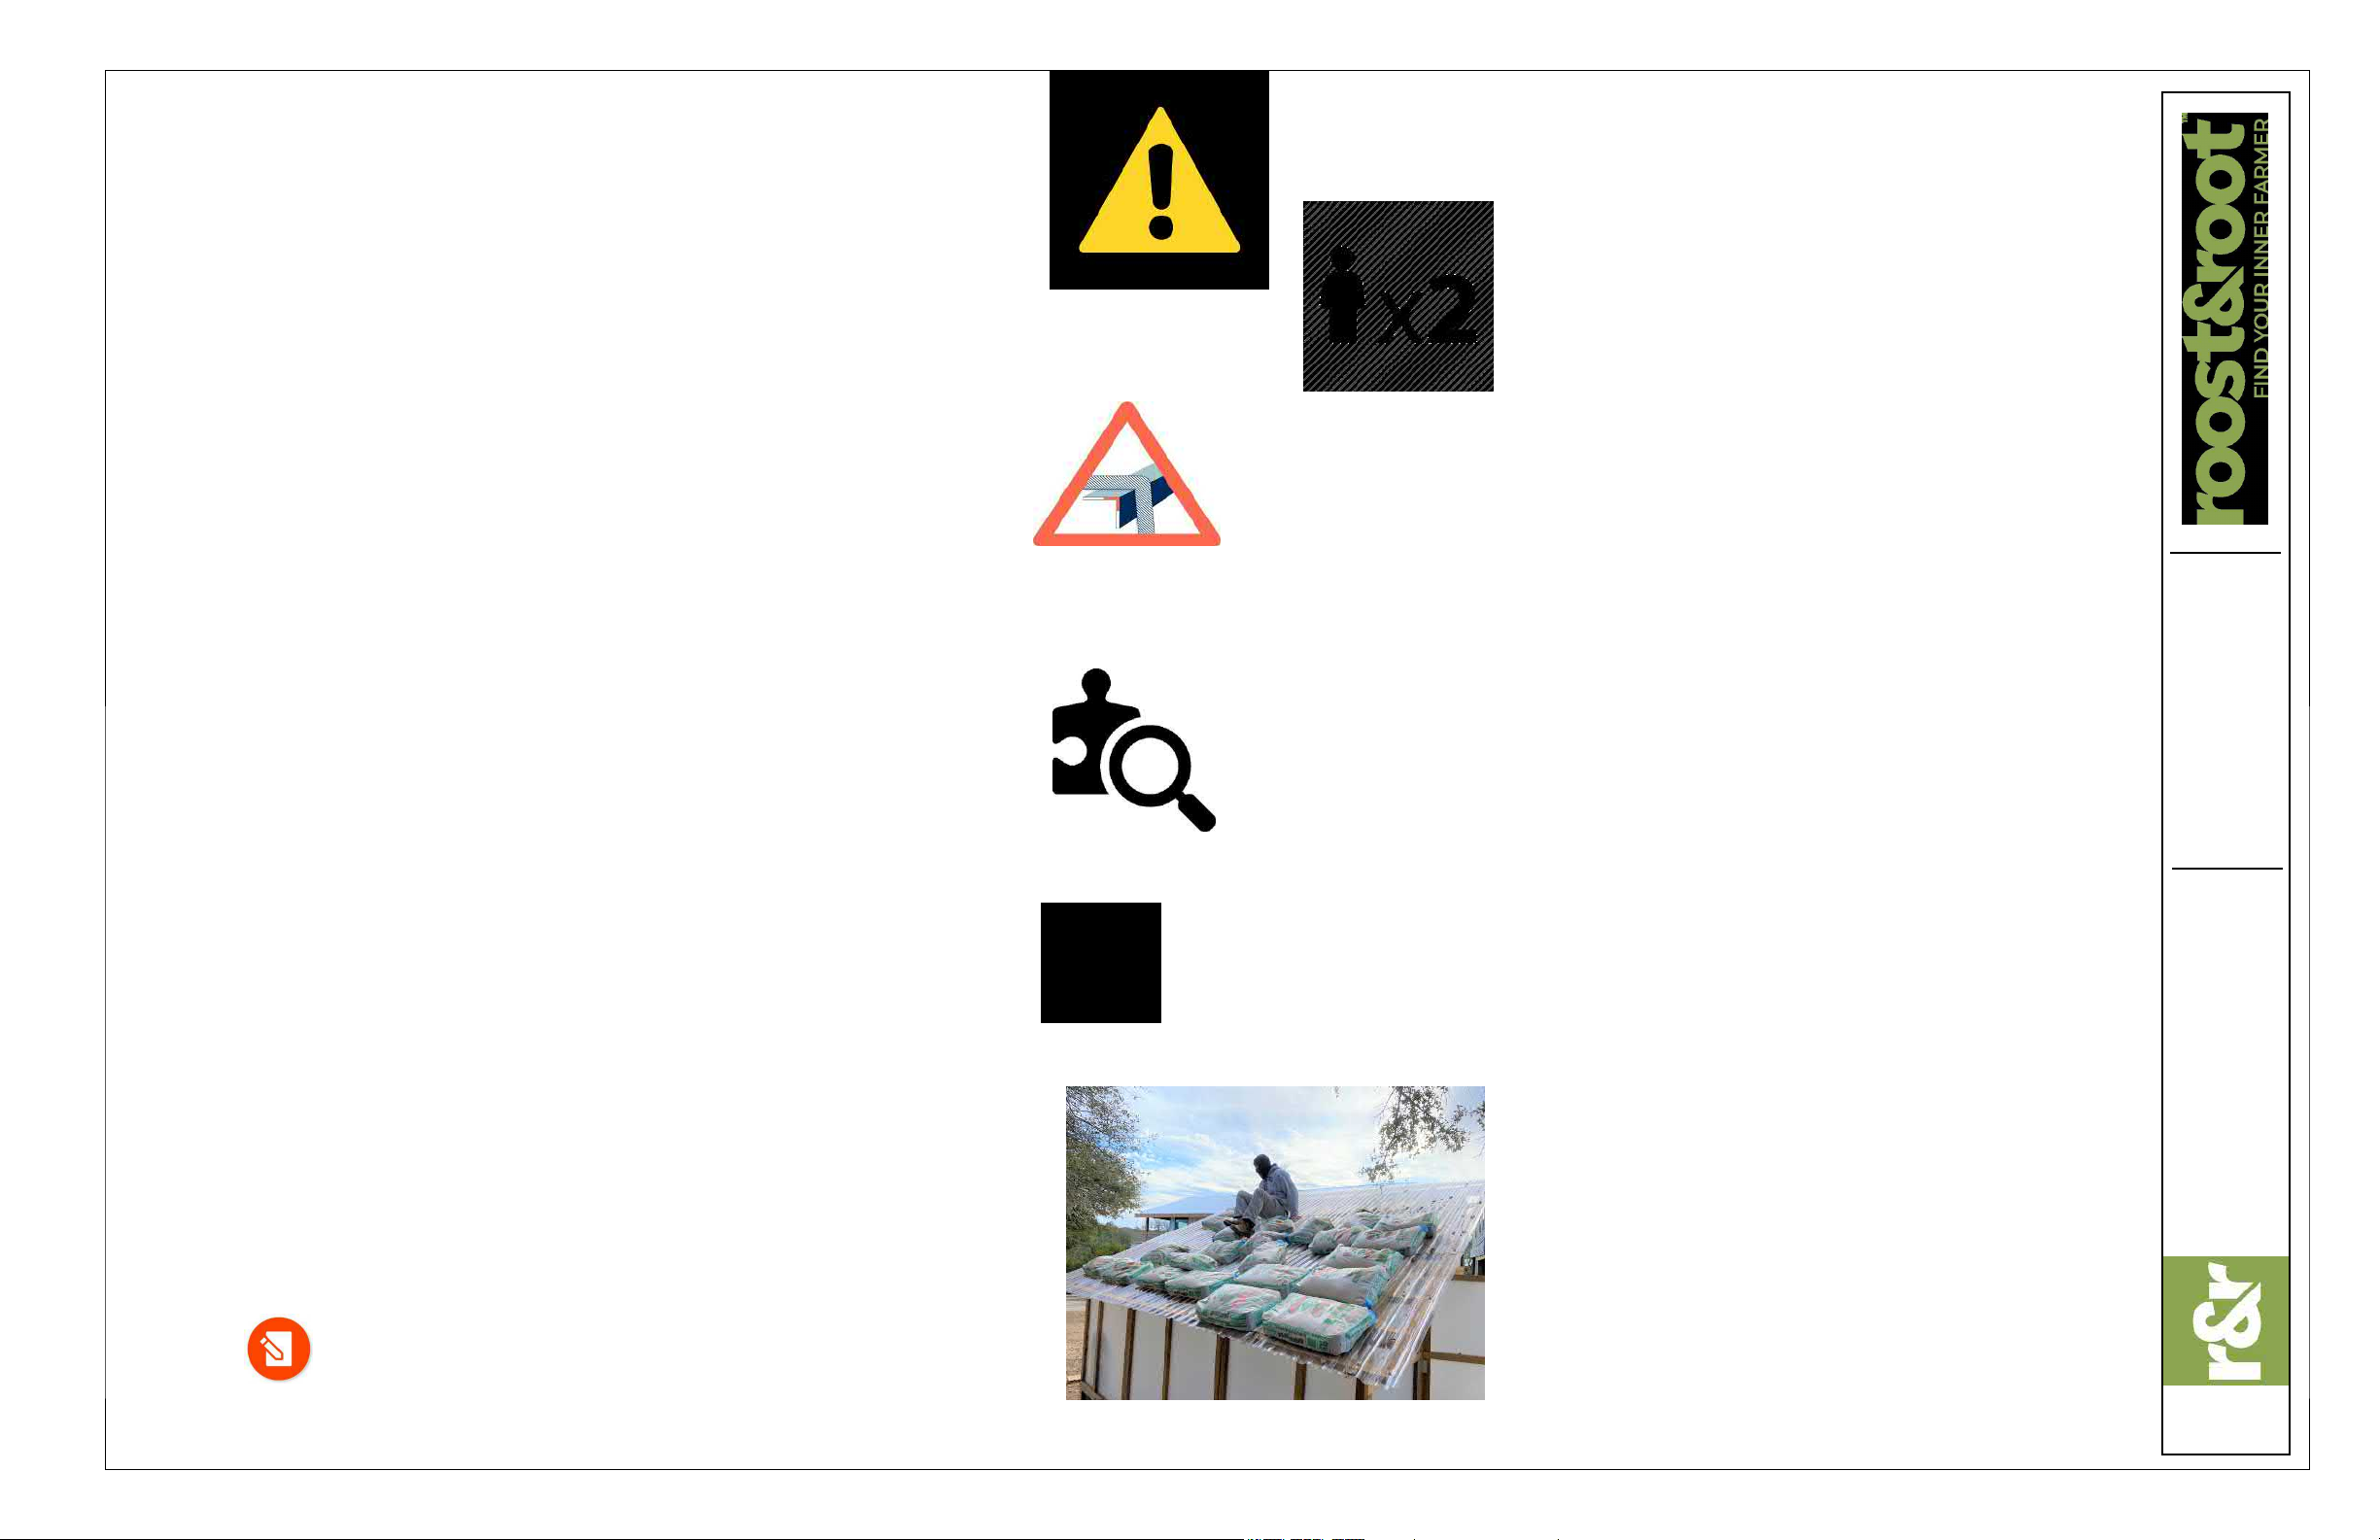
�We estimate about 12 man hours (6-8 hours for 2 people) of
ordinary skills to assemble. Two strong people are required for
several steps.
�You will need a drill (preferably cordless) a tape measure and a
hammer. Everything else is provided.
�Drive screws only deep enough to hold parts tight and not bury
the heads too deeply as water will sit in the divots and it may
cause softening of the wood and prematurely loosen screws. It
will also greatly decrease your ability to easily disassemble a
part if needed.
�You may end up directly driving in a screw. The provided
screws are very aggressive and will drive with no pre-drilled
hole. Keep screw entry points in the meat of the wood and not
too close to edges. Screws in knots or close to edges should
be pre-drilled.
�Rough cedar may have knots, cracks or frays that are normal.
We cull and cut around most imperfections we deem
structurally problematic during fabrication. If you get a piece
that you feel is not beautiful, please let us know so we can
address your concern. Cedar naturally varies quite a bit.
�We hand fabricated your greenhouse with human carpenters.
We work really hard to not make mistakes. On the rare
occasion that we either misfabricated a part, a part was
damaged in shipping, or we forgot to package a needed part,
contact us and we will ship out a replacement part for you at no
cost.
�It is common for rough cut cedar to vary in size by up to 1/8
inch and to shrink and swell by up to 1/8 inch when wet and
dry. It is normal for edges to not perfectly line up and shrink
and swell during periods of heavy rain or snow cover.
Reading this will help you...
Please Be Careful
Any building material can have sharp edges. We attempt to
knock off sharp edges when possible during fabrication. You
must be the final determiner of sharp edges. A standard file
from your hardware store, or snips can be used to make
edges to your standards. You may choose to wear a pair of
work gloves while assembling this product for extra
protection. Wood, being what it is, can also have splinters.
Be careful not to get caught inside your greenhouse.
Children should not play in the greenhouse. If you decide to
install some inside closure device, keep children in mind.
Spending the time up front to identify all the parts and lay
them all out will pay off in the long run and make assembly
go more smoothly. The instructions are intended to be
read in page order as the information builds in that way,
then referenced during assembly. Pre-reading the
instructions will help immensely.
Designed to be assembled
by two strong people of ordinary skill.
This note icon is used to
bring something extra
important to your attention
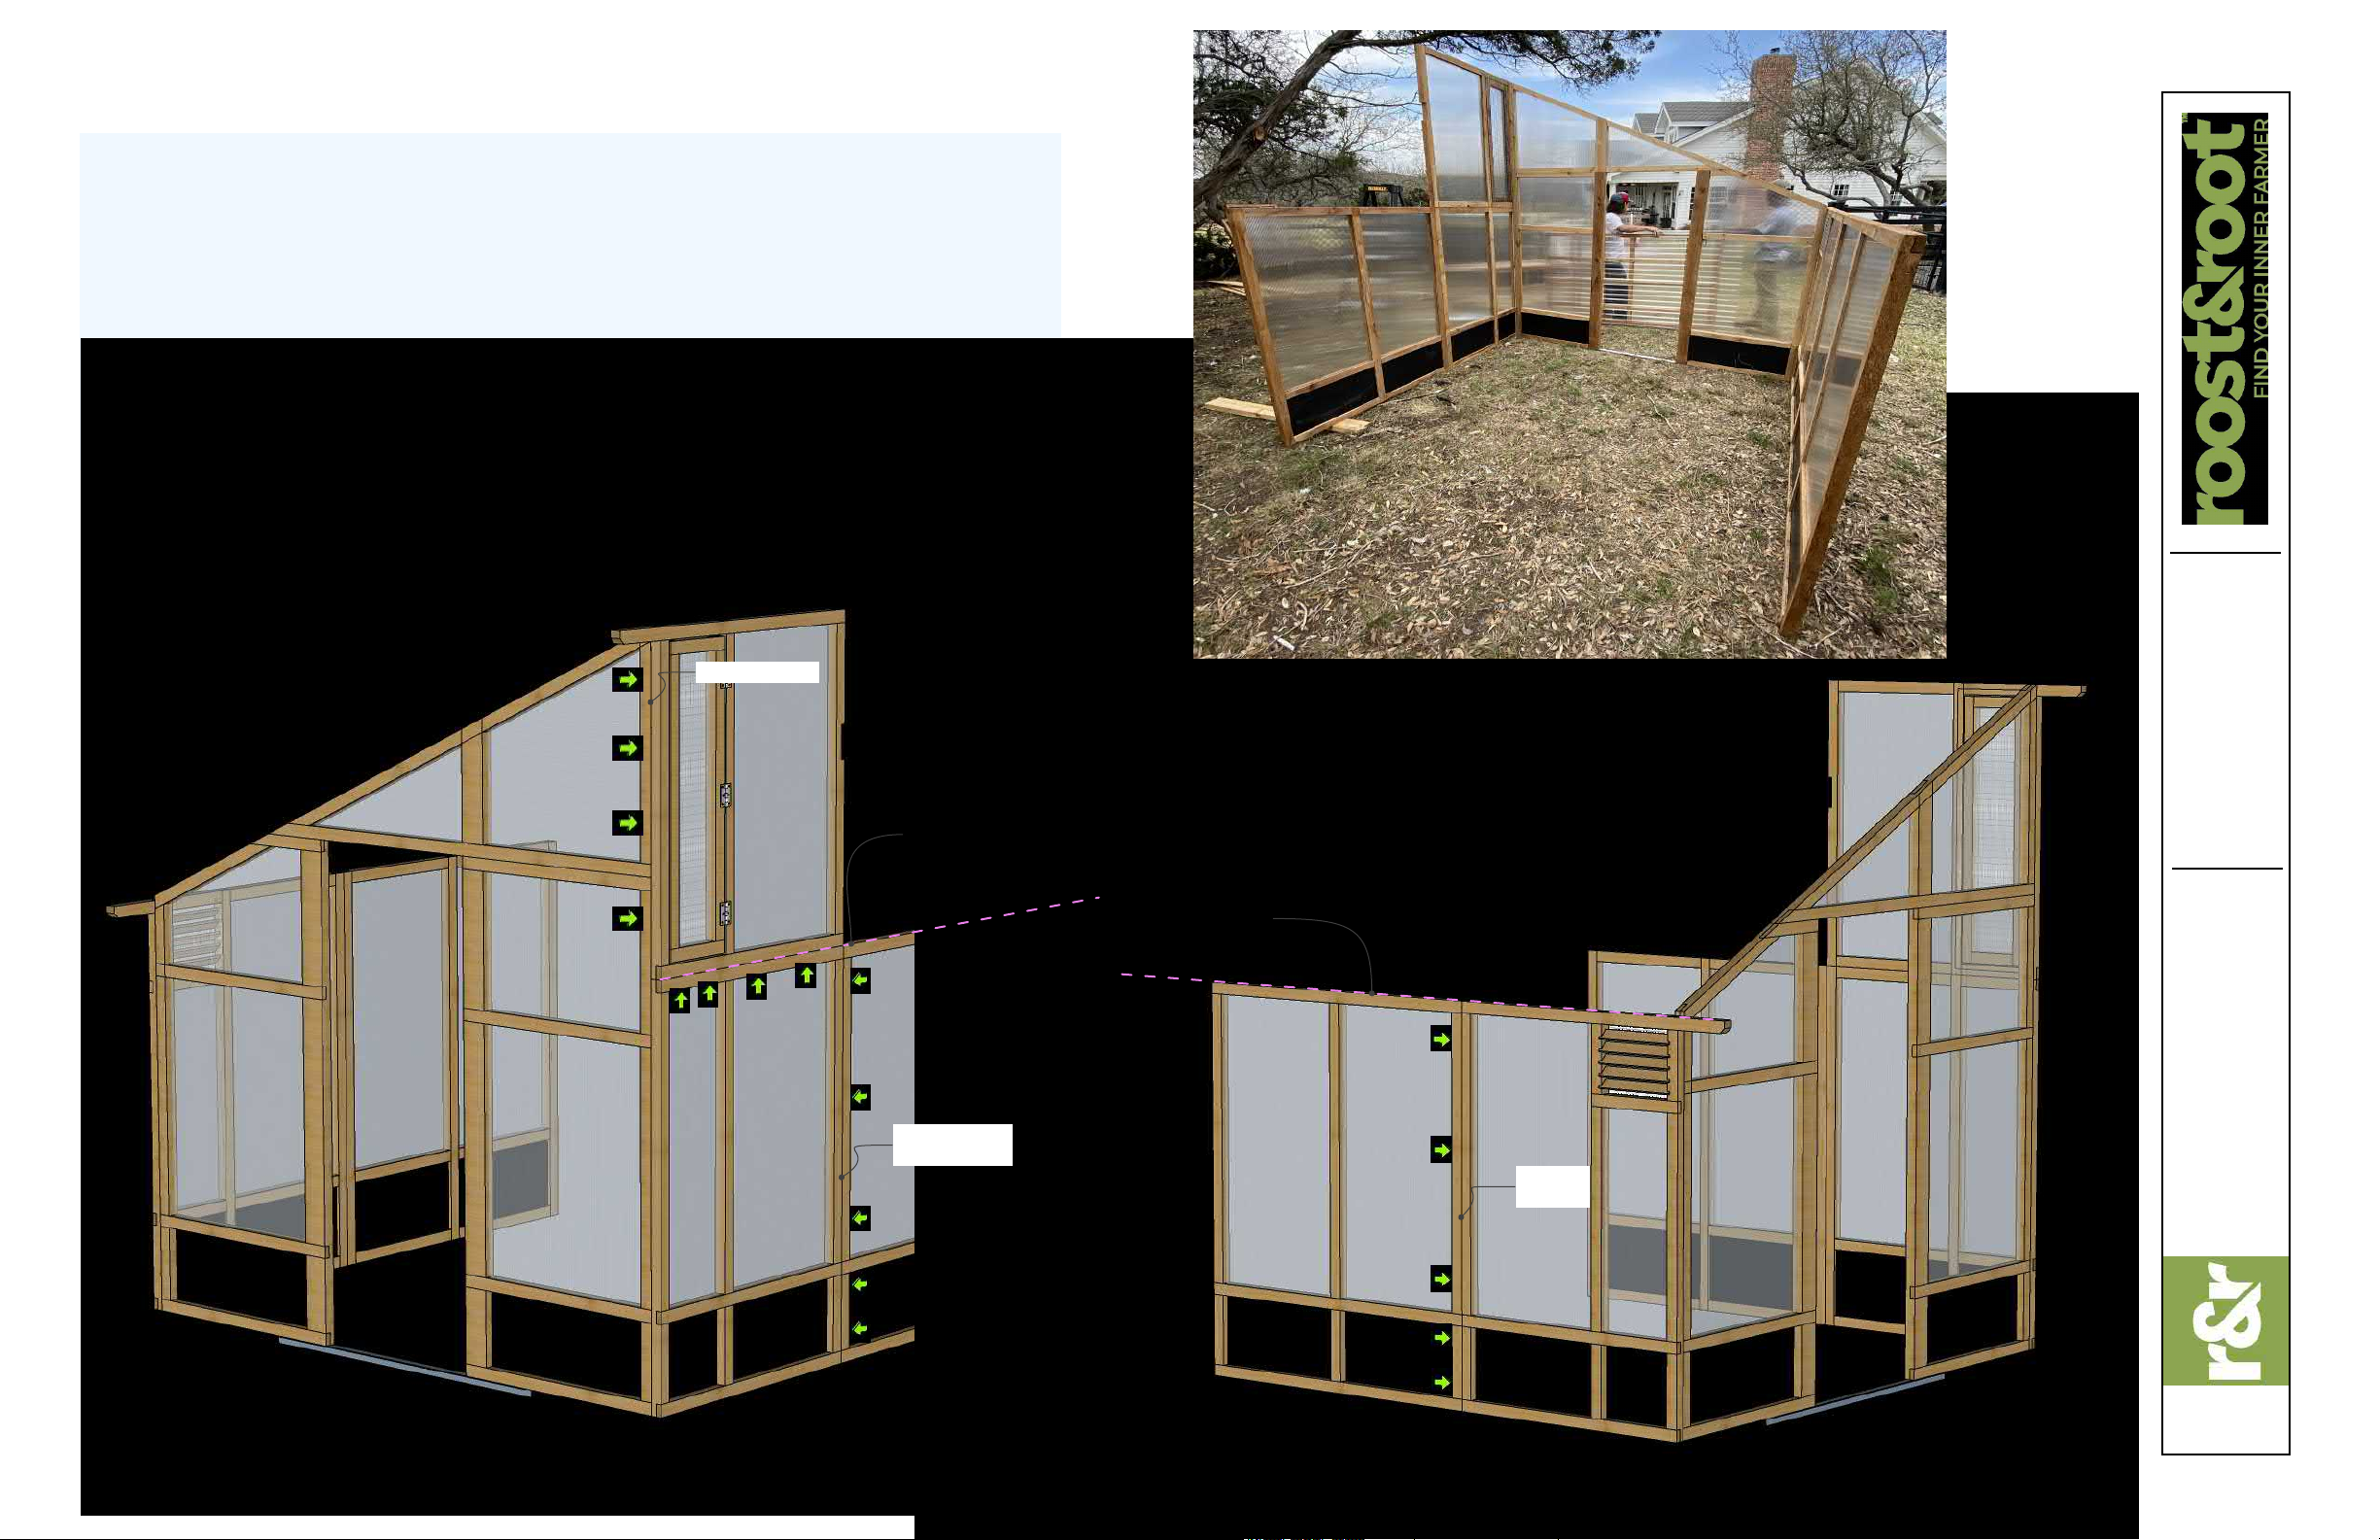
The roof has been load tested with more than
#1000 of weight and a #200 man. But we do not
intend on you being up on the roof. It will not
reach its full strength until after full assembly and
at 25° it is extremely steep. We use a unique
preassembled scissor style folding roof design that
allows you to place the roof from the ground. It
will take two strong people... maybe 3 if you're
not comfortable working with weight. If you decide
to work from a ladder, be mindful of your balance
and weight load.

Assembly Instructions
Slant-Roof Greenhouse™
V1 Spring 2021
Copyright ® Roost & Root all rights reserved.
Orientation
Page 04
For optimal light transit time
you want your greenhouse
situated East to West from
side to side.
If you bought the AVM Solar
Ventilation System then the
solar panel is optimally
facing South with clear
unobstructed view of the sun.
The more room you leave
around your greenhouse, the
more light that can come in
through the sidewalls.
If you live somewhere where
it snows a lot, make sure to
leave plenty of room in the back
for snow to be knocked off the roof
and accumulate on the ground
before cleaning.
1
2
3
4
East to West or West to East

Assembly Instructions
Slant-Roof Greenhouse™
V1 Spring 2021
Copyright ® Roost & Root all rights reserved.
Threshhold & Back Left
Corner
Page 05
E1 3 Inch T25 Screw
Green arrow shows placement and direction
L1
B3
M6
Make Bottom Flush
Sides
Flush
Position
Approximately
10" Overlap
1.1 Door Threshold Stabilizer: Using the measurements provided in the prior
sections, hammer into the ground the M6 angled aluminum door threshold stabilizer in
the position where you want the center of your door to be. Either leg of the angle can be
driven into the ground. If your ground is too hard, use a shovel or other sharp tool to
create a crevice for the stabilizer to be seated into.
1.2 Assemble Back Left Corner: Using provided E1 3" T-25 screws, your drill and the
provided T-25 bit in provided bit holder, assemble the back left corner as shown in FIG
1 with the L1 panel screwing to the backside of the B3 panel.
Focus on making bottom and side edges flush and then drive screws as indicated by
the green arrows only tight enough to secure the pieces and not so tight as to bury the
screw head too far.
1.3 Position Over the Threshold Stabilizer: The assembly should be able to be self
standing. Generally position over the stabilizer overlapping about 10 inches and move
on to the next step.
:-) Here we go!
Fig 1
1
2
3
One person can hold
panel while the other
drives in the screws.
Bigger ledge
goes out.

Assembly Instructions
Slant-Roof Greenhouse™
V1 Spring 2021
Copyright ® Roost & Root all rights reserved.
Front Left Corner
Page 06
It will make sense soon!
About 10" of overlap
Bottoms Flush
Edges
Flush
L2
F1
L1
B3
You know
the drill
;-)
Fig 2
1
2
2.1 Assemble Front Left Corner: Using provided E1 3" T-25 screws, your drill
and the provided T-25 bit in provided bit holder, assemble the front left corner L2
to F1 as shown in FIG 2.
Focus on making bottom and side edges flush and then drive screws as
indicated by the green arrows only tight enough to secure the pieces and not so
tight as to bury the screw head too far. (swear not to repeat this again :-)
2.2 Position Over the Threshold Stabilizer: The assembly should be able to
be self standing. Generally position over the stabilizer overlapping about 10
inches and move on to the next step.
Will put actual photos whenever
we can too so that you can
double check in your mind what
is going on.

Assembly Instructions
Slant-Roof Greenhouse™
V1 Spring 2021
Copyright ® Roost & Root all rights reserved.
Left Side Triangle Panel
Page 07
We're about to find out how flat your ground is...
L2
F1
L1
B3
L4
1
1
2
3
4
5
Flush
Angle & Edge
Flush
2
3.1 Install Left Triangle Panel: Place the L4 triangle panel on top of L2 and L1 as illustrated
and the using E1 3" T-25 screws, screw down L4 panel tight to L2 and flush in the order of the
1-3 green arrows as shown.
3.2 Position Over L1: Line up L4 over the top of L1 making flush as shown in FIG 3A and
then install screws 4 & 5 drawing the seam tight.
If the ground is not level and the tops of L2 and L1 are significantly off it will become apparent
in this step. Let the screws draw the assembly tight and remove or add soil under L1 & L2 as
needed to support the assembly.
Fig 3
Fig 3A

Assembly Instructions
Slant-Roof Greenhouse™
V1 Spring 2021
Copyright ® Roost & Root all rights reserved.
Set doorway...
Page 08
The one time you'll use a tape measure... sorry :-(
Width
Same
As Top
1
Fig 4
Fig 4B
Fig 4A
5/32 Drill Bit
2
3
4.1 Verify Door Top Opening: Take a measurement in the door opening at the top. It should be pretty much 26½ inches. If
it's more than 1/4 inch off then verify front edge of L4 to L2 are flush and that trailing edge of L4 to L1 angle is aligned. See
FIG 4A.
4.2 Pin Left Side of L1 Door Frame: Line up back edge of L1 Panel to the M6 stabilizing strip back edge and using the
provided 5/32 drill bit drill down through the bottom rail of L1 through the aluminum strip. Fig 4B Note: Take care not to move
when you withdraw the drill so the holes stay lined up. Insert an E1 screw into the hole you drill and drive the screw SLOWLY
through the bottom rail into the aluminum bar so as to lock the bottom edge to the bar. If the screw resists too much, reverse
out, and slowly repeat going in until the screw seats into the aluminum.
4.3 Pin Right Side of L2 Door Frame: Line up back edge of L2 Panel to the M6 stabilizing strip back edge. Move in or out the
bottom of the L2 Panel as needed to make the bottom opening the same as the top opening. Using the drill bit, repeat the
procedure you did to pin the left side of the door, and pin in place the right side of the door.
About
26½"
Fig 4C
L2
L1
L4
M6
Make back sides of panels
flush with back side of
aluminum bar.

Assembly Instructions
Slant-Roof Greenhouse™
V1 Spring 2021
Copyright ® Roost & Root all rights reserved.
3 Panel Push
Page 09
Lets get this done... 3 panels at once!
5.1 Install Bottom F2 Panel: You know the drill. Using the provided T25 screws where
indicated by the green arrows, attach F2 to F1 keeping top edge & faces as flush as
possible. See FIG 5A.
5.2 Install F4 Panel: Place panel F4 on top of panel F1 making sure bottom edges and
side edges where F4 meets L4 & F1 are as flush as possible. Attach using T25 screws
as indicated by the green arrows. See FIG 5A.
5.3 Install B2 Panel: Aligning faces and top edge of panel B2 to panel B3, install T25
screws as indicated by the green arrows in FIG 5B.
Fig 5A
Fig 5B
L2
L1
L4
F4
F1
F2
B3
B2
Make All Tops
As Flush As
Possible
Sides Flush
Make All Tops As
Flush As Possible
Keep faces
flush
Faces
Flush

Assembly Instructions
Slant-Roof Greenhouse™
V1 Spring 2021
Copyright ® Roost & Root all rights reserved.
Roof Section ID
Page 10
Here's how to identify which roof section is which...
Back Short Wall
Front Tall Wall
Looking down aerial view.
Longer is Front
Notch
Notch
Outside
Outside
Left/First
Section
Middle/Second
Section
Right/Third
Section
Hinge
Point

Assembly Instructions
Slant-Roof Greenhouse™
V1 Spring 2021
Copyright ® Roost & Root all rights reserved.
Roof Section 1 Unfold &
Placement
Page 11
1. Stage Roof Section: Carry the roof section into the open end of the partially assembled
structure. positioned with the hinged end going in first and the shorter side of the roof assembly
facing the back of the greenhouse.
2. Stand Up & Fold Open: The first person in stands their end up and the short side is folded
over the back side of the greenhouse while the long side is straightened out over the front.
3. Slide Over Into Position: After unfolding, slide the roof up and into position over the triangle
side of the side wall. You will use the side triangle as a ramp and to hold some of the load.
4. Slide Up & Over The Top: While lifting a little to take weight off, LIFT & SLIDE the assembly
up and over the front wall of the greenhouse.
This procedure is repeated for all roof sections.
We didn't want you crawling up on the roof...
Maybe 3 People
If You Aren't
Comfortable
With Weight
The concept of the pre-assembled scissor roof...
General procedure... instructions on next page.
1
2
3
4
The polycarbonate roof is very, very flexible and will not break if you rest weight on it.

Assembly Instructions
Slant-Roof Greenhouse™
V1 Spring 2021
Copyright ® Roost & Root all rights reserved.
Roof Section 1 (Left Side)
Attachment
Page 12
6.1 Slide Side & Back Into Place: Refer to instructions on page 11 for placement procedure and put in
place Roof Section 1 as illustrated onto left end of greenhouse.
6.2 Square Back to Left Side: By moving the roof section and pulling in or out back walls and left side
wall, make the back edges and the side edges of walls flush with the roof frame as indicated in
illustrations. Place 3" T25 Screws in back B3 panel and left L4 and L1 side panels as indicated by green
arrows in FIG 6B.
6.3 Align Front Edge: By moving the front wall in or out, align top of the F4 panel with the beveled front
roof frame piece making the edges flush and install T25 screws as indicated by green arrows in FIG 6C.
Refer to figures and photos 1-4 to orient yourself to the task.
Fig 6A
Left
Side
View
Fig 6B
Back View
Fig 6C
Front View
1
2
3
4
Flush Along Back - Move
Wall in & Out As Needed
Flush Along Side
Move sidewall in and
out as needed to make
flush along entire edge.
Overhang
Flush
Flush Along Front Edge
F4
B3
L4
Install Roof Section 1 (left roof panel)

Assembly Instructions
Slant-Roof Greenhouse™
V1 Spring 2021
Copyright ® Roost & Root all rights reserved.
AVM Otional Parts ID
Page 13
Louvered Vent Panel
Slightly
Different
Standard Model
With AVM Option
Take Note...
Treat As Same
Treat As Same
Even though these parts look different in the coming steps if you ordered the
AVM option, assembly is the same and is only shown for the standard model.

Assembly Instructions
Slant-Roof Greenhouse™
V1 Spring 2021
Copyright ® Roost & Root all rights reserved.
M2 Brackets & Front Mid
Section
Page 14
7.1 Install M2 Roof Support: The M2 Bracket positions & stabilizes the front wall
and provides some roof support. More roof support to come later. Position the M2
Bracket as illustrated in FIG 7A and using E2 T20 screws and provided bit, drive 5
screws through bracket as indicated by the blue arrows.
You will need to push the bracket into place in the direction of the aqua arrows
making sure the front notch locks into the F4 panel as illustrated and the back edge
of the M2 bracket is flush with the top edge of the roof frame.
This positioning will automatically lock the front wall and the roof into alignment for
later strengthening.
Let's pick up the pace
now that you know
what's going on and bite
off a few steps at a time.
7.2 Install Panel F6: Using T25 screws, install panel F6
7.3 Install Panel F7: Using T25 screws, install panel F7 or louvred vent
panel shown on prior page if you ordered the AVM Option.
7.4 Install Middle Roof Section: Place middle roof section using the
same procedure used in step 6 left section, and place then fasten to both
front and back walls as indicated in FIG7B.
7.5 Install Panel M2 Bracket: Using T25 screws, and procedure in 7.1,
install bracket M2 as indicated in FIG7B.
E2 1 5/8 Inch T20 Screw
Blue arrow shows placement and direction
Top Edge Flush
With Roof Frame
M2
Fig 7A
Fig 7B
F4
F6
F7
Middle/Second
Roof Section
Middle Section Roof Panel
Edge Goes Over Top Of
First Section Edge
Same Back Wall
Screw Pattern And
Procedure As FIG 6B
M2
Leading Edge Flush
Roof / Wall Support Bracket
Big Bite very little instruction... but you know.

Assembly Instructions
Slant-Roof Greenhouse™
V1 Spring 2021
Copyright ® Roost & Root all rights reserved.
Screw Together Left &
Middle Roof Sections
Page 15
8.1 Attach Middle Roof Section To Left Side Roof Section: Using T25 screws and provided bit, drive screws in the approximate locations as illustrated while
pushing up on roof sections as needed to make sure bottom edges of each section are flush with one another. See FIG 8A. Holes are not pre-drilled. Drive screw
towards the middles of the wood and their aggressive thread will self pierce.
8.2 Front Leading Edge: Using T25 screws and carefully standing on at least a 6 foot step ladder or similar... drive a screw in the approximate location as
illustrated in FIG 8B while pushing up on roof sections as needed to make sure bottom edges of each section are flush with one another and the front leading edge
looks straight.
8.3 Back Trailing Edge: Using T25 screws, drive a screw in the approximate location as illustrated in FIG 8C while pushing up on roof sections as needed to make
sure bottom edges of each section are flush with one another and the back trailing edge looks straight.
Fig 8A
Make Seam Flush
Make Seam Flush
Make Seam Flush
Outside
Front
Outside
Back
Fig 8B
Fig 8C
A little roof structure work.... still more to come. It's big!

Assembly Instructions
Slant-Roof Greenhouse™
V1 Spring 2021
Copyright ® Roost & Root all rights reserved.
Finish Front & Back Walls
Page 16
9.1 Install F5 Panel: Using provided T25 screws install F5 panel as
illustrated in FIG 9A.
9.2 Install R2 Panel: Using provided T25 screws install R2 panel as
illustrated in FIG 9A. Make bottom edge flush.
9.3 Install R2 Panel: Using provided T25 screws install R2 panel as
illustrated in FIG 9A making top edges flush.
Fig 9A
Fig 9B
Flush Bottom
Flush
Top Edge
Top Edge
Flush
R2
R3
R1
F5
B1
9.4 Install B1 Panel: Using provided T25 screws install B1 panel as illustrated in
FIG 9B making top edges flush and straight with other back panels.
9.5 Install R1 Panel: Using provided T25 screws insert and install the R1 Panel by
first screwing from R3 into R1 with top edges flush and then making bottom corner
flush, screw R1 into B1.
Doing so in this order will make the various panels fall into the right place and
improve tolerances.
Flush
Finish up front wall and some of right wall...
Finish up back wall and right wall...

Assembly Instructions
Slant-Roof Greenhouse™
V1 Spring 2021
Copyright ® Roost & Root all rights reserved.
Right End & Section 3 Roof
Page 17
10.1 Install R4 Panel: Referencing Step 3 on page 7 repeat the procedure from
installing the left side triangle L4 panel, to install the right side R4 triangle panel.
See FIG 10A.
10.2 Install Right Side Roof Section: Repeating procedures used in prior roof
section installation steps, unfold the Right Side Roof Section and slide over the
back of greenhouse, up the top rail of the R4 panel, and over the top of the F5
panel. Align all edges and make flush and attach as indicated. Right side roof
section rests over the top of the middle roof section. See FIG 10A
10.3 Connect Right to Middle Roof Sections: Using same procedure as in Step
8 on page 15, lift and make flush the bottom sides of the frames from the right to
the middle roof section from inside and screw together.
Fig 10A
R4
F5
Install Right Side
Roof Consistent
With Other Sections
Right Section
On Top Of
Middle
Section
Fig 10B
Make all edges flush
A little tricky! Right triangle and last roof panel.
Starting to look pretty good!

Assembly Instructions
Slant-Roof Greenhouse™
V1 Spring 2021
Copyright ® Roost & Root all rights reserved.
Roof Stiffeners
Page 18
Install Roof Stiffeners: From inside the greenhouse, you'll be installing 9 roof stiffeners onto the underside of the roof frame in the
positions as indicated in FIG 11B.
11.1 Starting off at the left end, place the stiffener along the indicated longitudinal frame member (beveled ends facing down) where
the middle of the stiffener is approximately along the middle of the hinge line (see FIG 11A)
11.2 While pushing up on the stiffener to make it flat against the roof frame, drive T25 screws through the stiffener into the roof frame
starting from the middle of the stiffener and working your way out. See FIG 11A for pattern. Repeat this until all screws for the
stiffener are tightly screwed in. The stiffener should be flush against roof line.
11.3 Now go to the right end of the greenhouse and repeat the process for the stiffener in that position. Now start switching back and
forth from end to end until you get all 9 installed. Roof will remain flexible to be able to absorb load of snow or wind pressure, but
stiffeners will keep it flat.
9 M4 Roof Stiffeners 6 T25 Screws In Each
1
1
2
3
2
3
Hinge
Line
Fig 11A
Fig 11B
M4 Stiffener
1
2
3
4
5
6
7
8
9
While it's not super critical that you follow the exact pattern, it will in fact yield the best result. If you get off, it will not affect
the structural integrity.
Flatten out the roof...

Assembly Instructions
Slant-Roof Greenhouse™
V1 Spring 2021
Copyright ® Roost & Root all rights reserved.
Front Wall Stiffeners
Page 19
Install Front Wall Stiffeners: From inside the greenhouse, you'll be installing 2 wider and two of the narrower wall stiffeners on the front wall of the greenhouse. The position
of the stiffeners is indicated in FIG 12.
11.1 Position one of the narrower wall stiffeners centered over the lower wall seam (left or right) with beveled ends facing out, and attach to wall using T25 screws as indicated
in the illustration. Push the wall from the inside, or have a helper push the wall from the outside to make the wall flat while affixing the stiffener. Repeat for other side.
11.2 Position one of the wider wall stiffeners centered over the upper wall seam (left or right) with beveled ends facing out, and attach to wall using T25 screws as indicated in
the illustration. Push the wall from the inside, or have a helper push the wall from the outside to make the wall flat while affixing the stiffener. Repeat for other side.
Fig 12
Strengthen the front wall...
Lower
Upper
Table of contents
Popular Greenhouse Kit manuals by other brands

Palram
Palram Bella 8'x8'- TwinWall Glazing Assembly instructions

ACF Greenhouses
ACF Greenhouses GROW MORE GM16 Assembly instructions

Halls
Halls Universal 128 SD Assembly instructions

Halls Greenhouses
Halls Greenhouses Garden Room manual

Juliana
Juliana Premium 8,8 Assembly instruction

Costway
Costway GT3563 quick start guide