DESCRIPTION
The FD 2056 Pressure Sealer is designed to process a variety of form sizes and weights. The fold tables are automatically
adjusted for standard folds and custom folds. Documents that are 8 ½” x 11”/14” and 11” x 17” (A5, A4, A3, B4, B5 & B6)
are detected by sensors on the infeed tray. Batch counting, and self-centering side guides are added features. Three
standard folds are pre-programmed for 11”, 14” and 17” forms, uneven C and Z folds for 14” forms, and up to 36 custom
folds can be programmed. The sealer will stop automatically after the last document has been processed.
SPECIFICATIONS
1
Upper Fold Table
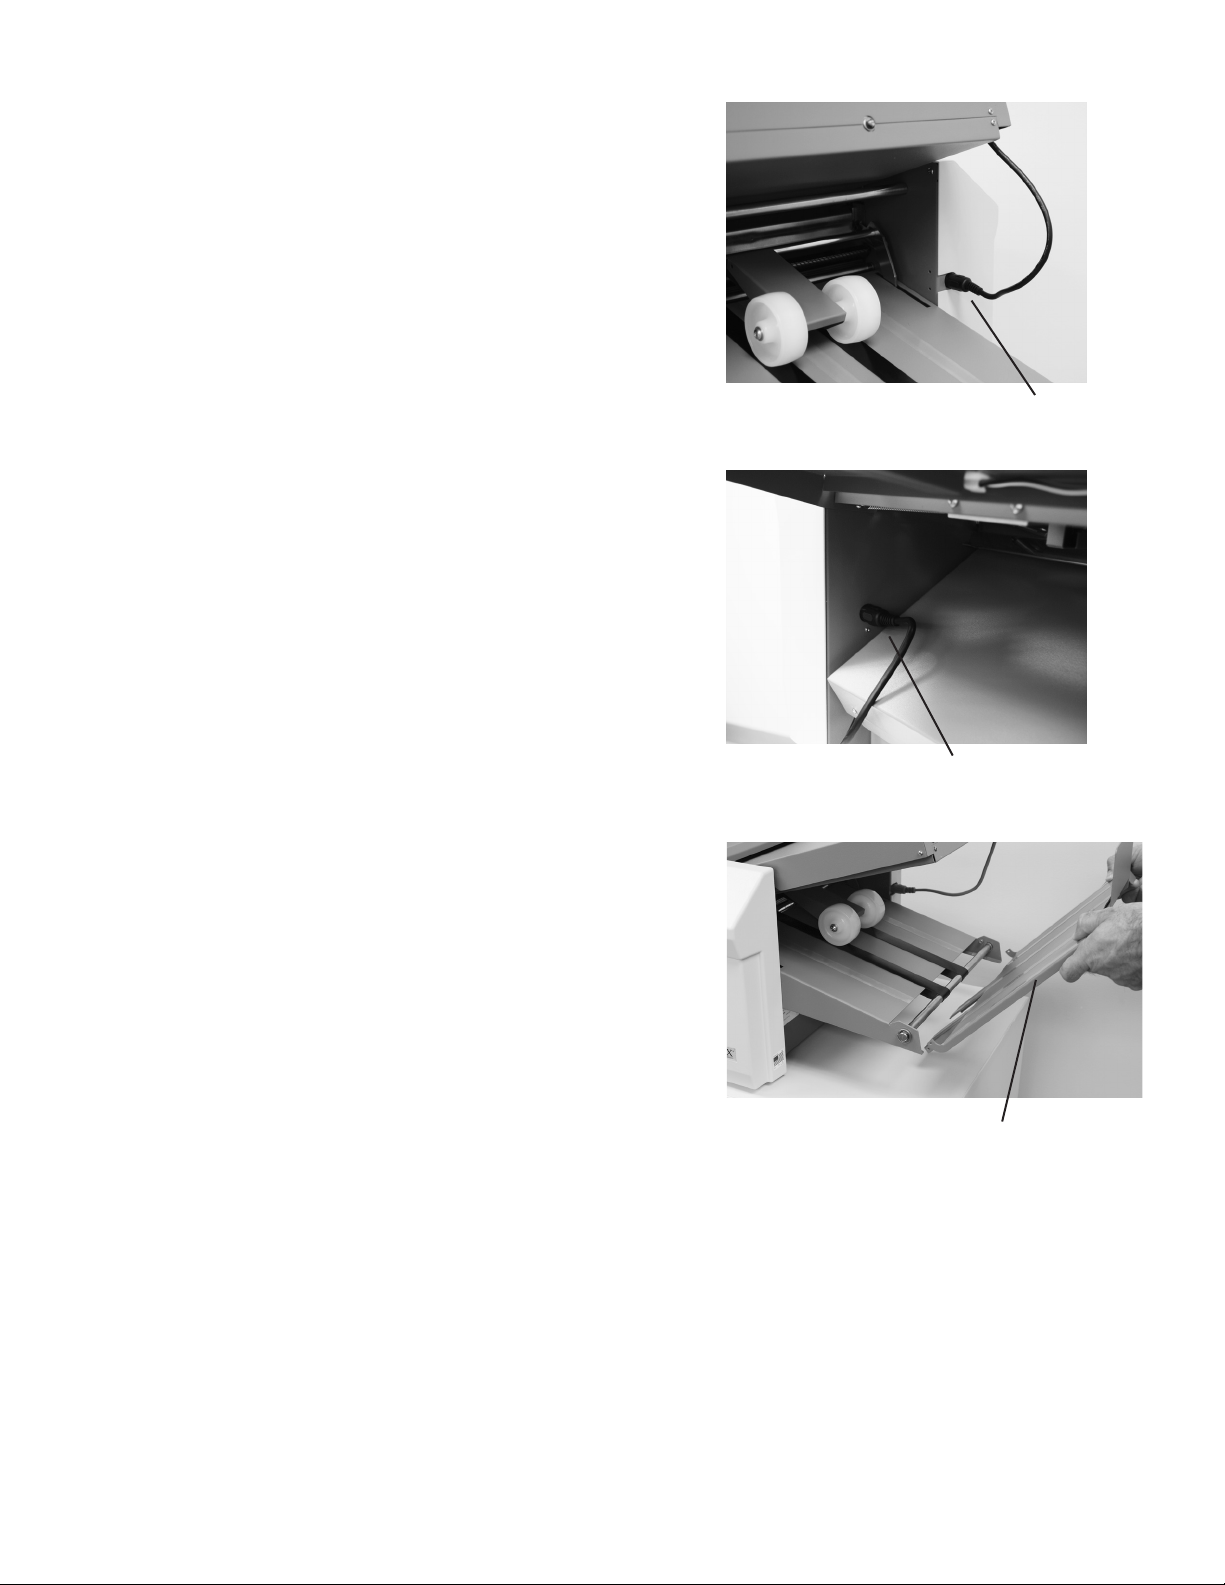
Telescoping
Outfeed Stacker
Self Centering Paper
Side Guides
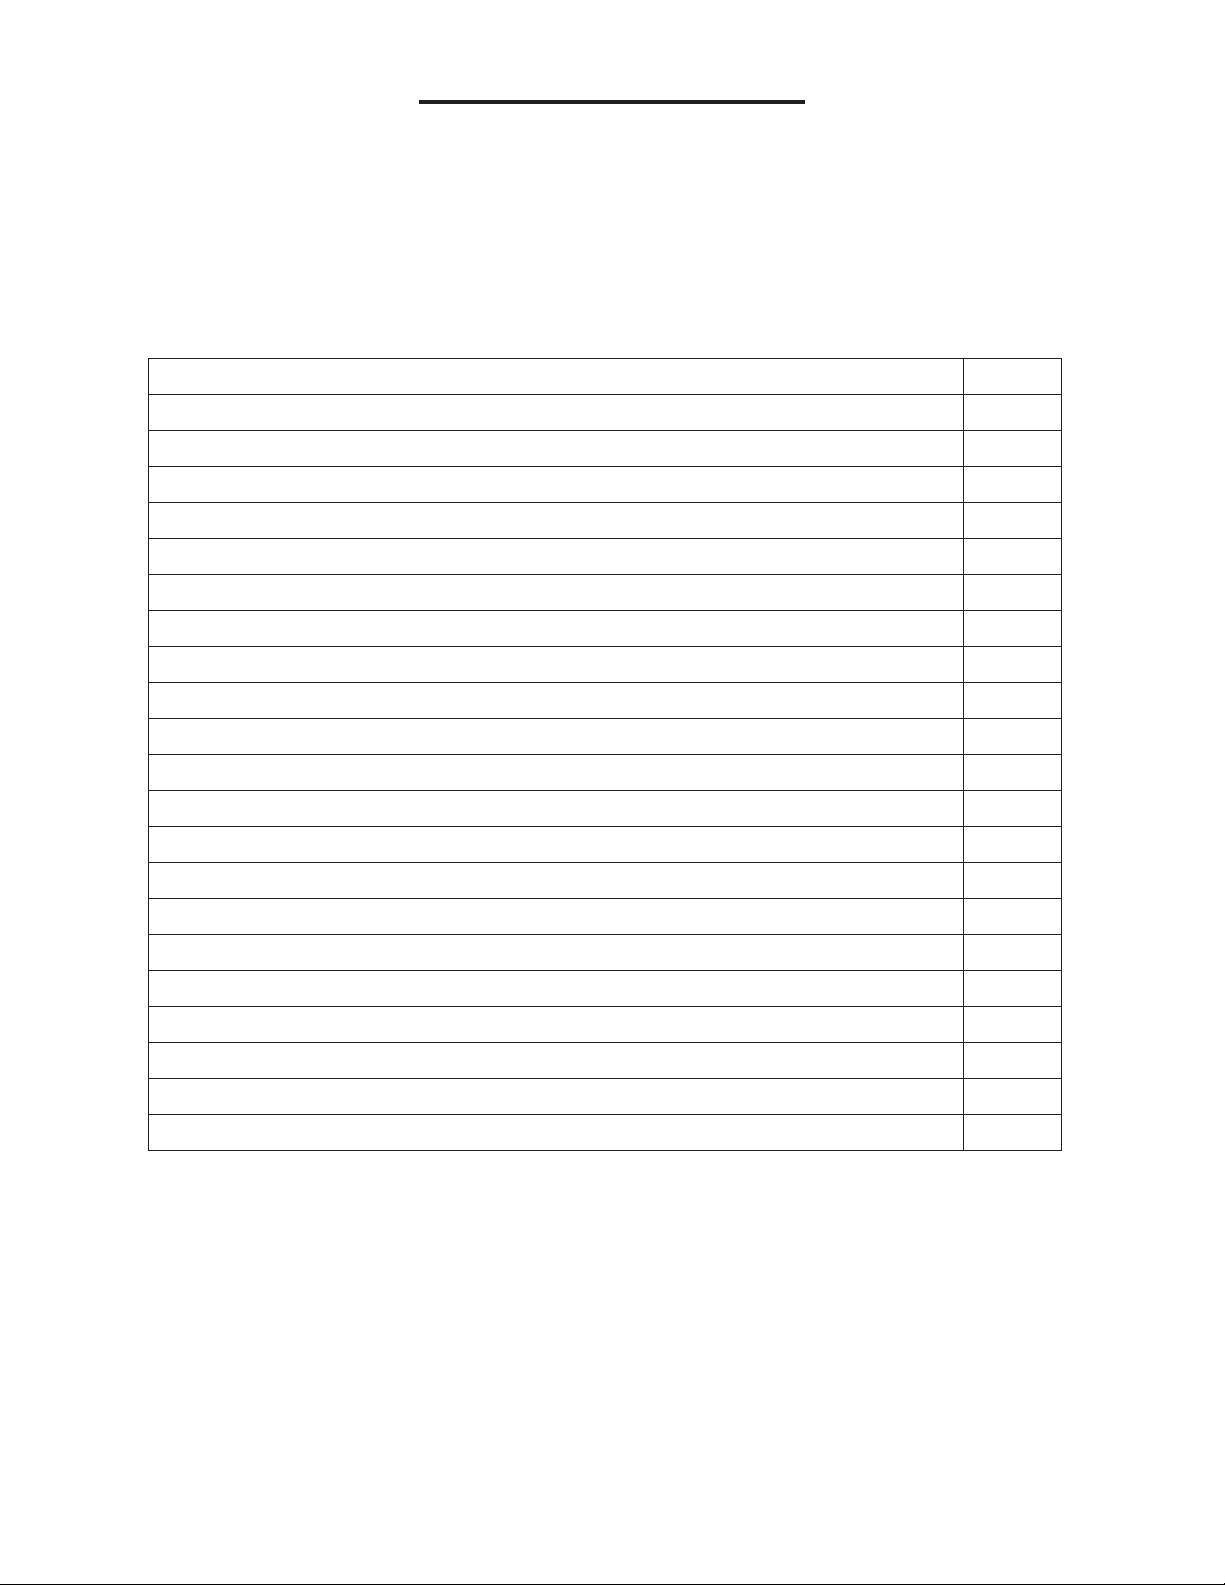
Infeed Tray
Infeed Tray
Extension
Infeed Tray
Lever
Lower Fold Table
Non Operator Side
Operator Side
Stacker Wheels
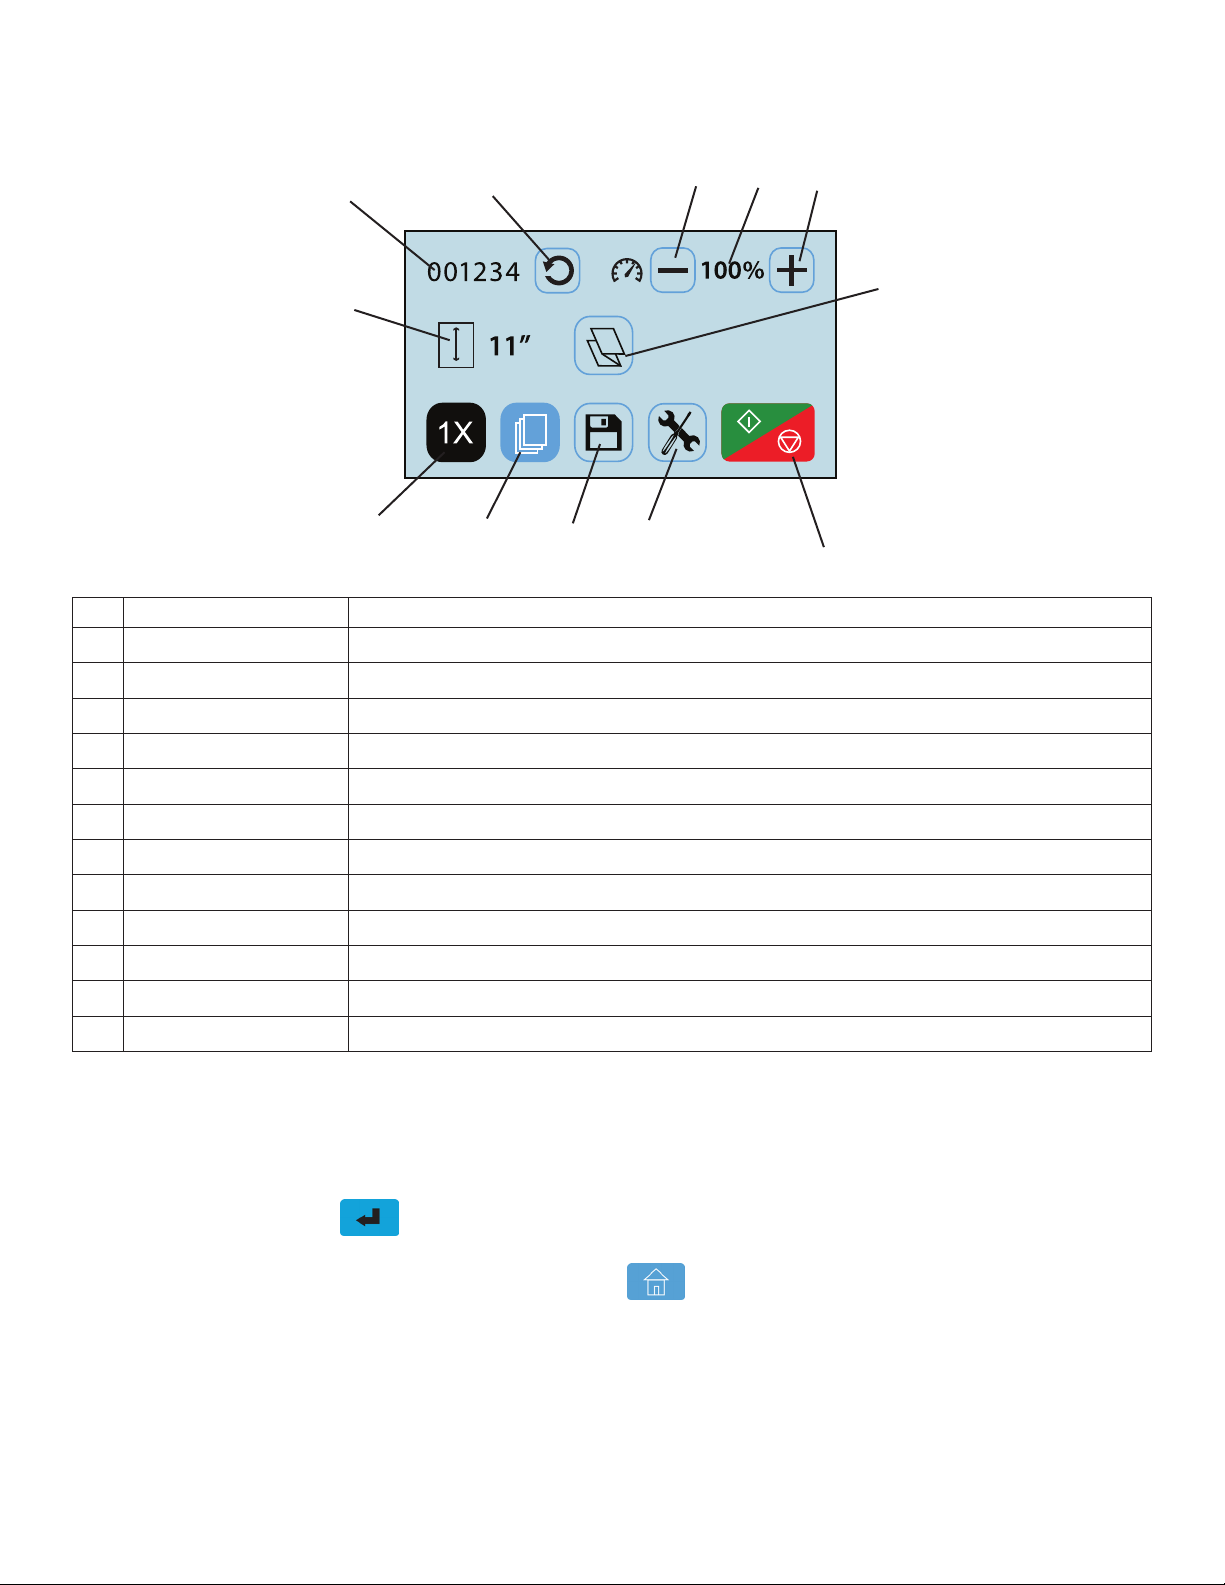
Top Cover
Control Panel
Speed: Up to 17,000 forms per hour – based on 11” (279mm) Z-Fold
Hopper Capacity: Up to 500 forms 20# (75gsm)
Pre-Set Folds: Pre-programmed for C, V, Z in 11 - 17” forms, uneven C, Z in 14” forms
Pre-Set Paper
Sizes:
FD Model: 11”, 14”, 17”
FE Model: A5, A4, A3, B6, B5, B4
Custom Folds: Stores up to 36 custom folds into memory
Paper Size: Min: 3.5” W x 5” L (88.9 W x 127 L mm)
Max: 12.25” W x 17” L (311 W x 432 L mm)
Dimensions: Closed: 43” L x 21.28” W x 16” H (109 L x 54 W x 41 H cm)
Fully Extended: 55” L x 21.28” W x 16” H (140 L x 54 W x 41 H cm)
Weight: 127 lbs (57kg)
Power: 110-240VAC 50/60 Hz
Safety Certications: UL & CE applied for