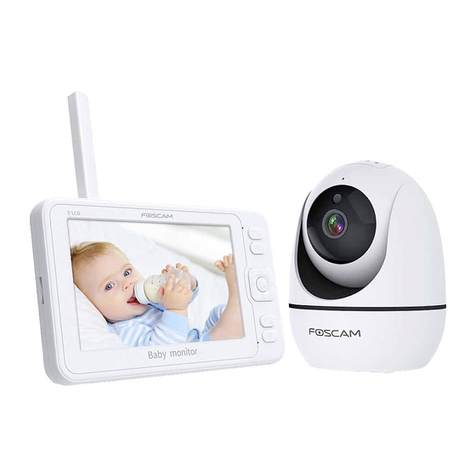
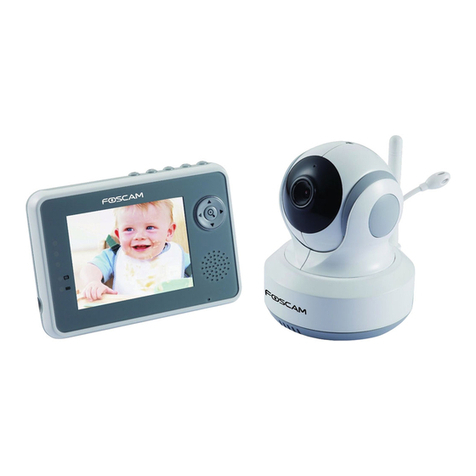
Foscam BM1 User manual

Baby Monitor BM1
User Manual • Uživatelský manuál •
Užívateľský manuál • Használati utasítás •
Benutzerhandbuch

2
English
3 –25
Čeština
26 –48
Slovenčina
49 –71
Magyar
72 –94
Deutsch
95 –118

3
Dear customer,
Thank you for purchasing our product. Please read the following instructions carefully before
first use and keep this user manual for future reference. Pay particular attention to the safety
instructions. If you have any questions or comments about the device, please contact the
customer line.
✉www.alza.co.uk/kontakt
✆+44 (0)203 514 4411
Importer Alza.cz a.s., Jankovcova 1522/53, Holešovice, 170 00 Praha 7, www.alza.cz

4
Safety Precautions
Failure to use this product as instructed may result in personal injury. We therefore strongly
recommend that you read the instructions carefully before using the product for the first
time.
Before using the camera, it's crucial to ensure that the correct power supply is utilized.
Securely install the camera and bracket using the provided screws to prevent any
instability.
Make sure to operate this product within the recommended temperature range. Extreme
ambient temperatures could potentially lead to product malfunctions.
To minimize the risk of fire or electric shock, store the camera in a cool and dry location.
Keep the camera out of the reach of young children to avoid any accidents or
mishandling.
Remember, this product is not a toy, and children should only use it under adult
supervision.
Packaging
1× Monitor
1× Camera
2× Power Adapter
1× Mounting Bracket
1× USB Type-C Cable (For
Monitor)
1× Micro USB Cable (For
Camera)
1× Screw Pack
1× User’s Manual

5
Diagram
Camera
Reset Button
Camera Lens
Speaker
Night Vision Sensor
Microphone
MicroSD Card Slot
Micro USB Port
Temperature Sensor
Antenna

6
Monitor
1. Screen: Before using the monitor for the first time, make sure to remove the
protective film covering the screen.
2. Power/Sleep Button: Long press this button to power on or power off the monitor. A
short press will turn the screen on or off.
3. VOX: While watching the live video, press the VOX button to activate or deactivate
sound detection.
4. Power Indicator: When the battery is fully charged, the power indicator will display a
green light. If the battery is low, the indicator will turn red.
5. Back/Menu: Use this button to access the menu page or go back to the previous
screen.
6. Camera Switch: If you have connected two or more cameras to the monitor, use this
button to switch between cameras or loop through the live video feed.
7. Up: Press to tilt the camera upward or move your selection upward.
8. Left: Press to pan the camera leftward or move your selection leftward.
9. Right: Press to pan the camera rightward or move your selection rightward.
10. OK: Press this button to zoom in/out or confirm your selection in the menu.
11. Down: Press to tilt the camera downward or move your selection downward.
12. Volume/Brightness: Press this button to bring up the Volume/Brightness menu.
Then use the Left/Right/Up/Down buttons to adjust the monitor's volume or
brightness.
13. Talk: To communicate with your baby near the camera, press and hold the Talk
button.
14. Microphone: The built-in microphone allows for audio transmission from the camera
to the monitor.
7
How To Get Started
Step 1:
Begin by charging the monitor. Connect the Power Adapter to the monitor and plug it into a
socket. It usually takes around 4 hours for the monitor to reach full charge, and once fully
charged, the battery can last for approximately 8 hours.
Step 2:
Next, connect the Power Adapter to the camera and plug it into a socket to power on the
camera. Once the camera is powered on, you'll hear a beep as confirmation.
Antenna
Speaker
Memory Card Slot
Stand
USB Type-C Port

8
Step 3:
Ensure that the camera is positioned at least 1 meter away from your baby.
Step 4:
To turn on the monitor, gently press and hold the Power Button for 3 seconds. Once it's
powered on, you'll be able to see the live view from the camera.
Important Notes:
1. In most cases, the camera should already be paired with the monitor. However, if it's not
paired, please refer to the next section for manual pairing instructions.
2. If you intend to record videos, make sure to install a memory card into either the monitor
or the camera before powering it on.
3. Upon powering on the monitor, please ensure to set the time and date as a priority.
4. If the monitor's power is too low, it may not power on properly or display abnormal
behavior. In such cases, please try again after allowing the monitor to charge for at least
10 minutes.
Interface For Monitoring
Signal
Battery Capacity
Sound
Temperature
Feeding Reminder Enabled
Music Enabled
Sound Detection - Will turn on if
you enable VOX funtcion
Live Video Loop Enabled
Camera Channel
Date and Time
When an alarm or notification for abnormality is issued, additional icons will appear on the
monitoring interface.
No Signal
Battery Low
Temperature Alarm
Sound Alarm
Feeding Reminder

9
Camera Settings
Pairing a Camera With a Monitor
Step 1:
Press to enter the menu page and select „Cameras“icon.
Step 2:
Select an unpaired channel (e.g., Channel 2) and press OK, the monitor will start searching for
a camera.
Tip: A grey icon indicates that no camera is paired with this channel, whereas a green
icon indicates that a camera has been successfully paired with this channel.
Cameras
Feeding
Sound Alarm
TemperatureA
larm
Music
Display
Recording
Playback
System
Language
Channel 1
Channel 2
Channel 3
Channel 4

10
Step 3:
By keeping the camera powered on, it will automatically pair with the monitor. Once
successfully paired, you will see a prompt indicating that the device is Paired.
Important Notes:
1. In case the pairing process fails, you will observe the prompt "Pairing failed" on the
screen. Please repeat the steps mentioned earlier and attempt the pairing process again.
2. The monitor can accommodate a maximum of four paired cameras.
3. If you reset your camera, ensure to pair it with the original channel rather than a new one
to avoid pairing issues and potential failures.
Replacing The Old Camera
To replace the old camera, simply pair a new camera with the same channel that the old
camera was previously paired with. Once the pairing with the new camera is successful, the
old camera will be automatically deleted from the system.
Pairing, please wait…
Paired!

11
Feeding
This function is designed to serve as a reminder for feeding your baby.
Step 1:
To access the Feeding function, navigate to the menu page and select the "Feeding" button.
Step 2:
After selecting the "Feeding" function, you can set the Time Interval and Repeat Mode as per
your preferences. Once you've configured the settings, press the "OK" button to confirm your
choices.
When the time interval is set to 2,5 hours, choosing will trigger the alarm only
once in 2,5 hours. However, if you select alarm will be triggered every 2,5
hours, repeatedly at the set interval.
Tip: During feeding time, the monitor will emit a beeping sound and display a icon. To
stop the alarm, simply press any button on the monitor.
Cameras
Feeding
Sound Alarm
Temperature
Alarm
Music
Display
Recording
Playback
System
Language
Time Interval
Repeat

12
Sound Alarm
This monitor is equipped with a Voice-Activated Switch, commonly known as VOX. It will
send alarms when it detects sound exceeding a certain threshold.
Step 1:
To access the Sound Alarm function, navigate to the menu page and select "Sound Alarm."
Step 2:
After selecting the "Sound Alarm" function, you can adjust the sensitivity level to your
preference. Once you have set the desired sensitivity level, press the "OK" button to confirm
your selection.
Cameras
Feeding
Sound Alarm
Temperature
Alarm
Music
Display
Recording
Playback
System
Language
Tips:
1. Adjust the sensitivity for sound detection according to your needs.
2. For the Low setting, the alarm threshold is a loud crying sound.
3. For the Medium setting, the alarm threshold is a loud voice.
4. For the High setting, the alarm threshold is set for normal speech
volume.

13
The sound detection sensitivity can be customized with four options: Off, Low, Medium, and
High. When set to Off, the sound detection feature is disabled entirely. Opting for Low
sensitivity will result in alarms being triggered solely when your baby cries loudly. The
Medium setting will notify you of loud baby voices, while selecting High sensitivity will alert
you to your baby's normal speech. Choose the most suitable sensitivity level based on your
preferences and monitoring requirements to ensure the desired level of sound detection for
your peace of mind.
Tip: When the alarm is triggered, the monitor will activate the screen with icon and emit
a sound alarm. To stop the sound alarm, simply press any button on the monitor.
Alternatively, you can press the VOX button to disable this function if you prefer not to
receive sound alarms.
Temperature Alarm
The monitor will send alarms if the ambient temperature falls below 18 °C or exceeds 30 °C,
indicating that the temperature is too low or too high, respectively.
Step 1:
To access the Temperature Alarm function, navigate to the menu page and select
"Temperature Alarm".
Cameras
Feeding
Sound Alarm
Temperature
Alarm
Music
Display
Recording
Playback
System
Language

14
Step 2:
After selecting the "Temperature Alarm" function, enable it to activate the temperature alarm
feature. Next, choose the preferred temperature unit (e.g., Celsius or Fahrenheit). Once you
have made your selections, press the "OK" button to confirm and save your choices.
Tip: When the temperature alarm is triggered, the monitor will display icon on the
screen and emit a sound alarm. To stop the sound alarm, simply press any button on the
monitor.
Temperature Alarm
Temperature Unit
On
Off
Note: The optimal temperature range is between 18 to 30 degrees Celsius.

15
Music
This function is designed to comfort your baby when needed. Each song's volume and type
are distinctive, offering a variety of options to choose from. Please select the most suitable
one for your baby's comfort and preference.
Step 1:
To access the Music function, navigate to the menu page and select "Music." Here, you can
choose from a selection of comforting songs to soothe and entertain your baby as needed.
Step 2:
After selecting a song from the available options, you can then set the playing mode
according to your preference. Once you have made your selections, press the "OK" button to
confirm and start playing the chosen song in the specified mode.
If you select a single song, that specific song will be played repeatedly. On the other hand, if
you choose "Loop Play," four songs within the same category will be played in a continuous
loop, providing a variety of soothing tunes for your baby.
Cameras
Feeding
Sound Alarm
Temperature
Alarm
Music
Display
Recording
Playback
System
Language
Lullabies
Loop Playback

16
Display
This function is designed to extend your monitor's runtime by automatically shutting down
the screen when it's not actively in use. This feature helps conserve battery power and
ensures the monitor operates efficiently for an extended period.
Step 1:
To access the Display settings, navigate to the menu page and choose "Display."
Step 2:
Configure the time duration for sleep mode and press the "OK" button to confirm your
choice.
If you select "1 Min", the monitor will enter sleep mode after 1 minute of inactivity. Similarly,
choosing "10 Min" or "30 Min" will put the monitor into sleep mode after 10 minutes or 30
minutes of no activity.
Cameras
Feeding
Sound Alarm
Temperature
Alarm
Music
Display
Recording
Playback
System
Language
Sleep Timer

17
Recording
This function allows you to record videos of your baby. By default, the maximum video length
is set to 1 hour.
Step 1:
To access the Recording function, navigate to the menu page and select "Recording".
Step 2:
To enable video recording to the monitor or camera, depending on the memory card
installation, simply enable the function and press the "OK" button to confirm your choice.
This will allow you to start recording videos of your baby for later viewing.
Tips: Once you have installed the memory card, it will be automatically formatted when you
power on the monitor or camera. Before enabling the video recording function, it is essential
to set the date and time. This will enable precise video playback and make it easier to search
for specific moments when reviewing the recorded videos.
Cameras
Feeding
Sound Alarm
Temperature
Alarm
Music
Display
Recording
Playback
System
Language
Record By Monitor
Expected Recording Time: 13
Record By Camera
Resolution: 1080p
Channel 1
Channel 2
Channel 3
Channel 4

18
Playback
Step 1:
To access the Playback function, navigate to the menu page and select "Playback." By default,
it will play the latest recorded videos on Channel 1. In case there are no videos on Channel 1,
you can select the icon to explore additional video playback options.
Step 2:
After selecting the icon, press "OK" to open the search page. Here, you can set the
date, time, and channel to filter and find your desired videos. Once you have entered the
search criteria, select "Search," and press "OK" to apply the filters and display the relevant
videos accordingly.
Tip: Please note that videos recorded on the monitor can only be viewed through the
monitor itself and cannot be accessed on a computer directly. If you wish to watch videos
recorded on the camera, you will need to remove the memory card from the camera and use
a card reader to view the videos on your computer.
Cameras
Feeding
Sound Alarm
Temperature
Alarm
Music
Display
Recording
Playback
System
Language
Search
Fast forward
Play/Pause
Rewind
Full screen

19
System
This function allows you to perform various tasks, including setting the Date & Time,
changing the language, restoring factory settings, and checking the software version.
Step 1:
To access the System settings, navigate to the menu page and select "System".
Step 2:
In the "System" settings, you can set the date and time according to your local region, select
your preferred language, and check the remaining storage capacity of the memory card.
Additionally, if required, you have the option to restore the monitor to its factory settings.
Cameras
Feeding
Sound Alarm
Temperature
Alarm
Music
Display
Recording
Playback
System
Language
Date/Time
Factory Reset
Advanced Settings
Version

20
Language
Step 1:
To access the Language settings, navigate to the menu page and select "Language". Here,
you can choose your desired language for the monitor's interface.
Step 2:
Choose the language you need from the available options. Once you have made your
selection, confirm it, and the monitor will automatically restart to apply the changes.
Tip: When changing the language, please ensure that the monitor has sufficient battery
power. Keep in mind that the camera broadcast will synchronize with the selected language
on the monitor.
Cameras
Feeding
Sound Alarm
Temperature
Alarm
Music
Display
Recording
Playback
System
Language
Other manuals for BM1
1
Table of contents
Languages:
Other Foscam Baby Monitor manuals

Foscam
Foscam FosBaby User manual

Foscam
Foscam FosBaby User manual

Foscam
Foscam FBM2307 User manual

Foscam
Foscam BM1 User manual

Foscam
Foscam FosBaby P1 User manual

Foscam
Foscam FosBaby User manual

Foscam
Foscam FosBaby P1 User manual

Foscam
Foscam FBM3501 User manual

Foscam
Foscam FosBaby User manual

Foscam
Foscam FosBaby User manual