Foscam FI9820W User manual

U
Us
se
er
rM
Ma
an
nu
ua
al
l
Model: FI9820W
Indoor HD Pan/Tilt Wireless IP Camera
Black White

w
ww
ww
w.
.f
fo
os
sc
ca
am
m.
.c
co
om
m
1
S
Sh
he
en
nz
zh
he
en
nF
Fo
os
sc
ca
am
mI
In
nt
te
el
ll
li
ig
ge
en
nt
tT
Te
ec
ch
hn
no
ol
lo
og
gy
yC
Co
o.
.,
,L
Li
im
mi
it
te
ed
d
T
Te
el
l:
:8
86
67
75
55
52
26
67
74
45
56
66
68
8F
Fa
ax
x:
:8
86
67
75
55
52
26
67
74
45
51
16
68
81
TableofContents
1 Overviews.................................................................................................................................2
1.1 Key Features.......................................................................................................................................................3
1.2 Read Before Use ................................................................................................................................................3
1.3 Packing Contents................................................................................................................................................3
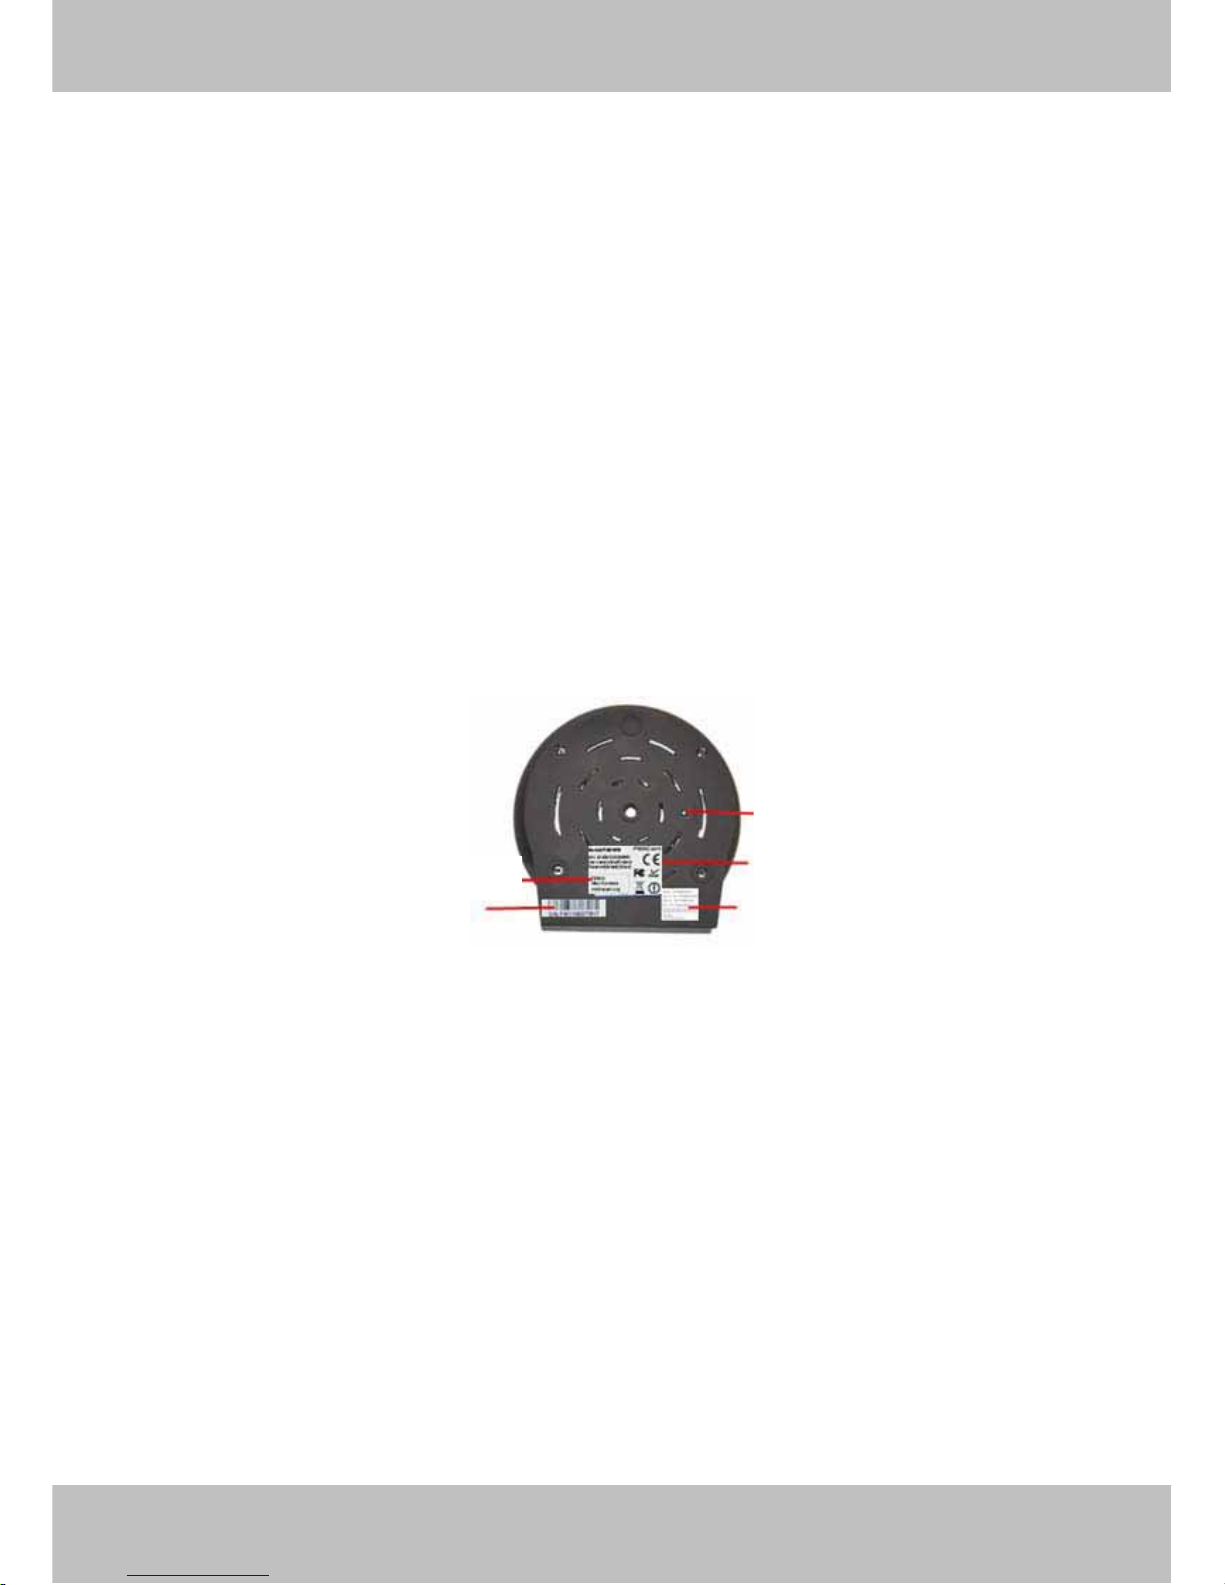
1.4 Physical Description............................................................................................................................................4
2 Surveillance Software GUI........................................................................................................6
2.1 Login Window .....................................................................................................................................................6
2.2 Surveillance Window...........................................................................................................................................9
3 Advanced Camera Settings ....................................................................................................16
3.1 Device Information............................................................................................................................................16
3.2 Date & Time Settings........................................................................................................................................18
3.3 User Settings ....................................................................................................................................................20
3.4 Basic Network Settings.....................................................................................................................................21
3.5 Wireless Settings..............................................................................................................................................27
3.6 Remote Access.................................................................................................................................................27
3.7 Email Settings...................................................................................................................................................28
3.8 FTP Settings .....................................................................................................................................................29
3.9 Auto Capture.....................................................................................................................................................30
3.10 Motion Detection.............................................................................................................................................30
3.11 Alarm ...............................................................................................................................................................33
3.12 Schedule.........................................................................................................................................................34
3.13 Video...............................................................................................................................................................35
3.14 Image Settings................................................................................................................................................38
3.15 Audio...............................................................................................................................................................39
3.16 Initialize...........................................................................................................................................................40
3.17 Back................................................................................................................................................................41
4 Other Settings.........................................................................................................................41
5 APPENDIX..............................................................................................................................42
5.1 Frequently Asked Questions.............................................................................................................................42
5.2 Third Party Domain Name Settings ..................................................................................................................50
5.3 Default Parameters...........................................................................................................................................53

w
ww
ww
w.
.f
fo
os
sc
ca
am
m.
.c
co
om
m
2
S
Sh
he
en
nz
zh
he
en
nF
Fo
os
sc
ca
am
mI
In
nt
te
el
ll
li
ig
ge
en
nt
tT
Te
ec
ch
hn
no
ol
lo
og
gy
yC
Co
o.
.,
,L
Li
im
mi
it
te
ed
d
T
Te
el
l:
:8
86
67
75
55
52
26
67
74
45
56
66
68
8F
Fa
ax
x:
:8
86
67
75
55
52
26
67
74
45
51
16
68
82
5.4 Specifications....................................................................................................................................................54
6 OBTAINING TECHNICAL SUPPORT.....................................................................................55
7 Warinings................................................................................................................................55
1
1O
Ov
ve
er
rv
vi
ie
ew
ws
s
FOSCAM FI9820W is an integrated wireless IP Camera with a color CMOS sensor enabling
viewing resolution 1280*720. It combines a high quality digital video camera, with a powerful web
server, to bring clear video to your desktop from anywhere on your local network or over the
Internet.
With flexible 300-degree pan and 120-degree tilt, FI9820W gives users more comprehensive
control over a monitored site. The FI9820W supports the industry-standard H.264 compression
technology, drastically reducing file sizes and conserving valuable network bandwidth.
The IPCAM is based on the TCP/IP standard. There is a WEB server inside which could support
Internet Explore. Therefore the management and maintenance of your device is simplified by
using the network to achieve the remote configuration, start-up and to upgrade the firmware.
The camera is designed for indoor surveillance applications such as retail stores, offices or
banks. Controlling the IPCAM and managing images are simplified by using the provided web
interface across the network utilizing wireless connectivity.

w
ww
ww
w.
.f
fo
os
sc
ca
am
m.
.c
co
om
m
3
S
Sh
he
en
nz
zh
he
en
nF
Fo
os
sc
ca
am
mI
In
nt
te
el
ll
li
ig
ge
en
nt
tT
Te
ec
ch
hn
no
ol
lo
og
gy
yC
Co
o.
.,
,L
Li
im
mi
it
te
ed
d
T
Te
el
l:
:8
86
67
75
55
52
26
67
74
45
56
66
68
8F
Fa
ax
x:
:8
86
67
75
55
52
26
67
74
45
51
16
68
83
1
1.
.1
1K
Ke
ey
yF
Fe
ea
at
tu
ur
re
es
s
Standard H.264 video compression algorithm to satisfy the transmission of high definition
video in narrow bandwidth network
1.0 Mega-Pixel
Supports SD memory card storage
Supports IE/Firefox/Google/Safari browser or any other standard browsers
Supports mobile watch
Supports WEP,WPAand WPA2 Encryption
IR night vision (Range:8m)
Supports dual-stream
Supports IR-Cut and the filter change automatically
Embedded FOSCAM domain name
Supports two-way audio / remote viewing & record from anywhere anytime
Multi-level users management with password protection
Motion detection alert via email or upload image to FTP
Supporting Third Party Domain name
Supports multiple network protocols: HTTP /TCP /IP /UDP /FTP /DHCP /DDNS / UPNP
/RTSP
Providing Central Management Software to manage or monitor multi-cameras
1
1.
.2
2R
Re
ea
ad
dB
Be
ef
fo
or
re
eU
Us
se
e
Please first verify that all contents received are complete according to the Package Contents
listed below. Before the Network Camera is installed, please carefully read and follow the
instructions in the Quick Installation Guide to avoid damage due to faulty assembly and
installation. This also ensures the product is used properly as intended.
1
1.
.3
3P
Pa
ac
ck
ki
in
ng
gC
Co
on
nt
te
en
nt
ts
s
ƔIPCAM×1 ƔCD×1
ƔWi-Fi Antenna×1 (only available for wireless
model)
ƔQuick Installation Guide×1
ƔDC Power Supply×1 ƔWarranty Card×1
ƔMounting bracket×1(option)
ƔNetwork Cable×1

w
ww
ww
w.
.f
fo
os
sc
ca
am
m.
.c
co
om
m
4
S
Sh
he
en
nz
zh
he
en
nF
Fo
os
sc
ca
am
mI
In
nt
te
el
ll
li
ig
ge
en
nt
tT
Te
ec
ch
hn
no
ol
lo
og
gy
yC
Co
o.
.,
,L
Li
im
mi
it
te
ed
d
T
Te
el
l:
:8
86
67
75
55
52
26
67
74
45
56
66
68
8F
Fa
ax
x:
:8
86
67
75
55
52
26
67
74
45
51
16
68
84
1
1.
.4
4P
Ph
hy
ys
si
ic
ca
al
lD
De
es
sc
cr
ri
ip
pt
ti
io
on
n
Front Panel
Figure 1.1
Infrared LED: 11 IR LEDs
LENS: CMOS sensor with fixed focus lens. (3.6mm)
WIFI Antenna: Wireless Antenna
Microphone: Built-in microphone
Speaker: Built-in speaker
Rear Panel
Figure 1.2
LAN: RJ-45/10-100 Base T
Power: DC 5V/2A Power supply

w
ww
ww
w.
.f
fo
os
sc
ca
am
m.
.c
co
om
m
5
S
Sh
he
en
nz
zh
he
en
nF
Fo
os
sc
ca
am
mI
In
nt
te
el
ll
li
ig
ge
en
nt
tT
Te
ec
ch
hn
no
ol
lo
og
gy
yC
Co
o.
.,
,L
Li
im
mi
it
te
ed
d
T
Te
el
l:
:8
86
67
75
55
52
26
67
74
45
56
66
68
8F
Fa
ax
x:
:8
86
67
75
55
52
26
67
74
45
51
16
68
85
Power Light: If the power adapter works well, the light will turn on.
SD Card Light: If you have plugged in the SD card, the light will turn on
SD card: Supports to 32G
Audio Input: This jack is used to plug an external microphone
Audio Output: This jack is used to plug an external speaker
Bottom View
There are up to three labels located at the bottom of the camera; this is an important feature of
original Foscam cameras. If your camera does not have labels as shown in Figure 1.3, it may be
a clone. Cloned Foscam cameras can not use original firmware and are not eligible for warranty
or technical services.
Figure 1.3
Reset button: Press and hold down the RESET BUTTON for 15 seconds. when released the IP
camera will be reset back to factory default settings. You must power on the camera before
reset.
Reset button
MAC address of wired connection
MAC address of wireless connectionS/N of FOSCAM
FOSCAM domain name

w
ww
ww
w.
.f
fo
os
sc
ca
am
m.
.c
co
om
m
6
S
Sh
he
en
nz
zh
he
en
nF
Fo
os
sc
ca
am
mI
In
nt
te
el
ll
li
ig
ge
en
nt
tT
Te
ec
ch
hn
no
ol
lo
og
gy
yC
Co
o.
.,
,L
Li
im
mi
it
te
ed
d
T
Te
el
l:
:8
86
67
75
55
52
26
67
74
45
56
66
68
8F
Fa
ax
x:
:8
86
67
75
55
52
26
67
74
45
51
16
68
86
2
2
S
Su
ur
rv
ve
ei
il
ll
la
an
nc
ce
eS
So
of
ft
tw
wa
ar
re
eG
GU
UI
I
2
Please refer to the Quick Installation Guide if you install the camera at first time. After finishing
quick installation, you can take time to learn the operation of the software.
Please refer to the Quick Installation Guide if you install the camera at first time. After finishing
quick installation, you can take time to learn the operation of the software.
2
2.
.1
1L
Lo
og
gi
in
nW
Wi
in
nd
do
ow
w
2
2S
Su
ur
rv
ve
ei
il
ll
la
an
nc
ce
eS
So
of
ft
tw
wa
ar
re
eG
GU
UI
I
2.
.1
1L
Lo
og
gi
in
nW
Wi
in
nd
do
ow
w
Figure 2.1
Please check the login window above, it was divided to 4 sections from no. 1 to 4.
Section1 Select Language
FOSCAM camera supports up to 5 languages, such as English, Deutsch,French and so on. You
can selectthe language you need via click on the select language bar to switch.
Section2 Video View
If you use PC to login the camera, please choose Video View Mode. Here you can use IE,
Firefox, Google Chrome ,Safari browsers or other standard browsers to view the live stream.
Section3 Mobile View
If you use Mobile Phone to login the camera, please choose Mobile View Mode.
Section4 Download
For IE users, the ActiveX have been embedded in the IP Camera Tool, so if you have installed
1
2
3
4

w
ww
ww
w.
.f
fo
os
sc
ca
am
m.
.c
co
om
m
7
S
Sh
he
en
nz
zh
he
en
nF
Fo
os
sc
ca
am
mI
In
nt
te
el
ll
li
ig
ge
en
nt
tT
Te
ec
ch
hn
no
ol
lo
og
gy
yC
Co
o.
.,
,L
Li
im
mi
it
te
ed
d
T
Te
el
l:
:8
86
67
75
55
52
26
67
74
45
56
66
68
8F
Fa
ax
x:
:8
86
67
75
55
52
26
67
74
45
51
16
68
87
the IP Camera Tool, you need not download again. If you use Firefox, Google Chrome, Safari or
others, you should download and install QuickTime Player as the ActiveX from other website.
For remote IE users, first time you use the IPCAM, you may need download and install the
ActiveX. (Please read chapter 5.1 in Appendix about how to download and install the ActiveX).
Click the login button under Video View, you will see the video window:
Figure 2.2
If you could not view living video after running the ActiveX, only a red cross in the center
of the video or just a black screen. Please change another port number to try.
Make sure all firewall or antivirus software on your computer does not block the active download
and installation. If you are unable to run the ActiveX control, try shutting down the firewall or
antivirus program.
For Firefox, Google Chrome and Safari
Install the Quick Time Player and fill in user name and password then login, you will see the
living video.

w
ww
ww
w.
.f
fo
os
sc
ca
am
m.
.c
co
om
m
8
S
Sh
he
en
nz
zh
he
en
nF
Fo
os
sc
ca
am
mI
In
nt
te
el
ll
li
ig
ge
en
nt
tT
Te
ec
ch
hn
no
ol
lo
og
gy
yC
Co
o.
.,
,L
Li
im
mi
it
te
ed
d
T
Te
el
l:
:8
86
67
75
55
52
26
67
74
45
56
66
68
8F
Fa
ax
x:
:8
86
67
75
55
52
26
67
74
45
51
16
68
88
Figure 2.3

w
ww
ww
w.
.f
fo
os
sc
ca
am
m.
.c
co
om
m
9
S
Sh
he
en
nz
zh
he
en
nF
Fo
os
sc
ca
am
mI
In
nt
te
el
ll
li
ig
ge
en
nt
tT
Te
ec
ch
hn
no
ol
lo
og
gy
yC
Co
o.
.,
,L
Li
im
mi
it
te
ed
d
T
Te
el
l:
:8
86
67
75
55
52
26
67
74
45
56
66
68
8F
Fa
ax
x:
:8
86
67
75
55
52
26
67
74
45
51
16
68
89
2.2 Surveillance Window
Figure 2.4
Section1 Resolution
The resolution contains five types: 1270*720, 960*540, 640*360, 320*180 and Auto. You can
choose First Stream or Second Stream to adjust the view window.
Note: When the network bandwidth is badly, you’d better select Second Stream and the video
will be more fluency.
Section2 Snapshot/Record/Playback/Audio/Path Buttons
: Browse the SD Card: If the camera has plugged in SD card, click this icon and you can
see some information such as the stored files in the SD card, you can read the stored files.
Snapshot: Click this icon, the camera will snap a picture and store it to a predetermined
path.
Record: Click the icon. The camera will begin recording and store the recorded file to the
folder you set. And the status column will display REC when recording. Click the icon again it will
stop recording.
1
2
3
4
5
6

w
ww
ww
w.
.f
fo
os
sc
ca
am
m.
.c
co
om
m
10
S
Sh
he
en
nz
zh
he
en
nF
Fo
os
sc
ca
am
mI
In
nt
te
el
ll
li
ig
ge
en
nt
tT
Te
ec
ch
hn
no
ol
lo
og
gy
yC
Co
o.
.,
,L
Li
im
mi
it
te
ed
d
T
Te
el
l:
:8
86
67
75
55
52
26
67
74
45
56
66
68
8F
Fa
ax
x:
:8
86
67
75
55
52
26
67
74
45
51
16
68
810
Figure 2.5
Playback: Click the icon, it will pop up a player. And you can see the videos you have stored
in the computer

w
ww
ww
w.
.f
fo
os
sc
ca
am
m.
.c
co
om
m
11
S
Sh
he
en
nz
zh
he
en
nF
Fo
os
sc
ca
am
mI
In
nt
te
el
ll
li
ig
ge
en
nt
tT
Te
ec
ch
hn
no
ol
lo
og
gy
yC
Co
o.
.,
,L
Li
im
mi
it
te
ed
d
T
Te
el
l:
:8
86
67
75
55
52
26
67
74
45
56
66
68
8F
Fa
ax
x:
:8
86
67
75
55
52
26
67
74
45
51
16
68
811
Figure 2.6
Mute Click this icon, the icon will become to you can hear the sound around the
camera by the earphone or speakers that connected with PC.
Talk:Click the button and the icon will become to , then talk to the microphone that
connected with PC, people around the camera can here your voice. Click the icon again and stop
talking.
Path: Setting the storage path of snapshot photos and recording files. The default path is D
disk.
These settings buttons are controlled by the ActiveX, so Firefox, Google Chrome and Safari will
not allow these functions.
Section3 Pan/Tilt Control
1------Up control button,
2------Down control button,
3------Left control button,
4------Right control button,
5------Go to center
:Click this icon; camera will rotate up and down. Click to stop.
:Click this icon; camera will rotate left and right. Click to stop.
1
34
2
5

w
ww
ww
w.
.f
fo
os
sc
ca
am
m.
.c
co
om
m
12
S
Sh
he
en
nz
zh
he
en
nF
Fo
os
sc
ca
am
mI
In
nt
te
el
ll
li
ig
ge
en
nt
tT
Te
ec
ch
hn
no
ol
lo
og
gy
yC
Co
o.
.,
,L
Li
im
mi
it
te
ed
d
T
Te
el
l:
:8
86
67
75
55
52
26
67
74
45
56
66
68
8F
Fa
ax
x:
:8
86
67
75
55
52
26
67
74
45
51
16
68
812
1) Preset----------Support 8 preset position, which is considered enough for DIY home & small
business surveillance market
2) Set----------- Click Set to save the position you need the camera to remember
3) Go----------- Click Go to make the camera move the preset position
4) Number button from 1 to 8--------You can click the number button with preset position, and the
camera will go to the preset position.
5) PTZ Speed-------- Here you can set the len’s moving speed .This function can be used only
when the IPCAM is a high-speed camera .It has no affection at a constant speed camera.
How to do preset position?
We can start preset settings from position 1.
Firstly, select no. 1 within the menu of Preset on the panel.
Secondly, move the camera and stop at a place where you want make preset position.
Thirdly, click set button to save it as position 1 and you have done preset of position 1.
After that, you can select no. 2 within the menu of Preset on the panel, and move the camera and
stop at another place, and set as preset position 2. You can do all the 8 preset positions with this
method.
If you want to see the preset position you have set, such as the position 1, only select the set
no.1 ,and click go button, the camera will go to position no.1.
Section4 For Administrator
For Administrator------Path toAdministrator Control Panel, Click it, and it will lead to Administrator
Control Panel.
Section5 OSD Date/Time
If you have added time and camera name in the video, you can see it in the live window.
Go to For Administrator ---ÆVideo, you can reset it:

w
ww
ww
w.
.f
fo
os
sc
ca
am
m.
.c
co
om
m
13
S
Sh
he
en
nz
zh
he
en
nF
Fo
os
sc
ca
am
mI
In
nt
te
el
ll
li
ig
ge
en
nt
tT
Te
ec
ch
hn
no
ol
lo
og
gy
yC
Co
o.
.,
,L
Li
im
mi
it
te
ed
d
T
Te
el
l:
:8
86
67
75
55
52
26
67
74
45
56
66
68
8F
Fa
ax
x:
:8
86
67
75
55
52
26
67
74
45
51
16
68
813
Figure 2.7
Section6 Status Bar
Figure 2.8
There is a status column below the view window (Figure2.8).
1) The current state of IPCAM
2) After the view has been digital amplified, click the icon, the view will be digital narrowed.
3) Click the icon, the view window will be digital amplified.
4) Click the icon, the view window will restore the original size.

w
ww
ww
w.
.f
fo
os
sc
ca
am
m.
.c
co
om
m
14
S
Sh
he
en
nz
zh
he
en
nF
Fo
os
sc
ca
am
mI
In
nt
te
el
ll
li
ig
ge
en
nt
tT
Te
ec
ch
hn
no
ol
lo
og
gy
yC
Co
o.
.,
,L
Li
im
mi
it
te
ed
d
T
Te
el
l:
:8
86
67
75
55
52
26
67
74
45
56
66
68
8F
Fa
ax
x:
:8
86
67
75
55
52
26
67
74
45
51
16
68
814
Onscreen Mouse Control
Click on a place on the screen to indicate the camera move direction you prefer. For example,
you can click on the upper-right corner of the screen, and the cameras lens will move toward the
upper-right direction.
When the icon has three arrows, the speed of the rotation is fastest. And when the icon has one
arrow, the speed is lowest.
Figure 2.9
Put the mouse at the center of the living video, you will see the icon of the magnifying glass
(Figure 2.10). Press the left mouse and you can use the optical zoom function.
The camera doesn’t support this function because the lens without the optical zoom.

w
ww
ww
w.
.f
fo
os
sc
ca
am
m.
.c
co
om
m
15
S
Sh
he
en
nz
zh
he
en
nF
Fo
os
sc
ca
am
mI
In
nt
te
el
ll
li
ig
ge
en
nt
tT
Te
ec
ch
hn
no
ol
lo
og
gy
yC
Co
o.
.,
,L
Li
im
mi
it
te
ed
d
T
Te
el
l:
:8
86
67
75
55
52
26
67
74
45
56
66
68
8F
Fa
ax
x:
:8
86
67
75
55
52
26
67
74
45
51
16
68
815
Figure 2.10
Right click on the screen, you can see two graphic display modes: Direct Draw and GDI. The
default mode is Direct Draw, and almost graphic card support this mode. But some old graphic
card cannot display normally under Direct Draw, you can select GDI to try again.
Figure 2.11
Under GDI mode, you cannot see the motion detect region lines when set motion detection.(For
more details: read chapter 3.10 Motion Detection)

w
ww
ww
w.
.f
fo
os
sc
ca
am
m.
.c
co
om
m
16
S
Sh
he
en
nz
zh
he
en
nF
Fo
os
sc
ca
am
mI
In
nt
te
el
ll
li
ig
ge
en
nt
tT
Te
ec
ch
hn
no
ol
lo
og
gy
yC
Co
o.
.,
,L
Li
im
mi
it
te
ed
d
T
Te
el
l:
:8
86
67
75
55
52
26
67
74
45
56
66
68
8F
Fa
ax
x:
:8
86
67
75
55
52
26
67
74
45
51
16
68
816
3
3A
Ad
dv
va
an
nc
ce
ed
dC
Ca
am
me
er
ra
aS
Se
et
tt
ti
in
ng
gs
s
Click the bar “For Administrator”, goes to Administrator Control Panel to make advanced camera
settings.
3.1 Device Information
Figure 3.1
Device ID: It displays “IP Camera”. This ID is different form the camera name. You can set any
camera name you like for the camera in “For Administrator—> Video—>Parenthesis Options”
and the camera name can be showed at the video window, but the device ID will always display
“IP Camera”.
Network Connection: LAN or Wireless, If the camera gets wired connection, here will show
LAN, if the camera gets wireless connection, here shows Wireless.
Current Client: It shows that how many people are viewing the video. For example, the Current
Client shows 1,that means one people are looking the video. If someone have logged in the
camera but do not open the video, the Current Client will not change.
Device Firmware Version/Device Embedded Web UI Version: The camera’s software
version.
Mac Address: Each camera has its own MAC ID. For example Device ID is 00606E8C5058, the

w
ww
ww
w.
.f
fo
os
sc
ca
am
m.
.c
co
om
m
17
S
Sh
he
en
nz
zh
he
en
nF
Fo
os
sc
ca
am
mI
In
nt
te
el
ll
li
ig
ge
en
nt
tT
Te
ec
ch
hn
no
ol
lo
og
gy
yC
Co
o.
.,
,L
Li
im
mi
it
te
ed
d
T
Te
el
l:
:8
86
67
75
55
52
26
67
74
45
56
66
68
8F
Fa
ax
x:
:8
86
67
75
55
52
26
67
74
45
51
16
68
817
same MAC ID sticker is found at the bottom/back of the camera.
Another Way:
Double click the the icon “IP Camera.exe” , select the camera, right click and select the
Basic Properties, you can also see the Firmware Version and MAC Address, such as the
following screen:
Figure 3.2
Figure 3.3
SD Status: Some information about the plugged SD Card. If the camera has inserted SD card
and it works well, this status column will display the SD card information as the following screen
and the SD Card light on the back of the camera will turn on, else it will display “no devices:
figure 3.1.
Browser SD Card: Click it and you can see the stored files if the camera has plugged SD card.
You need enter the user name and password again before looking the following screen:

w
ww
ww
w.
.f
fo
os
sc
ca
am
m.
.c
co
om
m
18
S
Sh
he
en
nz
zh
he
en
nF
Fo
os
sc
ca
am
mI
In
nt
te
el
ll
li
ig
ge
en
nt
tT
Te
ec
ch
hn
no
ol
lo
og
gy
yC
Co
o.
.,
,L
Li
im
mi
it
te
ed
d
T
Te
el
l:
:8
86
67
75
55
52
26
67
74
45
56
66
68
8F
Fa
ax
x:
:8
86
67
75
55
52
26
67
74
45
51
16
68
818
You can open the stored files and read it.
Format SD card as fat32: Click it and format the SD card.
Unplug SD Card: Click it then unplug SD card safely.
3
3.
.2
2D
Da
at
te
e&
&T
Ti
im
me
eS
Se
et
tt
ti
in
ng
gs
s
There are four models for you to adjust time: Manual setting, Sync with computer time, Network
Time Protocol and Keep current time, choose one model and adjust the camera time. Then
choose Time zone.
Manual settings: The administrator can enter the date and time manually. Note that the date
and time format is [yyyy/mm/dd] and [hh:mm:ss].
Network Time Protocol: It is a protocol which synchronizes computer clocks by periodically
querying an NTP server.
Interval: The interval time between last time and next time that the camera adjust time with Ntp
Server.
Time zone:Select the appropriate time zone from the list.

w
ww
ww
w.
.f
fo
os
sc
ca
am
m.
.c
co
om
m
19
S
Sh
he
en
nz
zh
he
en
nF
Fo
os
sc
ca
am
mI
In
nt
te
el
ll
li
ig
ge
en
nt
tT
Te
ec
ch
hn
no
ol
lo
og
gy
yC
Co
o.
.,
,L
Li
im
mi
it
te
ed
d
T
Te
el
l:
:8
86
67
75
55
52
26
67
74
45
56
66
68
8F
Fa
ax
x:
:8
86
67
75
55
52
26
67
74
45
51
16
68
819
Figure 3.4
If your country implements the Daylight Saving Time, when you select the Time zone, you can
see the following screen:
Figure 3.5
Other manuals for FI9820W
2
Table of contents
Other Foscam IP Camera manuals

Foscam
Foscam FI9900EP User manual

Foscam
Foscam FI8918W User manual

Foscam
Foscam FI8919W User manual

Foscam
Foscam FI9821W User manual

Foscam
Foscam FI9821P User manual

Foscam
Foscam FI8918W User manual

Foscam
Foscam FI8910W User manual

Foscam
Foscam R2 User manual

Foscam
Foscam FI9851P User manual

Foscam
Foscam FI9828P User manual

Foscam
Foscam FI8910W User manual

Foscam
Foscam FI8601 User manual

Foscam
Foscam FI8909W User manual

Foscam
Foscam FI9828P User manual

Foscam
Foscam FI9816P User manual

Foscam
Foscam FI8909W User manual

Foscam
Foscam FI9831P User manual

Foscam
Foscam FI8916W User manual

Foscam
Foscam FI8906W User manual

Foscam
Foscam FI9805P User manual