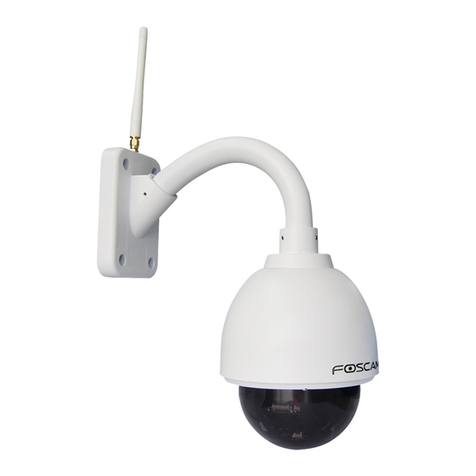
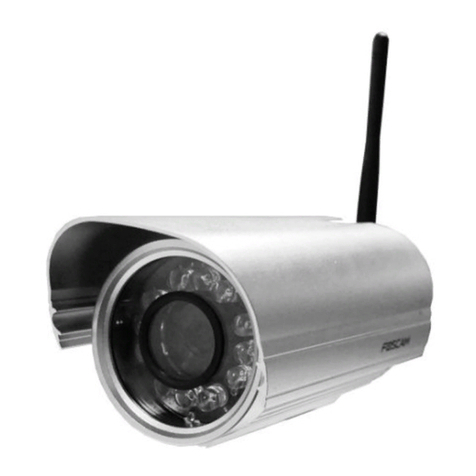
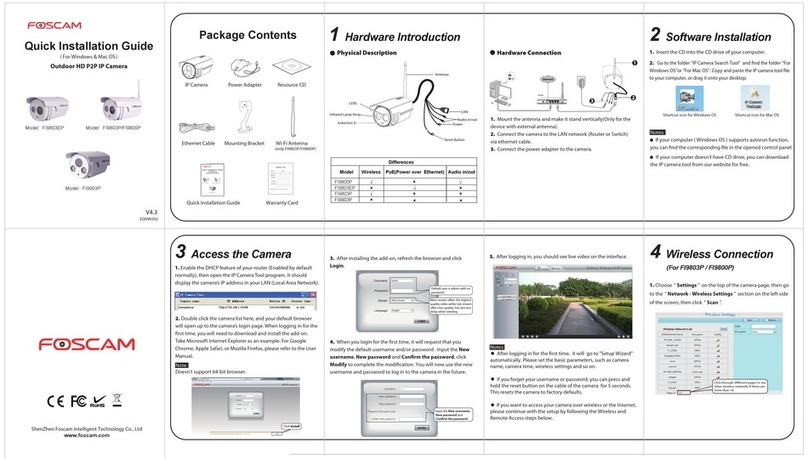
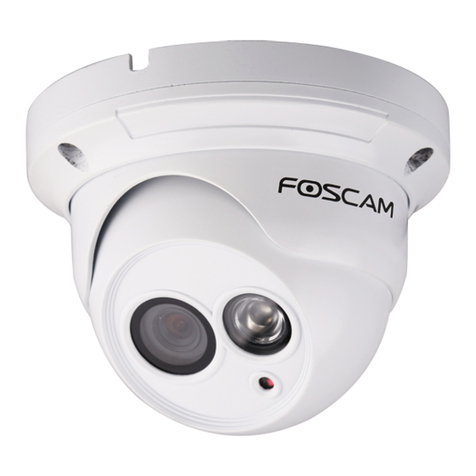
Foscam Huntvision User manual

For more detailed instrucons, please visit
foscam.com/downloads.
For more specific assistance, please feel free
to drop us an E-mail at: [email protected]
User Manual

Contents
P1
P1
P1
P2
P3
P3
P3
P4
P6
P7
1. Descripon
1.1 Package Contents
1.2 Physical Descripon
1.2.1 Front Panel
1.2.2 Rear Panel
1.2.3 Indicator Light Status
1.3 Key Features
2. Inial Installaons
2.1 Setup by Foscam App
2.2 Setup by a Web Browser
2.2.1 Hardware Installaon
2.2.2 Connect to Camera
3. Access to Your Camera
3.1 Access from a Web Browser
3.1.1 Access from Local Area Network
3.1.2 Basic Sengs for Remote Access
● Port Forwarding Seng
● Stac IP Address Seng
P1
P2
P3
P4
P6
P7
P7
P9

P9
P9
P12
P12
P12
P15
P15
P15
P17
P17
P18
P18
P18
P19
P20
P20
P20
P22
P23
P23
P26
P28
3.1.3 Remote Access Methods
● WAN IP Access Seng
● DDNS Access Seng
3.2 Access from Foscam App
3.2.1 Local Area Network Access
3.2.2 Remote Access
3.3 Other Access Method
4. Features and Sengs
4.1 WiFi Configuraon
4.2 Storage
4.2.1 SD Card
4.2.2 FTP
4.2.3 Foscam Cloud
4.2.4 Foscam NVR Products
4.2.5 Device Local Storage
4.3 Mail Sengs
4.4 Detecon Setup
4.4.1 Moon Detecon
4.4.2 Sound Detecon
4.5 Other Sengs
4.5.1 Sengs in Foscam App
4.5.2 Sengs in a Web Browser
5. FAQ
P10

1
1. Descripon
1.1 Package Contents
1.2.1 Front Panel
1.2 Physical Descripon
WPS/Reset
Micro SD
Card Slot
Microphone
Infrared LED
Lens
Quick Start Guide
User Manual
Power Adapter
Mounng Bracket
IP Camera
WiFi Antenna Ethernet Cable Expansion Screws
Please verify all contents received are complete according to the Package Contents listed below.
● Lens: Fixed focus lens
● Infrared LED: Infrared LEDs for night vision
● Microphone: Built-in microphone
● Micro SD Card slot: Supports up to 128GB SD card for storing the video
● WPS/Reset
WPS: Push both WPS/Reset buon on the camera and wireless router
about 3 seconds, the camera will connect to the wireless router
automacally, in WPS process, the Network light will flash every 0.4
seconds;
Reset: Push and hold the WPS/Reset buon unl a voice prompt,
‘Reset Succeeded’, to set the camera to factory default, the Power light
will flash every 0.4 seconds.

2
LAN
Power
Network light
Power light
Antenna
Loud Speaker
● LAN: 10/100 Mbps RJ-45 port for wired connecon
● Power: DC 5V/2A power supply
● Speaker: Built-in speaker
● Antenna: Used to connect external wireless antenna
Power Light
Light
Network Light
OFF
Flashing Status Descripon
ON
The power doesn’t work properly
The power supply works fine
Flashing every 0.4 seconds Reset takes effects
OFF No network connecon
ON Wired connecon
Slow Flash every 1.0 Second WiFi connected
Flashing every 0.4 seconds WPS is connecng
Flashing every 0.2 seconds EZ-Link takes effect
1.2.2 Rear Panel
The flashing status of the power light and Network light are shown in the following table.
1.2.3 Indicator Light Status

3
1.3 Key Features
●App Management
●Standard H.264
●P2P Easy Access
●2MP (P2) / 4MP (P4)
●WEP, WPA-PSK and
WPA2-PSK Encrypon
●Wireless Connecon
(IEEE 802.11b/g/n WI-FI,
up to 150Mbps)
●IR Range up to 8m (26)
●IR-Cut Auto Switch
●Embedded Free Foscam DDNS
Service
●Third-Party Domain Name Service
●Two-way Audio
●ONVIF Protocols
●Mul-level User Management
with Password Protecon
●Moon/Sound Detecon
●Image Snapshot
●Dual-stream
●Micro SD Card Storage
up to 128GB
●Voice Prompt
●FTP Storage
●Record Schedule
●Wide Dynamic Range
●Magic Zoom (P4)
●Pan & Tilt Control (horizontal
350°, vercal 100°)
2. Inial Installaon
You will need to set up the camera to make sure all the features work normally. Huntvision product provides
several methods for the inial installaon. Please choose the most convenient method for you.
You can download Foscam App for your smartphone from APP Store or Google Play Store so that you can
easily set up and manage your Huntvision products. For detailed instrucon, please check the Quick Start
Guide.
You can also use a web browser to set up your camera on your computer. Huntvision products support
IE/Firefox/Google/Safari browser. Please read the following instrucons carefully for a successful inial setup.
NOTE: We recommand the IE web browser for full features and sengs.
2.1 Setup by Foscam App
2.2 Setup by a Web Browser

4
2.2.1 Hardware Installaon
3
Mount the antenna and make it stand vercally.
Connect the camera to the LAN network (Router
or Switch) via an Ethernet cable.
Connect the power adapter to the camera, and
wait for a few moments unl camera boots with
an automaca rotaon and a voice promot,
‘Wired connecon succeed’.
2.2.2 Connect to camera
Equipment Search Tool
Camera Name
P2 Hp://192.168.**.**:88 ************ IPC
IP Address Device ID Type
Visit Foscam official website ‘foscam.com/tools’, then
you can find the ‘Equipment Search Tool’; Download
it to your computer.
Open the Equipment Search Tool, and you will find
your camera in the device list if your camera and your
computer are connected to the same network.
Double click your camera, and your web browser
will be opened to the camera login page.
NOTE: If your computer runs the Windows OS, please
set the IE web browser as your default browser, or you
can copy the web address to this login page and open
it on your IE web browser.

5
Donwload and install the plugins for your browser
(IPWebComponents.exe).
NOTE: During the plugins installaon, your browser will
be required to close, and aer installaon completed,
you will need to double click the camera in the search
tool list again.
Now you can log in your camera, the default
username is admin, and there is no password;
aer entering the default username, click Login.
NOTE: Aer you login the camera, you will be required
to change the username and the password for your
camera; Aer midifying, you can log into your camera
with this new username and password.
Aer login, there will be a Setup Wizard, which
will guide you to complete the camera setup.
NOTE: If you don’t want to do these sengs at this
moment, you can just click ‘ Next ’ to skip, and you can
update all of this sengs later in the camera system.

6
● Now you have logged in the camera system!
P2
3.1 Access to Camera via a Web Browser
3. Access to Camera
Aer you finished the inial installaon for your camera, you can login your camera for your daily use and
sengs.
*If you want to access to your camera via a local area network (LAN), please make sure your App or computer and your
camera are connected to the same network;
*If you want to access to your camera remotely, please make sure your camera has been connected to the Internet;
*If you don’t want to connect your camera with an Ethernet cable, please make sure that you have completed the WiFi
configuraon for your camera.
It is easy for you to access to camera by using a web browser; Before accessing to your camera, please check if
your camera is connected to a local area network or the Internet.

7
3.1.1 Access to Camera in a Local Area Network
Equipment Search Tool
Camera Name
P2 Hp://192.168.**.**:88 ************ IPC
IP Address Device ID Type
Double click your camera in the device list and your
default web browser will be opened automacaly to
the camera login page.
3.1.2 Basic Sengs for Remote Access
Log into your router to check the LAN IP your router assign to your camera.
By using the Equipment Search Tool, you can have a quick and easy access to your camera.
Please check Page 4 in this User Manual for the method of
downloading the Equipment Search Tool.
You can also just type in the IP Address in your web browser to open the camera login page, our camera
supports HTTP and HTTPS protocol.
●hp://LAN IP:HTTP Port No. ( The default HTTP Port No. is 88 ); For example: hp://192.168.**.**:88
●hps://LAN IP:HTTPS Port No. ( The default HTTP Port No. is 443 ); For example: hps://192.168.**.**:443
Before having the remote access to our camera, you need to complete the Port Forwarding and Stac IP
Address Sengs for both these two remote access methods.
● Port Forwarding Sengs
* This seng is on your router system, not in the camera. Here we will use a regular WiFi Router as an
example, and the router sengs descripon will be slightly different on different routers.

8
a). If your router supports UPnP funcon
You will need to set up the Port Forward-
ing manually.
Go to the Forwarding funcon page in
your router, and add a Custom Service.
For the specific funcon descripon and seng methods, please check your router’s User Manual or contact with
your router’s customer service.
Go to the UPnP funcon page in your
router system, and make sure that the
UPnP funcon is Enable.
b). If your router doesn’t support UPnP funcon

9
443
443
The default HTTPS port of your camera is
443; Server IP Address is the IP Address
your router assign to your camera; If you
need to access to several cameras remotely,
you will need to add different Port
Forwarding services and assign different
ports for each camera.
● Stac IP Address Sengs
Log in your camera via a web browser from a Local Area Network, go to the Sengs page, click Network
seng tag, and select IP Configuraon seng, uncheck the Obtain IP From DHCP and click Save:
* This IP Address is the one your router assign to
your camera, keep it as default;
* Change the Gateway to your router’s LAN IP
address;
* Change the DNS to 8.8.8.8 or keep it the same
as the Gateway.
3.1.3 Remote Access Methods
When your Port Forwarding Seng is successful, you can access to your camera remotely now!
There will be two remote access methods for you: WAN IP access and DDNS access.
● WAN IP Access Seng
You can type the WAN IP address in your web browser to get access to your camera, and the WAN IP address
would be:

10
hps:// WAN IP: HTTPS port No.
You can acquire your WAN IP by vising hp://www.whasmyip.com from your browser; The default HTTPS port No.
is 443. For example, if your WAN IP is 58.541.***.**, your WAN IP access address will be hps://58.541.***.**:443;
Type this address in your web browser, and you will be able to locate the camera login page.
If you want to use DDNS to get access to your camera, you will need to log in your camera in a Local Area
Network to acvate the DDNS funcon in your camera first. Please check Page 7 in this User Manual for the
method on geng access to your camera in a Local Area Network.
Step 1. Enable UPnP on your camera
Go to the Sengs > Network > UPnP seng tag,
select Yes to enable UPnP.
● DDNS Access Seng

11
Step 2. Enable DDNS on your camera
Go to the Sengs > Network > DDNS
seng tag, check Enable DDNS.
NOTE: You can use Foscam DDNS server
(Foscam DDNS server is free for you), or you
can also select third party DDNS servers for
this seng (curently we can only support
some third partey DDNS servers, please check
the server list in DDNS Server secon).
Click Get My DDNS Now to start the Foscam DDNS applicaon process.
*During the applicaon process, you will
need to login with your Foscam Cloud
account, and this Foscam Cloud account
is the Foscam account you sign up via App;
*If you don’t have a Foscam Cloud account
yet, you can sign up one in DDNS
applicaon login page, or download the
Foscam App, which you can check the
details on Quick Start Guide.

12
Step 3. Access to your camera with DDNS address
hps://DDNS:HTTPS port No. (The default HTTPS port is 443)
For example: hps://****.myfoscam.org:443
3.2 Access to Camera via Foscam App
Now you can type in the DDNS address to get access to your camera, and the DDNS address would be:
You can have a easy access to your camera by using Foscam App from your smartphone. If you want to access
to your camera remotely, please make sure that your camera is connected to the Internet.
If you have added camera to your Foscam App, you just need to connect your smartphone and your camera to
a same network, and you can log in your camera in the App’s home page.
If you didn’t add camera to your Foscam App before, please check the Quick Start Guide for the detailed
instrucon on the method of adding your camera to Foscam App.
If you have added your camera to the Foscam App locally before and the camera has connected to the
Internet, then you can remotely access to your camera directly by using the Foscam App.
If you didn't add your camera to the Foscam App before, but the camera has already been setup, you can also
access the camera remotely by manually adding the camera with valid UID/WAN IP Address/DDNS, please
check the following steps to proceed it:
UID / WAN IP address / DDNS
NOTE: Before the following steps, please make sure that your camera is connected with the power adapter, and has been connected to a
router (or switch) with an Ethernet cable or WiFi which can access to the Internet.
3.2.1 Local Area Network Access
3.2.2 Remote Access

13
Step 1. Download Foscam App
Search ‘Foscam’ from your smartphone in APP Store or Google Play Store and you can download the latest
version of Foscam App.
Step 2. Sign up a Foscam Account and Sign in
Aer downloaded Foscam APP, you can sign up a Foscam Account from the APP’s home page, and if you have
a Foscam account, you can directly sign in with it.
* For more details, please check the Quick Start Guide.
Step 3. Add your camere to Foscam App
Step 4. Add your camera by alternave method
●Tap Camera
+
+
Foscam Add Device
Camera
Base Staon
Add Device
Next
+
●Tap buon or + buon on the top right
corner from App’s home page to start the
process of adding a camera.
●Tap Next
*If you have your camera around you, you can also scan the QR code to add camera to your Foscam App, and you
can find the QR code from the boom of your camera.

14
●Tap buon for Alternate Setup;
?
Step 5. Complete the sengs
Scan QR code
?
Other Setup Methods
Find My Camera
UID/DDNS/IP
UID/DDNS/IP
UID
DDNS
IP Address
Add
●Tap UID/DDNS/IP buon for the sengs.
Now you can choose UID, DDNS or IP Address to add camera to Foscam App:
● UID: Please check UID, and type in your camera’s UID, where is located at the boom of your camera;
● DDNS: If you want to use DDNS to add your camera, please make sure that you have completed Port
Forwarding
Sengs, Stac IP Address seng and DDNS seng (Please check page 9 to page 14 in this User Manual);
● IP Address: This should be your WAN IP address if you want to add your camera remotely, and please make
sure that you have completed Port Forwarding Sengs, Stac IP Address seng and WAN IP Sengs
(Please check page 7 to page 12 in this User Manual);
Choose one of these methods menoned above, and type in the according paremeters; Tap Add to complete
the sengs.
NOTE: Aer you completed these sengs, Foscam App will require you to login the camera with the camera’s
user name and password, if you didn’t set any username or password before, the default username should be
‘admin’ (without ‘ ’), and there is no password.

15
3.3 Other Access Methods
Huntvision products also support other access methods for you to login your camera.
● VMS: This is also a Foscam soware designed for computer use, and you can visit foscam.com/downloads to
get the latest version soware;
● VLC: The camera supports RTSP streaming, here you can view the camera by VLC player. RTSP URL would be:
rtsp:// [user name][:password]@IP:Port number/videostream
Open the VLC, and go to Media > Open Network Stream opon, then enter the URL in VLC.
4. Features and Sengs
Please make sure that you have completed the inial installaon and access sengs, so that you can have a
successful access to your camera for daily use and sengs.
Huntvision camera P2 and P4 are WiFi IP cameras, which can be connected to a WiFi router without using an
Ethernet cable; For a successful WiFi configuraon, please maintain a distance between the camera and
wireless router of maximum 2-5 meters (6-12 feet) first, and follow the following instrucons carefully.
● Configurate the WiFi from Foscam App
Please check Quick Start Guide for the detailed instrucons on how to configurate the WiFi from Foscam App.
4.1 WiFi Configuraon

16
● Configurate the WiFi from a Web Browser
Access to your camera from a Web
Browser, and go to the Sengs page, click
Network tag, and select Wireless Sengs.
Step 1. Scan the available WiFi connecon
Click Scan buon on the Wireless Sengs
page, and the camera will start to scan all
the WiFi connecons; Aer the camera
done the searching, you will see a list of
wireless networks.

17
Step 2. Connect to the WiFi network
Select one wireless network that you want
your camera connect to, and type
according password, then click Test buon.
4.2 Storage
NOTE: Huntvision products can only support 2.4 GHz WiFi connecon,
please make sure that the Wireless Network you selected is 2.4 GHz; If
your WiFi router is a dual band router, please check and make sure that the
SSID you are going to connect is the 2.4Ghz one.
Aer tesng successfully, you can click Save buon to complete the
WiFi configuraon for your camera.
Now you can unplug the Ethernet cable from your camera; Aer
unplugging the Ethernet cable, you will need to wait for seconds unll a
voice prompt, “WiFi connecon Succeed” .
Huntvision products support several storage methods for you to store your video recordings and snapshots.
Huntvision P2/P4 supports Micro SD card, and you can find the SD card slot in the camera; The storage
supports maximum 128GB.
● Once you insert a Micro SD card on your camera, all your alarm recordings will be stored at this Micro SD
card automacaly; This is a default seng, and you can change the storage locaon from a web browser.
4.2.1 SD Card
Table of contents
Other Foscam IP Camera manuals

Foscam
Foscam FI8910W User manual

Foscam
Foscam FI8910W User manual
Foscam
Foscam FI9803P User manual

Foscam
Foscam FI9853EP User manual

Foscam
Foscam FI9818W User manual

Foscam
Foscam FI9801W User manual

Foscam
Foscam P2P User manual

Foscam
Foscam FI9803EP User manual

Foscam
Foscam FI9853EP User manual

Foscam
Foscam FI8916W User manual

Foscam
Foscam C2 User manual

Foscam
Foscam FI9851P User manual

Foscam
Foscam FI9826P User manual

Foscam
Foscam FI8910W User manual
Foscam
Foscam FI8908 User manual

Foscam
Foscam C1 Lite User manual

Foscam
Foscam FI9831P User manual

Foscam
Foscam FI9805W User manual

Foscam
Foscam FI8919W User manual

Foscam
Foscam FI8918W User manual