manuals.online logo
Brands
  1. Home
  2. •
  3. Brands
  4. •
  5. Fosworks
  6. •
  7. Transmitter
  8. •
  9. Fosworks OMNI Tx-4.1 DCC User manual

Fosworks OMNI Tx-4.1 DCC User manual

OMNI Tx-4.1 DCC
Programmable 2.4GHz Transmitter
For electric models with DCC
decoders and ESC, with Inertia
Or analogue DC models with up to 12 functions
PO.Box 675,
Blackburn, Lancs.
BB1 9DL
UK
WWW.FOSWORKS.CO.UK
Tel 01254 814675
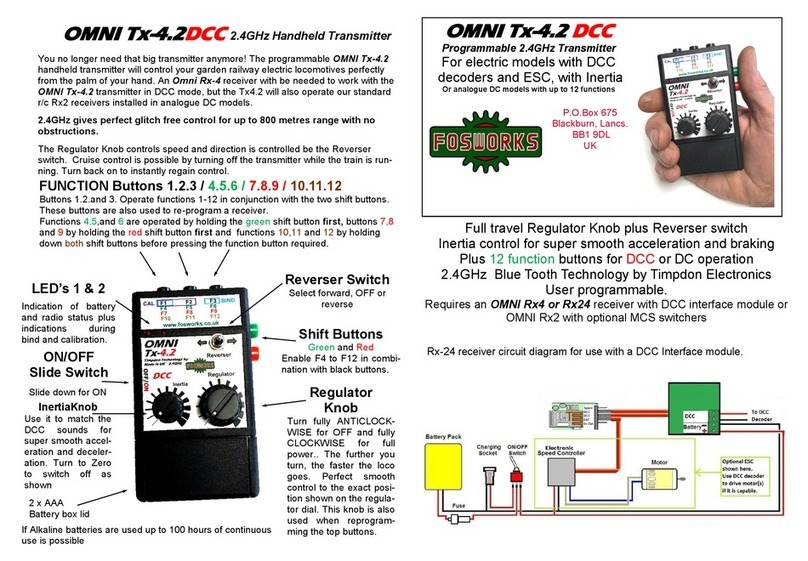
Rx-24 receiver circuit diagram for use with a DCC Interface module.
You no longer need that big transmitter anymore! The programmable OMNI Tx-4.1
handheld transmitter will control your garden railway electric locomotives perfectly
from the palm of your hand. An Omni Rx-4 receiver with be needed to work with the
OMNI Tx-4.1 transmitter in DCC mode, but the Tx4.1 will also operate our standard
r/c Rx2 receivers installed in analogue DC models.
2.4GHz gives perfect glitch free control for up to 800 metres range with no
obstructions.
The Regulator Knob controls speed and direction. Forwards to the right, reverse to
the left. Cruise control is possible by turning off the transmitter while the train is run-
ning. Turn back on to instantly regain control.
OMNI Tx-4.1 DCC
2.4GHz Handheld Transmitter
2 x AAA
Battery box lid
FUNCTION Buttons 1.2.3 / 4.5.6 / 7.8.9 / 10.11.12
Buttons 1.2.and 3. Operate DCC command functions
On a OMNI Rx4 receiver. These buttons are also used to re-program a receiver.
Functions 4,5,and 6 are operated by holding the green shift button first, buttons 7,8
and 9 by holding the red shift button first and functions 10,11 and 12 by holding
down both shift buttons whilst pressing the function button required.
ON/OFF
Slide Switch
Slide down for ON
If Alkaline batteries are used up to 100 hours of continuous
use is possible
Inertia
Knob
Use it to match the
DCC sounds for su-
per smooth accelera-
tion and decelera-
tion. Turn to Zero to
switch off as shown
Regulator Knob Forwards and backwards with centre stop
Inertia control for super smooth acceleration and braking
Plus 12 function buttons for DCC or DC operation
2.4GHz Technology by Timpdon Electronics
With Emergency stop function
Requires an OMNI Rx24 or Rx4 receiver with DCC interface module or
OMNI Rx22 or Rx2 with optional MCS switchers
Shift Buttons
Green and Red
Enables F4 to F12 in
combination with green
and red shift buttons.
LED’s 1 & 2
Indication of battery
and radio status plus
indications during
bind and calibration.
Regulator
Knob
Turn right for forwards
and left for reverse. The
further you turn, the
faster the loco goes.
Centre Stop.
Whilst moving, if a quick
stop is needed, move
the knob fully to the op-
posite direction for a
controlled E-stop (Max
2 secs from full speed)
Perfect smooth control
to the exact position
shown on the regulator
dial. This knob is also
used when reprogram-
ming the top buttons.
Binding Procedure.
Now simpler than ever!
1. Turn on the Receiver (or the model, if it’s
already fitted inside) then….
2. Hold down black buttons 1 and 3, then turn
on the transmitter
3. Successful binding is indicated by LED 2
going ON.
4. Release the two buttons and the job is
done. LED 1 goes solid to indicate that the
Transmitter and receiver are linked.
13
Programming the OMNI system to suit your needs.
The OMNI R/C system is ideal, in that when you wish to re-program it to suit the spe-
cial needs for a particular loco, it is not the transmitter you are re-programming, but the
receiver in the loco. The Transmitter tells the receiver what is expected of it in the fu-
ture, and it is the receiver that remembers it. In this way, one OMNI transmitter can
control many different types of locos, each with its own very different requirements.
It is possible to change all or just one of functions from Momentary to latching.
LED 1
On
Low battery warning
When the batteries in the handset get too low for reliable operation, both LED 1 and 2
start flashing together. Replace them with quality alkaline AAA cells for the best results,
LED 2
Re-Programming the top Buttons for momentary or
latching operation
(All are momentary by default, except F1 on Rx24 DCC re-
ceivers, which is latching by default)
This procedure must be started within 20 seconds of turning on the receiver, there-
fore start with the transmitter off and the model switched on. See our website for a
link to video instructions.
First you must put the transmitter into Button Calibration Mode :-
1. With the Transmitter turned Off. Press and hold button 1 and 2.
2. Turn the Transmitter On.
3. Both LED’s will start flashing, then go solid, indicating successful entry to
the Button Calibration mode. At this point, release the two buttons. LED 2 now
starts flashing.
Once in Button Calibration Mode, there is no exit except Transmitter power Off.
CHANGING BUTTONS FROM MOMENTARY TO LATCHING
The Regulator control knob is used to change the function of a button from latching
to Momentary or Vice Versa. Turn it in the desired direction and the given button
will be changed.
Fully anti-clockwise = Momentary Fully clockwise = Latched
Press the required buttons to save the setting for a function.
For example if you want function 12 to be latching, turn the regulator fully clockwise
and press both shift buttons followed by button 3.
You can now select another button to change, or turn the transmitter off.
Should you wish to reset the centre Off stop position, please contact me by email at
sales@fosworks.co.uk
If you do not have a computer, please call us on 01254 814675

Other Fosworks Transmitter manuals

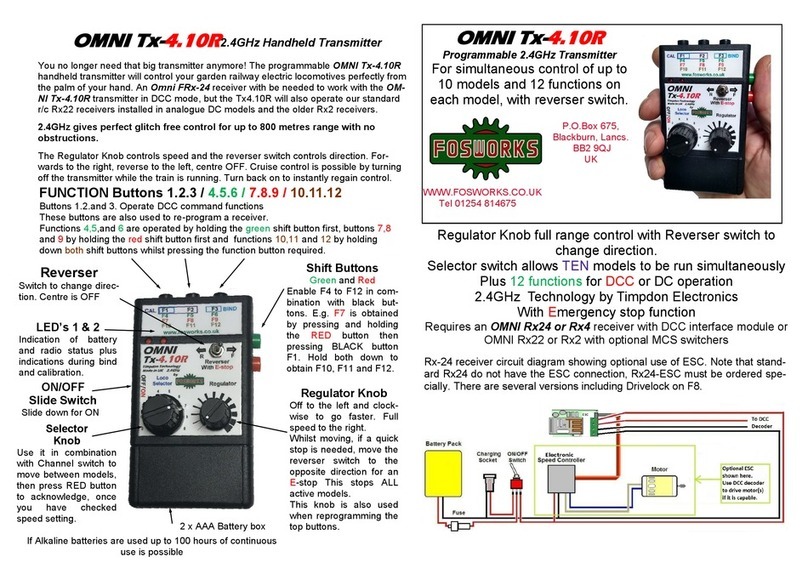
Fosworks OMNI Tx-4.2 User manual

Fosworks

Fosworks OMNI Tx-4.2 User manual

Fosworks OMNI Tx-3 User manual

Fosworks

Fosworks OMNI Tx-3 User manual

Fosworks OMNI Tx-4.10R User manual

Fosworks

Fosworks OMNI Tx-4.10R User manual

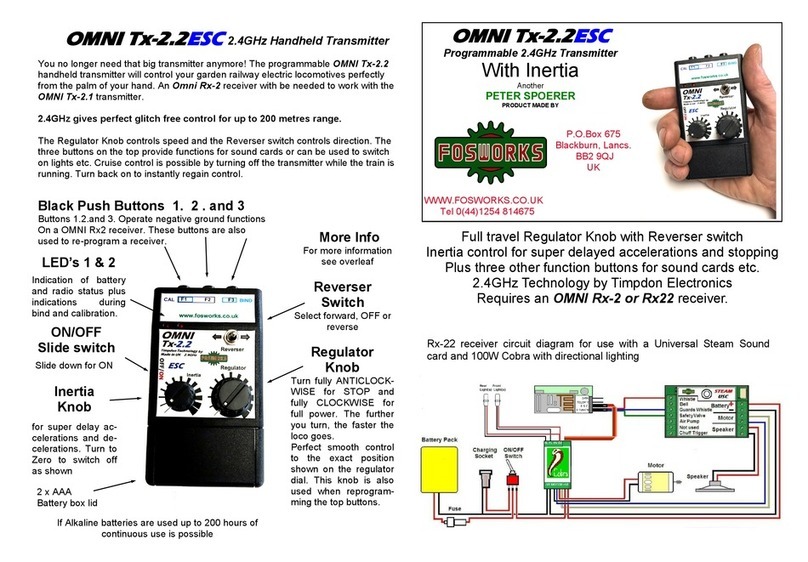
Fosworks OMNI Tx-2.2ESC User manual

Fosworks

Fosworks OMNI Tx-2.2ESC User manual

Popular Transmitter manuals by other brands

Omni Tx-3.1 quick start guide

Omni

Omni Tx-3.1 quick start guide

Honeywell Home ADEMCO 5811 Initial Installation and Setup Guide

Honeywell Home

Honeywell Home ADEMCO 5811 Initial Installation and Setup Guide

Scosche TUNESHIFT FMTD1 Setup guide

Scosche

Scosche TUNESHIFT FMTD1 Setup guide

dji LIGHTBRIDGE 2 user manual

dji

dji LIGHTBRIDGE 2 user manual

LEVTECH LSP-TST user manual

LEVTECH

LEVTECH LSP-TST user manual

Akytec PVT10 user guide

Akytec

Akytec PVT10 user guide

Procare EF6237 quick start guide

Procare

Procare EF6237 quick start guide

Camille Bauer KINAX 2W2 operating instructions

Camille Bauer

Camille Bauer KINAX 2W2 operating instructions

GF Signet 8750-2 manual

GF Signet

GF Signet 8750-2 manual

NIVELCO NIPRESS D-300 Series user manual

NIVELCO

NIVELCO NIPRESS D-300 Series user manual

ICS Schneider Messtechnik CPT-2 Series manual

ICS Schneider Messtechnik

ICS Schneider Messtechnik CPT-2 Series manual

EnOcean PTM 215ZE user manual

EnOcean

EnOcean PTM 215ZE user manual

Vector SRC-C1 manual

Vector

Vector SRC-C1 manual

Badger Meter 340BN Installation & operation manual

Badger Meter

Badger Meter 340BN Installation & operation manual

Berker 8587 62 00 Operation instructions

Berker

Berker 8587 62 00 Operation instructions

Baudcom BD-OP-SAT-15 manual

Baudcom

Baudcom BD-OP-SAT-15 manual

Smith Meter UPT Installation service

Smith Meter

Smith Meter UPT Installation service

RKI Instruments 65-2397-04 Series Operator's manual

RKI Instruments

RKI Instruments 65-2397-04 Series Operator's manual

manuals.online logo
manuals.online logoBrands
  • About & Mission
  • Contact us
  • Privacy Policy
  • Terms and Conditions

Copyright 2025 Manuals.Online. All Rights Reserved.