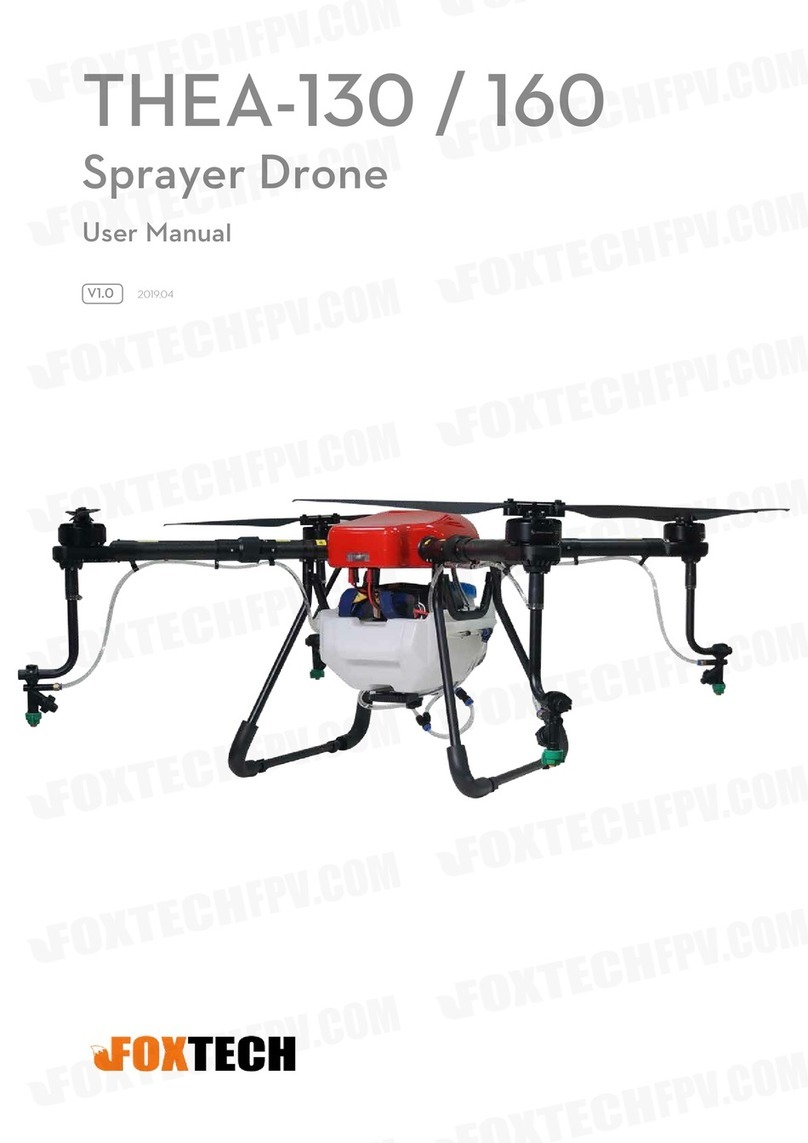
Foxtech GAIA 160AG User manual

User Manual
V1.0
GAIA 160AG
Agricultural Spraying Drone
2019.04

GAIA 160AG-Agricultural Spraying Drone User Manual
©2019 FOXTECH All Rights Reserved 1
Specications
SetupandCalibration
BasicTheory
N3-AGIntroduction
N3-AG Parts
AgricultureManagementUnit(AMUII)Introduction
RemoteController
Installation
Overview
Start the Installation
SystemFunctions
Flight Modes
Operation Modes
Operation Resumption
Data Protection
Empty Tank Warning
Return to Home (RTH)
Attitude Control When One Motor Output Fails
Propulsion System Protection
Altitude Stabilization System
Radar Module
DJIMGApp
Linking the Remote Controller
Operation View
Flight
Operation Environment
Flight Limits and No-Fly Zones
Pre-Flight Checklist
Compass Calibration
Flow Calibration
Flight Control
DJIAssistant2
Installation and Launching
Using DJI Assistant 2
Appendix
Flight Status LED Indicator Descriptions
FAQ
2
4
6
7
7
10
11
13
13
15
22
22
22
28
30
30
30
32
33
33
33
35
35
36
38
38
38
40
40
41
42
44
44
44
46
46
47
Contents

GAIA 160AG-Agricultural Spraying Drone User Manual
©2019 FOXTECH All Rights Reserved 2
Aircraft
Structure
Item Name
Version
Material
Shipping Dimension
Shipping Weight
Wheelbase
Max. Take-off Weight
No-load Weight
Load Pesticides
Flying-time
The Altitude of Spraying
Spraying Swath
Spraying speed
Operation Efficiency
Suggested Battery
Flight Controller
Remote Controller
GAIA 160AG-Agricultural Spraying Drone
ARF Combo
Carbon Fiber
1260x440x460mm
35kg
1600mm
46.5kg
24kg
22.5L
18min(4x 6s 16000mah)
1-5m
>5m
2-6m/s
10ha/h(max)
Foxtech 6s 16000mah x4
N3-AG
DJI AG 2.0
Specifications

GAIA 160AG-Agricultural Spraying Drone User Manual
©2019 FOXTECH All Rights Reserved 3
Dimension

GAIA 160AG-Agricultural Spraying Drone User Manual
©2019 FOXTECH All Rights Reserved 4
1.Mounting GPS holder. GPS
holder is horizontal to the
ground, GPS arrow points
straight ahead to the aircraft
head direction.
4.Unfold carbon tube.
7.Fix the arms and lock the
hooks.
10.Note: if use two batteries,
connect one battery to A cable,
the other to B cable.
2.Install carbon tube kit.
5.Mounting propellers.
8.Install the arms according to its
number.
11.Turn on the remote controller.
9.Power the drone.
12.Toggle the flight mode switch
on the remote controller back
and forth until the aircraft status
indicator turns yellow.
3.Connect water pipe.
6.Conect the arms.
Setup and Calibration

GAIA 160AG-Agricultural Spraying Drone User Manual
©2019 FOXTECH All Rights Reserved 5
13.Calibrate according to the
prompts, horizontally rotate the
aircraft 360 degrees.
16.Open the pressure relief valve,
drain the air in the pipeline, and
tighten the pressure relief valve
after the spraying test.
14.Calibrate. make the aircraft
head vertical to the ground,
horizontally rotate the aircraft 360
degrees.
15.Fill the tank with water.

GAIA 160AG-Agricultural Spraying Drone User Manual
©2019 FOXTECH All Rights Reserved 6
Basic Theory
GAIA 160AG agriculture spraying drone is a high performance aircraft capable of offering comprehensive
solutions for agricultural care. GAIA 160AG is made of carbon fiber material which features light weight and
high strength, the top cover of the fuselage and the tank are made of glass fiber. The frame weight if about
7.25kg. The arm of GAIA160 series hexacopter is pluggable, both the cover and arms can be locked with
the quick locking hooks.
The big fuselage of GAIA 160AG makes it possible to install many equipments eg. battery, Gps, flight control
system. And all the wires are built into the fuselage. The closed fuselage structure can protect the GAIA
160AG hexacopter from the rain and dust, and also protect other load equipments.
This GAIA 160AG is equipped with a 2.8 meter long tube with four nozzles. The new water-saving nozzles
could save the pesticide and improve the efficiency of spraying at the same time. This GAIA 160AG has a
grid pesticide container which can prevent the liquids sloshing in the flight. The capacity of pesticide tank
is 22.5L, so do not need to add pesticide frequently. The propeller vortex can help the GAIA 160AG evenly
spraying the pesticide on the front and back of the plant leaves.
The GAIA 160AG is equipped with powerful motor and high efficiency 30 inch folding propeller, the max
lift of one rotor can reach 13kg. The total thrust is over 70kg. The GAIA 160AG supports both manual and
automatic flight, it can achieve automatic spraying by the planned flight paths. The motor and ESC use the
water-resistant design, and can be applied in different weather conditions. Because of the large liquids load
the efficiency of GAIA 160AG is twice as much as other aircraft with 10L payload.
The GAIA 160AG DJI AG 2.0 Version adopts N3-AG 2.0 flight controller and radar sensing system,
combined with the new spraying system and intelligent operation planning system, agricultural plant
protection efficiency is significantly improved. All these additions make plant protection more accurate and
efficient. The downward radar module adopts microwave technology which provides high-precision altitude,
so 160AG will fly above the crops at a constant spraying distance to ensure uniformity of the pesticide
spraying.
Version Upgrade: The legs of GAIA 160AG are lengthened to provide more space for installation of various
spraying equipment.
GAIA 160AG-Agricultural Spraying Drone User Manual
©2019 FOXTECH All Rights Reserved 7
N3-AG Introduction
N3-AG Parts
The N3-AG Agriculture Flight Control System, based on the DJI N3 flight control system, is designed for
agriculture applications. It consists of flight controller, GNSS-Compass Pro, PMU(Power Management Unit)
and LED module.
Flight Controller
Feature Highlights
1. Built-in inertial sensors for the measurement
of aircraft attitude and built-in pressure sensor
for the detection of aircraft altitude.
2. Support for multiple receiver types. If used
with the DJI Datalink 3, the A3-AG has direct
access to features in the DJI MG app such as
intellignt planning and operation.
3. M1 to M8 are used to connect the ESCs of
the aircraft and iESC for DJI Intelligent ESC
communication.

GAIA 160AG-Agricultural Spraying Drone User Manual
©2019 FOXTECH All Rights Reserved 8
Flight Controller
1. PMU Port
Derives power from the PMU module.
2. LED Port
Communicates with the LED module.
3. M1-M8 Pins
Connects to the corresponding ESC
PWM port for each motor.
4. iESC Port
Communicates with the DJI Smart ESC
using the Smart ESC Communication
Cable.
5. RF Port
Communicates with the DJI Datalink 3
Air System.
6. Status Indicator
Indicates the status of the flight controller.
7. CAN2 Port
CAN Bus port (Reserved port).
8. S-Bus Port
Communicates with a DJI DR16 or S-Bus
receiver.
9. F1-F4 Pins
Multifunction PWM output ports.
10. F5-F8 Pins
Multifunction PWM I / O ports.
11. API Port
Reserved port.
12. EXP Port
Extended port (Communicates with the
A3 upgrade kit).
13. Orientation Arrow
The flight controller orientation arrow.
GNSS-Compass Module
The GNSS-Compass module has a built-in GPS/GLONASS and compass. The compass is used for
geomagnetic field measurements. Compass calibration is required before use. DO NOT use or store the
compass in environments with ferromagnetic materials.
1. Orientation Arrow
The GNSS-Compass module should be mounted
with the arrow pointing toward the aircraft nose.
2. GNSS-Compass Status Indicator
Indicates the status of the GNSS-Compass Module.
3. Extended CAN1 Port
Dedicated DJI CAN-Bus port. Communicates with a DJI device.
PMU Module
Supported the LiPo batteries. with built-in PMU providing power for the whole Flight Control System and low
voltage protection function.
1. iBAT
Reserved.
2. Power Status Indicator
Indicates the power status of the
flight control system.
3. 3S-12S
Derives power from LiPo battery.
4. Power Port (9V 2A)
Connected to the Flight Controller for power supply.
5. CAN1 Port
Connected to the GNSS-Compass module.

GAIA 160AG-Agricultural Spraying Drone User Manual
©2019 FOXTECH All Rights Reserved 9
LED Module
The LED Module has an integrated LED Indicator and Micro USB port.
A. The LED is mainly for flight control system status indication during flight (e.g. Flight Mode).
B. In addition, there is a Micro USB port for firmware upgrades via DJI Assistant 2.
1. Flight Status Indicator
Indicates the status of the flight control system.
2. Micro USB Port
Used to configure and upgrade the N3 via DJI Assistant 2.

GAIA 160AG-Agricultural Spraying Drone User Manual
©2019 FOXTECH All Rights Reserved 10
AgricultureManagementUnit(AMUII)
Introduction
The Agriculture Management Unit (AMUII) is equipped with essential expansion ports to support DJI
modules such as pump, RTK.
1. iBAT
Intelligent communication interface
2. The light is always green when working normally
3. CAN
2 CAN Bus ports, can be connected to FC CAN1 port
4. Power port
XT60 port, connect to 12s lipo battery
5. RTK
Reserved Interface
6. Pump I
Used to connect DJI liquid pump 1
7. Pump II
Used to connect DJI liquid pump 2
8. Radar
Used to connect DJI radar module
9. EXP
Extension interface for connecting other agriculture-related accessories.

GAIA 160AG-Agricultural Spraying Drone User Manual
©2019 FOXTECH All Rights Reserved 11
RemoteController
1. Antennas
Relays aircraft control signals.
2. Display Device
Android-based to run the DJI MG app.
3. Speaker
Audio output.
4. Control Sticks
Controls aircraft movement. Can be set to Mode 1,
Mode 2, or a custom mode.
5. Lanyard Attachment
Used to attach the remote controller lanyard.
6. Power Button
Used to turn the remote controller on and off.
7. Status LED
Indicates whether the remote controller is linked to
the aircraft.
8. Battery Level LEDs
Displays current battery level.
9. RTH Status LED
Circular LED around the RTH button. Displays RTH
status.
10. RTH Button
Press and hold this button to initiate Return to
Home (RTH).
11. Micro USB Port
Reserved.
12. Micro SD Card Slot
Provides display device with up to 128 GB of extra
storage.
13. CAN Port
Used to connect other accessories, such as a
GPS module.
14. USB Port
Reserved.
15. Spray Rate Dial
Turn to adjust the spray rate in Manual operation
mode.
16. Spray Button
Press to start/stop spraying in Manual operation
mode.
17. Flight Mode Switch
Used to switch among P, A, and M flight modes.
18. Sleep/Wake Button
Press to sleep/wake the screen; press and hold to
restart.
19. Button A
Records Point A of the operation route.
20. Button B
Records Point B of the operation route.
21. Settings Dial
Turn to adjust work efficiency in Smart operation
mode, AB Point mode, Manual plus mode.
22. Button C1
Press to start or end obstacle measurements
when planning a task.
In other mode, the default fuction: task mode
( switch between A-B, M and M+ )

GAIA 160AG-Agricultural Spraying Drone User Manual
©2019 FOXTECH All Rights Reserved 12
23. Button C2
Press to add a waypoint when planning a task.(not support
user-defined)
Support user-defined in other mode. Default function:
eliminate route.
24. Button C3
Default function: Press to use the front two sprinklers only
in Manual operation mode.
support user-defined in APP.
25. Button C4
Press to use only the rear two sprinklers in Manual
operation mode.
support user-defined in APP.
26. Power Port
Connects to a power source to charge the remote
controller’s internal battery.

GAIA 160AG-Agricultural Spraying Drone User Manual
©2019 FOXTECH All Rights Reserved 13
Installation
In this chapter use the N3-AG.
Overview
Installation Procedure
Read this section carefully and follow the procedures below to install your flight control system,
otherwise the flight control system may not normally work.
1 Ensure all parts are in good condition.
2 Mount the parts to your airframe and connect them properly.
3 Launch the DJI Assistant 2 and configure the parameters.
4 Ensure the motor, remote controller channels and Failsafe settings are correct.
5 Ensure the devices connected to the flight controller are working normally and correctly set in DJI
Assistant 2.
Remember to select the corresponding airframe type in DJI Assistant 2 after assembling the
airframe and connecting the cables.

GAIA 160AG-Agricultural Spraying Drone User Manual
©2019 FOXTECH All Rights Reserved 14
The arrow directions in the above diagram indicate the rotation direction of the motor/ propeller. Dark
colored arm (s) indicate the direction of the aircraft’s nose.
For coaxial propellers, dark colored propellers are at the top and gray colored propellers are at the
bottom. Otherwise, all propellers are at the top.
There is no need to enable the Failsafe function on the remote controller. Once the receiver loses
signal from the remote controller, the controller unit will enter Failsafe mode automatically, and the
aircraft will hover or return-to-home & land according to the Failsafe configurations in DJI Assistant 2.
Supports Windows 7 (or later) or Mac OS X 10.11 (or later).
Make sure that the receiver and remote controller are linked properly before use. Be sure to link the receiver
and remote controller according by following all the procedures in the remote controller and receiver user
manual, and according to the configurations in DJI Assistant 2.
DJI Datalink 3
DJI Datalink 3 lets you use DJI MG app to configure the flight control system parameters and utilize
intelligent agricultural operation.
ESC
ESC output should be 400Hz. DJI Propulsion systems are recommended.
The iESC port can connect to the DJI Smart ESC Communication Cable if using the DJI Intelligent ESC.
Propeller and Motor
It is required to use with Propeller and Motor of more than 2400rpm.
Battery
If using a LiPo battery (3S - 12S), only the voltage information and low voltage protection are available.
Preparing DJI Assistant 2
Download DJI Assistant 2
DJI Assistant 2 is used to configure the flight control system.
http://www.dji.com/agriculture-solution/info#downloads
Installing DJI Assistant 2
DJI Assistant 2 will guide you through setting the Flight Control System’s parameters. Carefully follow the on-
screen prompts to configure the Flight Control System.
Installing and Running on Windows
Supports Windows 7, Windows 8, Windows 10 (32 or 64 bit).
1. Connect the Micro USB port on the LED module to a PC via a Micro USB cable.
2. Run the software assistant installer and follow the prompts to finish installation.
3. Double click the software assistant icon on your Windows desktop to launch the software.
Installing and Running on Mac OS X
Supports Mac OS X 10.11 (or later).
1. Run the DMG installer and follow the prompts to finish installation.
2. If using Launchpad to run DJI Assistant 2 for the first time, Launchpad will not allow access because the
software has not been reviewed by the Mac App Store.

GAIA 160AG-Agricultural Spraying Drone User Manual
©2019 FOXTECH All Rights Reserved 15
3. Locate the DJI Assistant 2 icon in the Finder, press the Control key and then click the DJI Assistant 2 icon
(or right-click the DJI Assistant 2 icon using a mouse). Choose Open from the shortcut menu, click Open in
the dialog box and the software will launch.
4. After the first successful launch, direct launching of the software can be achieved by double-clicking the
DJI Assistant 2 icon in the Finder or using Launchpad.
DJI Assistant 2 works exactly the same way on Mac OS X and Windows. The DJI Assistant 2
screenshots that appear in this manual are taken from the Windows version.
For safety reasons, do not use the power battery for power supply or remove the propellers from
the motors before connecting to the Assistant Software.he Windows version.
The top side should be facing up. DO NOT mount upside-down.
Remember to warm up the battery if operating in cold weather.
Mount the flight controller at a low vibration position. The sides of the flight controller should be
precisely parallel to the aircraft body. Based on our experience, there is less vibration near the
aircraft’s center of gravity.
The flight controller is NOT water-proof or oil-proof.
Check the double-faced adhesive tape regularly to ensure the IMU is fixed firmly in place.
Start the Installation
Important: Strictly follow the provided guidelines. Failure to do so may lead to unexpected flight behavior or
serious accidents.
Flight Control System Installation
Mounting the Flight Controller
Mount the Flight Controller with the Orientation Arrow pointing to the front, back, left or right. Make sure the
module is parallel to the aircraft and then fix it onto the aircraft with double-faced adhesive tape. Configure
the parameters in DJI Assistant 2 and select the direction in which you mounted the Flight Controller. We
recommend mounting the Flight Controller with the Orientation Arrow pointing forward.

GAIA 160AG-Agricultural Spraying Drone User Manual
©2019 FOXTECH All Rights Reserved 16
Mounting the GNSS-Compass Module*
Follow the procedures below to mount the GNSS-Compass bracket and the GNSS-Compass module. The
GNSS-Compass module included in the Upgrade Kits is the same as the one in the N3 package.
1. Use the M2.0×4 screws to assemble the GNSS-Compass bracket with the Ball End Hex Key assistant.
The longest one is recommended.
2. With the M2.5×7 screws and M2.5×3.4 nuts, mount the bracket on the aircraft.
3. Ensure the GNSS-Compass arrow is pointing to the aircraft nose and then fix it onto the top of the GNSS-
Compass bracket. Try to keep it parallel to the aircraft.
Usage Requirements
1. The DJI logo should be facing the sky, with the orientation arrow pointing directly to the nose direction;
otherwise you may experience take off failure.
2. Fly the aircraft in an open space without buildings or trees; otherwise the GPS satellite number may be
affected.
3. The compass is sensitive to magnetic interference. Always keep the compass module away from
magnetic fields. Otherwise, the compass module may become damaged and lead the aircraft to work
abnormally or even lose control.
4. Select a bracket of appropriate length for you aircraft to avoid interference with the compass. The length
is based on the airframe type and the mounting position and so on. Ensure that there will not any compass
warning when the aircraft is flying with maximum load and can normally fly.
Mounting the LED Module
Mount the LED module in a position to ensure it remains visible during flight. The LED bracket included can
be used to fix the LED module onto the aircraft.
Mounting the PUM Module
Mount the PMU module to an unobstructed position on the bottom of the aircraft’s upper plate for heat
dissipation.

GAIA 160AG-Agricultural Spraying Drone User Manual
©2019 FOXTECH All Rights Reserved 17
Flight Control System Connection
Follow the below diagram to connect the flight control system, and use the cable ties to tidy the cables.
The flight control system’s shell is connected to the whole system’s ground.
Connecting to the Airframe and its Equipment
Ensure you have a suitable airframe, remote controller system, ESCs and battery to use with the flight
control system. Strictly follow the provided guidelines. Failure to do so may lead to unexpected flight
behavior or serious accidents.
DJI Datalink 3
1. Connect the DJI Datalink 3 receiver DBUS port to the Flight Controller RF Port with included RF Cable.
2. Install the antenna to air unit and press it with aloud Click.
3. Fix the air unit to the appropriate ßat surface. Make sure there is a gap between the frequency button
and other structures, so as to avoid triggering the frequency button due to the body vibration.

GAIA 160AG-Agricultural Spraying Drone User Manual
©2019 FOXTECH All Rights Reserved 18
Be sure to install the antenna before powering up to avoid damage to the circuit.
When using, try to keep the antenna facing down and obstruct the obstacles, avoiding the
communication distance being shortened due to blocking or even can't communicate.
Be sure to use the speciÞed model antenna and ensure proper installation. forbidden to use other
types of antennas.
When connecting the air unit antenna and the antenna extension cable, be careful to avoid
damage to the connector.
When removing the sky end antenna, be sure to use pliers to force the metal part of the antenna
connector. Do not pull on the feeder to avoid damage to the antenna.
Other types of aircraft connections
Connect to the ESC interface in sequence according to the actual number of ESCs.
When powering up for the first time, please power on the flight control and the ESC power supply
at the same time to ensure that the flight control successfully addresses the ESC.
If you need to replace some ESCs, you need to repeat this operation at least once to ensure that
the ESC is successfully addressed.
Ensure the 3S battery voltage is higher than 11.1V, as low battery level may effect the battery life
and decrease the PMU stability.
Connecting to the ESCs
1. Connect the M1-M6 ports on the bottom board to the M1-M6 ports on the Flight Controller in order.
Connecting to a Battery
Connect the PMU to the Flight Controller PMU port, and then connect the battery (3S - 12S, 11.1V - 51V) to
the PMU.

GAIA 160AG-Agricultural Spraying Drone User Manual
©2019 FOXTECH All Rights Reserved 19
AMUII Installation
Installation
Mount the AMU to an appropriate position on the aircraft for heat dissipation.
Connection
1. Connect the CAN Bus port on the AMU to the CAN1 port on the flight controller or extended CAN1 port
on the GNSS-Compass / GPS-Compass Pro module via the included CAN-Gimbal cable.
2. Connect the power port on the AMU to the power supply of the aircraft via an appropriate cable.
Connect to Expansion Devices
Delivery Pump
DJI delivery pump: used with the AMUII. Mount the DJI delivery pump to the desired position, and then
connect the power cable of the pump to the Pump port on the AMU.
Other pumps: Connect the ESC signal cables of the pump to the F1 and F2 ports on the flight controller. The
F1 or F2 port cannot supply power for the pump. Users should connect the pump to an extra power supply.
DJI Radar Module (Fixed Height / Forecast)
To ensure that the spray is evenly dispensed, a DJI Radar Module which uses microwave radar module can
be mounted to the aircraft to maintain the same distance above the crops at all times. It should be used with
the AMUII.
If three radar modules are installed in the front, rear, and lower directions of the aircraft, The front and rear
radar modules can predict the terrain. Better realize imitation flight.
Installation and connection
1. If one radar module is used, this radar module acts as a fixed-high radar, is mounted to the lower position
of the aircraft, and then connects the module to the AMU II's Radar interface.
2. If three radar modules are used, the three radar modules are respectively installed as the front and rear
prediction radars and the lower fixed height radar, respectively, to the corresponding directions. Three
modules need to be connected in series and then connected to the AMU II's Radar interface.
3. When connecting to the radar module, first install the rubber pad in the package to the plug of the cable,
then connect to the 4-pin connector of the radar module and tighten 2 M2×6 screws.
IN
OUT
Other manuals for GAIA 160AG
1
Table of contents
Other Foxtech Drone manuals

Foxtech
Foxtech Baby Shark 260 VTOL User manual

Foxtech
Foxtech AYK-350 VTOL User manual

Foxtech
Foxtech Nimbus VTOL V2 User manual

Foxtech
Foxtech GAIA 190MP User manual

Foxtech
Foxtech GAIA 160HY-Hybrid A3 PRO User manual

Foxtech
Foxtech THEA-130 User manual

Foxtech
Foxtech THEA 160S User manual

Foxtech
Foxtech VG-450 UGV User manual

Foxtech
Foxtech Thor 210 User manual

Foxtech
Foxtech AYK-250 VTOL User manual