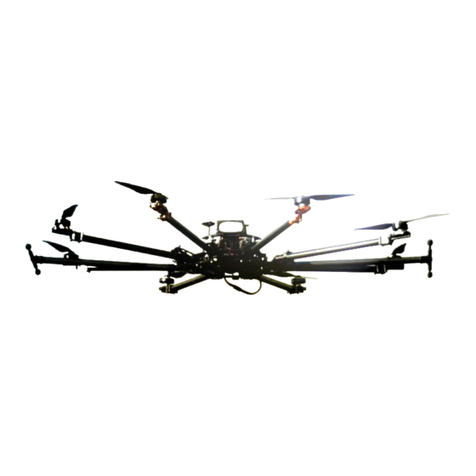
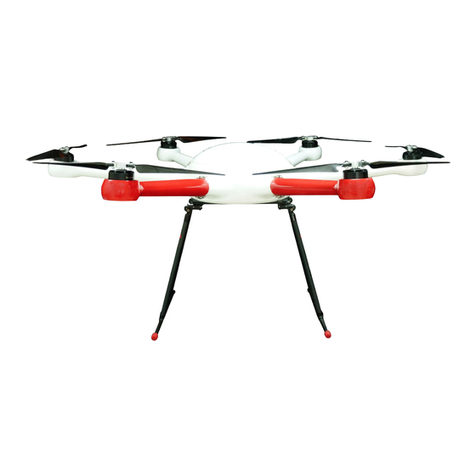
Foxtech GAIA 190MP User manual

User Manual (Pixhawk Version)
V1.0
FOXTECH GAIA 190MP
2023.06

Description
Disclaimer
Thank you for purchasing this product. you can log in to the website for the latest
product information, technical support and user manual. It is recommended that
you download and use the latest version of the user manual. This manual is
subject to change without notice.
You can also get product usage information or technical support through official
customer service. Due to different production batches, the appearance or
function parameters are slightly different and will not affect the normal use of the
product.
Please read this statement carefully before using. Once used, it is deemed to be
an endorsement and acceptance of the entire contents of this statement. Please
read the instruction manual carefully and strictly follow the instructions in this
manual to use this product. Foxtech will not be liable for any result or loss
caused by improper use, installation, assembly or modification of users.
Intellectual Property
The intellectual property rights of this product and manual are owned by Foxtech.
Any organization or individual may not copy, reproduce or distribute in any form
without written permission. If you need to quote, you need to indicate the source,
and you should not make any modifications, deletions and references to this
manual.
Contents
Product Profile
Introduction
Specifications
Mission Planner Basic Operation
1
1
3
3
3
6
Connect To The Mission Planner
Basic Hardware Calibration
Route Planning
Automatic Mission Planning
9
9
9
11
2
Flight
Flight Environment
Arm The Drone
Disarm The Drone
Take-Off Precautions
Appendix
DA16S+ Remote Controller
7
10
10
11

The GAIA 190MP is a heavy-lift drone platform with high strength, light weight, and stability. With its
quick-detach design and pluggable arms and frame top cover, it is easy to transport and quick to set up.
What sets the GAIA 190MP apart is its impressive heavy-lift capability. Equipped with P80motor and
high-efficiency 32-inch propeller, it can carry max 35kg of weight. During our tests, we loaded it with a 20kg
bucket of water as a payload and it remained remarkably stable.
In addition to its strength, the GAIA 190MP features an aluminum landing gear and ample space
between the center board and the ground, making it versatile enough to accommodate various equipment,
such as searchlights and cargo delivery boxes.
To ensure safety and reliability, the GAIA 190MP hexacopter can be installed with redundancy flight
controllers and three GPS. Its closed fuselage structure protects it from rain and dust while also making it
easy to maintain. If you need a heavy-lift drone with exceptional strength and stability, the GAIA 190MP is an
excellent choice.
Introduction
Product Profile
GAIA 190MP User Manual
© 2023 FOXTECH All Rights Reserved 1

Specifications
Aircraft
Structure
Item Name
Wheelbase
Frame Weight
Max Take-off Weight
Flight Time
Max Effective Load
Max Flying Speed
Max Lifting Speed
Max Descent Speed
Suggested Flight Altitude
Working Temperature
GAIA 190MP
1925 mm
5.1 kg(With Landing Gear)
60 kg
40 min
35 kg
15 m/s
8 m/s
10 m/s
500 m
-20℃~ 40 °C
GAIA 190MP User Manual
© 2023 FOXTECH All Rights Reserved 2

Connect To The Mission Planner
Data transmission connection method: usually use USB to connect the data link of the ground
station you need to select the corresponding COM port, and set the baud rate on the right side to 115200;
while if using WIFI or Bluetooth to connect the data link of the ground station, it is in the device list Select
the corresponding type and fill in the IP address to connect. For specific parameters, please refer to your
data link instructions first.
Basic Hardware Calibration
Check the items shown in the upper left section, including RC signal quality, flight mode, battery
voltage, GPS status, etc.
The RC signal quality should be 100%;
The flight mode should agree to the current status of the RC three-position switch;
The battery voltage should be above 48 V;
The GPS status should display rtk Fixed or 3D Fix if there is no RTK module onboard;
The Ready to Arm alert should be white if all the items are fine.
Mission Planner Basic Operation
GAIA 190MP User Manual
© 2023 FOXTECH All Rights Reserved 3

Motor Test
Run the motor test under
SETUP
>
MOTOR TEST
>fill in a number between 15~20 in the throttle
box>
Test all in sequence
Compass Calibration
Run the compass calibration under
SETUP
>
Mandatory Hardware
>
Compass
>choose
Relaxed
in Fitness box>Click
Start
GAIA 190MP User Manual
© 2023 FOXTECH All Rights Reserved 4

Radio Calibration
Run the radio calibration under
SETUP
>
Mandatory Hardware
>
Radio Calibration
>
Calibration
Radio
FailSafe Setting
Set the fail insurance of the battery under
SETUP
>
Mandatory Hardware
>
FailSafe
>Battery.
GAIA 190MP User Manual
© 2023 FOXTECH All Rights Reserved 5

Route Planning
Click on PLAN in the upper left corner to open the route planning page.
Steps:
①Click on the map on the left area to create a new waypoint with the left mouse button,
and a corresponding waypoint will appear on the right section;
②After adding all the waypoints on the map, and all corresponding waypoints appearing on the
right, set the first waypoint to TAKEOFF, and the last waypoint to RETURN_TO_LAUNCH;
③Click Write to save the route planning;
④Click Read to override the old route.
⑤Choose OK on the pop-up window that says "This will clear your existing points, Continue?"
GAIA 190MP User Manual
© 2023 FOXTECH All Rights Reserved 6

Automatic Mission Planning
Flight planning is one of the most important functions in MP: the average player can use
it to plan the simplest flight missions, including height control of each waypoint, stay time,
camera trigger, various condition triggers, channel triggers, and even Automatic take-off
and landing planning, etc. Industry users can also do surveying and mapping planning
and so on.
The main explanation here is the mission planning function of the MP ground station, but the
waypoint planning concepts of other ground stations are actually very similar.
- In the MP mission planning interface, create a multi-waypoint area
GAIA 190MP User Manual
© 2023 FOXTECH All Rights Reserved 7

- In the area, click the right mouse button to open the menu and select Automatic Waypoint Survey(Grid)
-The mission planner will display the configuration interface. This interface defines the camera parameters
and automatically calculates the shooting distance. DO_SET_CAM_TRIGG_DIST command parameters, you
can also set the parameters according to the actual situation.
If you accept these parameters, please click accept, the mission plannaer will generate a series of
waypoints covering the designated area, including the take-off point and the landing point. Call DO_SET_
CAM_TRIGG_DIST command to set the distance of the camera shutter command, and finally call DO_SET_
CAM_TRIGG_DIST again to set the parameter back to 0 and stop taking pictures; note that the parameters
of two call are different.
GAIA 190MP User Manual
© 2023 FOXTECH All Rights Reserved 8

Flight Environment
wind.
signal.
1. Do not use the aircraft in adverse weather conditions including rain, snow, fog, and strong
2. Only fly in open areas. Tall buildings and steel structures may affect the accuracy of the GPS
3. Avoid flying near obstacles, crowds, high voltage power lines, trees and water.
4. Avoid flying in areas with high levels of electromagnetism, including mobile phone base
stations and radio transmission towers.
5. Aircraft and battery performance is subject to environmental factors such as air density and
temperature.
Flight
ARM the drone
Before the drone takes off, it must be unlocked. This will power all motors and actuators.
Before unlocking, please make sure to test in an empty environment to avoid accidents. Check in
detail whether the hardware installation is correct (especially whether the arm is locked in place, the
battery compartment cover is tightly locked, whether the landing gear is locked, whether the external
load is installed firmly, the direction of the propeller, etc.). After confirming that there is no problem,
perform the following steps :
For this product, press the A button on the bottom of the remote control to enter Althold.
mode
•Unlock the safety switch: Press and hold the unlock safety s itch until the safety LED is always on
(flashing means lock and does not output pwm signal, and always on means unlocking and output
pwm signal) (the safety switch of this product is disabled, so the user can omit this step)
•Arm the aircraft: There are two ways to unlock the autopilot, which can be unlocked through the
ground station or the remote control.
Unlock through the remote control, lower the RC throttle to the lowest position, and the YAW channel to the
far right for 2 seconds to unlock it, and then return the YAW channel to the center.
Unlock through the ground station. Under the premise that the autopilot has a link to the ground, there is an
action tab at the bottom of the HUD window of the ground station. Click the unlock button inside to unlock.
•Turn on your rc transmitte
•Insert the battery into the aircraft. The flight control status light should flash red and blue alternately
(self-check process). Do not move the aircraft during the self-check.
•Pre-Arm will run automatically. After a normal self-check, the blue light or green light will flash,
indicating that the Pre-arm has no error and can be unlocked. If the yellow light is flashing, please
refer to the FAQ summary to eliminate the error.
•Set the correct mode: Set the mode to Stabilize, ATLhold or Loiter (outdoor GPS lock is required).
Novices are recommended to use Stabilization or Altitude hold mode.
GAIA 190MP User Manual
© 2023 FOXTECH All Rights Reserved 9

•ARM Successfully : The propeller will spin up at idle speed to remind that it has been
successfully unlocked.
•Take off: raise the throttle to take off, and control the direction according to the attitude (if the
novice is not familiar with the control, you can practice the flight simulator first, so as to avoid the
explosion of the aircraft and the loss of personnel and property)
If there is no operation within 15 seconds after unlocking, it will be automatically locked.
After unlocking, the ideal attitude is too different from the actual attitude it will be
automatically locked.(Such as hitting the roll bar sharply or shaking the aircraft with your
hands )
Perform the following operations to disarm the drone:
Disarm the drone
It is best to use the Stabilize mode to take off for the first time. Make sure that the aircraft is flying normally
before switching to another mode. The throttle control mode of the stable mode is linear, so the range of
throttle control needs to be relatively small.
After flying in the stable mode for a period of time, if the altitude stays above 1 m, you can switch to other
functional modes such as altitude hold, fixed point, etc. The throttle control logic of altitude hold and fixed
point modes is different. There is a dead zone in the neutral position of the throttle to maintain altitude , Push
up, the plane goes up, push down, the plane goes down.
Note: Before switching to another function mode, you must first understand the
characteristics of the flight mode.
•Check your flight mode switch, set to Stabilize, Alt Hold or Loiter.
•Keep the throttle at the lowest and the direction YAW to the left.
•Unplug the aircraft battery
•Turn off the remote control transmitter
Take-off Precautions
GAIA 190MP User Manual
© 2023 FOXTECH All Rights Reserved 10
Table of contents
Other Foxtech Drone manuals

Foxtech
Foxtech GAIA 160AG User manual

Foxtech
Foxtech GAIA 160MP User manual

Foxtech
Foxtech AYK-250 VTOL User manual

Foxtech
Foxtech Baby Shark 260 VTOL User manual

Foxtech
Foxtech GAIA 160HY-Hybrid A3 PRO User manual

Foxtech
Foxtech Nimbus VTOL V2 User manual

Foxtech
Foxtech VG-450 UGV User manual

Foxtech
Foxtech RHEA 160 User manual

Foxtech
Foxtech GAIA 160AG User manual

Foxtech
Foxtech KRAKEN 130 User manual