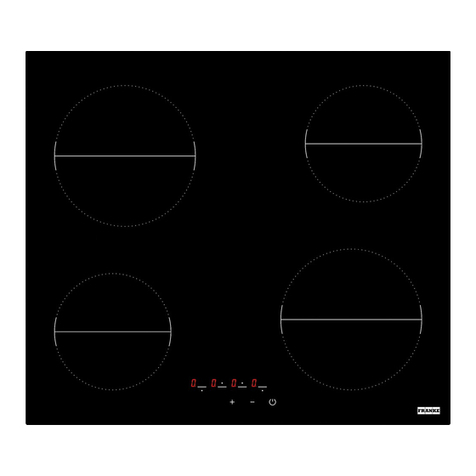
Franke FRI604B1 User manual

You’re about to begin a very happy and delicious
relationship. Let’s get started.
This is no ordinary Appliance.
Welcome to your new
Franke Cooktop
FRI604B1 - 60CM INDUCTION COOKTOP

2
AN IMPORTANT NOTE
Please read this document and the safety information carefully before you first use
your cooktop.
SUPPORT
Speak to our customer service representatives.
New Zealand: 09 964 0400 | info@prks.co.nz
WARRANTY
Your Franke product is protected by a 2-year warranty. Should you ever need to make a
warranty enquiry, simply contact our service department.
GET SOCIAL
Keep up to date on all things Franke by following us on Facebook and Instagram.
@FrankeAUS
#makeitwonderful
“Let’s let everyone else be ordinary,
while we make it wonderful”

Contents 3
Chapter 1: Ready, set up, go
5 Introducing your new Franke cooktop
6 Cooking advices
7 First time use
7 Installation instructions
10 Warnings and safety
10 Appliance use warnings
10 Intended function
10 Environmental information
10 Disposal
Chapter 2: Life with your Franke Cooktop
12 Induction principle
12 Using the controls
12 Setting a timer
12 Operating your cooktop
12 Child lock
Chapter 3: Getting the most out of your Franke Cooktop
14 Cleaning and care
14 Various cooking power cells
14 Ventilation system
14 Precautions not to damage the appliance
Chapter 4: Problem, meet solution
16 Trouble shooting
Chapter 5: Last, but not least
18 Warnings, hazards, risks and legal
Looking for something?
19 Glossary
CONTENTS

Chapter 1 Ready, set up, go
4
READY, SET UP, GO
CHAPTER 1
Your Franke cooktop is designed to be set up
quickly and easily - so you can start creating delicious
masterpieces even sooner.

5Introducing: Your new Franke cooktop
INTRODUCING: YOUR NEW FRANKE COOKTOP
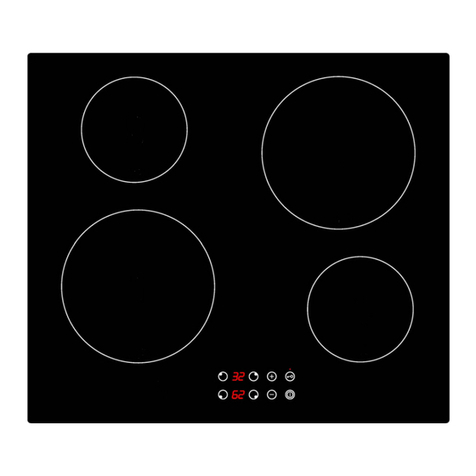
DISPLAY
ICON FUNCTION EXPLANATION
0 Zero Heating zone is activated, and waiting for power level
1-9 Power level rating The selection of cooking level power
U Pan detection No pan or pot is detected, or pan is not suited for
induction cooking
E Error message
There has been a failure, or error in one of the
components. Please read the error section of this
manual to diagnose the error
H Residual heat The heating zone or surface is still hot, please be
careful not to burn yourself
L Child lock Control panel is locked
Control light timer
[ - ] key
Selection key
Timer and
Power display
Timer keys
[ + ] key
Power display
On/off key

Chapter 1 Ready, set up, go
6
COOKING ADVICES
PAN QUALITY
Adapted materials: steel, enamelled steel, cast iron, ferromagnetic stainless-steel, aluminium with
ferromagnetic bottom.
Not adapted materials: aluminium and stainless-steel without ferromagnetic bottom, cupper, brass,
glass, ceramic, porcelain.
The manufacturers specify if their products are compatible induction.
To check if pans are compatibles:
• Put a little water in a pan placed on an induction heating zone set at level [ 9 ].This water must
heat in a few seconds.
• A magnet stucks on the bottom of the pan.
Certain pans can make noise when they are placed on an induction cooking zone. This noise doesn’t
mean any failure on the appliance and doesn’t influence the cooking operating.
PAN DIMENSIONS
The cooking zones are, until a certain limit, automatically adapted to the diameter of the pan.
However the bottom of this pan must have a minimum of diameter according to the corresponding
cooking zone.
To obtain the best efficiency of your hob, please place the pan well in the centre of the cooking zone.

Chapter 1 Ready, set up, go
7
FIRST TIME USE
Clean your hob with a damp cloth, and then dry the surface thoroughly. Do not use detergent which
risks causing blue-tinted colour on the glass surface.
INSTALLATION INSTRUCTIONS
Check the appliance for damage after unpacking it, and don’t connect the appliance if it has been
damaged in transport.
Only a licensed professional may connect the appliance – damage caused by incorrect installation is
not covered under the warranty.
Ensure that the panels of the cabinetry around the Appliance are heat resistant, and the glues and
materials can withstand temperatures of at least 90 degrees Celsius.
Remove all labels and adhesives from the ceramic glass prior to use. The ceramic glass cannot be used
as working surface, or chopping board or for anything other than cooking.
The appliance must be grounded and must not be controlled by a separate remote control system.
This appliance must not be used in close proximity to dishwasher or dryer, as steam can damage the
surface.
The installation comes under the exclusive responsibility of specialists.
The installer is held to respect the legislation and the standards enforced.
How to stick the gasket:
The gasket supplied with the hob avoids all infiltration of liquids in the cabinet.
This installation has to be done carefully, in conformity of the following drawing.
Stick the gasket (2) two millimetres from the
external edge of the glass, after removing the
protection sheet (3).

Chapter 1 Ready, set up, go
8
Fitting - installing:
• The cut out sizes are:
• Ensure that there is a distance of 50 mm between the hob and the wall or sides.
• The hobs are classified as “Y” class for heat protection. Ideally the hob should be installed with
plenty of space on either side. There may be a wall at the rear and tall units or a wall at one side.
On the other side, however, no unit or divider must stand higher than the hob.
• The piece of furniture or the support in which the hob is to be fitted, as well as the edges of
furniture, the laminate coatings and the glue used to fix them, must be able to resist temperatures
of up to 100 °C.
• The mural rods of edge must be heat-resisting.
• Not to install the hob to the top of a not ventilated oven or a dishwasher.
• To guarantee under the bottom of the hob casing a space of 20 mm to ensure a good air
circulation of the electronic device.
• If a drawer is placed under the work, avoid to put into this drawer flammable objects (for example:
sprays) or not heat-resistant objects.
• Materials which are often used to make worktops expand on contact with water. To protect the
cut out edge, apply a coat of varnish or special sealant. Particular care must be given to applying
the adhesive joint supplied with the hob to prevent any leakage into the supporting furniture. This
gasket guaranties a correct seal when used in conjunction with smooth work top surfaces.
Ref. Width Depth Width Depth Radius Width Depth Thickness
FRI 604B1 560 490 596 526 8 590 520 4
Cut size Cut size flush mounting Glass Size

Chapter 1 Ready, set up, go
9
• The safety gap between the hob and the cooker hood placed above must respect the indications
of the hood manufacturer. In case of absence of instructions respect a distance minimum of
760 mm.
• The connection cord should be subjected, after building, with no mechanical constraint, such for
example of the fact of the drawer.
• WARNING: Use only hob guards designed by the manufacturer of the cooking appliance or
indicated by the manufacturer of the appliance in the instructions for use as suitable or hob
guards incorporated in the appliance. The use of inappropriate guards can cause accidents.
ELECTRICAL CONNECTION
• The installation of this appliance and the connection to the electrical network should be entrusted
only to an electrician perfectly to the fact of the normative regulations and which respects them
scrupulously.
• Protection against the parts under tension must be ensured after the building-in.
• The data of connection necessary are on the stickers place on the hob casing near the connection
box.
• The connection to the main must be made using an earthed plug or via an omnipolar circuit
breaking device with a contact opening of at least 3 mm.
• The electrical circuit must be separated from the network by adapted devices, for example: circuit
breakers, fuses or contactors.
• If the appliance is not fitted with an accessible plug, disconnecting means must be incorporated in
the fixed installation, in accordance with the installation regulations.
• The inlet hose must be positioned so that it does not touch any of the hot parts of the hob or
even.
CAUTION!
This appliance has only to be connected to a network 230 V~ 50/60 Hz.
Connect always the earth wire.
Respect the connection diagram.
The connection box is located underneath at the back of the hob casing. To open the cover use a
medium screwdriver. Place it in the slits and open the cover.
CONNECTION OF THE HOB FOR:
Mains Connection Supply cord Supply cord Circuit braker
230V~ 50/60Hz 1 Phase + N 3 x 2,5 mm2H 05 VV - F
H 05 RR - F
25 A *
400V~ 50/60Hz 2 Phases + N 4 x 1.5 mm2H 05 VV - F
H 05 RR - F
16 A *
* calculated with the simultaneous factor following the standard EN 60 335-2-6
Connection of the hob
For the various kinds of connection, use the brass bridges which are in the box next the terminal
Monophase 230V~1P+N
Put the 1st bridge between terminal 1 and 2
Attach the earth to the terminate “earth”, the neutral N to terminal 4, the Phase L to one of the
terminals 1 or 2.
Biphase 400V~2P+N
Attach the earth to the terminate “earth”, the neutral N to terminal 4, the Phase L1 to the terminals 1
and the Phase L2 to the terminal 2.
We cannot be held responsible for any incident resulting from incorrect connection or which could
arise from the use of an appliance which has not been earthed or has been equipped with a faulty
earth connection.
Chapter 1 Ready, set up, go
10
WARNINGS & SAFETY
• The Appliance may become hot during use and directly after use.
• This appliance is not intended for use by persons (including children) with reduced physical,
sensory or mental capabilities, or lack of experience and knowledge, unless they have been given
supervision or instruction concerning use of the appliance by a person responsible for their safety.
• Children should be supervised to ensure that they do not play with the appliance.
• If any parts become damaged, they must be replaced by the manufacturer only, including the
power supply cord.
• The appliance must be grounded and connected conforming to local standards.
• Do not use harsh abrasive cleaners or sharp metal scrapers during cleaning.
• The cooking plate can not be used as freestanding or as working surface.
• This appliance is suited only for the cooking of food for domestic purposes.
• Remove all labels and self-adhesives from the ceramic glass.
APPLIANCE USE WARNINGS
Magnetically inclined objects must not be placed anywhere near the appliance (credit cards,
calculators, floppy disks, magnetic strips, Public transport travel cards, phones).
Metallic objects such as knives, forks, spoons or lids should not be placed on the hob surface as they
can become hot.
INTENDED FUNCTION
Only enamelled cast iron pots and pans may be used on the ceramic glass surface. Any damaged
saucepans must be thrown out or mended.
Place saucepans carefully on the surface, avoid dropping any objects on the ceramic glass. Do not
place empty saucepans or pots on the cooking surface.
Any messes, spills, or food scraps must be cleaned immediately off the cooking surface.
Using poor quality pots or pans or cookware that is not suited for induction breaches the manufacturer
warranty.
ENVIRONMENTAL INFORMATION
This Franke appliance is particularly energy efficient, however to make the most out of it, and to save
even more energy make sure you adhere to the following steps:
1. It is more energy efficient to bake multiple items at the same time to avoid prolonged operation
2. Do not unnecessarily leave the appliance on or over boil food liquids
3. Use the correct power level for the cooking you require.
DISPOSAL
Dispose of all packaging in an environmentally friendly manner. Franke practises environmentally
conscious behaviour, and this appliance is labelled in accordance with the used electrical and
electronic appliances waste guidelines.
If you have any questions on disposals, please call the Franke customer service
team on 03 9700 9100.

11Chapter 2 Life with your Franke Cooktop
life with your
franke cooktop
CHAPTER 2
We designed this cooktop with one thing in mind.
How do we create a wonderfully simple user experience
for you, our customer?

12Chapter 2 Life with your Franke Cooktop
INDUCTION PRINCIPLE
An induction coil is located under each heating zone. When it is activated it produces an
electromagnetic field which interacts with the bottom plate of your cookware and the result is that
heat is produced in the pan.
The heating area adapts automatically to the size of the pan and if the pan is too small or is the wrong
material the message U is displayed on the control display.
USING THE CONTROLS
Your Franke appliance is equipped with the latest technology sensitive touch keys. Press the surface
with your finger and the corresponding command is activated by a beep. Ensure your hands are clean
when operating the display.
SETTING A TIMER
The timer is used when simmering or leaving an item on the cooking surface for a prolonged amount of
time. To activate the timer:
With the desired heating zone and power selected, press [-] and [+] simultaneously. Now use the [-]
and [+] keys to select the amount of time.
After a few seconds the control light will stop flashing. The time is confirmed and the cooking will
commence until the time reaches [00]. Automatic stop at the end of the cooking time.
OPERATING YOUR COOKTOP
To turn on the cooking surface, select a cooking zone and reach the desired cooking power level,
follow these steps;
1. Turn on the appliance by pressing [0/I], which activates all the control displays
2. Select the desired cooking zone by pressing the [O] button adjacent to the cooking zone display
3. Press the [+] or [-] keys to select the power level
4. To switch off a cooking zone, press the [-] key to decrease the power level back to 0
5. Press [0/I] to power down the appliance.
CHILD LOCK
The appliance can be locked for child safety or cleaning purposes. To lock the appliance:
Press [0/I] key to turn on appliance. Then on the front right cooking zone, press the selection key [O]
simultaneously with the [-] key.
• Locking:
Action Control panel Display
Start Press key [0/I] [ 0 ] or [ H ]
Hob locking Press simultaneously [ - ] and [ O ] No modification
Re-press selection key from
the front right zone [ L ]
• Unlocking:
Action Control panel Display
Start Press key [0/I] [ L ]
In the 5 seconds after start:
Unlocking the hob Press simultaneously [ - ] and
[ O ] from the front right zone [ 0 ]
Re-press key [ - ] No light on the display

13Chapter 3 Getting the most out of your Franke cooktop
getting the most out of
your franke cooktop
CHAPTER 3
Getting the most out of your Franke cooktop.
Your Franke cooktop turns work into play, and inspires
creativity every single day.

14Chapter 3 Getting the most out of your Franke cooktop
CLEANING AND CARE
We want your Franke Appliance to be looking this good for a long time to come. To ensure that the
various surfaces are not damaged through cleaning, please observe the following:
Ceramic glass: Hot soapy water with a soft cloth
Control panel: Clean with a damp dish cloth and then dry with a soft cloth
Spills or food stains: A mix of hot soapy water. Wash with a dish cloth, and then allow to dry. Do not
use abrasive cleaners
VARIOUS COOKING POWER LEVELS
Levels 1-3: Melting, reheating, defrosting (sauces, butter, rice, frozen, chocolate)
Levels 3-6: steam, water and medium cooking (vegetables, meat, soups, pasta, sausages,
steamed potatoes)
Levels 6-9: cooking, frying, roasting, boiling (steak, omelette, fried dishes, water)
VENTILATION SYSTEM
Your Franke appliance is designed to cool itself down when in operation. The ventilation system will
automatically switch on and off when the system decides necessary. There will be a small noise of the
cooling fan audible. This can also stay on after the appliance has been switched off.
PRECAUTIONS NOT TO DAMAGE THE APPLIANCE
• Raw pan bottoms or damaged saucepans (not enamelled cast iron pots,) may damage
the ceramic glass.
• Sand or other abrasive materials may damage ceramic glass.
• Avoid dropping objects, even little ones, on the vitroceramic.
• Do not hit the edges of the glass with saucepans.
• Make sure that the ventilation of the appliance works according to the manufacturer’s
instructions.
• Do not put or leave empty saucepans on the vitroceramic hobs.
• Sugar, synthetic materials or aluminium sheets must not contact with the heating zones.
These may cause breaks or other alterations of the vitroceramic glass by cooling: switch on the
appliance and take them immediately out of the hot heating zone
(be careful: do not burn yourself).
• WARNING: Danger of fire: do not store items on the cooking surface.
• Never place any hot container over the control panel.
• If a drawer is situated under the embedded appliance, make sure the space between the content
of the drawer and the inferior part of the appliance is large enough (2 cm). This is essential to
guaranty a correct ventilation.

15Chapter 4 Problem, meet solution
problem, meet solution
CHAPTER 4
We don’t expect your experience with your new Franke
cooktop to be anything but wonderful, but here’s some
trouble shooting remedies just in case.

16Chapter 4 Problem, meet solution
TROUBLE SHOOTING
You shouldn’t have any issues with your Franke Appliance, however there are some problems which
can easily be fixed by trouble shooting the table below. If you can’t find your problem, or the remedy
has not fixed the issue, then give our friendly customer service team a call on 03 9700 9100.
Problem Cause and Remedy
The appliance does
not turn on
Check the circuit breaker or fuse box. Check to see if any
other appliances are working.
The control panel can no
longer be operated, or Er03
is displayed
Clean your hands and the control panel with hot
soapy water.
A cooking zone switched
off by itself The pan overheated and the safety system functioned.
E2 or EH is displayed The appliance has overheated, let it cool down.
E3 is displayed The pan or pot is not designed to be used for this ceramic
glass cooktop.
E5 is displayed Check the voltage of the connection.
E6 is displayed Check the voltage of the electrical work.
E8 is displayed The ventilation system under the appliance is obstructed by
an object or there is limited airflow.
U400 is displayed The appliance is not connected to the electrical network.

17Chapter 5 Last but not least
last but not least
CHAPTER 5
This section contains the warnings, precautions and
legal notices to make sure everything runs smoothly.

18Chapter 5 Last but not least
ELECTRIC SHOCK HAZARD
Never carry out any repairs yourself, always get an authorized technician to do any repairs or
maintenance on your cooktop. If any electrical components become damaged or there is exposed
wiring, there is a risk of electrical shock.
If the supply cord is damaged, it must be replaced by the manufacturer, its service agent or similarly
qualified persons in order to avoid a hazard.
Ensure whenever the cooktop is in operation and you come into contact with it, that appropriate
footwear is worn.
HAZARDS
The following is a comprehensive list of all hazards and risks this product possesses.
Risk of fire:
• Any combustible items left in or near the cooktop during operation
• Be aware of baking paper coming into contact of the heating element.
• Danger of fire: Do not store items on the cooking surface
• CAUTION: The cooking process has to be supervised. A short term cooking process has to be
supervised continuously.
• WARNING: Unattended cooking on a hob with fat or oil can be dangerous and may result in a fire.
Risk of burns:
• The appliance becomes very hot. Never touch any surfaces or compartments which has been
exposed to the heating elements.
• Accessories also become very hot. Use appropriate gloves and cooktopware.
• Alcoholic vapours may catch fire. Never use a high quantity of alcohol in a cooking recipe.
Risk of scalding:
• Any liquid in the cooking compartment may become hot and potentially dangerous if not
handled carefully.
Risk of magnetism:
• Magnets are used during the creation and operation of the control panel.
Keep away all pace makers.
Risk of electric shock:
• The insulation and coating of cooktop accessories may cause electric shock if they come into
contact with electrical components.
Risk of death or serious injury to human health:
• The cables and wiring harnesses at the rear of the cooktop must not be tampered with or come
into contact with the hot appliance.
• If the appliance is not operating correctly, do not continue to operate it.
Discuss your problem with our customer service team.

19
GLOSSARY
Abrasive - a course and harsh substance capable of polishing or cleaning a surface by rubbing or
grinding.
Buzzer - a device that makes a loud noise and is used to signal something.
Cabinetry - a collection of cupboards with drawers or shelves.
Circuit breaker - and automatic device for stopping the flow of current in an electrical circuit for
safety reasons.
Control display - an electrical component which depicts various function on a screen, usually LED.
Convection - a fan with a heating element which provides heat. This improves the
heat transfer.
Food residue - a small amount of food which remains after cooking.
Insulation - protecting or shielding an object from excessive heat or moisture.
Licensed professional - a person who has had the proper training and prerequisite to complete a
certain job.
Manufacturer - the person or organisation which is the original producer of a product.
Metal scraper - a single edged tool used to scrape a surface clean.
Packaging - the materials used to wrap or protect goods.
Scalding - very hot burning and blistering
Timer - used to indicate how long a process has left remaining.
Trouble shooting - finding the causes of common problems.
User experience - the overall experience of a person using a product, in terms of how easy or
pleasing it is to use.
Warranty - a written guarantee promising to repair or replace a product under certain circumstances
within a certain time.
Glossary

20
PR Kitchen & Washroom Systems
83 Bangholme Road
Dandenong South
VIC 3175
Australia
Phone +61 3 9700 9100
Fax +61 3 9700 9191
www.franke.com.au
PR Kitchen & Washroom Systems NZ Ltd
P.O Box 53171, Auckland Airport
Auckland 2150
New Zealand
Phone 09 964 0400
Fax 09 964 0401
www.franke.co.nz
Table of contents
Other Franke Cooktop manuals

Franke
Franke FHR 604 C T BK User manual

Franke
Franke FIX906B1 Installation instructions

Franke
Franke FRE604B1 User manual

Franke
Franke FIG301S1 User manual

Franke
Franke FRG302S1 User manual

Franke
Franke PROFESSIONAL Series User manual

Franke
Franke FHSL 604 4GAV XS User manual

Franke
Franke FIG903S1N/L User manual

Franke
Franke FH 604-1 4I T PWL Operation manual

Franke
Franke FIG301S1N User manual
Popular Cooktop manuals by other brands

Fisher & Paykel
Fisher & Paykel CG363MLNGB1 user guide

Westinghouse
Westinghouse PHR222U Care and use guide

GE
GE Profile JP346 Dimensions and installation information

Bosch
Bosch Benchmark Series NETP066SUC use and care manual

Miele
Miele KM 5753 Product dimensions

Viking
Viking Designer DGVU Use & care manual