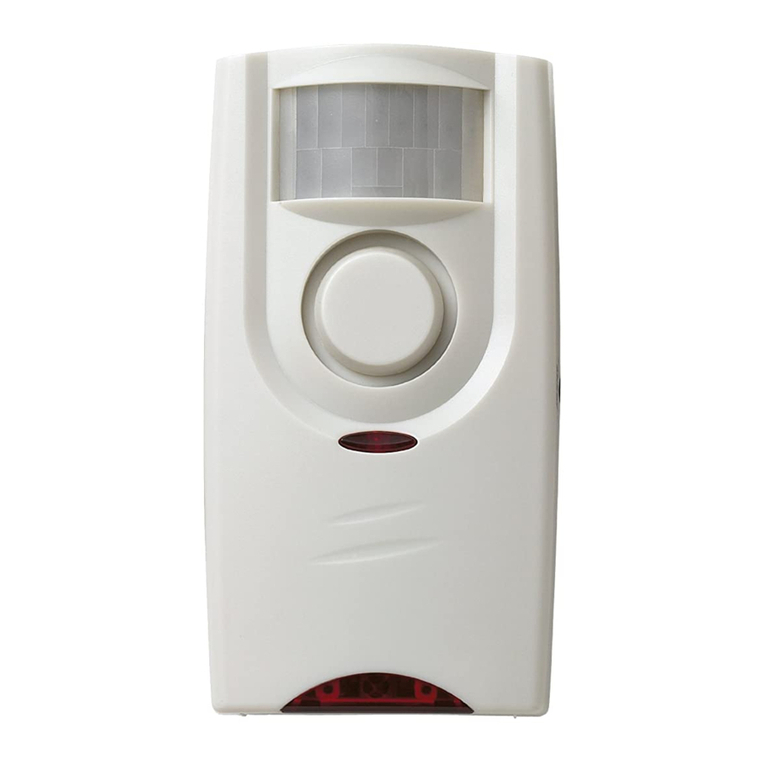
FRIEDLAND Spectra Plus L430N BLK User manual

D
ENG 1-10
Instruction Manual
11-20
Bedienungsanleitung
NL 21-31
Gebruiksaanwijzing
S32-41
Instruktionsanvisning
DK 42-51
brugervejledning
FIN 52-61
Ohjekirja
POL 62-72
Instrukcja obsługi
RUS 73-84
Инструкция по эксплуатации
PLUS
L430N BLK and L430N WHI
51004PL_Ed2

ENG
Wirefree PIR
Movement Detector
L430N BLK and L430N WHI
Instruction Manual
and Guarantee
Your Spectra Plus Wirefree Passive
Infrared (PIR) Movement Detector can
operate with the Spectra Plus Wirefree
Switching receiver to expand an existing
Spectra Plus lighting control system
(868Mhz Version). Alternatively it will operate
with a Libra Plus Chime to provide an
audible warning when movement is
detected. A built in Dusk/Dawn sensor
can be adjusted to prevent movement
from activating light during daylight or
alternatively if working with a Chime it
will prevent movement activating the
Chime during the night. The PIR Detector
is suitable for mounting outdoors.
No Wires! - There is no physical wiring
connection between the PIR and Receiver
or Chime. Instead the system uses radio
technology to provide the link which makes
installation even quicker and allows the
PIR to be located remotely at the most
appropriate position for the area being
monitored. To prevent interference from
other devices the PIR detector is coded with
a unique identification code that can be
easily learnt by the receiver or Chime.
The PIR is compatible with the Friedland
Libra Plus Chime system, (Chimes and
Pushes) and Spectra Plus switching receiver.
Introduction
1

SAFETY
Always follow the manufacturers advice when using power tools; steps, ladders etc. and
wear suitable protective equipment (e.g. safety goggles) when drilling holes etc.
Before drilling holes in walls, check for hidden electricity cables and water pipes,
the use of a cable/pipe locater maybe advisable if in doubt.
Do not attempt to install or program this product while it is wet or raining.
TOOLS REQUIRED
●No.2 Philips Screwdriver
●
3mm flat bladed screwdriver
●Drill
●6mm Masonry drill bit
2
The quoted range of the system is measured
in ideal conditions. Any barrier (e.g. walls/
ceilings aluminium reinforced UPVC windows
and metallic parts of house structures etc)
between the PIR and receiver will reduce
the effective radio range by an amount
dependant upon the construction of and
number of barriers between the PIR and
receiver.
In extreme cases where metal barriers are
involved then it is possible for the signal
to be blocked out completely.
Whilst the majority of installations are not
adversely affected, you may have to
experiment a little to discover the best
location for your PIR and Receiver Unit.
KIT CONTENTS
PIR Detector
Instruction Manual
Fixing pack containing:
●
2 slot-in PIR window masking curtains
●2 fixing screws and plastic wall plugs
You will also need
●One 9V PP3 (6LR61) Alkaline Battery
Device range
Installing the PIR Detector
Positioning the PIR
●Place the detector within range of the Receiver, taking into consideration any reduction in
the 200m maximum range caused by any objects in between. Avoid mounting the unit on
or near large metal objects.

3
●The recommended mounting height for
the detector is 2.5m. At this height, the
detector will have a range of approximately
12m. Mounting the detector higher will
increase the detection range but it will be
less sensitive to movement at the
extreme range and also may not be able
to detect movement very close to it.
Tilting the detector head up and down will
havethesameeffect.
●Mount the detector on a firm stable
surface where the logical path of a
person would cut across the detection
pattern. The detector is more sensitive
to movement across its detection pattern
than to movement directly towards it.
Avoid positioning the detector where
there are any heat sources in the detection
area (e.g. heating or tumble drier exhaust
vents etc.). Also avoid highly reflective
surfaces or hanging branches in the
detection area as these can cause false
activation in some weather conditions.
✔✘
Installing the PIR
NOTE: Before fixing the PIR unit to the
mounting surface, it is advisable to check
that the system works correctly (i.e. that
the PIR and receiver are within radio range
of each other) by temporarily operating the
PIR Detector in the chosen location.
●Open the PIR Detector by inserting a flat
bladed screwdriver into the slot at the base
of the unit and pushing gently to release the
catch and to allow the front cover to be
opened.
Dusk and Time controls
Battery
Day/Night
Operation Mode
Selector Switch
Fixing holes
PIR DETECTOR
Fig. 2
Fig. 3
Fig. 1
●Set the Day/Night operation switch
according to whether you wish the PIR
to detect movement during the day or night.
Day operation is intended for use with a
Libra Plus Chime where movement will trigger
the Chime during the day but not at night.
Night operation is intended for use with a
Switching Receiver for controlling lighting
where movement will activate the lights
only at night and not during the day

4
Note: The PIR can be configured to work
with either a Chime or a Switching
Receiver in Day or Night mode. It cannot
work with both.
●Mark the position of the fixing holes and
drill two 6mm holes, then insert the wall plugs
(supplied). If fixing to non-solid or wood
surface the wall plugs will not be needed
and only a small pilot hole will be required.
●Clip a 9V PP3 (6LR61) Alkaline battery to
the connector and fit the battery in its holder.
Note: When the battery is connected the LED
behind the detector lens will continuously
flash or stay ON while the detector goes
through its warm up cycle.
The unit will not operate normally until the
LED stops flashing.
●Fix the unit in place on the wall and then
close the cover ensuring it clicks fully closed.
●Adjust the sensor head to point in
approximately the desired direction.
PIR Walk Test
Important: Before commencing walk test
ensure the RED indicator behind the PIR
lens is not flashing continuously. If it is
wait until the PIR has completed its warm
up cycle and the flashing stops.
Configure the detector for walk testing
according to the selected Day or Night
operating mode as follows:
1) Set the TIME control fully anti-clockwise
to its minimum setting.
2) If the PIR is set to NIGHT operation for
use with lighting adjust the DUSK contro
l fully clockwise to its maximum setting.
If however the PIR is set to DAY operation
for use with a chime adjust the DUSK control
fully anti-clockwise to its minimum setting.
Slowly walk across the detection area
approximately 5m from the unit. As you cross
a detection zone and your movement is
detected a small red indicator behind the lens
will illuminate for a few seconds. Stand still
until the indicator goes out after a few
seconds. Continue moving around at various
distances and angles to the unit, stopping
each time the indicator illuminates, until you
have established the detection area.
If the PIR has already been linked to the
Switching Receiver or Chime when the Walk
test is performed then the lights will illuminate
for approximately 5 seconds or the Chime will
sound each time movement is detected.
Fig. 4
Fig. 5
Dusk control setting
for NIGHT operation
Dusk control setting
for DAY operation
Time
control
Fig. 6

5
Adjust the position of the detector head to
obtain approximately the desired detection
area as required. Angling the PIR head
downwards will reduce the range and produce
a smaller coverage area. Angling the head
upwards will increase the range and produce
a larger coverage area. If necessary the
detection area can also be reduced by
masking the detection window (see below).
Linking the PIR to a Libra Plus
Chime or Spectra Plus Switching
Receiver
The PIR has a unique identification code that
prevents inadvertent and unwanted interference
from other products operating in the area. In
order for movement detected by the PIR to
trigger the lights or Chime this code needs to
be learnt by the either the Switching Receiver
or Chime Unit.
Learn mode PIR
To enable your chime to learn the identity of
your PIR:
●Press the ●button and keep it pressed.
Each Icon will light in turn. When the Icon
you want is lit, release the button.
●While the Icon you have selected is lit,
operate your PIR. The chime will sound.
TheIconwillflash.
Unlearn procedure
If you want to remove a PIR from the chime’s
memory:
●Press the ●button and keep it pressed.
Each Icon will light in turn. When the Icon
associated with the PIR to be un-learnt is
lit, release the button.
●Press and hold down both ●& buttons,
until a ‘beep’ sound is heard.
Please refer to your instruction manual supplied
with the Switching Receiver or Chime for the
procedure to do this. At the appropriate point
you will have to trigger the PIR by walking in
front of it so that it detects your movement.
Masking the PIR window
To prevent movement detection in unwanted
areas or to shield off shrubs etc which can
cause false activation in the wind, the detection
area may be reduced by masking off sections
of the lens using either the window mask
curtain provided or electrical insulation tape.
To discover how much screening is needed,
first obscure the PIR unit’s lens with insulation
tape, progressively covering more of the lens
until the required detection area is achieved.
The top half of the PIR Detector lens deals
with long-range detection, the bottom half is
for short range. Then simply cut a piece of
the plastic window masking curtain to cover
the same area as the tape. Remove the tape
from the lens (ensuring that any adhesive
residue is removed) and clip the cut masking
curtain into the window recess.
Alternatively, the PIR Detector can be easily
re-positioned in a more suitable location.
Fig. 7

Setting the PIR for Automatic
NIGHT Operation with a Spectra Plus
Switching Receiver:
Having completed the ‘walk test’ procedure,
you can set the unit for automatic operation
as follows:
1) The TIME control determines how long
the unit remains illuminated following
activation and after all motion ceases and is
adjustable between approximately 5 seconds
(- setting) and 20 minutes (+ setting).
Rotate the control to set the TIME to
approximately the desired setting.
The DUSK control determines how dark it
needs to be before detected movement will
trigger the controlled lights and can be set
as follows:
2) Turn the DUSK control knob to the
setting and wait until darkness falls .
3) When the ambient light level reaches
the level at which you wish the lights to
turn on (i.e. at dusk), SLOWLY turn the
control in a clockwise direction towards
the mark until movement causes the
light(s) to illuminate. Leave the control
setatthispoint.
4) The PIR will become operative at
approximately the same level of darkness
each evening. Observe the operation of
the unit over several nights to ensure it
is set as required and adjust as necessary.
If the unit activates too early (i.e. when
it is too light), turn the control slightly
towards the mark. If the unit activates
too late (i.e. when it is too dark), turn the
control slightly towards the mark.
6
Operating Instructions Setting the PIR for Automatic DAY
Operation with a Libra Plus Chime:
Having completed the ‘walk test’ procedure,
you can set the unit for automatic operation as
follows:
1) Set the TIME control fully anti-clockwise to
its minimum setting.
The DUSK control determines how light it
needs to be before detected movement will
trigger the Chime and can be set as follows:
2) Turn the DUSK control knob to the setting
and wait until darkness falls.
3) When the ambient light level reaches the
level at which you wish the chime to stop
sounding due to detected movement SLOWLY
turn the control in a clockwise direction
towards the mark until movement no
longer causes the chime to sound. Leave
the control set at this point.
4) The PIR will become operative at
approximately the same level of light
each day. Observe the operation of the
unit over several days to ensure it is set
as required and adjust as necessary. If
the unit stops activating too early (i.e.
when it is too light), turn the control slightly
towards the mark. If the unit stops
activating too late (i.e. when it is too
dark), turn the control slightly towards the
mark.

PIR low battery indication:
The PP3 battery should operate the PIR Detector
for approximately 12 months depending on the
number of activations each day and the effect of
low temperatures. When the battery is nearing
the end of its life (about 30 days before failure),
the low battery status will be indicated by the red
LED behind the detector lens flashing 5 times
after movement is detected.
You should change the battery in the PIR as
soon as you notice the low battery signal or if the
PIR stops working altogether.
Testing:
The system may be tested by placing the PIR
into Walk Test, (see “PIR Walk Test”).
7
If your wirefree system fails to work properly, complete the relevant test or tests which follow.
Note: Also refer to the trouble shooting guide in your Chime or Switching Receiver manual.
PIR does not detect movement…
●Check that the battery in the PIR is not exhausted.
●Detection is set incorrectly.
PIR does not activate Chime at all…
●Check that the battery in the PIR is not exhausted.
●Make sure you use new batteries.
●Check that the sound on the Chime is switched ON.
●Check that the Receiver has correctly learned the PIR identification code by following
the test procedure. If necessary reset the Receiver and relearn the code.
PIR activates Chime during the night and not during the day…
●Check that the PIR operating switch is set to the DAY position.
PIR activates Chime at night as well as during the day…
●The ambient level of light at the Detector may be too high for the current dusk setting
permanently simulating day-time. At dusk, adjust the dusk control slightly clockwise.
Move around the detection area to see if the movement still activates the Chime.
If necessary continue to adjust the dusk setting until movement does not activate the
Chime. In extreme case it may be necessary to reposition the PIR.
●The PIR may be illuminated by a light at night preventing the ambient light level falling
low enough for the current dusk setting. Try adjusting the dusk setting or shielding the
PIR from the light. In extreme case it may be necessary to reposition the PIR.
Troubleshooting

8
PIR does not activate Switching Receiver and lights at all…
●Check that the battery in the PIR is not exhausted.
●Check that the power to the Receiver is switched ON.
●Check the bulb and replace if defective. Ensure that the light bulb is correctly fitted.
●Turn OFF the power to the unit and check the wiring connections as per the wiring
diagram. Ensure all connections are correct and terminals are tight. Check the
connections at the switch, PIR and Light.
●Check that the fuse or Miniature Circuit Breaker (MCB) supplying the lighting circuit
has not blown or tripped. Before replacing the fuse or resetting the MCB be sure to
check for the cause.
●Check that the Receiver has correctly learned the PIR identification code by following
the test procedure. If necessary reset the Receiver and relearn the code.
PIR activates Switching Receiver during the day and not during the night…
●Check that the PIR operating switch is set to the NIGHT position.
PIR activates Switching Receiver during the day as well as at night…
●The ambient level of light at the Detector may be too low for the current dusk setting
permanently simulating night-time. In normal daylight, adjust the dusk control slightly
anticlockwise. Wait outside the detection area until the light goes out, then re-enter it
to see if the movement activates the light. If necessary continue to adjust the dusk
setting until movement does not activate the light. In extreme cases it may be
necessary to reposition the PIR.
PIR activates for no apparent reason at random without any movement in its
detection area…
●Wind, small animals or pets, passing traffic or pedestrians may be activating the
detector. Try adjusting the detector head or masking sections of the lens to reduce
the detection area. You may even have to move the PIR to a different position
Detection range varies from day to day...
●The PIR Detector operates by sensing temperature changes caused by a person
moving through its detection zones. These temperature changes are measured
relative to the background temperature so on a colder day the PIR may appear more
sensitive than on a warmer day.
If you require advice on this product please contact the technical service helpline on: 01268 563066
(Lines open 9.00am to 5.00pm, Monday to Friday)

9
Maintenance
The product may be cleaned with a soft
damp cloth and then wiped dry. Do not
use abrasive, solvent based or aerosol
cleaners as this may damage and/or
discolour the product. Take care not to
accidentally move the detector head.
Do not allow water to enter or attempt to
clean inside the units.
Changing the PIR battery:
Change the PIR battery immediately the
low battery indication is noticed, (i.e. the
red LED behind the detector lens flashes 5
times after each movement detection).
Only fit a new Alkaline PP3 (6LR61) battery.
Disposal & Recycling
At the end of their useful life the
packaging and product should be
disposed of via a suitable Recycling
Centre. Do not dispose of with your
normal household waste.
DO NOT BURN.
Specification
PIR DETECTOR
Battery: 9V PP3 (6LR61) Alkaline battery
Battery life: Approx 12 months
(based on 20 activations per day and constant 15°C)
PIR detection range: 12m
PIR detection angle: 140°
Time on adjustment: 5 secs - 20 mins
Photocell adjustment: 5 lux to daylight
Protection: IP54
Operating Frequency: 868MHz
RF range: up to 200m (in open field conditions)
Operating temperature: -20°C to +35°C
Declaration
Novar ED&S hereby declares that this
Wirefree PIR Detector is in compliance
with the essential requirements and other
relevant provisions of the Radio and
Telecommunications Terminal Equipment
(R&TTE) directive, 1999/5/EC.

10
Guarantee
Novar ED&S undertakes to replace or repair at its discretion goods (excluding non
rechargeable batteries) should they become defective within 2 years solely as a result of
faulty materials and workmanship. Understandably if the product has not been installed,
operated or maintained in accordance with the instructions, has not been used appropriately
or if any attempt has been made to rectify, dismantle or alter the product in any way the
guarantee will be invalidated.
The guarantee states Novar ED&S Ltd’s entire liability. It does not extend to cover
consequential loss or damage or installation costs arising from the defective product.
This guarantee does not in any way affect the statutory or other rights of the consumer.
If an item develops a fault, the product must be returned to the point of sale with proof of
purchase, a full description of the fault and all relevant batteries (disconnected).
Friedland is a trademark of Novar ED&S.
Friedland, Novar Electrical Devices and Systems,
The Arnold centre, Paycocke Road, Basildon, Essex SS14 3E
Tel - 01268 563066 Fax 01268 563064
This manual suits for next models
1
Table of contents
Other FRIEDLAND Security System manuals

FRIEDLAND
FRIEDLAND SA1 Installation instructions

FRIEDLAND
FRIEDLAND SA5 User manual

FRIEDLAND
FRIEDLAND MA7 User manual

FRIEDLAND
FRIEDLAND MA6 User manual

FRIEDLAND
FRIEDLAND SA3 PLUS Installation instructions

FRIEDLAND
FRIEDLAND Bronze Installation instructions

FRIEDLAND
FRIEDLAND MA2 User manual

FRIEDLAND
FRIEDLAND SA5 Installation instructions

FRIEDLAND
FRIEDLAND PA4 Installation instructions

FRIEDLAND
FRIEDLAND MA10 User manual