RRAC099_REV_A04
5
© 2019 FRONT RUNNER VEHICLE OUTFITTERS
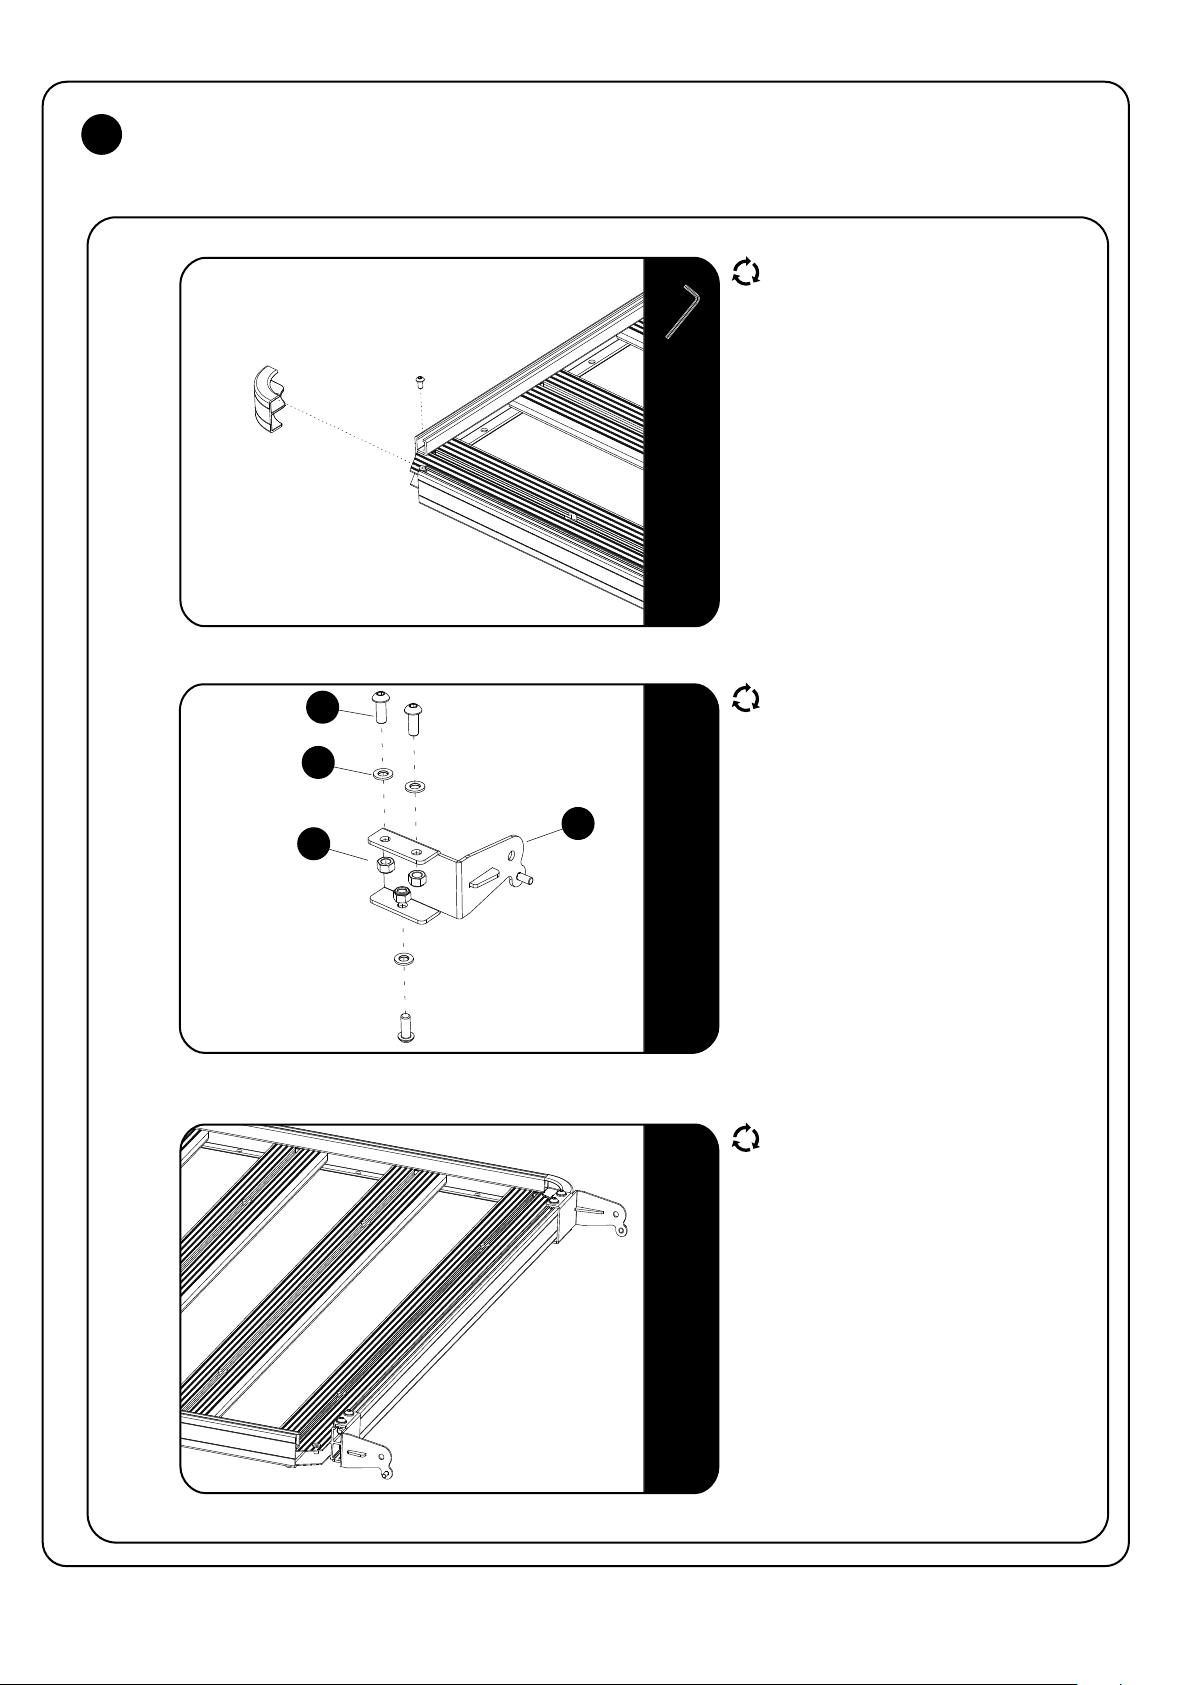
FIT AND SECURE THE LIGHT BAR - FRONT MOUNT
3
3.4
3.5
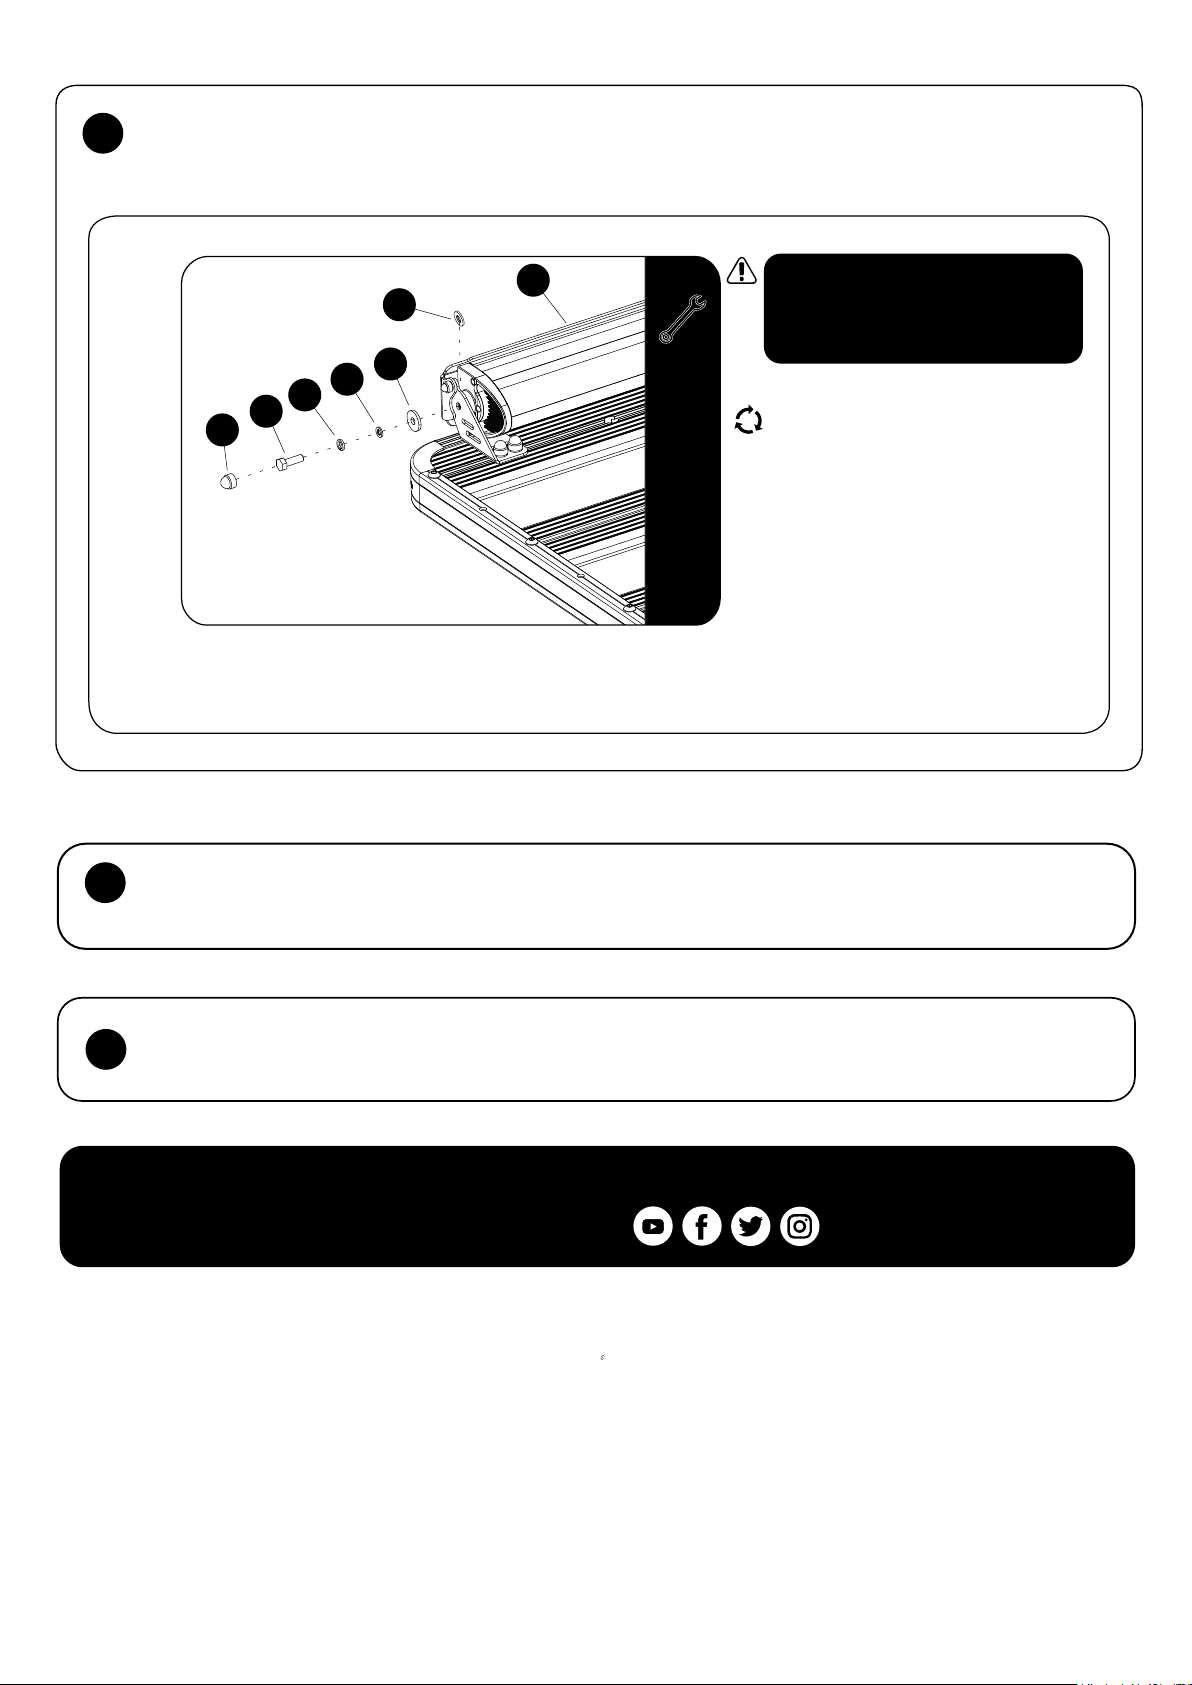
Secure the Light Bar (Item 14) onto the
Mounting Bracket using M8 x 19 x 2 Flat
Washers, M8 x 24.5 x 3 Flat Washers,
M8 x 16 x 1.6SS Flat Washers, M8 Spring
Washers and M8 X 25 Hex Bolts (Items
6, 4, 7 & 8).
Using a tape measure, center the Mounting
Brackets, Cover Assembly and Light Bar left
to right and fasten the Button Head Bolts
mentioned in 3.2.
Place M6 Nut Cups (Item 10) over each of the
M6 Nyloc Nuts and M8 Nut Caps (Item 9) over
each of M8 Hex Bolts Heads.
Wire the Light Bar to the vehicle according to
your personal preference or seek assistance
from an auto electrician.
Fasten the Front Cover (Item 2) to the two
Mounting Brackets using the four M6 Flat
Washers and two M6 Nyloc Nuts (Items 12 &
11). The Front Cover should still be able to
rotate after fastening, but should not open on
its own.
5mm
10mm
13mm
12
12
10
11
2
13
6
14
4
7
8
9
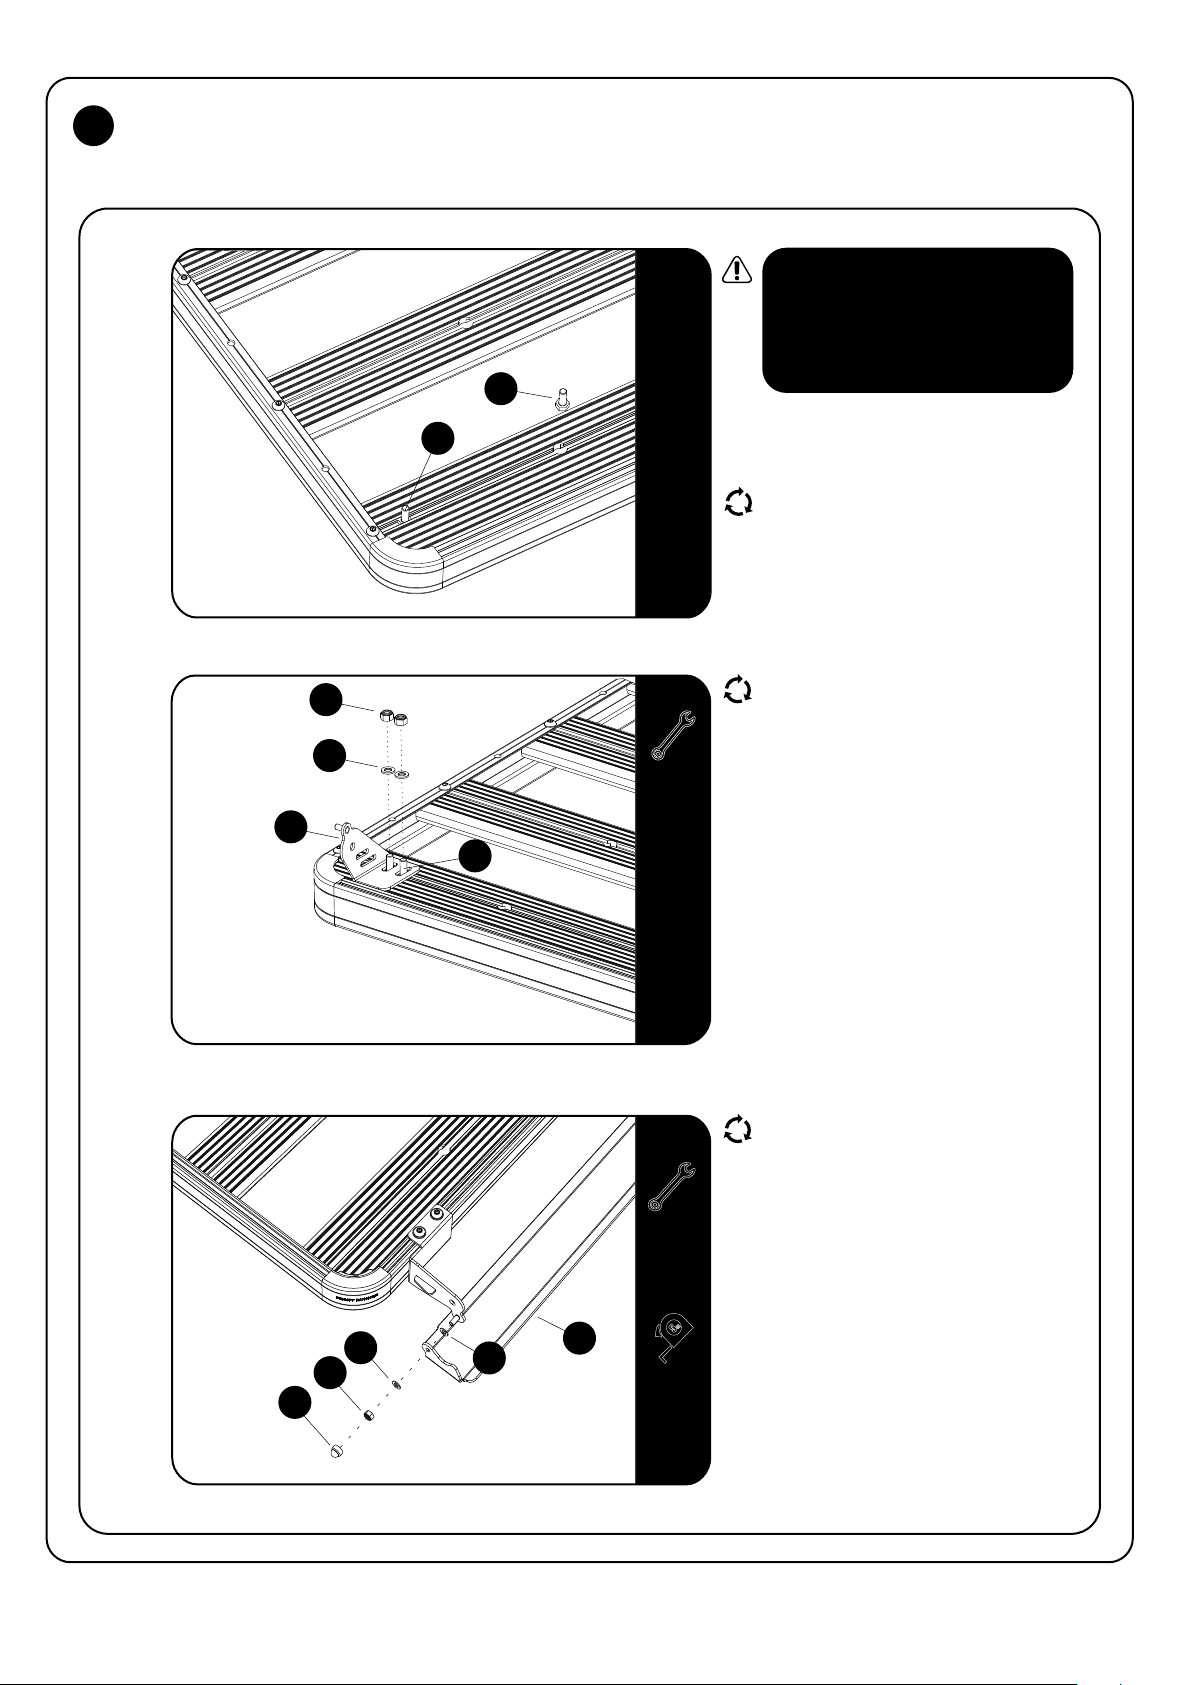
Test fit the Light Bar between the two
brackets. If there is a gap between the
light and the brackets use Item 13 to
fill the gap. This will prevent the Light
Cover from bowing.