manuals.online logo
Brands
  1. Home
  2. •
  3. Brands
  4. •
  5. Frontgate
  6. •
  7. Artificial Pine Tree
  8. •
  9. Frontgate Holiday 33027 User manual

Frontgate Holiday 33027 User manual

Drawing not to Scale
Wall Outlet
MIDDLE SECTION B
BOTTOM SECTION C
REMOTE CONTROL
and
PLUG-IN REMOTE
CONTROL RECEIVER
LEGS SET IN XSHAPE
TOP SECTION A
PARTS LIST
A. TOP
B. MIDDLE
C. BOTTOM
HARDWARE
A. TREE STAND QUANTITY 1 PC
B. 1/4” SCREWS FOR TREE STAND QUANTITY 5 PCS
C. POWER STRIP QUANTITY 1 PC
D.
E. PINE CONE ORNAMENT
REMOTE CONTROL W/ RECEIVER QUANTITY 1 SET
QUANTITY 2 PCS
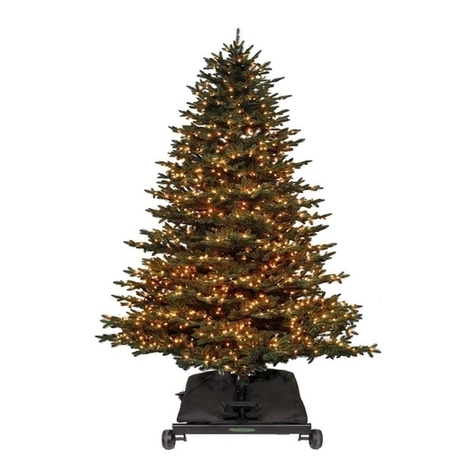
7.5’ FRASER FIR TREE - ITEM #33027
Step 1
Pull apart the legs of the stand so that they are “X” shaped.
Fasten the bottom screws to lock the stand into position.
Step 2
Insert the section (C) of the tree into the stand and tighten
screws on base to secure tree pole.
Step 3
Plug light set of (C) into power strip, plug power strip into
remote control receiver. Then, plug remote control receiver
into wall outlet.
Step 4
To shape your tree, start with the bottom most layer of
branches, with each branch start with the tips closest to the
pole and lift each tip up and out in alternating directions.
Repeat for each branch. It is recommended to shape section
(C) before adding section (B).
Step 5
Insert the section (B) of the tree into the section (C) of the
tree. Plug light set of (B) into power strip and repeat steps 4
and 5 for shaping.
Step 6
Insert the section (A) of the tree into the section (B) of the
tree. Plug light set of (A) into the section (B).
Step 7
To shape the top of the tree it will be necessary to gently bend
the branches downward to the desired angle before shaping
the tips.
SKU 33027 - 7.5’FRASER FIR TREE
5794 TIPS
METAL STAND
UL 1200 LIGHTS
MAX DIAMETER 63”
NUMBER OF PERSONS
RECOMMENDED FOR
ASSEMBLY: 2
ASSEMBLY INSTRUCTIONS
Step 1
Unplug all tree sections from power strip and unplug sections
(A) from section (B).
Step 2
Remove section (A) from section (B), gently press branches
upward and toward pole.
Step 3
Unplug section (B) from section (C) from powerstrip. Separate
section (B) from section (C) and hold upside down and
branches will fold toward the pole. It is recommended to
snuggly bind branches to the pole with a length of rope or
twine, This will allow for easy handling and storage.
Step 4
Untighten screws on stand and remove stand from section “C”.
Repeat step 3.
Step 5
Untighten screws on tree stand and fold flat.
Step 6
Place all tree sections, power strip, remote, and tree stand in
original box and tape shut. Store tree in cool dry area, storage
area temperature should not exceed 100ºF.
1. Light tree one section at a time as described in assembly instructions, so you can easily identify any bulbs that may be dislodged.
Push any loose bulbs back into their sockets.
2. Separate the branch tips to form a “V” shape and fluff the needles. Make sure each tip is spread out and no two branches are
touching each other. For best access to branches, shape each section prior to adding the next section as described in the initial
assembly instructions. You may want to wear cotton gloves when fluffing needles to avoid scratches and skin irritation.
3. Starting with the bottom row, position the branches parallel to the floor. Angle the tips slightly upward like they are growing
towards the sun. With each successive row, make the upward angle of the branches more pronounced. Position inner tips to hide
the center of the tree.
4. Arrange the uppermost section of the tree so that the tips are evenly spaced and pointing upward.
5. Step back and review the tree. Adjust branches and tips as neccessary to give the tree a fuller appearance (The tree may be shape
differently (upswept /downswept /etc.) pending on one’s preference.)
1. If entire tree lighting does not light, make sure power strip cords are securely inserted in a working wall outlet.
2. If an entire section of the tree does not light, please review following actions:
a. Check that all plugs within the tree are securely connected.
b. Check fuse in power strip to determine if it may need replacement. Caution: Note that a blown fuse indicates an electrical
overload or electrical short circuit. If the fuse is blown, unplug power strip from outlet. Also unplug any additional strings
or products may be attached to the power strip. Replace the fuse following manufacturer instructions with proper fuse
rating. If the replacement fuse blows, a short circuit may be present and the product should be discarded.
c. Check fuse in plug connection on end of each light string.(See section on replacing plug fuses in this document).
STORAGE TIPS
1. This is for decorative use only - do not immerse in water or expose to heat. Keep away from fire.
2. Please use water only for cleaning purpose.
3. When not in use, store neatly in a cool, dry location protected from sun light.
4. When the remote control has malfunctioned, please remove the power strip from the receiver and plug the power strip directly into
the wall.
CARE & MAINTENANCE INSTRUCTION
THE FOLLOWING STEPS WILL HELP MAKE YOUR TREE LOOK MORE REALISTIC
TROUBLE SHOOTING TIPS
3. If some individual lights do not light up, it may be due to becoming dislodged from the socket during assembly. Note those not
lit up; check for looseness and push any loose bulbs gently back into their socket. If they still do not light up, try a replacement
light bulb (supplied by manufacturer) and follow directions in section describing how to replace light bulbs.
When using electrical products, to avoid risk of fire burns, personal injury and electrical shock, basic precautions should always be
followed as stated below:
READ AND FOLLOW ALL SAFETY INSTRUCTIONS
1. Do not use seasonal products outdoors unless marked suitable for indoor and outdoor use. When products are used in outdoor
applications, connect the product to a Ground Fault Circuit interrupting (GFCI) outlet. If one is not provided, contact a qualified
electrician for proper installation.
2. This seasonal use product is not intended for permanent installation or use.
3. Do not mount or place near gas or electrical heaters, fireplace, candles or other similar sources of heat.
4. Do not secure the wiring of the product with staples or nails, or place on sharp hooks or nails.
5. Do not let lamps rest on the supply cord or on any wire.
6. For your safety, unplug the product when leaving the house, when retiring for the night or if left unattended.
7. This is an electrical product – not a toy! To avoid risk of fire, burns, personal injury and electric shock it should not be played
with or placed where small children can reach it.
8. Do not use this product for other than its intended use.
9. Do not hang ornaments or other objects from cord, wire or light string.
10. Do not close doors or windows on the product or extensions cords as this may damage the wire insulation.
11. Do not cover the product with cloth, paper or any material not part of the product when in use.
12. This product is equipped with push-in lamps. Do not twist the lamps.
13. This product employs overload protection (fuse). A blown fuse indicates an overload or short-circuit situation. If the fuse blows,
unplug the product from the outlet. Also unplug any additional strings or products that may be attached to the product. Replace
the fuse as per the user servicing instructions (follow product marking for proper fuse rating) and check the product. If the
replacement fuse blows, a short-circuit may be present and the product should be discarded.
14. Read and follow all instructions that are on the product or provided with the product.
CAUTION: To reduce the risk of fire and electric shock:
a. Do not install on trees having needles, leaves or branch coverings of metal or materials which look like metal, and:
b. Do not mount or support strings in a manner that can cut or damage wire insulation.
TROUBLE SHOOTING TIPS (Cont.)
IMPORTANT BASIC SAFETY INSTRUCTIONS
TO MAKE LIGHTINGS FLASH ON AND OFF:
Replace any one bulb in the string with the red-tipped flasher bulb if the flasher is included.
TO REPLACE LIGHT BULBS
CAUTION: FIRST UNPLUG YOUR PRODUCT FROM ANY POWER SOURCE.
1. To reduce the risk of overheating, replace burned-out light bulbs promptly. Use only
2.5 volt light bulbs only.
2. Grasp plug and remove from the receptacle or any other electrical outlet device. Do not
unplug by pulling on the cord.
3. Pull the light bulb and its attached plastic base straight out of light bulb holder.
4. Replace light bulb with only 2.5 volt super bright type light (provided with product).
5. If the new lamp base does not fit the replacement light bulb, follow the steps below
before step 4.
a. Remove the base of burned out light by straightening light leads and gently pull bulb out.
b. Thread metal leads of new lamp through hose in old base with one lead in each hold.
c. After lamp is fully inserted into base, bend each lead up, like other lights in the light set so that the leads will touch the
contacts inside the light socket.
TO REPLACE A FUSE:
CAUTION: FIRST UNPLUG YOUR PRODUCT FROM ANY POWER SOURCE.
1. Grasp plug and remove from the receptacle or other outlet device. Do not unplug by
pulling on cord.
2. Open fuse cover. Slide open fuse access cover on top of attachment plug towards plug’s
metal prongs or blades.
3. Remove fuse carefully.
4. Risk of fire. Replace fuse ONLY with 3 Amp 120 Volt fuse. (Provided with product).
5. Close fuse cover. Return the sliding fuse cover back to its former closed position on
attachment plug.
6. Risk of fire. Do not replace attachment plug because it contains a safety device (fuse)
that should not be removed. Discard product if the attachment plug is damaged
Please contact one of our Product Specialists for assembly assistance or questions at 1-800-537-8484 or email [email protected].
Specialists are available weekdays 8:00 a.m. to 8:00 p.m. EST or Saturday 9:30 a.m. to 6:00 p.m.
OPEN
OPEN
FUSE COVER
SLIDES FORWARD
3 AMP
120 VOLT
FUSES
PULL BULB UP
TO REMOVE
PUSH BULB DOWN
TO REPLACE
USER INSTRUCTIONS

Other Frontgate Artificial Pine Tree manuals
Frontgate Holiday Series User manual

Frontgate

Frontgate Holiday Series User manual

Frontgate Holiday 151867 CLE User manual

Frontgate

Frontgate Holiday 151867 CLE User manual

Frontgate Holiday 66637 User manual

Frontgate

Frontgate Holiday 66637 User manual

Frontgate SNOW ANGEL PINE 7.5ft User manual

Frontgate

Frontgate SNOW ANGEL PINE 7.5ft User manual

Frontgate Royal Spruce Pro Shape Tree User manual

Frontgate

Frontgate Royal Spruce Pro Shape Tree User manual

Frontgate Holiday VIRGINIA PINE COMMERCIAL User manual

Frontgate

Frontgate Holiday VIRGINIA PINE COMMERCIAL User manual

Frontgate OUTFITTING AMERICA'S FINEST HOMES 46037 CLE User manual

Frontgate

Frontgate OUTFITTING AMERICA'S FINEST HOMES 46037 CLE User manual

Frontgate Holiday 9ft DOWNSWEPT DOUGLAS TREE User manual

Frontgate

Frontgate Holiday 9ft DOWNSWEPT DOUGLAS TREE User manual

Frontgate Holiday 61547 User manual

Frontgate

Frontgate Holiday 61547 User manual

Frontgate Hoiday 61367 MUL User manual

Frontgate

Frontgate Hoiday 61367 MUL User manual

Frontgate 46027 CLE User manual

Frontgate

Frontgate 46027 CLE User manual

Frontgate Holiday 61327 User manual

Frontgate

Frontgate Holiday 61327 User manual

Frontgate Holiday 142067 CLE User manual

Frontgate

Frontgate Holiday 142067 CLE User manual

Frontgate Holiday Grand Noble 147677 CLE User manual

Frontgate

Frontgate Holiday Grand Noble 147677 CLE User manual

Frontgate 61707 User manual

Frontgate

Frontgate 61707 User manual

Frontgate Holiday Series User manual

Frontgate

Frontgate Holiday Series User manual

Frontgate Holiday 151883 CLE User manual

Frontgate

Frontgate Holiday 151883 CLE User manual

Frontgate Holiday 45767 User manual

Frontgate

Frontgate Holiday 45767 User manual

Frontgate Holiday 45827 User manual

Frontgate

Frontgate Holiday 45827 User manual
Frontgate Holiday 142137 MUL User manual

Frontgate

Frontgate Holiday 142137 MUL User manual

Popular Artificial Pine Tree manuals by other brands
Martha Stewart Living TV30P4598C01 quick start guide

Martha Stewart Living

Martha Stewart Living TV30P4598C01 quick start guide

Holiday Living W14L0099 manual

Holiday Living

Holiday Living W14L0099 manual

Home Accents Holiday TY454-1511-0 Use and care guide

Home Accents Holiday

Home Accents Holiday TY454-1511-0 Use and care guide

Polygroup TV50M3AVBL00 Assembly instructions

Polygroup

Polygroup TV50M3AVBL00 Assembly instructions

Home Accents Holiday 1003144371 manual

Home Accents Holiday

Home Accents Holiday 1003144371 manual

GE Just Cut Asheville Fir Assembly instructions

GE

GE Just Cut Asheville Fir Assembly instructions

Polygroup 915675 Assembly instructions

Polygroup

Polygroup 915675 Assembly instructions

Costway CM24135 user manual

Costway

Costway CM24135 user manual

Polygroup TV50M4G26C01 Assembly instructions

Polygroup

Polygroup TV50M4G26C01 Assembly instructions

Polytree M-P101005 Assembly instructions

Polytree

Polytree M-P101005 Assembly instructions

Polygroup TG90P3A45S05 Assembly instructions

Polygroup

Polygroup TG90P3A45S05 Assembly instructions

Trim a Home 0-03431353-6 owner's manual

Trim a Home

Trim a Home 0-03431353-6 owner's manual

HD DCCT0901 quick start guide

HD

HD DCCT0901 quick start guide

Coopers of Stortford H955 Instructions for use

Coopers of Stortford

Coopers of Stortford H955 Instructions for use

anko 43310852 Assembly instructions

anko

anko 43310852 Assembly instructions

Polygroup AR-P18002 Assembly instructions

Polygroup

Polygroup AR-P18002 Assembly instructions

Polygroup TGF0M3P07C00 quick start guide

Polygroup

Polygroup TGF0M3P07C00 quick start guide

Polygroup TG76P4724D03 Assembly instructions

Polygroup

Polygroup TG76P4724D03 Assembly instructions

manuals.online logo
manuals.online logoBrands
  • About & Mission
  • Contact us
  • Privacy Policy
  • Terms and Conditions

Copyright 2025 Manuals.Online. All Rights Reserved.