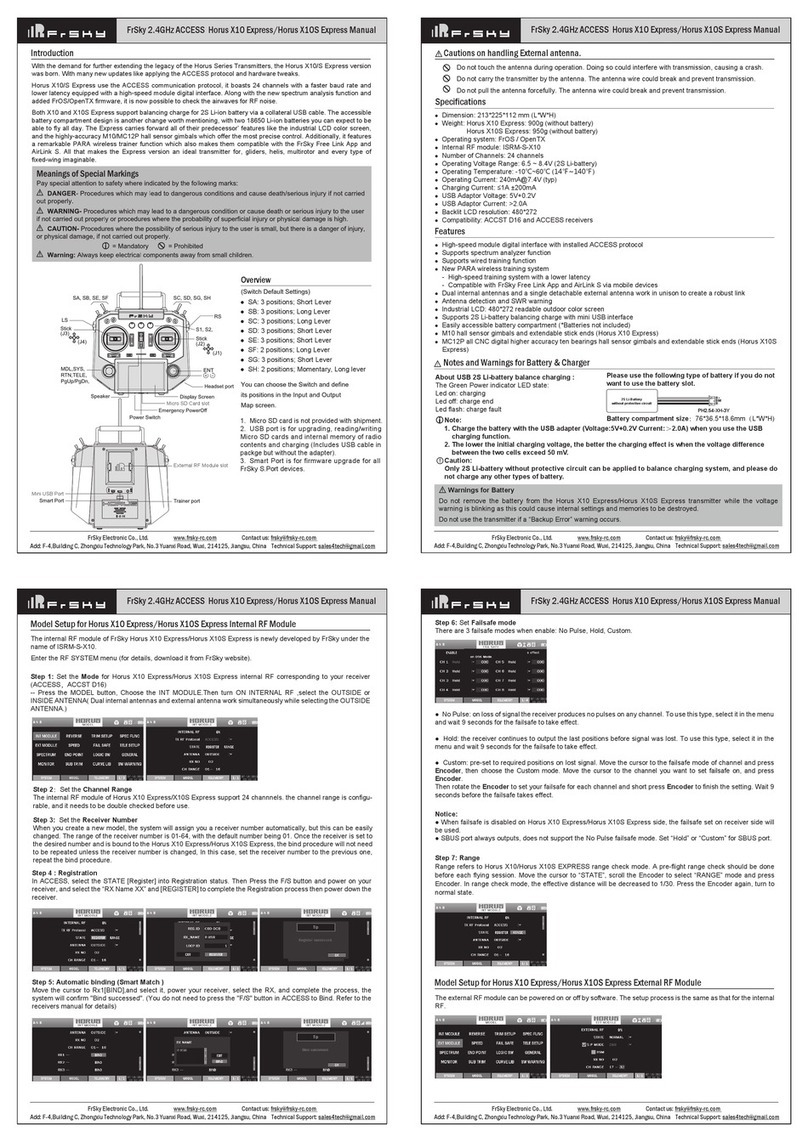
Step 5:
Automatic binding (Smart Match )
Move the cursor to Rx1[BIND],and select it, power your receiver, select the RX, and complete the process, the
system will confirm "Bind succeed". (You do not need to press the "F/S" button in ACCESS to Bind. Refer to the
receivers manual for details).
Add:
F-4,Building
C,
Zhongxiu
Technology
Park,
No.3
Yuanxi
Road,
Wuxi,
214125, Jiangsu, China Technical Support: [email protected] Version
1.0
FrSky TANDEM X20/X20 HD/X20 Pro Manual
Add:
F-4,Building
C,
Zhongxiu
Technology
Park,
No.3
Yuanxi
Road,
Wuxi,
214125, Jiangsu, China Technical Support: [email protected] Version
1.0
FrSky TANDEM X20/X20 HD/X20 Pro Manual
●No Pulse: on loss of signal the receiver produces no pulses on any channel. To use this type, select it in the menu
and wait 9 seconds for the failsafe to take effect.
● Hold: the receiver continues to output the last positions before signal was lost. To use this type, select it in the
menu and wait 9 seconds for the failsafe to take effect.
● Custom: pre-set to required positions on lost signal. Move the cursor to the failsafe mode of channel and press
Encoder, then choose the Custom mode. Move the cursor to the channel you want to set failsafe on, and press
Encoder.
Then rotate the Encoder to set your failsafe for each channel and short press Encoder to finish the setting. Wait 9
seconds before the failsafe takes effect.
Notice:
● When failsafe is disabled on TANDEM X20 side, the failsafe set on receiver side will be used.
● SBUS port always outputs, does not support the No Pulse failsafe mode. Set “Hold” or “Custom” for SBUS port.
Step 7:
Range
Range refers to TANDEM X20 range check mode. A pre-flight range check should be done before each flying
session. Move the cursor to “STATE”, scroll the Encoder to select “RANGE” mode and press Encoder. In range
check mode, the effective distance will be decreased to 1/30. Press the Encoder again, turn to normal state.
Add:
F-4,Building
C,
Zhongxiu
Technology
Park,
No.3
Yuanxi
Road,
Wuxi,
214125, Jiangsu, China Technical Support: [email protected] Version
1.0
FrSky TANDEM X20/X20 HD/X20 Pro Manual
Step 6:
Set Failsafe mode
There are 3 failsafe modes when enable: No Pulse, Hold, Custom.
Where to Fly
We recommend that you fly at a recognized model airplane flying field. You can find model clubs and fields by asking
your nearest hobby dealer.
CE
The product may be used freely in these countries: Germany, UK, Italy, Spain, Belgium, Netherlands, Portugal,
Greece, Ireland, Denmark, Luxembourg, Austria, Finland, Sweden, Norway, France and Iceland.
To ensure the safety of yourself and others, please observe the following precautions.
Have regular maintenance performed.
Although your
Taranis X9D Plus 2019/Taranis X9D Plus SE 2019
protects the model memories with non-volatile EEPROM memory (which does not require periodic replacement) and
of a battery, it still should have regular check-ups for wear and tear. We recommend sending your system to your
FrSky Service Center annually during your non-flying-season for a complete check-up and service.
Using a fully charged battery (DC 6.5~8.4V). A low battery will soon die, causing loss of control and a crash. When
you begin your flying session, reset your transmitter’s built-in timer, and during the session pay attention
to the duration of usage. Also, if your model used a separate receiver battery, make sure it is fully charged before
each flying session.
Stop flying long before your batteries become over discharged. Do not rely on your radio’s low battery
warning systems, intended only as a precaution, to tell you when to recharge. Always check your transmitter
and receiver batteries prior to each flight.
FLYING SAFETY
Warning:
Battery
FrSky is continuously adding features and improvements to our radio systems. Updating (via USB Port or the Micro
SD card) is easy and free. To get the most from your new transmitter, please check the download section of the
FrSky website for the latest update firmware and guide for adjusting your sticks. (www.frsky-rc.com)
Updates
frequency link to the model, resulting in loss of control.
Do not grasp the transmitter's antenna during flight. Doing so may degrade the quality of the radio frequency
transmission and could result in loss of control.
As with all radio frequency transmissions, the strongest area of signal transmission is from the sides of the
transmitter's antenna. As such, the antenna should not be pointed directly at the model. If your flying style creates
this situation, easily move the antenna to correct this situation.
Before taxiing, be sure to extend the transmitter antenna to its full length.
A collapsed antenna will reduce your flying range and cause a loss of control. It is a good idea to avoid pointing
the transmitter antenna directly at the model, since the signal is weakest in that direction.
Don’t fly in the rain! Water or moisture may enter the transmitter through the antenna or stick openings and
cause erratic operation or loss of control. If you must fly in wet weather during a contest, be sure to cover your
transmitter with a plastic bag or waterproof barrier. Never fly if lightning is expected.
Always pay particular attention to the flying field’s rules, as well as the presence and location of spectators,
the wind direction, and any obstacles on the field. Be very careful flying in areas near power lines, tall buildings, or
communication facilities as there may be radio interference in their vicinity.
At the flying field
To prevent possible damage to your radio gear, turn the power switches on and off in the proper sequence:
1. Pull throttle stick to idle position, or otherwise disarm your motor/engine.
2. Turn on the transmitter power and allow your transmitter to reach its home screen.
3. Confirm the proper model memory has been selected.
4. Turn on your receiver power.
5. Test all controls. If a servo operates abnormally, don’t attempt to fly until you determine the cause of the problem.
6. Start your engine.
7. Complete a full range check.
8. After flying, bring the throttle stick to idle position, engage any kill switches or otherwise disarm your motor/engine.
If you do not turn on your system on and off in this order, you may damage your servos or control surfaces, flood your
engine, or in the case of electric-powered or gasoline-powered models, the engine may unexpectedly turn on and
cause a severe injury.
Make sure your transmitter can’t tip it over. If it is knocked over, the throttle stick may be accidentally moved,
causing the engine to speed up. Also, damage to your transmitter may occur.
In order to maintain complete control of your aircraft it is important that it remains visible at all times. Flying
behind large objects such as buildings, grain bins, etc. must be avoided. Doing so may interrupt the radio
Model Setup for TANDEM X20 External RF Module
The external RF module can be powered on or off by software. The setup process is the same as that for the internal
RF.
This equipment has been tested and found to comply with the limits for a Class B digital device, pursuant to part
15 of the FCC Rules
FCC
FCC Statement:
Any Changes or modifications not expressly approved by the party responsible for compliance could void the user’s
authority to operate the equipment.
This device complies with part 15 of the FCC Rules. Operation is subject to the following two conditions: (1) This device may
not cause harmful interference,and (2) this device must accept any interference received, including interference that may
cause undesired operation.
Note: This equipment has been tested and found to comply with the limits for a Class B digital device, pursuant to part 15 of
the FCC Rules. These limits are designed to provide reasonable protection against harmful interference in a residential
installation. This equipment generates uses and can radiate radio frequency energy and, if not installed and used in
accordance with the instructions, may cause harmful interference to radio communications. However,there is no guarantee that
interference will not occur in a particular installation. If this equipment does cause harmful interference to radio or television
reception, which can be determined by turning the equipment off and on, the user is encouraged to try to correct the
interference by one or more of the following measures:
—Reorient or relocate the receiving antenna.
—Increase the separation between the equipment and receiver.
—Connect the equipment into an outlet on a circuit different from that to which the receiver is connected.
—Consult the dealer or an experienced radio/TV technician for help.
ISED RSS Warning/ISED RF Exposure Statement
ISED RSS Warning: This device complies with Innovation, Science and Economic Development Canada licence‐
exempt RSS standard(s). Operation is subject to the following two conditions: (1) this device may not cause interference, and
(2) this device must accept any interference, including interference that may cause undesired operation of the device.
Le présent appareil est conforme aux CNR d'ISED applicables aux appareils radio exempts de licence.
L'exploitation est autorisée aux deux conditions suivantes: (1) l'appareil ne doit pas produire de brouillage, et (2)
l'utilisateur de l'appareil doit accepter tout brouillage radioélectrique subi, même si le brouillage est susceptible d'en
compromettre le fonctionnement.
This device meets the government's requirements for exposure to radio waves. This device is designed and
manufactured not to exceed the emission limits for exposure to radio frequency (RF) energy set by the Federal Communications
Commission of the U.S. Government.
The exposure standard for wireless devices employs a unit of measurement known as the Specific Absorption Rate, or SAR.
The SAR limit set by the IC is 1.6 W/kg. *Tests for SAR are conducted using standard operating positions accepted by the IC
with the device transmitting at its highest certified power level in all tested frequency bands.
This device has been tested and meets the IC RF exposure guidelines for use with an accessory that contains no metal and the positions
the device a minimum of 0 mm from the body .
Cet appareil répond aux exigences du Gouvernement en matière d'exposition aux ondes radio.La conception et la fabrication de cet
équipement ne doivent pas dépasser les limites de rayonnement énergétique des radiofréquences (RF) établies par la Federal
Communications Commission des États - Unis.
La norme d'exposition pour les appareils sans fil utilise une unit é de mesure appelée Absorbance spécifique (SAR).La limite SAR
fixée par IC est de 1,6 W / kg.* L'essai SAR a été effectué à l'aide d'une position d'exploitation normalisée approuvée par le ci et
l'équipement a été transmis dans toutes les bandes d'essai à son niveau de puissance maximal certifié.
Cet équipement a été testé conformément aux lignes directrices sur l'exposition aux RF de l'IC pour les accessoires non métalliques
et doit être situé à au moins 0 mm de la carrosserie du véhicule.
RF Exposure Information (SAR) :

