manuals.online logo
Brands
  1. Home
  2. •
  3. Brands
  4. •
  5. Frymaster
  6. •
  7. Fryer
  8. •
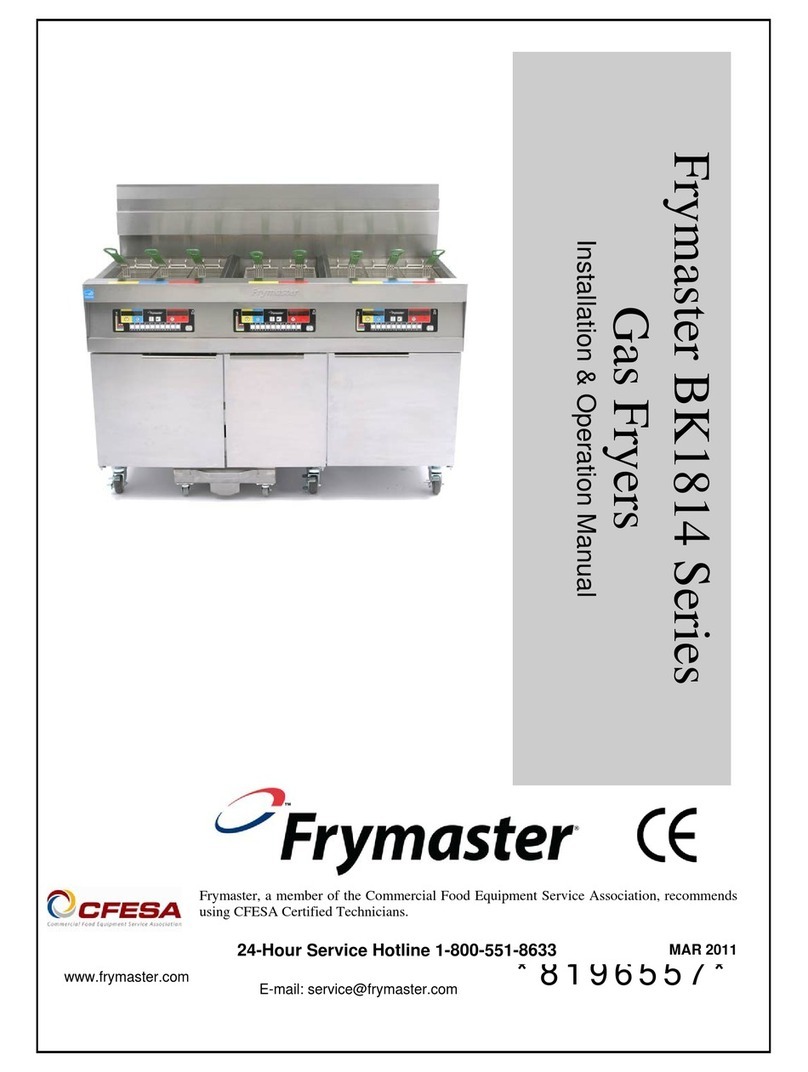
  9. Frymaster Pro H55-Series Product manual

Frymaster Pro H55-Series Product manual

Technical Reference Manual
Student Name
Instructor Name
*8197840*
Date: ___/___/___
8700 Line Avenue,
Shreveport, LA 71106
800-551-8633
Email: [email protected]om
Web sites: www.frymaster.com
© Welbilt Foodservice 2019
2020 Edition 12/5/2019
Interactive features are embedded
throughout this manual. e function
of the feature is based on the form of
the book: electronic books have linked
video and documents; paper copies
have QR codes, linking to Web-posted
material.
You will see images (like the non-
linked examples above) labeled Video
Content. Click on the desired image
and the related video will play on your
internet-connected device.
QR codes connect to Service and Parts
manuals. e title next to the QR code
is hyper linked. Click on the title while
viewing the manual on a connected
device and you will be taken to the de-
sired technical manual.
e Technical Reference Manual and
other service and parts manuals are
published on the ash drive provided in
the training class.
Using the Interactive Features in this Manual
Scan the bar code at left to be
taken to a service manual.
Pictures labeled video con-
tent are linked to Web-based
videos. Click on the image to
see the video while viewing
the manual on an internet-
connected device.
Frymaster Tech Reference
Frymaster Support 1-1
High-Eciency Gas 2-1
HEElectric 3-1
AutoFilter 4-1
FilterQuick Touch 5-1
Codes/Charts/Tables 6-1
Table of Contents
1-1
Chapter 1: Frymaster Support
Frymaster makes information available in a number of
formats:
• Training classes held all over
the country.
• Call Center service techs can be
reached at 800-551-8633 or via
email at frytechsupport@welbilt.
com
• Manuals, bulletins, forms and instructions are posted to
the service literature page of Frymaster.com
• Technical and operational videos are posted to Frymas-
ter’s YouTube channels.
• Interactive training
modules are posted to
Frymaster’s Google
Classroom.
• Throughout this
manual, video links are
identified and reach-
able by clicking when
reading on an internet
connected computer
or tablet. Manuals are
reachable by clicking
titles or scanning QR
codes.
Frymaster Call Center Techs: (Back row, from left) Bobby Boracz, Darryl
Tucker, Josepher Brown, Larry Shephard. (Front row, from left) Terry Loux,
Robert Hammond, Thomas Mitchell, Lyn Sealy, Dan Griffith, Brad Rowe,
Dave Glassy
Frymaster Support
1-2
Frypot Serial Number Placement
The serial number is etched inside the frypot. Aflashlight held at a sharp angle is useful in find-
ing and reading the number.
The frypot serial number is located inside the frypot on the front wall.
Information on the fryer un-
der repair is essential when
seeking help from Frymaster’s
Technical Call Center. The
rating plate is the first place to
look.
The serial number, annotated
above, provides the fryer’s
model year and the month it was
built, often vital information
when dealing with individual
components or software.
The rating plate, shown at right,
also includes the model number,
which reveals the fryer’s control-
lers and other features. The serial
number can also be found in the
frypot (shown below). The model
number is annotated in the Charts
and Tables section.
Year Fryer Was Built
13 - 2013
02 - 2002
Production Sequence
Family Model
Month Fryer Was Built
01 - January
04 - April
12 - December
Reading Rating Plates,
Model Numbers
2-1
Chapter 2: High-Efficiency Gas
• Troubleshooting • Frypots
• Ignition Components • Burners
• Legacy Controllers
H55 McD LOV Service McD LOV Parts OCF Parts
FQ Service FQ Parts
H55 LOV
FilterQuick
OCF
High-Efficiency Gas
2-2
The closed burner and ignition system on 50 and 30lb high-efficiency gas fryers work the
same. The fryers in the platforms shown here share a number of common ignition parts:
•Interface boards behind the controller hold relays that send 24VAC to the ignition system.
• Spark modules open the gas valve, create spark and check for flame in the burner.
• Blowers enhance the operation of the closed burner.
• Temperature probes in the frypot monitor oil via resistance and report back to the interface
board and then the controller display.
• Hi-limit probes open to prevent further heating if the oil becomes too hot.
The LOV and FilterQuick fryers have 30lb frypots and additional features for automatic
filtering and topoff. The OCF gas has 30lb frypots, automatic top off and prompted manual
filtering. Those features are described in more detail in an online course. However, the burner
and ignition system works the same as the earlier high efficiency gas fryers. .
The problems that prevent any of these fryers from heating will be similar and largely the
troubleshooting techniques are the same.
The following pages show inside views of the cabinet and the control boxes of the high-
efficiency gas fryers.
The cabinet interior of an Oil Conserving Fryer or OCF exhibits the same ignition
components as the 50-55, LOV and FilterQuick fryers.
Blower
Igniter
Gas
Valves
Gas
Valves
Spark
Module
High-Efficiency Gas
2-3
FQ3000
FilterQuick
Gas
Valve
Blower Igniter
Gas
Valve
Spark
Module
Behind the Doors of High-Efficiency Gas Fryers
High-Efficiency Gas
2-4
H55
CM 3.5
Controller
Blower
Gas
Valve
Igniter
High-Efficiency Gas
2-5
MIB
Oil
Discharge
Valve
McDonald’s LOV
M3000
JIB
Filter
Lights
Blower
Spark
Module
Gas
Valve
Igniter
Site Glass
Video Content
Spark
Module
Spark
Module
Spark
Module
Spark
Module
High-Efficiency Gas
2-6
OCF
Blower
Gas
Valve
Spark
Module
Igniter
Gas
Valve
High-Efficiency Gas
2-7
An H55 full vat control box.
Spark
Module
Interface
Board
Heat
Relay
Test
Points
A FilterQuick control box
Heat
Relay
Interface
Board
Test
Points
Oil is Back
Used to
detect
returning oil
and described
elsewhere.
This board
can halt
the ignition
system.
Heat
Relay
Interface
Board
Test
Points
An OCF control box. Oil filtration is manual; there is no OIB board.
Control Boxes
Control boxes, behind the controllers, contain the components that monitor the vat
temperatures and control the heat: interface boards, heat relays and in some cases the
spark module.
High-Efficiency Gas
2-8
FilterQuick transformer box.
H255 transformer box.
Blower Motor
The blower is an integral component in the combustion system.
It’s on when the fryer is calling for heat and the air flow it creates
enhances the burn. Proper air flow helps produces microamps
measured by the spark module. A poorly performing fan can
cause a spark module lockout.
A blower in an H55 fryer.
Components in the Ignition System
A sequence of successful events by a series of components is necessary for the fryer to fire.
Below we examine the components.
Spark modules for the FilterQuick 3000 are below the control box in metal boxes.
A LOV control box.
Oil is Back
Used to
detect
returning oil
and described
elsewhere.
This board
can halt
the ignition
system.
Test
Points
Heat
Relays
Transformer Boxes
Filter
Transformer
Filter Relay
Controller
Transformer Controller
Transformer
Controller
Transformer
Controller
Transformer
Filter
Transformer
Reset Switch
Relay
High-Efficiency Gas
2-9
Gas Valve
Frymaster’s high-efficiency gas fryers use Honey-
well valves. It is opened by current flowing through
the spark module.
Testing Gas Valves
The resistance across the contacts for the coils of the
Honeywell valve: 400-650 ohms on the diode setting.
Safety Drain Switch
Drain switches (here shown on an
H55 fryer) break the 24VAC to
the gas valve, preventing the fryer
from heating if the drain valve is
open. These switches are not on
automatically operated valves on the
LOV and FilterQuick fryers. Safety drain switch on H55 drain valve.
Burners
The service replacement burner
for the H55 is fitted with two gas
inlets and ceramics that function
with natural gas or propane. This
approach means the burner will fit
either side of a vat on a natural or
propane-fueled fryer. The same
approach is taken with smaller
service burners for 30-lb frypots.
The burner must have an airtight fit to heat efficiently. Insula-
tion strips are wrapped around the burner rails (above) to en-
sure a good seal. The radiants of a burner glow blue at startup.After approximately 1 minute, a bright orange
glow (right above) should appear. If the burner remains blue,there’s an improper gas/air mixture.
High-Efficiency Gas
2-10
Ignitors
The condi-
tion of the
ignitor and its
installation are
critical factors
in the efficient
operation of a
high-efficiency
burner. An
ignitor is placed into a frypot combustion chamber
with the insulating gasket held in place. The igniter’s
components should be parallel to the face of the
burner.
Spark rod
Flame sensor
Enrichment tube
A Solaronics igniter, introduced in 2012, is
shown.
Removable
orifice
Service Interface Boards
J1
J2
J3
1
2
3
4
5
67
High-Efficiency Gas Interface Board. LED’s are numbered and identified on page 2-11 chart.
High-Efficiency Gas
2-11
The interface board holds the circuitry to execute controller commands to the fryer.
The board design on 2-10 features removable relays, fuses and LEDs arrayed around the board.
LED Indications
LED* Illumination indicates
124VAC to left gas valve
224VAC to left module
324VAC from transformer
424VAC to right module
524VAC to right or full-pot gas
valve
612 VAC
7Proves blower is working (CE)
IMPORTANT: Disconnect harness
from the controller or interface board
before testing probe circuit.
Test Points
J1 Test Points
(Split Vat Left Side) J3 Test Points
(Full Vat & Split Vat Right Side)
1
21
2
3
4
5
1- High Limit – Pin 9 to gas
valve wire 12C
2-Probe–Pin 2 to Pin 6
1- 12 Volt – Pin 1 to Pin 3
2- 24 Volt – Pin 8 to Ground
3-HighLimit–Pin 9 to gas
valve wire 13C
4- Probe – Pin 2 to Pin 6
(Disconnect 15-pin harness.)
5- Line Voltage In – Pin 11 to
Ground
6
6- Line Voltage to blower – Pin 12
to Ground
*Numbered on page 2-10
High-Efficiency Gas
2-12
Heat relays operate on 12 volts DC from the
controller. The relays are dual-pole/dual-throw and
switch both the 24 VAC to the ignition/gas circuit
and 120 VAC to the combustion fan motor.
The relays are removable, which allows inspec-
tion and testing.
Use caution when installing. There is no stud to
prevent upside down placement, which damages
the controller and the interface board.
Line VAC from
J3 Pin 11
120 VAC
from Pin 12
12 VDC (-)
Coil Voltage
Not used
24 VAC from
Pin 8 of J3
24 VAC Out
to PWR
12 VDC (+)
Coil Voltage
Not used
Different Spark Modules
The style and brand of ignition module has changed
over the years. Honeywell units are the current mod-
ule and the most frequently used. Capable Controls
modules were introduced in December of 2014 and
stayed in use until December of 2015.
Capable Controls doesn’t produce a dual-spark
module and the units have a different flame sensing
specification.
Capable Control modules and Honeywells are inter-
changeable. Replacing a Honeywell with a Capable
Control requires a kit.
Fenwal modules were introduced in 2017 for use in
the 30-lb fryers. Fenwal spark modules
Heat Relay Socket
Heat Relays
High-Efficiency Gas
2-13
Ignition Module Timelines
Ignition Module Functions:
1. Produces high voltage for spark.
2. Senses the flame.
3. Provides 24V to gas valve.
4. Provides the Alarm Circuit (24V) to the
controller.
5. Fenwal modules are used in 30lb fryer pots:
LOV, OCF, FilterQuick
2000 —2014 — Current
Use Domestic
Spark Outputs Single/Dual
Fused No
Lockout 0.6
Optimal UA output 2.5-3.5
2014 — 2015
Use All
Spark Outputs Single
Fused No
Lockout 0.5
Optimal UA output 1.7-3.0
LOV, FQ, OCF Only
June 17 — Current
Use All
Spark Outputs Single
Fused No
Lockout 0.15
Optimal UA output 0.4- 0.8
TD = Time Delay Relay (4 Seconds)
HV = High Voltage
Power Flow Through Ignition Module
The heat relay provides power to ignition module.
Power flows to the contacts of the internal relay. If
the module does not energize, the alarm circuit is
energized.
Power flows through the coil of the internal relay
to ground for at least the period of the time delay (4
seconds).
The relay stays closed, if all components are
operating, and allows 24 VAC to flow through the
system, and to the gas valve.
The blower is now running, the module is sparking,
the gas valve is open and a flame is in the burner.
Once a flame is in the burner, the flame sensor
current has to be above the lockout minimum for the
module. This provides the hold for the relay coil.
Should the flame sensor lose flame current, the
module will try to relight the burner for the period of
the time delay. If flame sensing is not re-established,
the module will lockout.
Inside the Ignition Module
TD
Out to
Gas Valve
To Alarm
25 V +
GND
HV
Ignition Wire Flame Sensor
Coil
High-Efficiency Gas
2-14
Voltage From Ignition Module
From Blue Module 60-80 VAC
From Red Module 190-210 VAC
Flame Rectification
The spark module checks for the presence of flame in the burner by sending an AC signal
(graphic above) into the flame. It is rectified there to DC and detected by the sensing rod on the
igniter assembly. With sufficient flame, a path to ground is created and the signal is provided to
prevent module lock out and keep the gas valve open. With insufficient flame, the ground path
isn’t created and the module routes the 24 volts from the gas valve to the alarm circuit.
Frymaster’s
controllers use
a temperature
probe rather than
a thermostat.
The probe’s re-
sistance changes
as the tempera-
ture changes.
The controls
recognize the re-
sistance change
and react.
What Causes Problems
If the probe’s resistance reading falls between 1000-1950 —
well outside acceptable operating temperatures or the wires
are shorted — the controller displays a error message:
CM3.5: Prob
M2000 Probe Failure
FQ3000:Temp Probe Failure
Touchscreen: Probe Error (See Chart: 6-8, 6-9)
1
2
3
4
5
6
7
8
9
10
11
12
13
14
15
The pin counting starts at the ridge (shown
in red) on the 15-pin probe plug (above) and
at the top right on the 20-pin SMT plug.
Probes
Pin 8
Pin 2
H55 temp probe
High-Efficiency Gas
2-15
A socket with a
cutout to accom-
modate wiring is
necessary when
installing a probe
or high-limit:7/8”
(815-0386).
High-Limit Thermostat
The high-limit breaks voltage to the gas valve, prevent-
ing the fryer from dangerously overheating. It acts as a
normally closed switch, which opens when exposed to
temperatures above 425°F ±12°F / 218°C ±7°C. The
high-limit automatically resets when the oil temperature
drops below 350°F / 177°C.
High-Lmiit
Heating Frypots
Air flows through the plenum and into
the sealed burners. Heat is applied to
the side of the pot and exhaust gases
flow along the side of the pot, to the
flue and up.
Air from plenum
Ignited gas-air mixture in burner
Heated air flowing across pot,
out flue
Flue temperatures
are 800 to 850°F
(427 to 454°C)
Failure to maintain a clean path for the flue gasses to escape the fryer leads to problems for
hoods and fryers.

Other manuals for Pro H55-Series

2

This manual suits for next models

3

Other Frymaster Fryer manuals

Frymaster Enodis FPRE14-7 User manual

Frymaster

Frymaster Enodis FPRE14-7 User manual

Frymaster RE Series User manual

Frymaster

Frymaster RE Series User manual

Frymaster MASTERJET J1C Series Guide

Frymaster

Frymaster MASTERJET J1C Series Guide

Frymaster FLYMASTER KSCFH18E User manual

Frymaster

Frymaster FLYMASTER KSCFH18E User manual

Frymaster OCF30 Series User manual

Frymaster

Frymaster OCF30 Series User manual

Frymaster easyTouch FilterQuick FQG60T User manual

Frymaster

Frymaster easyTouch FilterQuick FQG60T User manual

Frymaster SR42 Series, SR52 Series, SR62 Installation and operating instructions

Frymaster

Frymaster SR42 Series, SR52 Series, SR62 Installation and operating instructions

Frymaster Enodis BIELA14 LOV Series User manual

Frymaster

Frymaster Enodis BIELA14 LOV Series User manual

Frymaster Pro H55-Series User manual

Frymaster

Frymaster Pro H55-Series User manual

Frymaster 47 Series User manual

Frymaster

Frymaster 47 Series User manual

Frymaster SM5020G User manual

Frymaster

Frymaster SM5020G User manual

Frymaster H52 Series User manual

Frymaster

Frymaster H52 Series User manual

Frymaster H14SC Manual

Frymaster

Frymaster H14SC Manual

Frymaster XFPRE80 Guide

Frymaster

Frymaster XFPRE80 Guide

Frymaster FilterQuick FQE30-T Manual

Frymaster

Frymaster FilterQuick FQE30-T Manual

Frymaster Pro Series Guide

Frymaster

Frymaster Pro Series Guide

Frymaster BIELA14-T Series User manual

Frymaster

Frymaster BIELA14-T Series User manual

Frymaster Universal Holding Cabinet User manual

Frymaster

Frymaster Universal Holding Cabinet User manual

Frymaster RE E4 Series User manual

Frymaster

Frymaster RE E4 Series User manual

Frymaster YFPRE1817E User manual

Frymaster

Frymaster YFPRE1817E User manual

Frymaster 1814E Series User manual

Frymaster

Frymaster 1814E Series User manual

Frymaster FR2 User manual

Frymaster

Frymaster FR2 User manual

Frymaster DECATHLON H55 User manual

Frymaster

Frymaster DECATHLON H55 User manual

Frymaster LOV BIEL14 SERIES User manual

Frymaster

Frymaster LOV BIEL14 SERIES User manual

Popular Fryer manuals by other brands

Bosch ET375FAB1E instruction manual

Bosch

Bosch ET375FAB1E instruction manual

Optimum FT-2517 operating instructions

Optimum

Optimum FT-2517 operating instructions

Giorik 921PGC instruction manual

Giorik

Giorik 921PGC instruction manual

YEDI GV008 manual

YEDI

YEDI GV008 manual

Gourmia GAF-575 user manual

Gourmia

Gourmia GAF-575 user manual

George Home GPF101SS user guide

George Home

George Home GPF101SS user guide

Rankam TF2048902-KK-00 Assembly, use and care manual

Rankam

Rankam TF2048902-KK-00 Assembly, use and care manual

Toastess TDF-22 Instruction booklet

Toastess

Toastess TDF-22 Instruction booklet

Cecilware EFP-40 user guide

Cecilware

Cecilware EFP-40 user guide

SIGURO SGR-AF-G250B user manual

SIGURO

SIGURO SGR-AF-G250B user manual

Hamilton Beach 35015 Use & care guide

Hamilton Beach

Hamilton Beach 35015 Use & care guide

TriStar TSHEF-15Si Installation and operating instructions
TriStar

TriStar TSHEF-15Si Installation and operating instructions

Diamond EF477 operating instructions

Diamond

Diamond EF477 operating instructions

SIGURO SGR-AF-P250B operating instructions

SIGURO

SIGURO SGR-AF-P250B operating instructions

KIENLE VX 21-Sirius Installation and user guide

KIENLE

KIENLE VX 21-Sirius Installation and user guide

Tibret DF-400C instruction manual

Tibret

Tibret DF-400C instruction manual

Coopers of Stortford Compact Mini Fryer Instructions for use

Coopers of Stortford

Coopers of Stortford Compact Mini Fryer Instructions for use

Hamilton Beach SimpliFry HB4001 instruction manual

Hamilton Beach

Hamilton Beach SimpliFry HB4001 instruction manual

manuals.online logo
manuals.online logoBrands
  • About & Mission
  • Contact us
  • Privacy Policy
  • Terms and Conditions

Copyright 2025 Manuals.Online. All Rights Reserved.