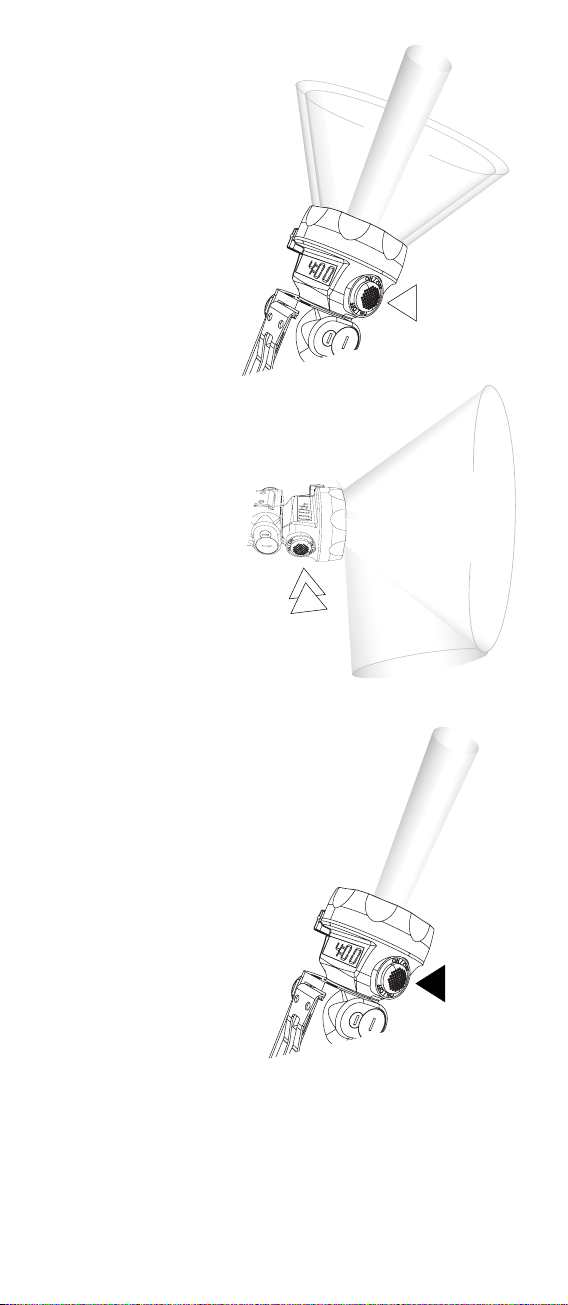
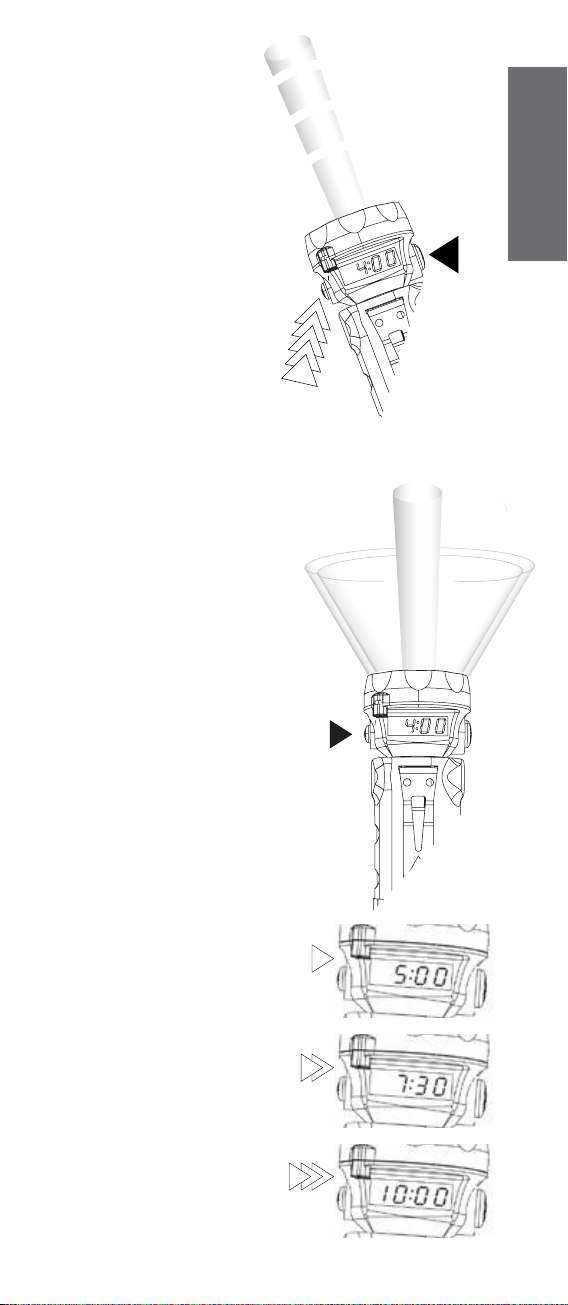
FSE SAFE L-3000 User manual

User Instructions
Bedienungsanleitung
Manual de Usuario
Instructions d’utilisation
Manual do Utilizador
II 1G Ex ia op is IIC T4 Ga IP67
II 1D Ex ia op is IIIC T85 oC Da
Technology
300 lm


Components List
1 Main Features
2 First Steps
3 On | Off Button
4 Menu Button
5 Charging System
6 Maintenance
7 Warranty
Technical Features (at the end of User Instructions)
Index
Bestandteile-Liste
1 Wichtigste Eigenschaften
2 Erste Schritte
3 AN / AUS Knopf
4 MENÜ Knopf
5 Ladevorgang
6 Wartung
7 Gewährleistung
Technische Merkmale
(am Ende der Bedienungsanleitung)
Index
Listado de componentes
1 Características principales
2 Primeros pasos
3 Pulsador On | Off
4 Pulsador Menu | Mapa de consumo
5 Sistema de Carga
6 Mantenimiento
7 Garantía
(VSHFLÀFDFLRQHV7pFQLFDVÀQDOGHOPDQXDO
Índice
Liste des pièces de rechange
&DUDFWpULVWLTXHVSULQFLSDOHV
2 Les premiers pas
3 Bouton On | Off
4 Bouton Menu
5 Système de charge
6 Entretien
7 Garantie
6SpFLÀFDWLRQVWHFKQLTXHV
jODÀQGHVLQVWUXFWLRQVG·XWLOLVDWLRQ
Index
Lista de componentes
1 Principais características
2 Primeiros passos
3 Botão On | Off
4 Botão Menu
5 Sistema de carregamento
6 Manutenção
7 Garantia
(VSHFLÀFDo}HVWpFQLFDVÀQDOGRPDQXDO
Índice

Components List
Bestandteile-Liste
Listado de componentes
Liste des pièces de rechange
Lista de componentes
L.3000
Complete torch | Komplette Leuchte | Linterna completa
Lampe complète | Lanterna completa
L3.10
Closing ring and protection glass | Verschlussring und Schutzglas
Aro y lente de protección | Anneau et lentille de protection
Aro e lente de protecção
L3.11
“O Ring” for closing ring
O-Ring für Verschlussring
Junta tórica para aro
-RLQWWRULTXHSRXUDQQHDX
O-ring para aro
L3.20
LedEngine | LedEngine | Óptica LedEngine
Óptica LedEngine | LedEngine
L3.30
PCB with display | Elektronik-Platine mit display
3ODFDFRQWUROGLVSOD\ _ &DUWHpOHFWURQLTXH _ 3ODFDFRQWURORYLVRU
L3.40
Complete head with turning axle
Leuchtenkopf mit Schwenkachse
Pieza de cabeza montada con eje de giro
3LqFHGHWrWHPRQWpHDYHFD[HGHWRXU
Peça da cabeça aplicada com eixo
L3.49
Screw | Schraube | Tornillo | Vis | Parafuso
L3.480
Clip | Halte-Clip | Gancho completo
&URFKHWGHÀ[DWLRQ _ &OLSFRPSOHWR
L3.54
Rubber battery protection | Gummischutz für Akku
Protector de goma batería | Protection caoutchouc de la batterie
Protetor de borracha da bateria
L3.55
Torch body “O ring” | Dichtung für Leuchtenkörper
-XQWDWyULFDSDUDFXHUSR _ -RLQWWRULTXH _ 2ULQJSDUDRFRUSR
L3.56
Rubber battery protection | Gummischutz für Akku
Protector de goma batería | Protection caoutchouc de la batterie
Protetor de borracha da bateria
L3.50
Torch body including charging PCB
Leuchtenkörper mit Ladekontakten
Cuerpo de la linterna con placa de carga
Corps de la lampe avec contrôle de charge
Corpo lanterna com placa de carregamento
L3.530
Torch body screw with ring
Gehäuseschrauben mit O-Ring für Leuchtenkörper
Tornillo de cierre cuerpo con junta
Vis de fermeture corps avec joint
Parafuso de fecho do corpo com junta
L3.60
Battery pack | Akku-Pack | Pack de baterías
Pack de la batterie | Conjunto de baterias
WL.117
Fuse 1A | Sicherung 1 A | Fusible 1A | Fusible 1A | Fusivel 1A


English
Congratulations, you have chosen a product that has
been developed with state-of-the-art technology.
Adalit L.3000 torch is a high performance professio-
nal safety torch that combines high intensity LEDs,
a revolutionary optic, a large digital display and an
elegant design.
1 Main Features
• 2 LEDs of 150 lumens each in a double optic with
different light beams.
• LedEngine technology with a step light system.
• Only focused light on, “Booster” function to illumi-
nate long distances with greater penetrating light
beam.
• Two button switches of soft touch material, ergo-
nomic and oversized in order to guarantee easy
pushing.
• 3 different burning intensities in order to select in
every moment the remaining burning time.
• Battery level indication in hours and minutes by
means of a digital display.
• Swivelling head with 3 positions: 0o| 45o| 90o
• Torch body made of high resistance thermoplas-
tic resin to the impacts, extreme temperatures
and corrosion.
• $7(;FHUWLÀFDWH=21$
2 First Steps
%HIRUHXVLQJWKHWRUFKIRUWKHÀUVWWLPHLWLVKLJKO\UH-
commended to charge the battery completely.
In order to get the maximum perfomance and life
span of the battery, a complete discharge/charge
cycle should be done at least once per month.
The user can activate:
• The two LEDs at the same time - all the power is
shared between the two light beams that enables
wide and spot light simultaneously.
• Only FLOOD light on - the outspread light gives
the user ample light for short distances. This optic
LQFOXGHVWKHXQLTXH´VWHSOLJKWLQJV\VWHPµWROLJKW
WKHJURXQGDUHDMXVWDKHDGXVHU·VIHHW
• Only FOCUSED light on - “BOOSTER” function
to illuminate long distances with a greater pene-
trating light beam.
• Only FOCUSED light on in strobe mode. Up to
ÀYHGLIIHUHQWLQWHUPLWWHQFHVFDQEHDFWLYDWHG

1
2
2”
Maximum
intensity
3 On | Off Button
First pulsation
The two LEDs on at the
same time which ena-
bles wide and spot light
simultaneously. At the
same time, the display
turns on indicating the
remaining burning time.
Second pulsation
Only the LED situated
RQWKHÁRRGRSWLFLV
on and the light gets a
greater opening angle.
Thanks to the special
design of the Led Engine
Technology the walking
area near to the bearer
of the torch gets illumi-
nated.
Longer pulsation
BOOSTER function
Keeping pushed for
two seconds, the LED
situated on the focused
optic gets on. All power
is gathered in one single
LED and the light beam
reaches the maximum
distance and penetra-
tion. To return to the
previous position, push
again On | Off.

English
4”
5
4”
1
2
3
Longer pulsation
STROBE function
Five different strobe
modes. Keeping pushed
for four seconds On | Off
button, the LED situated
on the focused optic gets
on in strobe mode. Pres-
sing Menu button up to
ÀYHWLPHV\RXFDQVHOHFW
WKHGHVLUHGIUHTXHQF\
The selected strobe
IUHTXHQF\ZLOOEHVWRUHG
To return to the previous
position, push again
On | Off button.
Third pulsation
The torch and the display
switch off.
4 Menu Button
Burning Time System
Longer pulsation
Pressing the button
“MENU” for 4 seconds
with the torch on, the
“Burning Time System”
gets activated which
allows the user to choose
the desired burning time
and the light intensity.
Meanwhile the display
ÁDVKHVWKHXVHUE\SUHV-
sing the “menu” button
can choose between the
three different burning
times, 5, 7.5 and 10 at
full charge, adjusting the
light intensity level auto-
matically. Once the user
has chosen the desired
burning time, the display
ZLOOEHÁDVKLQJDIWHU
seconds.

5 Charging System
When the torch is placed on the charger, the light
turns off automatically (if the light is on). Charging of
the torch starts when the green LED on the charger
changes to red. An automatic reset takes care of
loading the batteries for max. 5 h with highest light
intensity. The maximum charging time is 9 hours.
The time that appears after the letter
indicates the available burning time at
high intensity in the moment the torch is
taken from the charger and put into use.
At the end of charge, the display swit-
ches off and a letter “F” (full) followed by
the avalaible burning time will appear
on the display every 15 seconds.
If the charger is damaged, the display
VKRZVWKHIROORZLQJHUURU¶(·%XW
thanks to the intelligent circuit board the
torch keeps protected from the possible
damages due to a faulty charger.
6 Maintenance
Cleaning
• Clean exclusively with a soft cloth using a neutral
PH detergent diluted in warm water. Do not use
alcohol or other chemical solvents. Do not sub-
merge the torch into water.
• Do not open the torch in hazardous areas.
• IN ORDER TO GET THE MAXIMUM PER-
FORMANCE AND LIFE SPAN OF THE
BATTERY , A COMPLETE DISCHARGE/
CHARGE CYCLE SHOULD BE DONE AT
LEAST ONCE PER MONTH.

English
Clip replacement L3.480
1. Remove the two
upper screws
2. Remove the clip
3. Take out the two nuts
LED Engine Replacement
1. Unscrew the screw
ref. L3.49
2. Remove the closing
ring and the protection glass
ref. L3.10
3. Take out the LED engine
ref. L3.20
4. Disconnect the LED engine
Battery and/or
Protection Fuse Replacement
1. Unscrew the torch body
closing screws ref. L3.530
2. Separeate the torch body
from the torch ref. L3.50
3. Remove the battery L3.60
4. Remove the fuse from
its position ref. WL.117
VIDEOS AVAILABLE AT:
https://www.adalit.com
7 Warranty
Lamp L3000 has a warranty of 2 years against any
fabrication default, for use under normal conditions
and in accordance with the present instructions. It
does not include the battery nor the LEDs which are
guaranteed for 1 year.


Deutsch
Herzlichen Glückwunsch, Sie haben sich für eine
Leuchte entschieden, entwickelt unter Berücksichtigung
neuester Technologien.
Die ADALIT L.3000 Leuchte ist eine professionelle
ex-geschützte Sicherheits-Leuchte mit hoch intensiven
LEDs, exklusiver Spezialoptik, digitalem Display und
elegantem Design.
1 Wichtigste Eigenschaften
• 2 LEDs mit je 150 lm mit Lichtstrahlen für
Raum- und Distanzlicht.
• LEDEngine Technologie mit Ausleuchtung der
Wege zum Einsatz.
• Fokussierter Power-Lichtstrahl =
Booster-/Verstärker-Funktion für lange Distanzen.
• 2 ergonomische Druckknopf-Schalter zur
einfachen Bedienung.
• 3 verschiedene Leuchtstärken für 5, 7.5 oder 10 h
Leuchtdauer.
• Verbleibende Akku-Kapazität in Std./Min. auf dem
digitalen Display ablesbar.
• Schwenkbarer Kopf für 3 Positionen:
0o| 45o| 90o
• Gehäuse aus strapazierfähigem, antistatischem
Thermoplast. Besonders widerstandsfähig gegen
mechanische Belastungen, extreme Temperaturen
und Chemikalien.
• +|FKVWH$7(;=HUWLÀ]LHUXQJDXFKIU=RQH
2 Benutzer Hinweise
Empfehlung: Vor erster Nutzung der Leuchte den Akku
NRPSOHWWDXÁDGHQ
,:LFKWLJHU+LQZHLV=XU$NNX3ÁHJHHPSIHKOHQZLU
1x monatlich einen kompletten Ent- u.
$XÁDGH]\NOXVGXUFK]XIKUHQ
4 mögliche Lichteinstellungen:
• Power-Lichtstrahl und Raumlicht: beide LEDs
leuchten zeitgleich, für kurze und lange
Distanzen.
• Raumlicht: für kurze Distanzen in Räumen, an
Einsatzstellen oder um Wege auszuleuchten.
• Fokussierter Power-Lichtstrahl: für lange
Distanzen.
• Blinklicht: zur Warnung oder Absicherung,
einstellbar in 5 unterschiedlichen Intervallen.
ACHTUNG: LED Strahlung. Blicken Sie nicht direkt in
den Lichtstrahl der Leuchte. Richten Sie den Lichts-
trahl der Leuchte nicht direkt in die Augen von anderen
Menschen. Sehschäden könnten dadurch entstehen.
1XW]XQJGHU/HXFKWHQXULQHLQZDQGIUHLHP=XVWDQG
Vor Inbetriebnahme Sichtprüfung bezüglich Funktion
RGHU6FKlGLJXQJYRUQHKPHQ

1
2
2”
Maximale
Intensität
3 AN / AUS Knopf
1x Drücken
Power-Lichtstrahl u.
Raumlicht leuchten
zeitgleich. Das Display
zeigt die verbleibende
Rest-Leuchtzeit an.
2x Drücken
Raumlicht für kurze
Distanzen und zum
Ausleuchten der
Wege.
Längeres Drücken des
AN/AUS-Knopfs
BOOSTER Funktion
Ca. 2 Sek. gedrückt
halten, fokussierter
Power-Lichtstrahl für
lange Distanzen ist
HLQJHVFKDOWHW=XUFN]XP
Hauptmodus: AN/AUS
1x drücken.

Deutsch
4”
5
4”
1
2
3
Längeres Drücken
des AN/AUS-Knopfs -
BLINK-Funktion
AN/AUS-Knopf 4 Sek.
drücken: fokussierter
Lichtstrahl blinkt. MENÜ-
Knopf 5x drücken
zur Einstellung des
gewünschten Blink-
Intervals. Dieser wird
JHVSHLFKHUW=XUFN]XP
Hauptmodus: AN/AUS 1x
drücken.
3x Drücken des
AN/AUS-Knopfs
Leuchte und Display sind
ausgeschaltet.
4 MENÜ-Knopf
Anzeige der
Rest-Leuchtzeit
Längeres Drücken des
MENÜ-Knopf
Druckknopf ca. 4 Sek.
gedrückt halten (bei
eingeschalteter Leuchte):
der Akku-Sparmodus
wird über ein Blinken des
Displays aktiviert. Bei
voller Akku-Kapazität (5
h) kann bei nochmaligem
Drücken 7.5 h oder 10 h
Leuchtdauer eingestellt
werden. Ein Blinksignal
des Displays bestätigt die
eingestellte Leuchtdauer.
Die Leuchtkraft passt sich
automatisch entsprechend
der Leuchtdauer an.

5 Ladevorgang
'LH/HXFKWHNDQQLQHLQRGHUDXVJHVFKDOWHWHP=XVWDQG
in das Ladegerät gestellt werden. Der Ladevorgang
beginnt bei Umschalten der grünen auf rote LED am
Ladegerät. Es erfolgt automatisch ein Reset auf 5 h
Leuchtdauer bei höchster Lichtintensität. Die max.
Ladezeit beträgt 9 h.
Am Ende des Ladevorgangs schaltet sich
das Display aus. Bei Herausnahme der
Leuchte aus dem Ladegerät erscheint auf
dem Display der Buchstabe “F” (full) und
die verfügbare Leuchtkapazität (blinkt alle
15 Sek.).
Falls das Ladegerät defekt ist, wird
auf dem Display der Leuchte “E0:00”
angezeigt. Die Leuchte wird aufgrund ihrer
intelligenten Elektronik durch ein defektes
Ladegerät nicht beschädigt.
Automatischer Auf-und Entlade-Modus
Es wird empfohlen, mindestens einmal im Monat den
HLJHQVWlQGLJHQ$XIXQG(QWODGH0RGXV]XU3ÁHJHGHV
Akkus durchzuführen. Dazu den Menü-Druckknopf ca. 5
Sek. gedrückt halten
'HUHLJHQVWlQGLJH$XIXQG(QWODGH0RGXV]XU3ÁHJH
des Akkus wird gestartet. Sichtbar über ein blinkendes
[c] im digitalen Display. Die Handleuchte muss sich für
diesen Modus im Ladegerät bzw. beim Ladevorgang
EHÀQGHQ
6 Wartung
Reinigung
• =XU5HLQLJXQJGHU/HXFKWHDXVVFKOLHOLFKHLQ
weiches Tuch mit warmem Wasser anfeuchten
und etwas Seife (z.B. Spülmittel) verwenden. Die
Leuchte damit vorsichtig abreiben und nicht Wasser
eintauchen.
• Die Leuchte darf nicht in explosionsgefährdeten
Bereichen geöffnet oder geladen werden.
• :,&+7,*(5+,1:(,6=85$..83)/(*(
EMPFEHLEN WIR, 1X MONATLICH EINEN
.203/(77(1(178$8)/$'(=<./86
'85&+=8)h+5(1
• 5HSDUDWXUHQDXHU:HFKVHOGHV/HXFKWPLWWHOVXQG
GHV$NNX·VGUIHQQXUGXUFKDXWRULVLHUWH3HUVRQHQ
oder Werkstätten ausgeführt werden.
$XHUGHPGUIHQQXUYRP+HUVWHOOHU]XJHODVVHQH
Original-Ersatzteile verwendet werden.

Deutsch
Austausch des Halteclips L3.480
1. Entfernen der oberen
2 Schrauben
2. Halteclip abnehmen
3. 2 Muttern
herausnehmen
Austausch der LEDEngine
1. Lösen der Schraube M3
ref. L3.49
2. Verschlussring und Schutzglas
L3.10 entfernen
3. LEDEngine L3.20 herausnehmen
4. Trennen der LEDEngine
Austausch des Akkus
und/oder der Sicherung
1. Lösen der
Gehäuse-Schrauben
L3.530
2. Trennen des
Leuchten-Unterkörpers
L3.50 vom Gehäuse
3. Nehmen Sie den Akku (L3.60)
aus dem Gehäuse heraus
4. Sicherung WL.117
entfernen
7 Gewährleistung
Auf die L-3000 bieten wir eine Gewährleistung von 2
Jahren auf Funktion und Material unter den angegebenen
Betriebs- und Wartungs-Bedingungen. Die Gewährleistung
VFKOLHW9HUVFKOHLWHLOHZLH]%/('V'LFKWXQJHQRGHU
Akkus nicht ein. Die Gewährleistung erstreckt sich nicht
DXIGLH/HXFKWHGLHXQVDFKJHPlYHUZHQGHWYHUlQGHUW
vernachlässigt, durch Unfälle beschädigt oder anormalen
%HWULHEVEHGLQJXQJHQVRZLHGHUXQVDFKJHPlHQ
Handhabung ausgesetzt wird.
VIDEO AUCH VERFÜGBAR UNTER:
https://www.adalit.com


Español
(QKRUDEXHQDKDDGTXLULGRXQSURGXFWRTXHKDVLGR
desarrollado con tecnología de vanguardia.
Adalit L3000 es una linterna profesional de alto ren-
GLPLHQWRTXHLQFRUSRUDOHGVGHJUDQSRWHQFLD
lumínica, una revolucionaria óptica, amplio display
digital y un cuidado diseño.
1 Características principales
• 2 LEDs de 150 lúmenes de potencia en dos len-
tes con diferentes grados de apertura.
• Óptica LEDEngine integrada, con sistema de se-
guridad exclusivo de visión de paso e iluminación
de corta distancia.
• Led concentrador de alta intensidad con función
Booster para iluminación de gran alcance y alta
penetración.
• Pulsadores ergonómicos y sobre-dimensiona-
dos, fabricados en elastómero de alta calidad
con efecto “Soft Touch”.
• 3 niveles de intensidad de luz para ajustar, en
cada momento, la duración de la batería.
• Indicación de la duración de la batería en horas
y minutos mediante display digital de fácil visua-
lización.
• Cabezal pivotante a 0o| 45o| 90o
• Cuerpo de resina de alta resistencia al impacto,
a temperaturas extremas y sustancias corrosivas
• 0i[LPD&HUWLÀFDFLyQ$7(;=21$
2 Primeros pasos
Antes de utilizar la linterna por primera vez, realice
una carga completa de la batería.
Para alcanzar el máximo rendimiento y duración
de la batería, es necesario descargar y recargar
la linterna al menos una vez al mes.
El usuario puede activar:
• Los dos LEDs a la vez – toda la energía se distri-
buye entre las dos fuentes luminosas, generando
gran potencia luminosa tanto en distancias lar-
gas como cortas
• LED difusor – optimiza la iluminación del área
próxima al usuario. Incluye el exclusivo “Sistema
de visión de paso” con un ángulo ideal para la
iluminación del área situada en el suelo a una
distancia de un paso del usuario.
• LED concentrador – función “Booster”- optimiza
la iluminación de la larga distancia con una ma-
yor penetración del haz luminoso.
• LED concentrador en modo Intermitencia. Se
pueden activar hasta cinco frecuencias distintas.

1
2
2”
Máxima
intensidad
3 Pulsador On | Off
Primera pulsación
Se encienden am-
bas ópticas a la vez.
Iluminación de gran
intensidad en distancias
cortas y largas. Simultá-
neamente se enciende
HOGLVSOD\TXHLQGLFDOD
autonomía disponible.
Segunda pulsación
Se activa el LED
situado en la óptica
de difusión, la luz
alcanza un mayor ángu-
lo de apertura. Debido
al especial diseño de
la óptica LedEngine se
ilumina incluso la zona
de paso próxima al por-
tador de la linterna.
Pulsación prolongada
función BOOSTER
Pulsando durante dos
segundos, se activa el
LED situado en la óp-
tica de concentración.
Toda la energía se con-
centra en un sólo LED
y el haz de luz alcanza
la máxima distancia y
penetración.
Pulsando de nuevo
On | Off se retorna a la
posición anterior.
Table of contents
Languages:
Popular Lighting Equipment manuals by other brands

NEO
NEO STORMER 1200 IP user manual

PowerTech
PowerTech SL2254 user manual

Cooper Lighting Solutions
Cooper Lighting Solutions Might-D-Light LED140 Instriction Manual

Vision & Control
Vision & Control LDLF30x540-B470/UDC Instructions for use

MA lighting
MA lighting grandMA3 Quick manual

LIGMAN
LIGMAN LADOR 44 LD-50221 installation manual