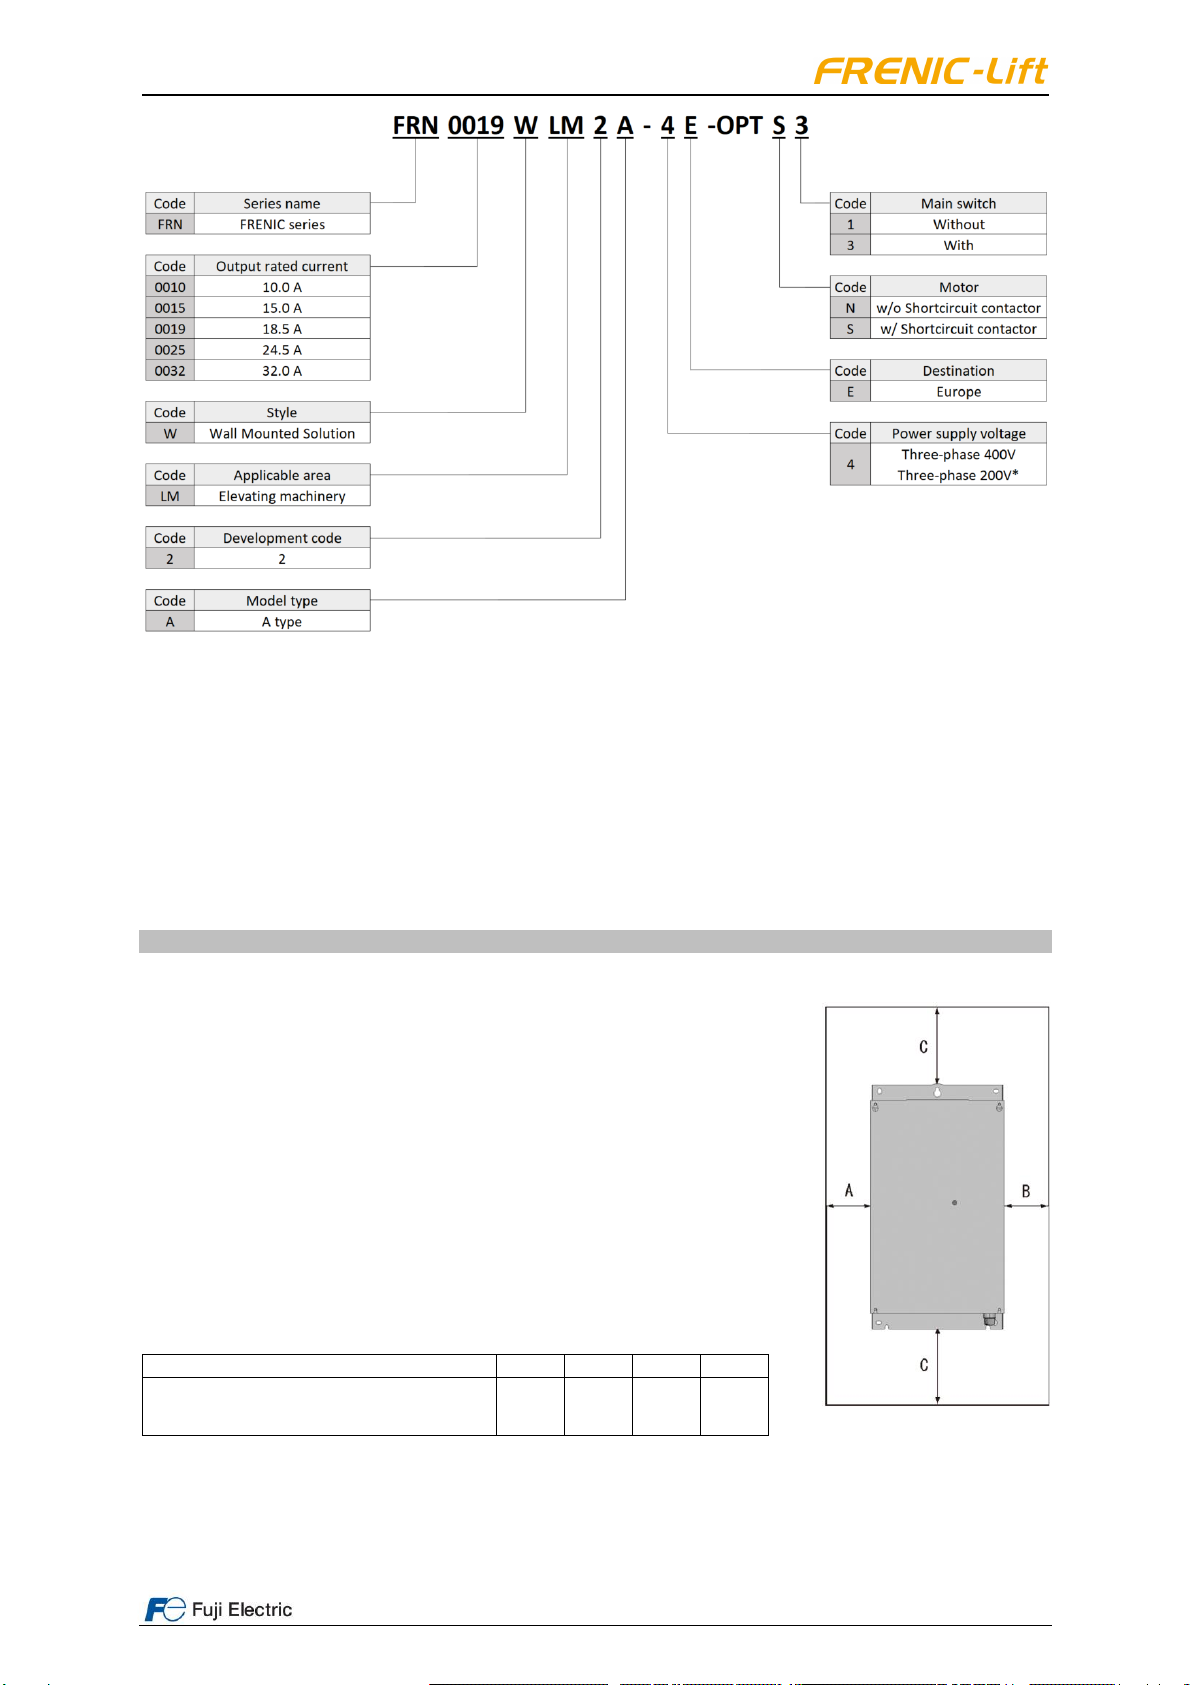
LM2A Wall Mounted Solution
Page 3of 20 Fuji Electric Europe GmbH
CONTENTS
0. Preface ...............................................................................................................................................................4
1. Before Use..........................................................................................................................................................8
1.1 Acceptance Inspection and Appearance of Product......................................................................................8
1.2 Usage and Storage environment...................................................................................................................9
2. Mounting and Wiring the Wall Mounted ..............................................................................................................9
2.1 Installing the cabinet......................................................................................................................................9
2.2 Circuit diagram............................................................................................................................................10
2.3 Wall Mounted diagrams...............................................................................................................................10
2.4 Wiring and terminals....................................................................................................................................13
2.4.1 Removing the front cover of the Wall Mounted......................................................................................13
2.4.2 Mounting the front cover........................................................................................................................13
2.4.3 Recommended wire sizes......................................................................................................................13
2.4.4 Terminal arrangement diagrams and screw specifications....................................................................14
2.4.5 Terminal functions .................................................................................................................................15
2.4.6 Inverter configuration.............................................................................................................................16
2.4.7 Mounting and connecting the keypad to the panel ................................................................................16
3. Operation Using the Keypad.............................................................................................................................16
4. Maintenance and Inspection.............................................................................................................................17
4.1 Daily Inspection...........................................................................................................................................17
4.2 Periodic Inspection......................................................................................................................................17
4.3 List of Replacement Parts...........................................................................................................................18
5. Dimensions.......................................................................................................................................................18
5.1 Frame 1.......................................................................................................................................................18
5.2 Frame 2.......................................................................................................................................................19
CONTACT INFORMATION....................................................................................................................................20