Funtronix SCORE-N-TIME SNT-140BB User manual

Copyright © 2015 Funtronix LLC. All rights reserved
1
FUNTRONIX
SCORE-N-TIMETM
PORTABLE WIRELESS
BASEBALL SCOREBOARD
MODEL SNT-140BB
OPERATING MANUAL
Revision January 7, 2016

Copyright © 2015 Funtronix LLC. All rights reserved
2
Thank you for purchasing our Funtronix baseball scoreboard.
At Funtronix, our motto is “Electronic Fun for Everyone”. Our
goal is to add a little fun to your sports and leisure activities.
The contents of the package may contain parts and packing materials that
can be hazardous to children under 3 years old. Assembly of these
components must to be performed with adult supervision.
While the AC adapter is UL approved, the input-side plugs into a standard
high-voltage AC outlet. Care should be taken to not make physical contact
with the power supply plug area.
Before using your new scoreboard, please read the following precautions.
Doing so will reward you with many years of enjoyment with your new
scoreboard. Failure to follow them may cause bodily harm or may damage
the scoreboard beyond the terms of the warranty.
1. DO NOT expose the scoreboard or keypad to rain or other condensing
moisture.
2. DO NOT store the scoreboard or keypad in direct sunlight for extended
periods of time.
3. DO NOT drop or hit the scoreboard, as this may result in injury and/or
void the warranty.
4. DO read the entire owner’s manual so that you will utilize the full potential
and versatility of your new scoreboard.

Copyright © 2015 Funtronix LLC. All rights reserved
3
TABLE OF CONTENTS
SECTION DESCRIPTION PAGE
1 Scoreboard Setup 4
2 Using Your Scoreboard 5
3 Charging the Wireless Keypad 6
4 Establishing a connection between the
scoreboard and remote keypad 6
5 Care and Maintenance 7
6 Troubleshooting 7
7 Specifications 8
PACKAGING CONTENTS
ITEM QUANTITY DESCRIPTION
1 1 SNT-140BB scoreboard unit
2 1 Wireless remote ke
y
pad
3 1 Neck lanyard
4 1
A
C char
g
er for ke
y
pad
5 1 Owner’s Manual
BASEBALL SCOREBOARD FEATURES
Wireless RF remote control keypad
operates up to 150 feet from scoreboard
Large 4-inch score digits displays scores
to 99 points per team
Indoor/outdoor brightness settings
Balls, Strikes, and Outs display
Top/Bottom of inning indicator
Full-digit innings display
Measures 24” x 12” x 2 ½ “
Battery or AC powered (adapter sold
separately)

Copyright © 2015 Funtronix LLC. All rights reserved
4
SECTION 1
SCOREBOARD SETUP
1. Charge the keypad battery as described in Section 3.
2. Install 6 AA-size alkaline batteries in the scoreboard into the battery holder located on
the back-side of the scoreboard. You may also use an AC adapter (sold separately)
to conserve your batteries. Plug the adapter into the AC adapter jack located on the
back of the scoreboard unit.
3. Extend the swivel-out feet located on
the bottom of the scoreboard to stand
the it upright on a table or floor.
4. Turn the scoreboard on using the power switch located on the back of the scoreboard.
5. If the scoreboard appears to operate erratically, it may be due to radio interference
from a nearby signal. Try changing the radio channel of the scoreboard by pressing
and holding the button for approximately 3 seconds.
6. To change the display brightness, press and hold the button for approximately
3 seconds.
7. Set the scoreboard on a sturdy surface, such as the floor or table.
8. You are now ready to use your scoreboard. Proceed to Section 2 for details
regarding configuration and use of your scoreboard.

Copyright © 2015 Funtronix LLC. All rights reserved
5
SECTION 2
USING YOUR SCOREBOARD
Operation of your scoreboard is very straight-forward. Refer to the illustration below for a
description of each keypad button.
OPERATIONAL NOTES:
1. The balls, strikes, and outs digits will flash if they are maxed-out to attract attention.
2. The score digits will flash each time the score changes.
3. The display screen will turn off and the inning digit will blink if the scoreboard has been
sitting idle for at least 10 minutes. Pressing any key on the remote will re-enable the
display.
4. Hold the for approximately 3 seconds to reset your game.

Copyright © 2015 Funtronix LLC. All rights reserved
6
SECTION 3
CHARGING THE WIRELESS KEYPAD
The wireless keypad contains a rechargeable battery. While the charge of the keypad battery will typically
last between 1 to 2 weeks (depending on usage), we recommend charging your keypad the night before
each use of the scoreboard.
The charging indicator will light up orange to indicate the keypad is charging. The light will turn green once
the keypad is fully charged.
Plug keypad charger into 120VAC wall outlet
SECTION 4
ESTABLISHING A CONNECTION BETWEEN THE
SCOREBOARD AND REMOTE KEYPAD
1. Cycle the scoreboard power off and
on (waiting 3 seconds before each
turn-on) until the scoreboard is
displaying the RF connection screen
shown below at right.
2. Press and hold the button on the remote for up to 5 seconds (until the
remote emits a beep). The scoreboard will go through a process of connecting to
the remote and will respond after a few seconds by displaying the radio channel
number. The remote will emit a double-beep when the connection process is
complete.
3. After a couple seconds the scoreboard will show a normal display and is then
ready for action.
NOTE - For scoreboard models built after October 2015:
The wireless keypad must be cleared of any previous scoreboard connection data to allow it to
connect to the scoreboard again. To clear the keypad’s previous connection information,
press and hold the and buttons simultaneously until the keypad status light
blinks 5 times.

Copyright © 2015 Funtronix LLC. All rights reserved
7
SECTION 5
CARE AND MAINTENANCE
Keep your scoreboard clean for optimum viewing of the display.
Never spray cleaning solutions directly onto the scoreboard or keypad.
Use only ammonia-free window cleaning solution.
To clean your scoreboard, spray the cleaner onto a clean cloth. Lightly wipe the
scoreboard or keypad with the damp cloth until clean. To eliminate fine scratches on the
front panel – apply a small amount of carnuba car wax on a terry cloth and lightly wipe
the front panel.
SECTION 6
TROUBLESHOOTING GUIDE
Symptom: Scoreboard operates erratically.
Solution: Radio signals from nearby devices, such as Bluetooth and WiFi, may
interfere with the operation of the Scoreboard. Changing the radio channel
of the scoreboard should solve the problem. Refer to Section 1 Step 5 to
perform this change.
Symptom: Keypad remote doesn’t appear to work or the scoreboard fails to connect to
keypad.
Solutions: 1. Distance between scoreboard and keypad is too far. Move the
scoreboard closer to the keypad.
2. Re-establish radio connection between scoreboard and keypad as
described in Section 4.
Symptom: Scoreboard won’t turn on or display is dim.
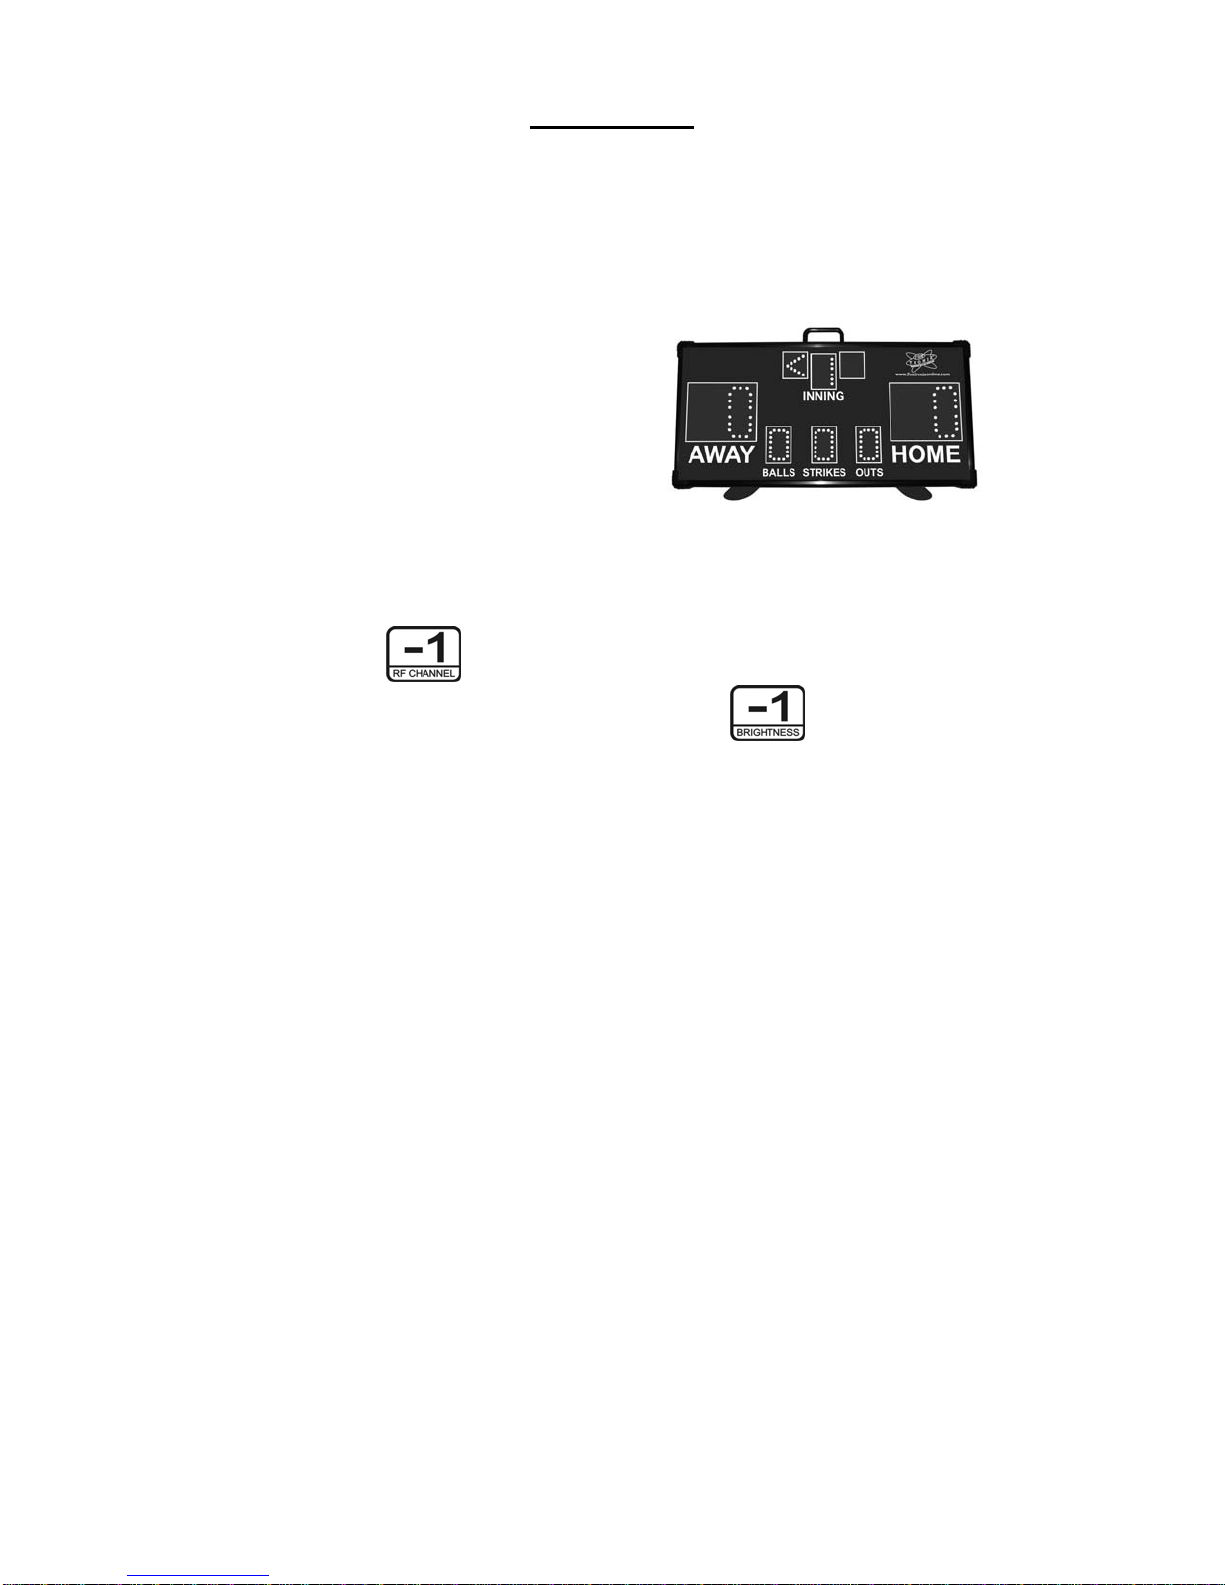
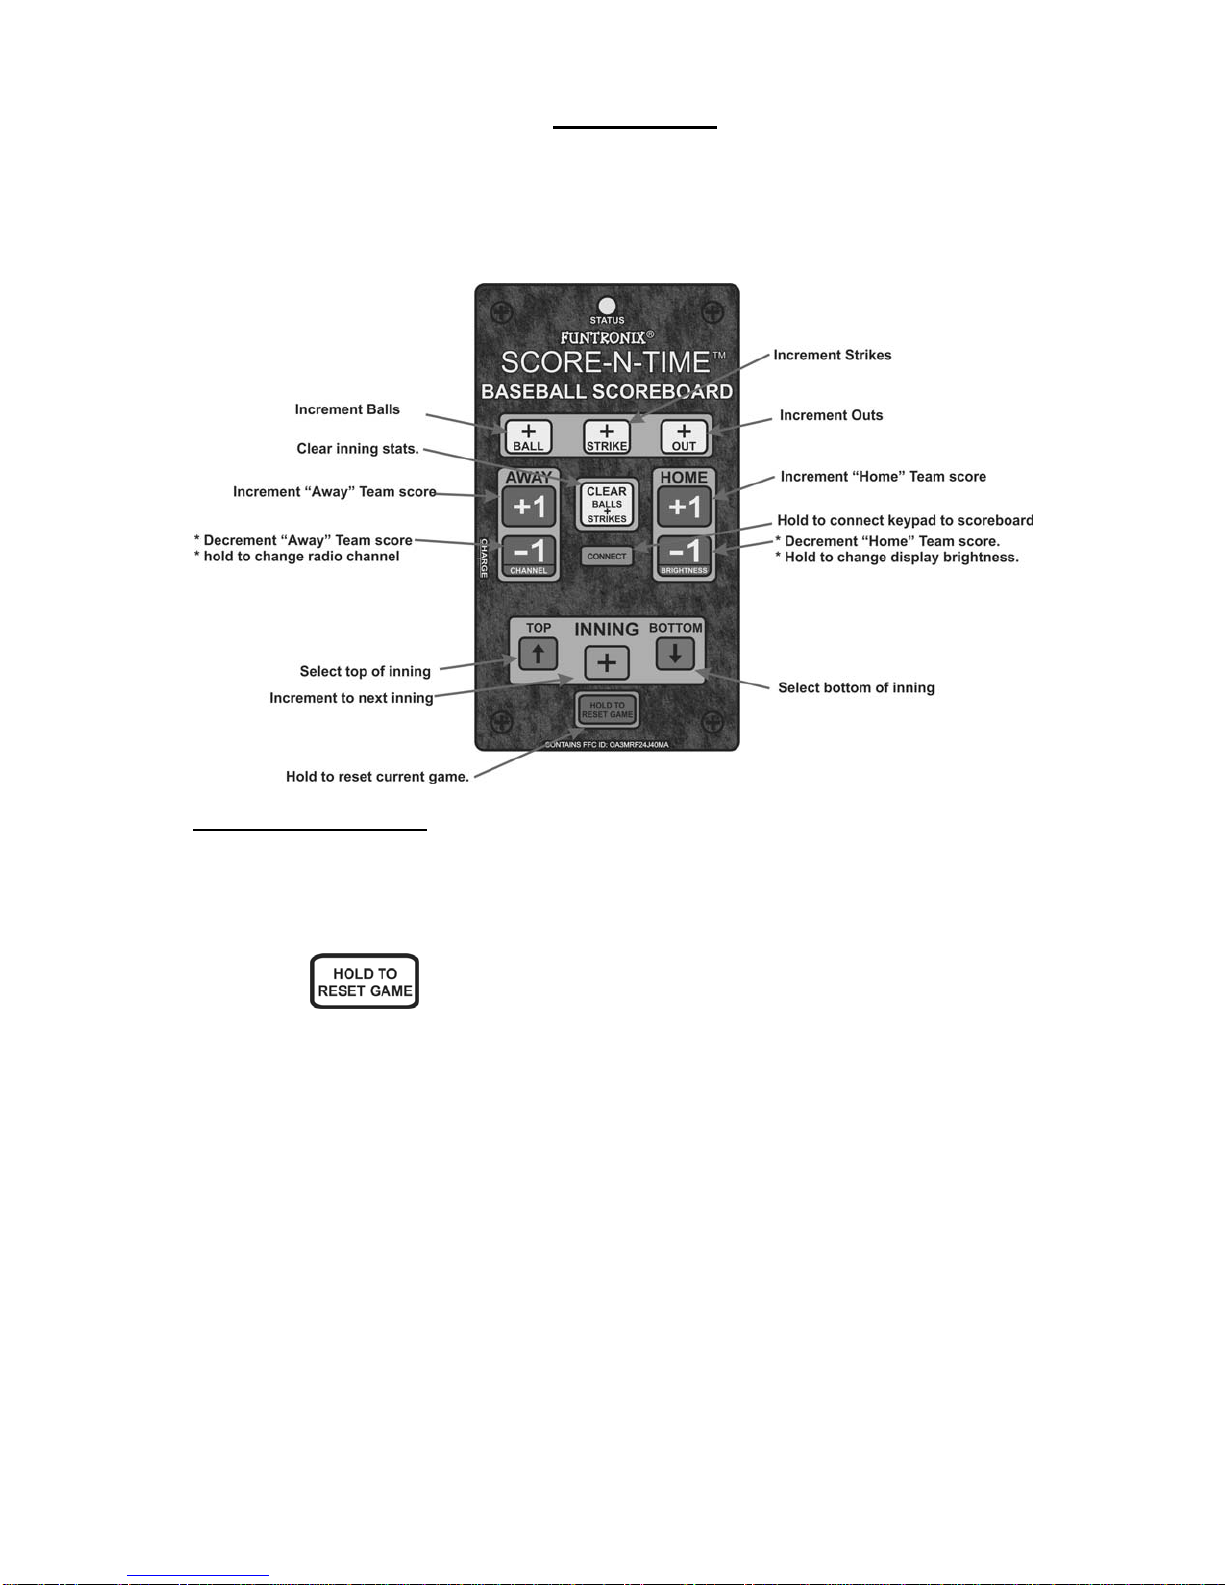
Solutions: 1. Screen brightness is on low setting: Press and hold the button
for 3 seconds to change brightness.
2. Replace the batteries in the scoreboard.
Symptom: Display ‘blinks’ when a button is pressed on the keypad.
Solution: This is normal.
Symptom: Display flickers occasionally when no buttons are pressed on the keypad.
Solution: This may occur if another scoreboard is being setup nearby. If the flicker
persists, change the operating channel by pressing and holding the
button on the keypad as described in Section 1 Step 5.

Copyright © 2015 Funtronix LLC. All rights reserved
8
SECTION 7
PRODUCT SPECIFICATIONS
(Specifications subject to change without notice)
FUNCTIONAL SPECIFICATIONS
Keypad Operating Range: Up to 150 feet from scoreboard unit.
Score range (per team): 0 to 99 points
Inning display range: 1 through 9 plus 0 for extended inning
ELECTRICAL SPECIFICATIONS
Operating Voltage: +9 volts DC.
Battery requirements
Quantity & Type: 6 x AA-size alkaline
Battery Life: up to 30 hours (standard brightness)
up to 18 hours (high brightness)
MECHANICAL SPECIFICATIONS
Dimensions: 24” X 12” X 2 1/2”.
Weight: approximately 6 pounds.
ENVIRONMENTAL SPECIFICATIONS
Operating Temperature: +10 degrees C to +50 degrees C.
Storage Temperature: 0 degrees C to 80 degrees C.
Humidity: 0 to 95% non-condensing.

Copyright © 2015 Funtronix LLC. All rights reserved
9
Write down your product serial number for your records.
Serial Number: ________________________
Please visit our website for new products and accessories for your Funtronix
Product:
www.funtronixonline.com
Table of contents
Other Funtronix Accessories manuals