furmates Co-rider K9 User manual

furmates
Co-rider K9
Co-rider K9
furmates
furmates
USER MANUAL
ANOTHER QUALITY PRODUCT
DISTRIBUTED BY
MELBOURNE, AUSTRALIA
valiantbrands.com.au


Co-rider K9
furmates
F. Mud Guard
E. Back wheel
C. Connector
B. Pet bag 1
1
1
2
2
1
1
1
1
2
A. Chassis
(with M6 screw & nut)
D. Base Rack
H. Multi tool
I. Open ended wrench
G. M4 Screw
J . Quick Release Pin
with elastic retainer
visual parts qty.
visual parts qty.
IMPORTANT INSTRUCTIONS
- Please read the instruction sheet carefully before you start assembly and keep
for future reference.
- Remove all components from the carton and ensure that no parts are missing.
Please look at the parts list for guidance. In case of missing parts, contact your dealer
- This ride-on is built for pets with a maximum weight of 8kg.
-This ride-on is developed for use with most prams, strollers and buggies.
It may not be suitable for those with a chassis that doesn’t allow for attachment
of ride-ons. Please check with your dealer or manufacturer to ensure that your model
is compatible for use with this ride-on.
CARE INSTRUCTIONS

STEP 1
STEP 2
UNFOLDING THE CO-RIDER K9
MUD GUARD INSTALLATION
Attach the Mud Guard (F) on to the wheel housing so that it aligns with the square hole (S1)
and the flat side facing inward.
Insert one M4 screw (G) into the hole (G1) and secure it. Repeat this procedure for the second
Mud Guard on the other side.Test that both Mud Guards are securely fastened.
Attaching the Mud Guard Installed Mud Guard
1.1 Press button (1) and lift the rider arm upward
until it is fully extended and engaged.
1.2 Pull the two lower sections apart in opposite
directions until fully opened and you hear
the centre shaft click into the locked position.
1
G
FF
A
A
G1
S1
S1
1.1
A1.2

STEP 3 REAR WHEEL : INSTALLATION/REMOVAL
For easy installation/removal,
- lift Pin (P)
- push wheel axle inside/pull wheel axle outside
- release Pin (P)
- test that it is securely engaged.
P
STEP 4 PET CARRIER SETUP
L2
STEP 5 ATTACHING THE CARRIER TO THE RACK
D
B
Place the carrier bag
on top of the rack
so that it aligns perfectly.
Pull each of the velcro straps
over the rack tube as indicated
and secure to the underside of
the bag. Repeat for the other side.
Once done, pull upwards
on the bag to ensure it is
securely attached to
the rack.
1.Unfold the carrier bag.
Using each side zip, close the sides of the carrier.
2.
The carrier is ready for use with the included straps.To attach the longer straps provided,
connect the locking hook (K1) to the ring (L1). Repeat for K2 and L2 on the other side.
Ensure all attachments are secure.
L1
K2
K1
Co-rider K9
furmates
Co-rider K9
furmates
Co-rider K9
furmates
Co-rider K9
furmates

1. Insert the rack tube, into
the base tube aligning the holes.
2. Secure the rack tube within
the base tube by inserting the
Quick Release pin (J) through
both tubes as shown.
3. Turn the Quick Release
locking ring as indicated
and push firmly to lock.
4. Test to make sure
it is fully engaged.
Ensure all connections are tight
and secure.
The co-rider K9 is now ready to use
pulling in the direction indicated.
When walking beside
the co-rider K9 be sure to hold
the stroller handle firmly.
When using in standalone mode,
always hold the handle and use
the tether strap when your pet
is in the carrier.
Avoid pulling backwards.
STEP 6 RACK TUBE ASSEMBLY
3
4
J
1
2
furmates
Tether
Strap
Handle
Co-rider K9
furmates

7.1 Wrap the flexible strap of the
Connector (C) around the stroller
frame tubing (1).
Insert it through the plastic slot (2)
in the screw housing.
7.2 Turn the knob (3) to tighten
until it is fully secured.
7.3 Press the button (5) on the underside
of the rider arm casing to release hook (4).
7.4 Insert the hook through the connector
ring (6) and secure back into the casing
(you may need to press the release
button (5) to do this).
Follow Step 7.2 to tighten.
To apply brakes, press down on each
of the pedal levers.
Lift each gently to release.
This is how
the co-rider K9
should appear
once connected.
C
4
6
5
7.1 7.2
7.3 7.4
STEP 7 CONNECTING CO-RIDER K9 TO THE BABY CARRIAGE
1
2
3
4
6
6
5
5
furmates
Co-rider K9
furmates

Press button (5) and pull hook to release.
Disengage the hook from the ring to separate your Co-Rider from the frame.
(Leave the connector attached to the frame for future easy connection and access)
Press the lower button (1) and push the front wheel downwards.
Press the main upper button (2) and push the handle down.
DISCONNECTING THE CO-RIDER K9
1
5
furmates
furmates
Co-rider K9
furmates

1
Unzip the upper flap of the bag. Pull the strap (with connector) out of the bag and
connect it to the leash of your pet.
ap
bag
connector
pet leash
front view top view
ap
inside
strap
SECURING YOUR PET
Place your pet into the carrier bag,
carefully, from the top.
Zip the upper flap of the carrier bag.
The air ventilation mesh at the top
will allow for air flow to help your
pet breathe comfortably.
For additional/optional ventilation,
roll the side flap (R) upward and
lock into position.
Reverse this process to help your
pet exit the carrier bag.
R
Co-rider K9
furmates
Co-rider K9
furmates
Co-rider K9
furmates

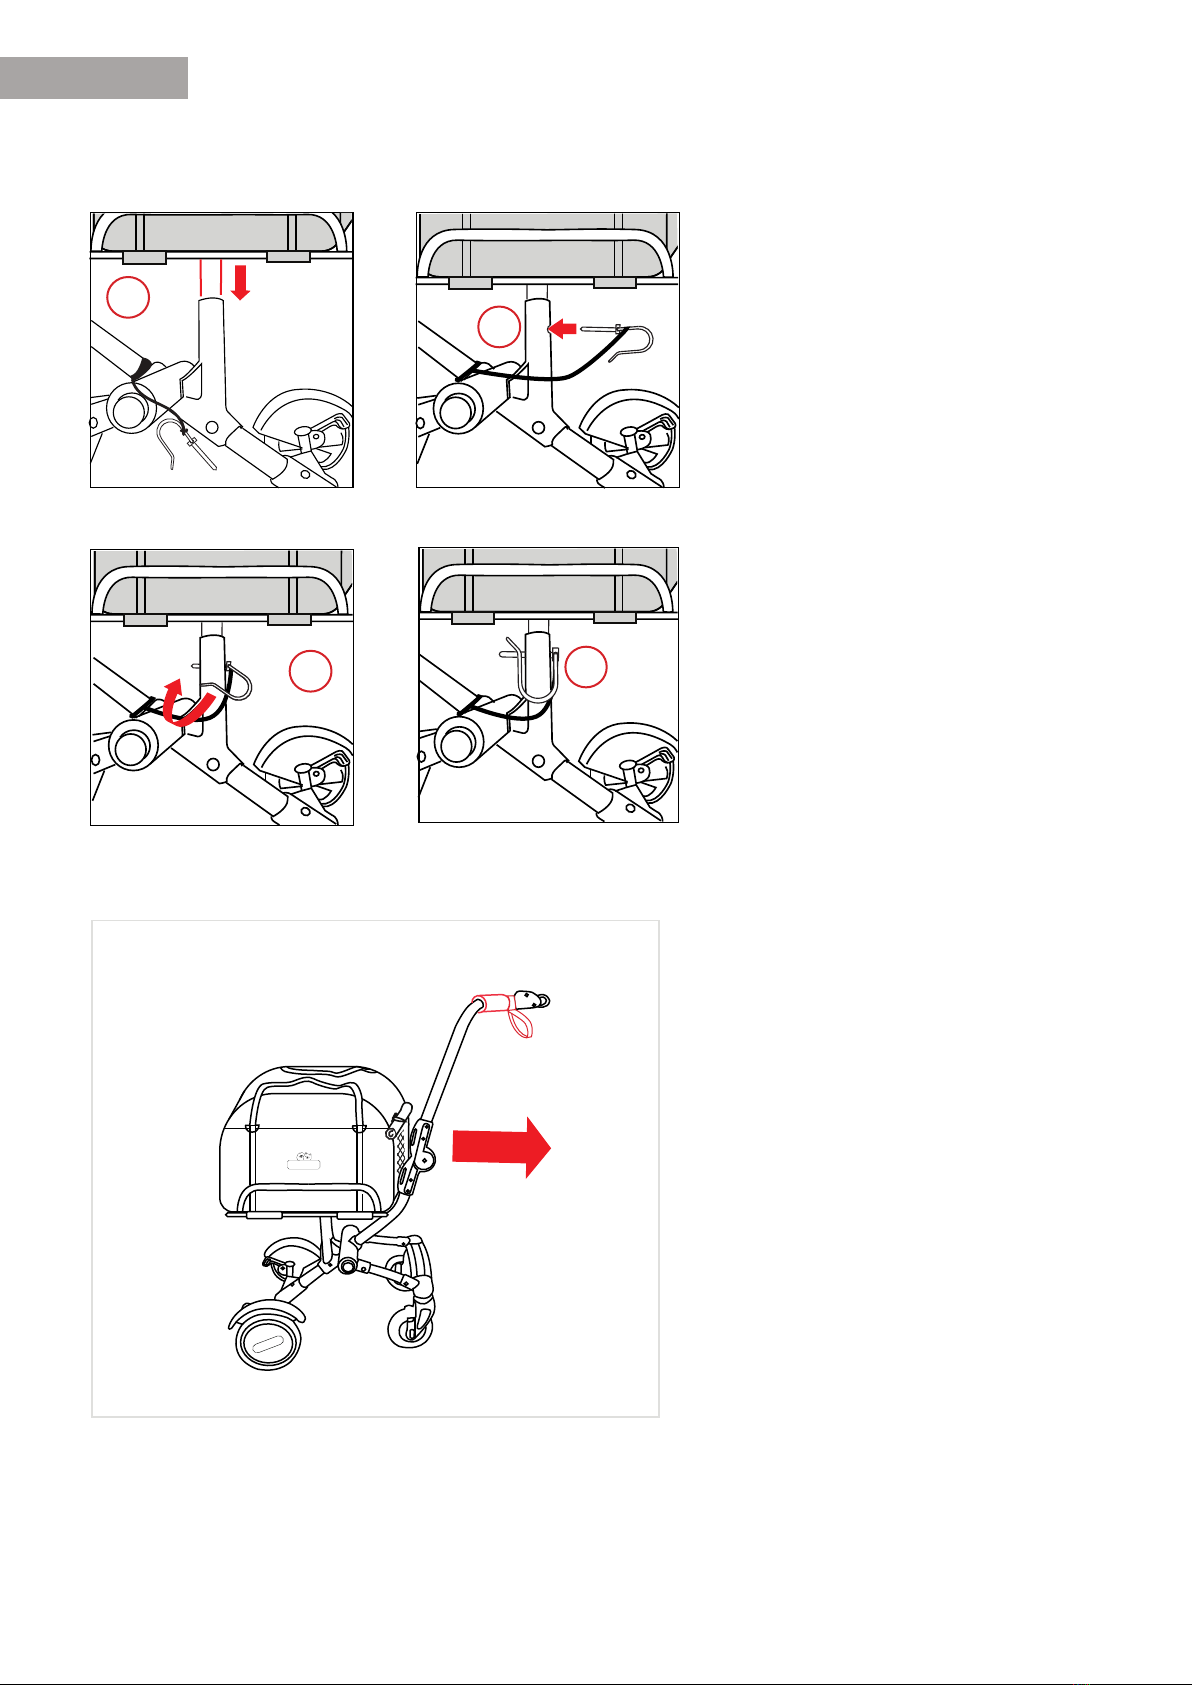
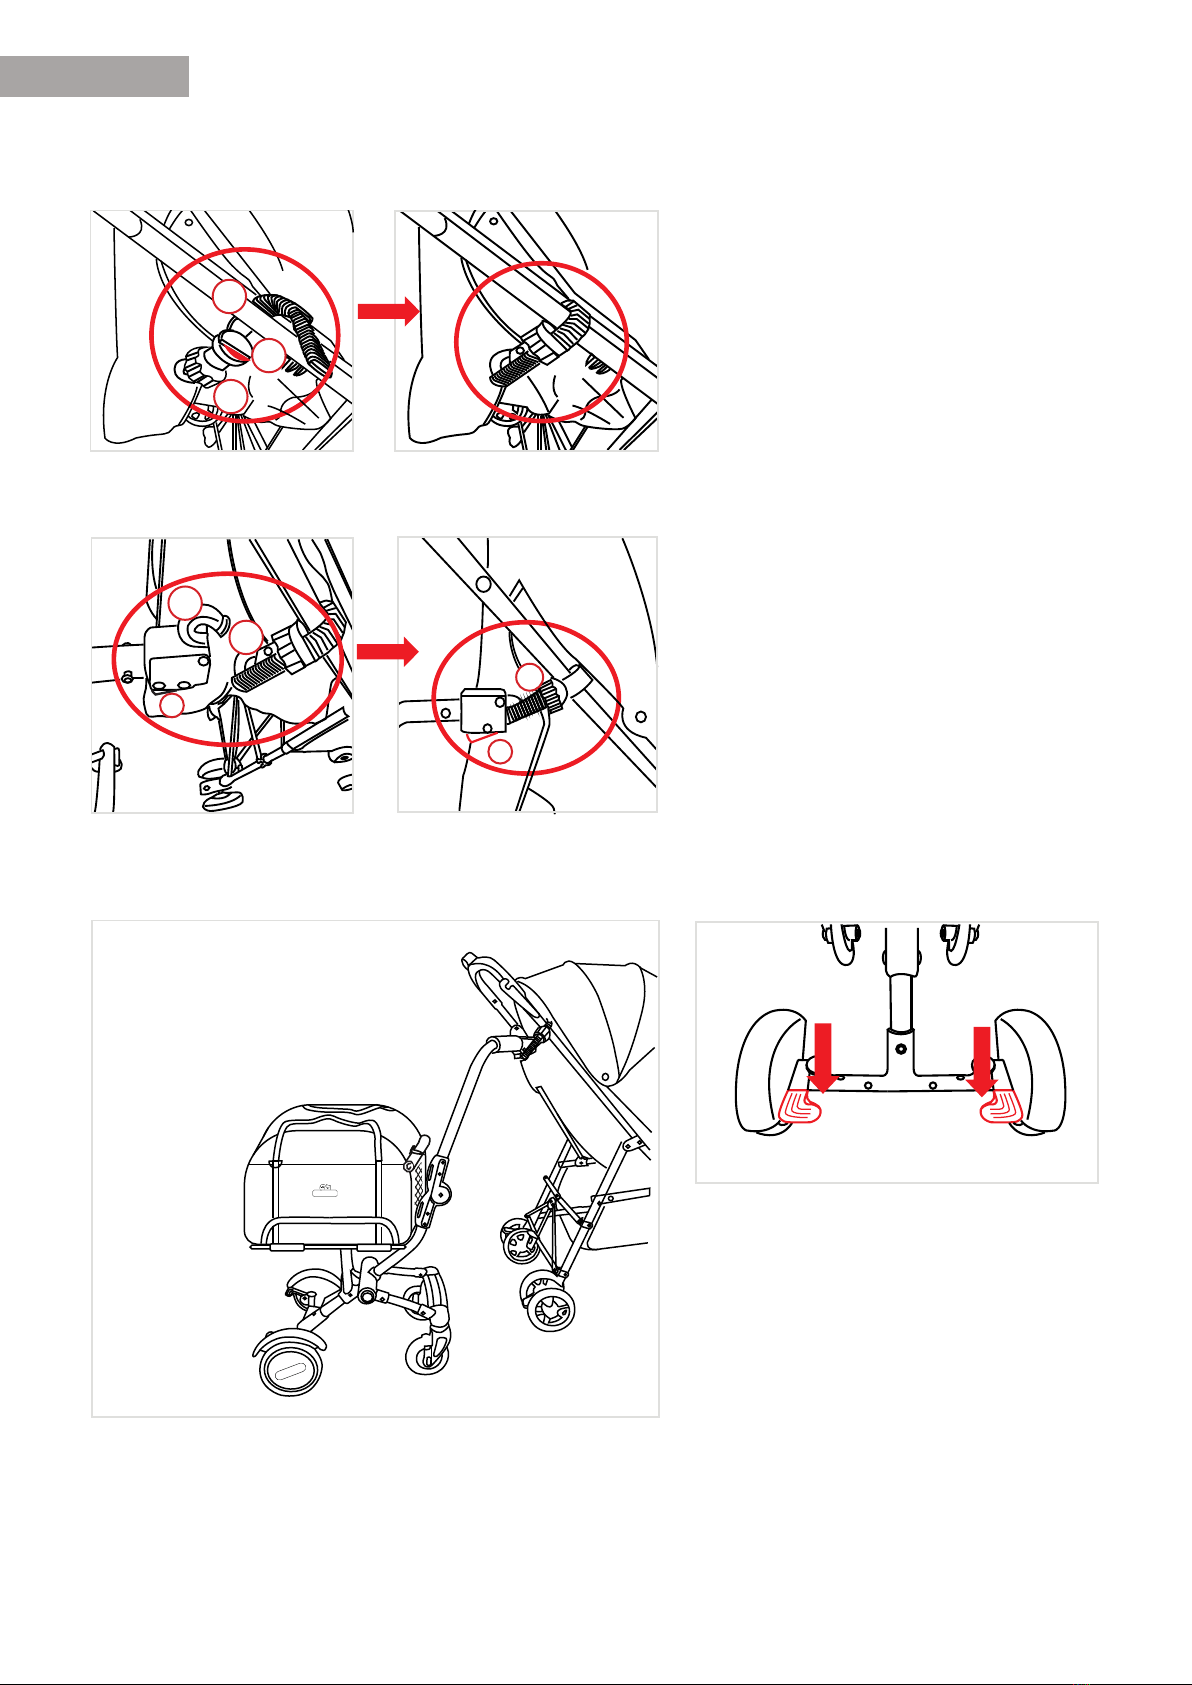
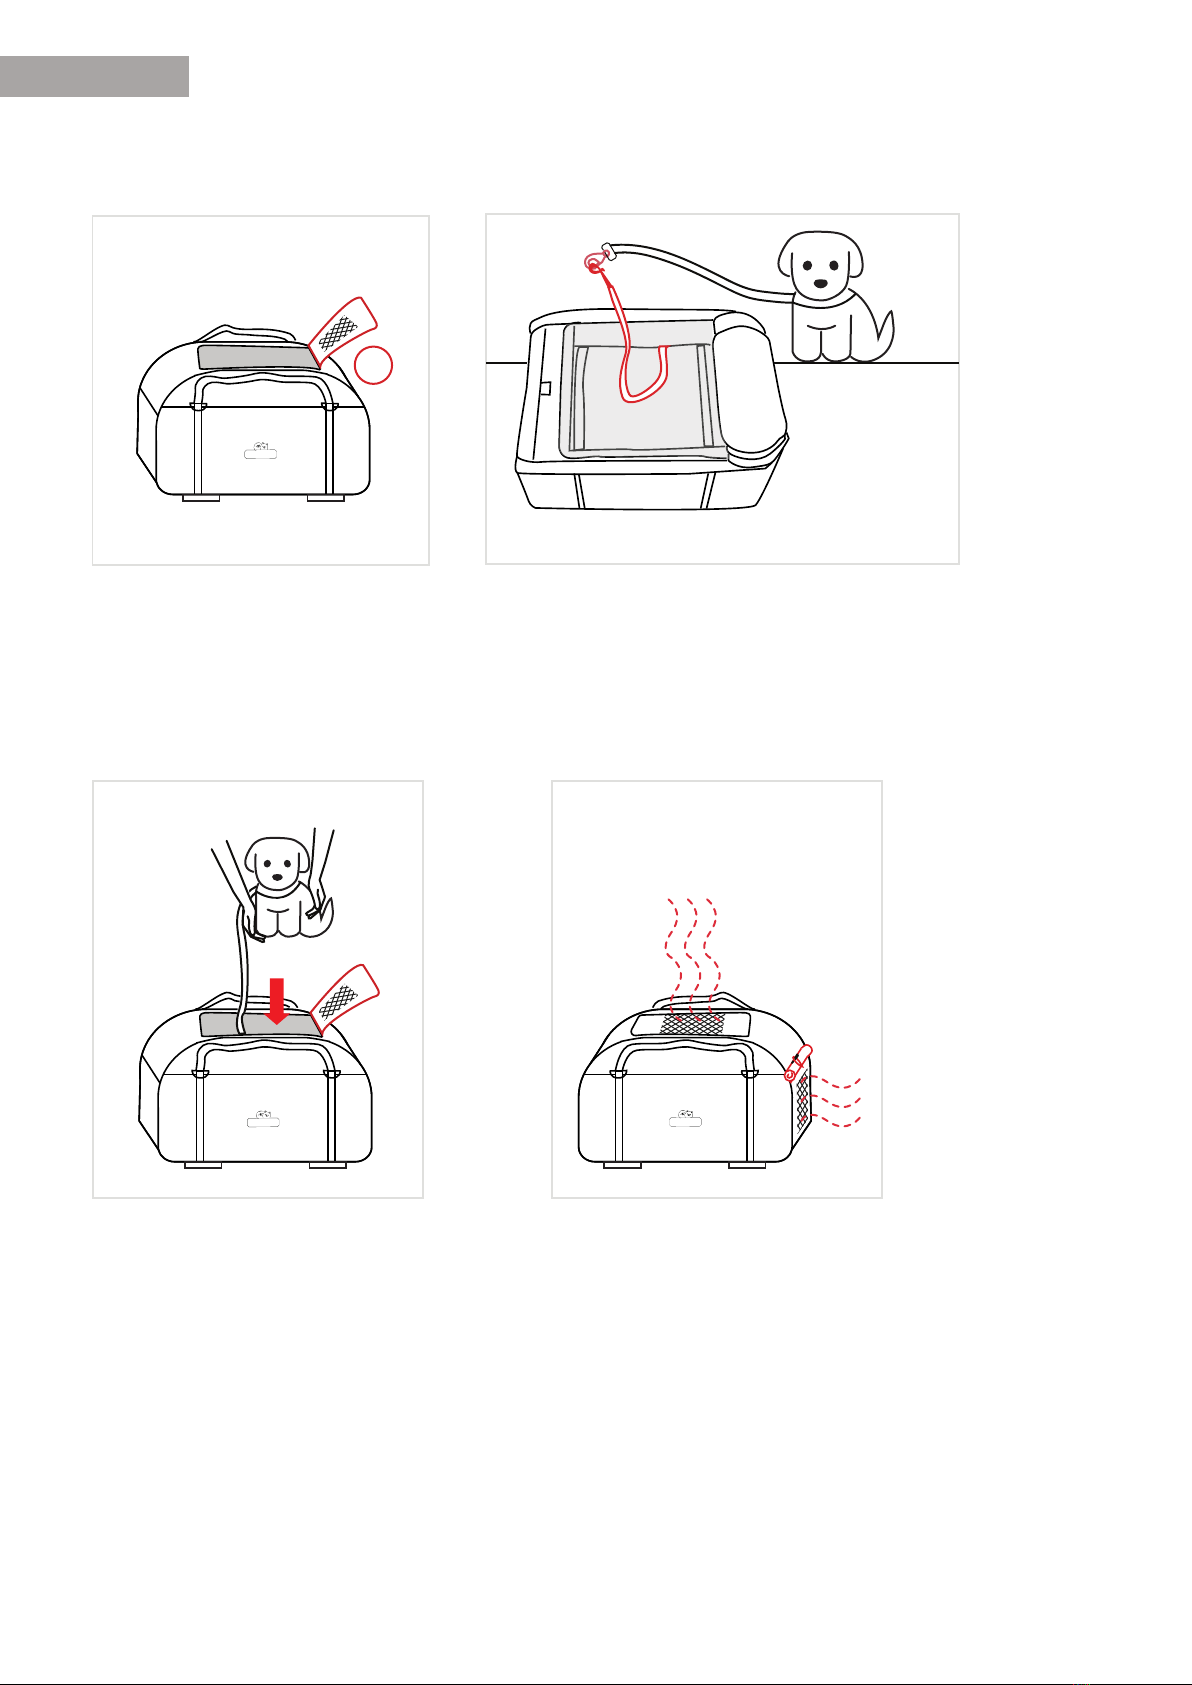
Make sure the Co-rider K9 is correctly connected and secured to the pram before use.
ï
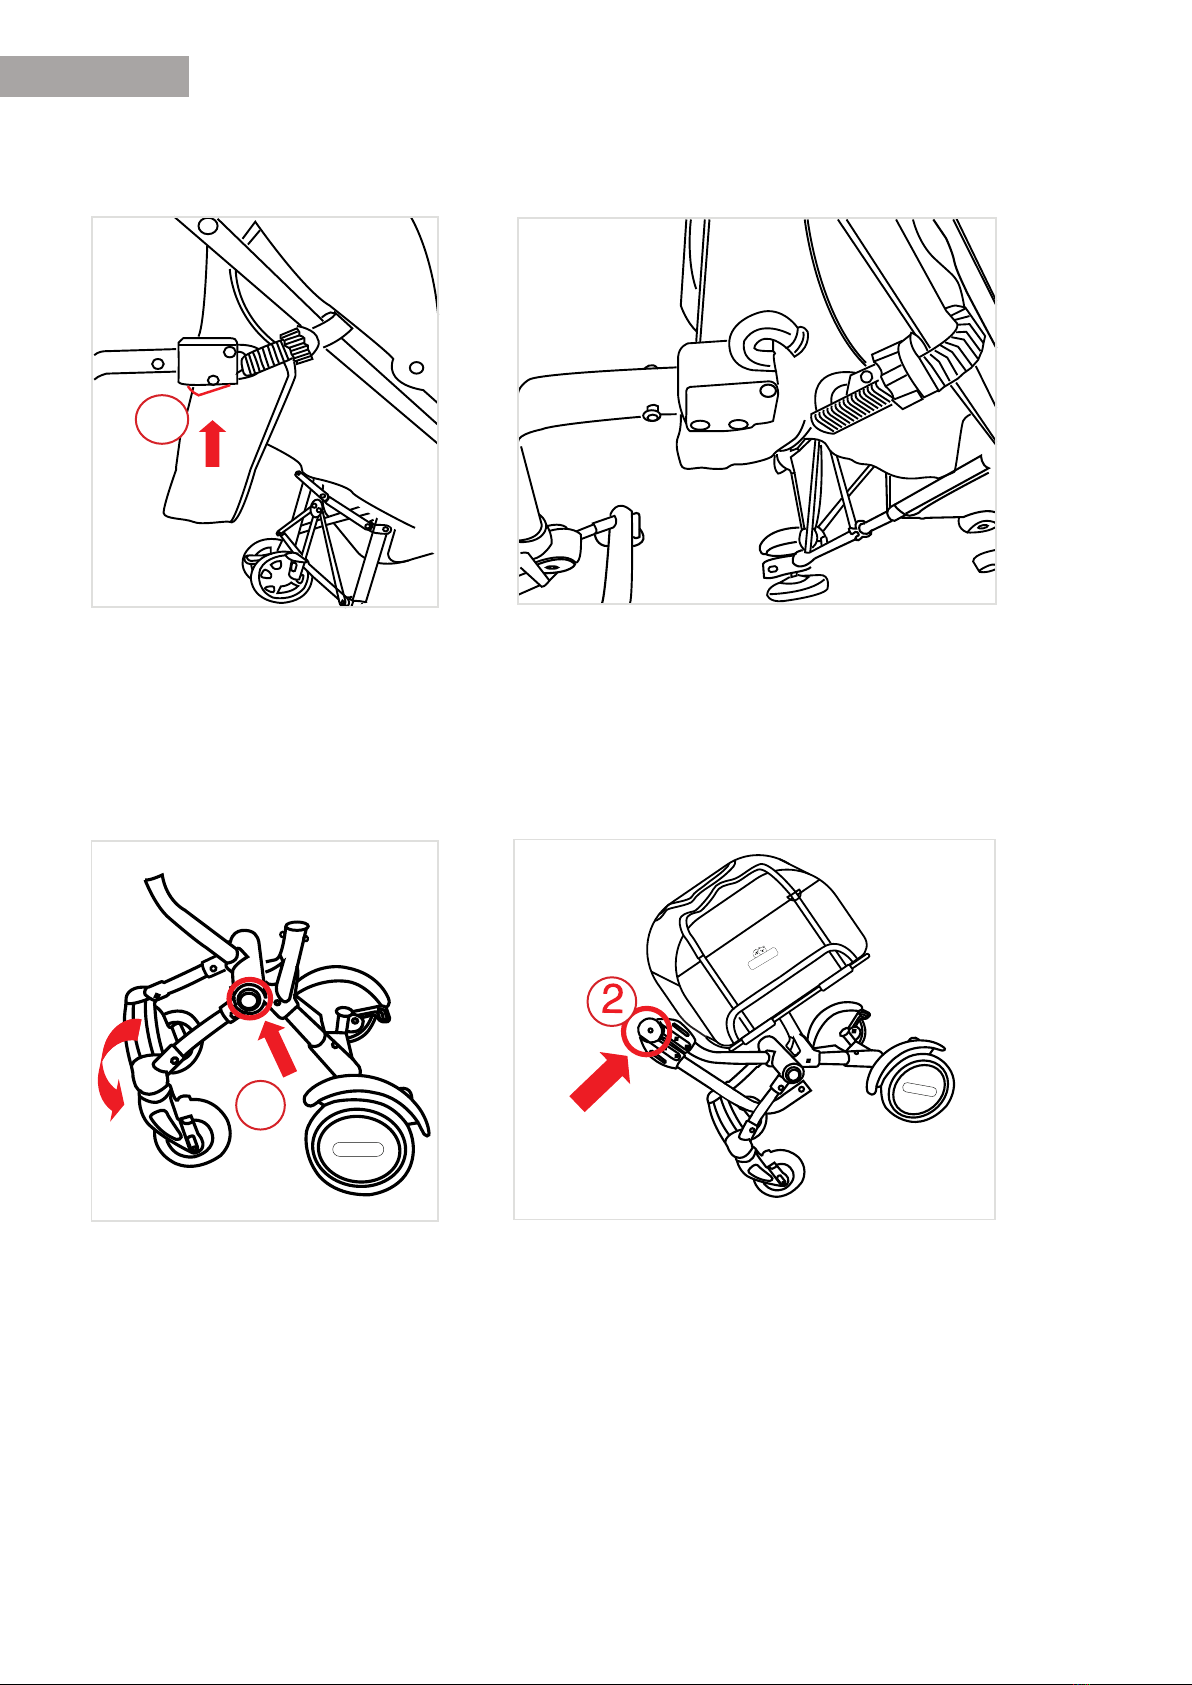
Ensure all screws and mountings of the product are sitting firmly and all parts are connected properly.
ï
Never make alterations to the Co-rider K9 to avoid compromising its safety.
ï
The Co-rider K9 is not suitable for use on snow or soft surfaces.
ï
Clean all the parts and wheels from time to time with warm soapy water. Dry thoroughly.
ï
Please keep the Co-rider K9 packaging materials away from pets and children.
ï
Keep the instruction manual carefully for future reference and any possible subsequent users.
In the event of any possible damage to the Co-rider K9, only original replacement parts from
the manufacturer must be used for repair.
ï
ï
ï
ï
ï
ï
SAFETY INSTRUCTIONS
Do not use the Co-rider K9 unless your pet is comfortable and secured completely.
•
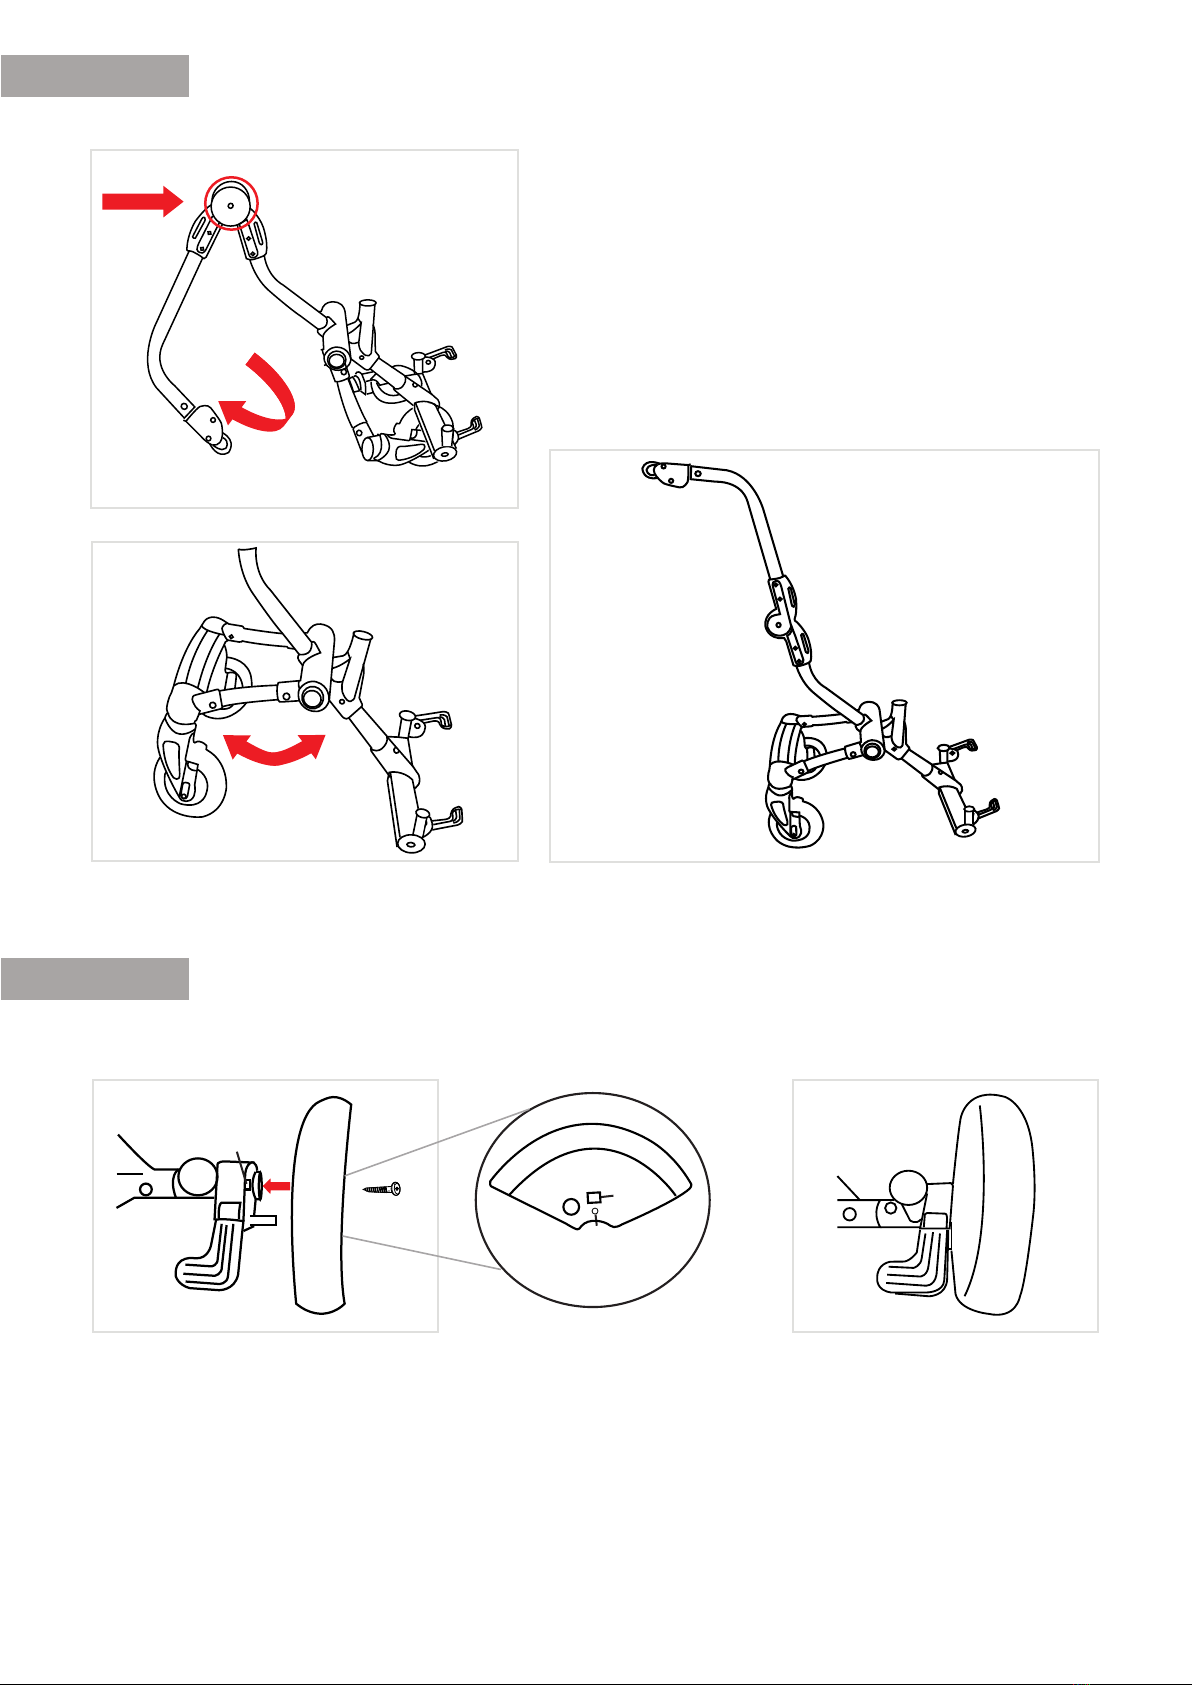
The Co-rider K9 connector is meant to be connected to the frame at the rear side of the pram.
•
Your pet must alight before reaching pavement edges, stairs, steep paths,tight corners and/or whilst
manoeuvring backwards.
•
The Co-rider K9 may not be suitable for all prams. Please consult your dealer before purchase
•
The Co-rider K9 is not a toy. It is not suitable for children.
The Co-rider K9 must not be used if you go jogging or skating with the pram.
The Co-rider K9 is designed for pets with a maximum weight of 8kg.
In order to guarantee the safety and functionality of this device, avoid any overloading.
Under no circumstances, can it be used for transporting additional items or occupants.
* Do Not operate the Co-rider K9 moving in the backward direction.
If this product is connected to a stroller/pram, it can only be used with a pet when there is a child
simultaneously sitting in the pram or stroller. The handles of the pram/stroller must always be held
tightly with both hands by an adult when this product is in use.
Avoid operating the Co-rider K9 in a backward direction.
•
WARNING


For further information
visit www.furmates.com.au
furmates
Table of contents
Other furmates Pet Care Product manuals