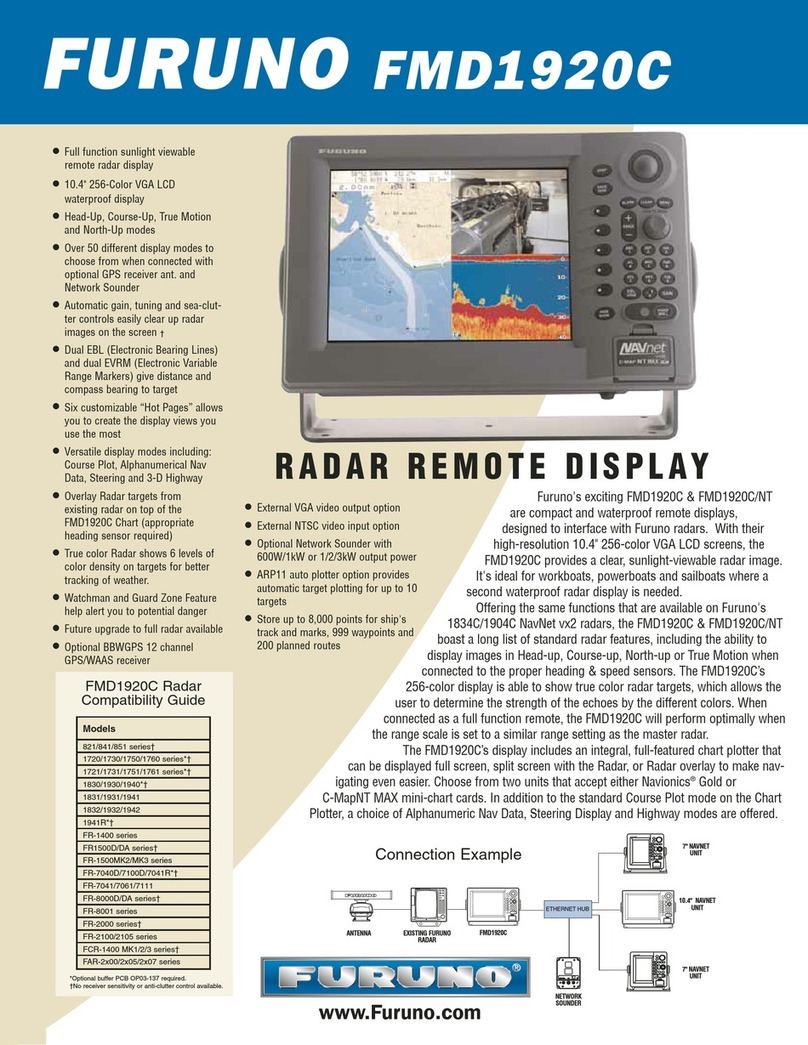
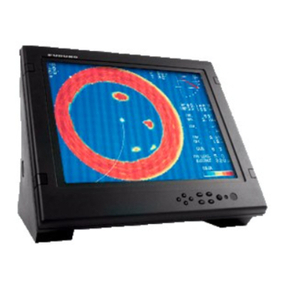
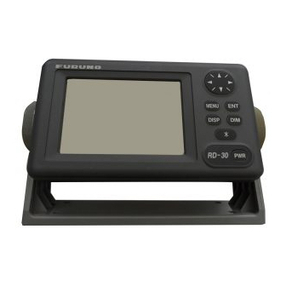
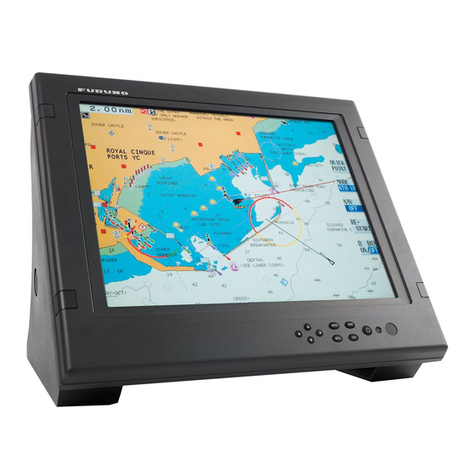
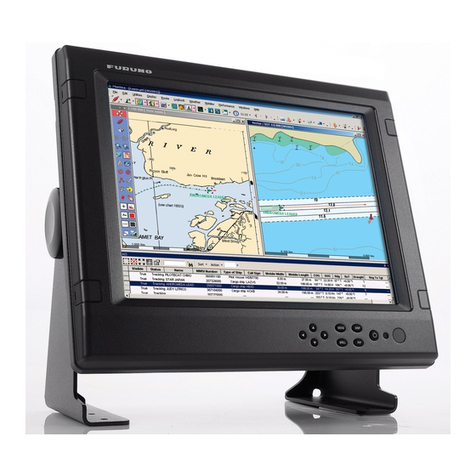
Furuno MU-201C User manual

MULTI-PURPOSE LCD DISPLAY
MU-201C

IMPORTANT NOTICE
• No part of this manual may be copied or reproduced without written permission.
• If this manual is lost or worn, contact your dealer about replacement.
• The contents of this manual and equipment specifications are subject to change without
notice.
• The example screens (or illustrations) shown in this manual may not match the screens
you see on your display. The screen you see depends on your system configuration and
equipment settings.
• This manual is intended for use by native speakers of English.
• FURUNO will assume no responsibility for the damage caused by improper use or
modification of the equipment or claims of loss of profit by a third party.
• Please carefully read and follow the operation and maintenance procedures set forth in
this manual.
• Store this manual in a convenient place for further reference.

i
SAFETY INSTRUCTIONS
WARNING
WARNING
To avoid electrical shock, do not
remove cover. No user-serviceable
parts inside.
WARNING
CAUTION
MU-201C
Standard Steering
compass compass
0.55 m 0.30 m
The TFT LCD is constructed using the
latest LCD techniques, and displays
99.99% of its pixels. The remaining 0.01%
of the pixels may drop out or blink, how-
ever this is not an indication of malfunc-
tion.
Name: Warning Label (1)
Type: 86-003-1011-1
Code No.: 100-236-231
Do not open the equipment.
Only qualified personnel should
work inside the equipment.
Do not disassemble or modify the
equipment.
Fire, electrical shock or serious injury can
result.
Use the proper fuse.
Fuse rating is shown on the equipment.
Use of a wrong fuse can result in damage
to the equipment.
Immediately turn off the power at the
switchboard if the equipment is emitting
smoke or fire.
Continued use of the equipment can cause
fire or electrical shock. Contact a FURUNO
agent for service.
Safety Instructions for the Operator Safety Instructions for the Installer
Do not open the cover unless
totally familiar with electrical
circuits and service manual.
Improper handling can result in
electrical shock.
Turn off the power at the switchboard
before beginning the installation.
Fire or electrical shock can result if the
power is left on.
Do not install the equipment where it may
get
wet
from
rain
or
water
splash.
Water in the equipment can result in fire,
electrical shock or damage to the
equipment.
Ground the equipment to
prevent mutual interference.
A warning label is attached to the
equipment. Do not remove the label.
If the label is missing or damaged,
contact a FURUNO agent or dealer.
About the TFT LCD
Observe the following compass safe
distances to prevent interference to a
magnetic compass:
The face of the LCD monitor is made of
glass. Handle it with care.
ii
TABLE OF CONTENTS
FOREWORD ........................................................................................................iii
SYSTEM CONFIGURATION................................................................................ iv
EQUIPMENT LISTS.............................................................................................. v
1 MOUNTING ......................................................................................................1
1.1 Display Unit ...................................................................................................................1
2 WIRING.............................................................................................................4
2.1 Wiring............................................................................................................................4
3 ADJUSTMENTS...............................................................................................6
3.1 OSD Settings ................................................................................................................6
4 OPERATION...................................................................................................10
5 MAINTENANCE, TROUBLESHOOTING.......................................................12
5.1 Maintenance................................................................................................................12
5.2 Troubleshooting...........................................................................................................13
SPECIFICATIONS...........................................................................................SP-1
OUTLINE DRAWINGS...................................................................................... D-1
INTERCONNECTION DIAGRAM ......................................................................S-1

iii
FOREWORD
A Word to the Owner of the MU-201C
FURUNO Electric Company thanks you for purchasing the MU-201C 20.1” Multi-Purpose
LCD Display. We are confident you will discover why the FURUNO name has become
synonymous with quality and reliability.
For over 50 years FURUNO Electric Company has enjoyed an enviable reputation for
quality and reliability throughout the world. This dedication to excellence is furthered by our
extensive global network of agents and dealers.
Your equipment is designed and constructed to meet the rigorous demands of the marine
environment. However, no machine can perform its intended function unless properly
installed and maintained. Please carefully read and follow the operation, installation and
maintenance procedures set forth in this manual.
We would appreciate feedback from you, the end-user, about whether we are achieving our
purposes.
Thank you for considering and purchasing FURUNO.
Features
• Main or remote display for radars, video sounders, sonars. Compatible equipment:
FCV-1200L, CH-250, FAR-2107/2807, GD-280/380/680, etc.
• High resolution display of 1280x1024 dot (SXGA), 1024x768 dot (XGA), 640x480 dot
(VGA)
• Wide viewing angle for observation by more than one person
• DVI and analog RGB connectors are employed.

i
v
SYSTEM CONFIGURATION
100-230 VAC
NMEA
0183
RGB
DVI Radar
(FAR-2117/2817 series)
IF-
8000
Video Plotter, Video Sounder,
Scanning Sonar, Radar, etc.
Navigator (GPS, etc.)
Control unit of
Video Sounder or
Scanning Sonar*
Multi-purpose LCD display MU-201C
*: When connecting the FCV-1200L or
CH-250 as the main display unit,
connect it to the interface unit (IF-8000).
Processor unit of
Video Sounder,
Transceiver unit of
Scanning Sonar*
Connectable equipment
Equipment Resolution* Image output
FC
V
-30 SXGA, XGA RGB
FS
V
-24/30 SXGA RGB
FC
V
-1200L VGA RGB
FR-2105 SXGA RGB
FAR-2117/2817 series SXGA DVI
GD-280/380/680 VGA RGB
CH-250/270/300 VGA RGB
CI-68/88 VGA RGB
*: SXGA: 1280x1024 dot, XGA: 1024x768 dot, VGA: 640x480 dot
Note1: Portrait orientation equipment cannot be connected to the MU-201C.
Note2: Non-VESAequipment cannot be connected to the MU-201C.
Note3: When inputted signal differs in resolution, characters and lines are not shown
clearly.
Note4: Missing dot, limited viewing angle and display flicker are inherent characteristics of
the LCD color display.
Note5: It takes about five seconds to switch the signal between RGB and DVI.

v
EQUIPMENT LISTS
Standard supply
Name Type Code No. Qty Remarks
LCD Display Unit MU-201C 000-083-166 1 AC specification
Spare Parts SP03-14401 008-535-990 1 set Fuse FGMB (2A, 2 pcs.)
Installation
Materials CP19-00301 008-546-780 1 set Crimp-on lug, FV2-4
(2 pcs.)
Accessories FP03-09810 008-536-010 1 set
Cosmetic cap (4 pcs.),
Panel hook (2 pcs.),
Self-tapping screw (6x30,
4 pcs.)
Option
Name Type Code No. Qty Remarks
Interface Unit IF-8000 000-068-495 1 Required connecting
FCV-1200L or CH-250/270
DVI-D/D
SINGLELINK 5M 000-149-054 1 For DVI
cable length: 5 m
3COX-2P-6C 5M 000-146-500 1 For RGB
cable length: 5 m
Cable Assy
3COX-2P-6C 10M 000-146-501 1 For RGB
cable length: 10 m
Bracket Kit FP03-09820 008-535-560 1 See page 2.
Handgrip Assy FP03-09840 008-535-570 1
Handgrip (2 pcs.),
Oval countersunk head screw
(M6x20, 4 pcs.),
Rosette washer (M6, 4 pcs.),
Wave washer (WW-6, 4 pcs.)
Dust Cover 03-163-1201 100-307-260 1

1
1. MOUNTING
Refer to the outline drawing of this manual for mounting dimensions.
Note: The face of the LCD monitor is made of glass. Handle it with care.
1.1 Display Unit
The display unit may be mounted on a desktop or flush mounted in a panel.
When selecting a mounting location, keep in mind the following points:
• Locate the unit out of direct sunlight.
• Select a location where the display can be easily viewed and the controls can be easily
operated.
• Leave sufficient space around the unit for servicing and maintenance. See the outline
drawing for minimum servicing space.
• Be sure the mounting location is strong enough to support the weight of the unit.
• Locate the unit away from areas subject to water splash and rain (the unit is not
waterproof).
Flush mounting
1. Make a cutout in the mounting location, referring to the outline drawing of this manual.
2. Set the display unit to the cutout, and fasten it with four self-tapping screws (6x30,
supplied as accessories).
Note: Hex head bolts may also be used to fasten the display unit. However, their lengths
must be 10 mm longer than the wall thickness.
80
30
Cosmetic cap Non-waterproofness: IPX0
Non-waterproofness: IPX0
Flush mounting

2
3. Attach the cosmetic cap (supplied as accessories) to the display unit at the locations
shown in the drawing on page 1.
Note: If necessary, fill gap between the mounting panel and the display unit chassis with
sealing material.
Desktop mounting
The display unit can be mounted on a desktop, using the optional bracket kit (Type:
FP03-09820, Code No.: 008-535-560).
Contents of bracket kit
Name Type Code No. Qty
Hanger L (20) 03-163-1111 100-305-141 1
Hanger R (20) 03-163-1112 100-305-181 1
Hanger stay (20) 03-163-1113 100-305-191 1
Hole plug CP-30-HP-13 000-147-143 2
Plastic rivet For KB-13, black button 000-570-276 4
Hex bolt M6x25 000-802-771 4
Hex bolt M10x30 000-802-182 2
Spring washer M10 000-864-261 2
Flat washer M10 000-864-131 2
1. Assemble two hangers and hanger stay with two hex bolts (M10x30), spring washers
and flat washers and cover each hex bolt with hole plug.
2. Fix the above assembly to the mounting location with four hex bolts (M10, dockyard
supply).
3. Fasten the display unit to the bracket with four hex bolts (M6x25, supplied).
4. Cover each hex bolt with cosmetic cap.
5. Cover each hole for handle on the hanger with plastic rivet.

3
Cosmetic cap
Hex bolt
(M6x25)
Hanger L
M10 bolts for fixing
(Dockyard supply)
Hanger stay Hanger R
Flat washer (M10)
Spring washer (M10)
Hex bolt
(M10x30)
Hole plug
Plastic rivet
To remove this, insert fingernail in groove.
Desktop mounting
The optional handgrip assy. (Type: FP03-09840, Code No.: 008-535-570) is available for
the desktop mount display unit.
Handgrip
Wave washer
Rosette washer
Oval countersunk head screw

4
2. WIRING
2.1 Wiring
Connect equipment to the MU-201C by referring to the drawings in this section and the
interconnection diagram of this manual.A cable with a connector at both ends is provided to
connect equipment.
General-purpose monitor
To use the MU-201C as a general-purpose monitor, connect equipment with the optional
cable assembly, 3COX-2P-6C (5 or 10 m) or DVI-D/D SINGLELINK.
A
ARGB port
DVI port
FCV-30: PROCESSOR UNIT RGB OUT port
FSV-24/30: PROCESSOR UNIT CN-A104/109 port
FCV-1200L: INTERFACE UNIT RGB OUT port
FR-2105: Connector on RGB BUFFER board in the display unit
GD-280/380/680: DISPLAY UNIT EXT VIDEO port
CH-250/270/300: INTERFACE UNIT RGB OUT port
CI-68/88: Connect to CN-A1 port in the control unit with the conversion cable
(66S1242, 0.3 m)
FAR-2117/2817: PROCESSOR UNIT DVI-D MONITOR port
3COX-2P-6C
(5/10 m)
DVI-D/D SINGLELINK 5M
Cable entrance
for power cable Cable entrance for signal cable
(The connector with no EMI core should
be connected to the DVI port.)
Note 1: Even when the power switch is off, electric current flows slightly. Connect the power
line via a double-contact breaker.
Note 2: The MU-201C does not have a hot plug function. When the power switches of the
MU-201C and the equipment connected are on, do not connect or disconnect
equipment to prevent damage to equipment.

5
Fabricating the power cable (DPYC-2.5 (Japan Industry Standard) or
equivalent)
1. Cut armor of the cable by 40 mm.
2. Cut vinyl sheath by 35 mm.
3. Remove insulation of wires by
about 10 mm. Fix crimp-on lugs
(FV2-4, blue, supplied) to the
cores.
4. Peel off the paint of the armor by
40 mm.
5. Cover the end of armor with vinyl
tape. Fix the part peeled at step 4
with cable clamp.
Connecting FCV-1200L or CH-250/270/300
To connect the FCV-1200L or CH-250/270/300 to the MU-201C, the optional cable
assembly 3COX-2P-6C (5 or 10 m) and the interface unit IF-8000 are required.
A
A
RGB IN port
CH-250/270/300: CONTROL UNIT CONT port
FCV-1200L: CONTROL UNIT CONT port
MJ-A10SPF0015-005
06S4078
IF-
8000 CH-250/270/300: TRANSCEIVER UNIT
DATA/VIDEO OUT port
FCV-1200L: PROCESSOR UNIT CN1 port
RGB OUT
NMEA
CONT
DATA/VIDEO IN
Cable entrance
for power cable Cable entrance
for signal cable
Navigator (GPS, etc.)
Note 1: The cover of the D-sub connector of the cable 06S4078 may be removed to pass
the cable through tubing, bulkhead, etc. Use vinyl tape to bind connector wiring and
rubber cover. This allows the cable to be passed through a hole having a diameter
of 30 mm.
Note 2: Cable 06S4078 is of waterproof construction,
however, the rear panel of the MU-201C is not
waterproof (specification IPX0). Therefore,
rubber cover and fixing metal at the display unit
side of the cable are not necessary.
Remove fixing metal.
Remove rubber cover.
35 mm
10 mm
DPYC-2.5
armor
Approx. 40 mm
Vinyl sheath
40 mm: Peel off paint
Taping
Conductor
S = 2.5 mm
φ= 2.01 mm
2
DPYC-2.5 Armor
Sheath
φ = 12.5 mm

6
3. ADJUSTMENTS
3.1 OSD Settings
The OSD (On Screen Display) contains items for adjustment of the display.
1. Press the [MENU] key to show the OSD.
Resolution
2. Press [◄] or [►] to select the mark at the main hierarchy you want to adjust, and then
press [▼].
The selected mark is highlighted and unselected marks are gray.
3. Press [◄] or [►] to select the mark at the sub hierarchy you want to adjust, and then
press [▼].
4. Press [◄] or [►] to select the position marker or value you want to adjust, and then
press [▼]. Alternatively, press [◄] or [►] to adjust the item by using the bar.
The selected mark is circled in red with a red dot below.
5. Press the [MENU] key to close the OSD.
6. If necessary, repeat steps 2-5 to adjust other items.

7
Contents of OSD menu item
Main mark Sub mark Item Function
All default Restores all default settings.
Default Auto adjustment* Adjusts image timing automatically.
Contrast
adjustment
Increases or decreases contrast level.
Adjusts the gain of input signal together.
After selecting the item, adjust the contrast on
the bar.
Dark (◄) ↔Bright (►)
Black
contrast
Black level
adjustment
Adjusts black level.
After selecting the item, adjust the level on the
bar.
Bright (◄) ↔Dark (►)
RGB contrast reset Resets contrasts of red, green and blue colors
together.
RGB adjustment
Adjusts contrast of red, green and blue colors
individually.
After selecting the item, adjust the contrast on
each bar.
Red
Green
Blue
Bright (◄) ↔Dark (►)
Color
contrast
Color temperature
Kelvin (k)
Indicates white tone numerically.
After selecting the item, choose the numeric
value out of four, referring to some feeling
shown below for scale.
Warm color ↔Cold color
SRGB: standard setting
5000k: typical daylight
6500k: bright sunshine
9300k: open shade on clear day
continued

8
Main mark Sub mark Item Function
Auto adjustment* Adjusts image timing automatically.
Pixel adjustment*
Adjusts the number of pixels in the horizontal
direction. If there is pixel count mismatch
between analog signal and monitor, vertical
flicker and unclear text will result.
After selecting the item, adjust the image on the
bar.
To the left (◄) ↔To the right (►)
Phase adjustment*
Adjusts the timing of sampling so that the flicker
disappears and the text is clear.
A
fter selecting the item, adjust the phase on the
bar.
To the left (◄) ↔To the right (►)
Horizontal position
adjustment*
Adjusts the image position horizontally.
After selecting the item, adjust the horizontal
position on the bar.
To the left (◄) ↔To the right (►)
Position,
Phase
Vertical position
adjustment*
Adjusts the image position vertically.
After selecting the item, adjust the vertical
position on the bar.
Down (◄) ↔Up (►)
Setting of OSD
time out
Sets the OSD time out. (Time to wait to blank
screen without key operation.)
After selecting the item, choose the time out of
four.
5 sec. 15 sec. 30 sec. 60 sec.
OSD
position
OSD location
Sets the OSD location on the screen.
After selecting the item, choose the location out
of five.
Center
Bottom
Left
Top
Right
*: When inputting DVI, these marks are not shown.

9
Contents of other marks and messages
Mark/Message Function
Select the mark and press [▼] to save the ongoing setting or the auto
adjustment value. Then, OSD is off.
Select the mark and press [▼] to cancel the ongoing setting or the auto
adjustment. Then, OSD is off.
When phase adjustment is completed, this mark is shown. (Press [▼]
to erase this mark.)
This message shows no signal is input.
This message shows the input resolution signal is beyond the
specification of the MU-201C.
This message shows the input video signal is beyond the specification
of the MU-201C.

10
4. OPERATION
S
S
S
S
MENU DISP
LED
Arrow keys Power key
Brill key
Key/LED Function
Turns the power on/off.
a) Adjusts the display brilliance (lowest: 0, highest: 10).*
-: Decreases the display brilliance.
+: Increases the display brilliance.
b) Switches the display mode between full screen and fixed aspect ratio.
Press [+] while pressing the [DISP] key: Full screen zoom
Press [-] while pressing the [DISP] key: Fixed aspect ratio
MENU a) Opens/closes the OSD.
b) Saves settings.
DISP Switches input signal between RGB and DVI .
Arrow key (▲) a) Returns to the main hierarchy on the OSD.
b) Saves settings.
Arrow key (▼) a) Moves to mark at the lower hierarchy on the OSD.
b) Selects item.
Arrow key (◄)** a) Chooses item on the OSD (move to the left).
b) After selecting the item, selects options on the bar.
Arrow key (►)** a) Chooses item on the OSD (move to the right).
b) After selecting the item, selects options on the bar.
LED
Shows input signal status as below.
Green: Video signal is applied.
Orange: No video signal is applied.

11
*: When decreasing the display brilliance, unevenness of the brilliance may occur. This is
normal symptom.
**: Continuous pressing makes change faster.
Note: Even if the power switch is off, a small amount of current flows through the equipment.
If the equipment won’t be used for a long time, turn off the breaker switch at ship’s
power distribution box to prevent battery consumption.
Full screen zoom and fixed aspect ratio
When inputting VGAsignal, two display modes are available: full screen zoom and fixed
aspect ratio. For XGA input signal, only full screen zoom is available.
Switching the display mode (only for VGA)
Equipment Full screen zoom Fixed aspect ratio
FCV-1200L Yes Yes
GD-280/380/680 No Yes
CH-250/270/300 No Yes
CI-68/88 No Yes
When inputting VGAfrom the radar or scanning sonar, the circle may be displayed as an
ellipse because the aspect ratio differs. In this case, use the fixed aspect ratio. The top and
bottom on the screen are left as blank, but it is normal.

12
5. MAINTENANCE,
TROUBLESHOOTING
WARNING
ELECTRICAL SHOCK HAZARD
Do not open the equipment.
Only qualified personnel
should work inside the
equipment.
5.1 Maintenance
Routine maintenance
Regular maintenance is important for good performance. Check the following on a regular
basis to keep the equipment in good operating condition.
• Check that the connectors at the rear of the display unit are tightly fastened.
• Check the ground wire and ground terminal for rust. Clean if necessary. Confirm that the
ground wire is tightly fastened.
• Remove dust and dirt from the display unit and LCD with a dry, soft cloth. Do not use
chemical cleaners to clean any part of the display unit – they can remove paint and
markings.
• Wipe the LCD carefully to prevent scratching, using tissue paper and an LCD cleaner. To
remove dirt or salt deposits, use an LCD cleaner, wiping slowly with tissue paper so as
to dissolve the dirt or salt. Change paper frequently so the salt or dirt will not scratch the
LCD. Do not use solvents such as thinner, acetone or benzene for cleaning.
Fuse replacement
The 2 A fuse on the rear panel protects the equipment from internal fault and overcurrent. If
the fuse blows, find the cause before replacing it. If the fuse blows again after replacement,
request service.
WARNING
Use the proper fuse.
Use of a wrong fuse can cause fire or
damage to the equipment.

13
5.2 Troubleshooting
The table below provides troubleshooting procedures to use when no picture appears. If
you cannot restore the picture, do not attempt to check inside the equipment – there are no
user serviceable parts inside. Refer any work to a qualified technician.
Troubleshooting table
Reason for no picture Remedy
Battery voltage too high. Check battery voltage.
Fuse has blown. Replace fuse on the rear of
the display unit.
Cable between MU-201C and external
equipment has loosened.
Refasten cable.
Power cable has loosened. Refasten cable.
The brilliance is too low. Increase the brilliance.
Other manuals for MU-201C
1
Table of contents
Other Furuno Monitor manuals

Furuno
Furuno NAVNET TZTOUCH2 TZTL15F Installation guide

Furuno
Furuno FMD-1800 User manual

Furuno
Furuno MU-155C Manual

Furuno
Furuno RD-30 User manual

Furuno
Furuno PM30 User manual

Furuno
Furuno RD-50 User manual

Furuno
Furuno RD-50 User manual

Furuno
Furuno FMD-1712 User manual

Furuno
Furuno FMD3100 User manual

Furuno
Furuno TZT16F User manual

Furuno
Furuno NavNet TZtouch3 TZT9F Manual

Furuno
Furuno MU-155C Manual

Furuno
Furuno RD-20 User manual

Furuno
Furuno MU-190V User manual

Furuno
Furuno MFD8 Instruction Manual

Furuno
Furuno RD-20 User manual

Furuno
Furuno RD-30 Manual

Furuno
Furuno FMD3100 User manual

Furuno
Furuno SFD-1010 User manual

Furuno
Furuno Multi Instrument FI-504 User manual