Important
•Fully charge the battery before first use. Charge under direct
sunlight in the <OFF> position for 2 days.
•For best results, locate your solar lamp in a position where it can
get direct sunlight on the solar panel and generally free from cover
and shade.
•Keep your solar lights away from other night-time light sources,
such as streetlights.
•Make sure the solar panels are not covered by dust, snow and
debris. Clean it with a soft damp cloth or paper towel periodically.
Avoid the use of abrasive cleaning agents.
•Use only rechargeable batteries for your solar lights. Replace with
a new battery of the same size each year for optimum
performance.
•The performance of the solar light will vary with the time of year. It
will deliver more light when it has had a full day in the sun rather
than a day in overcast weather.
Operation (Manual Control)
STEP 1: Fully charge the batteries before first
use. Charge under direct sunlight in the <OFF>
position for 2 days.
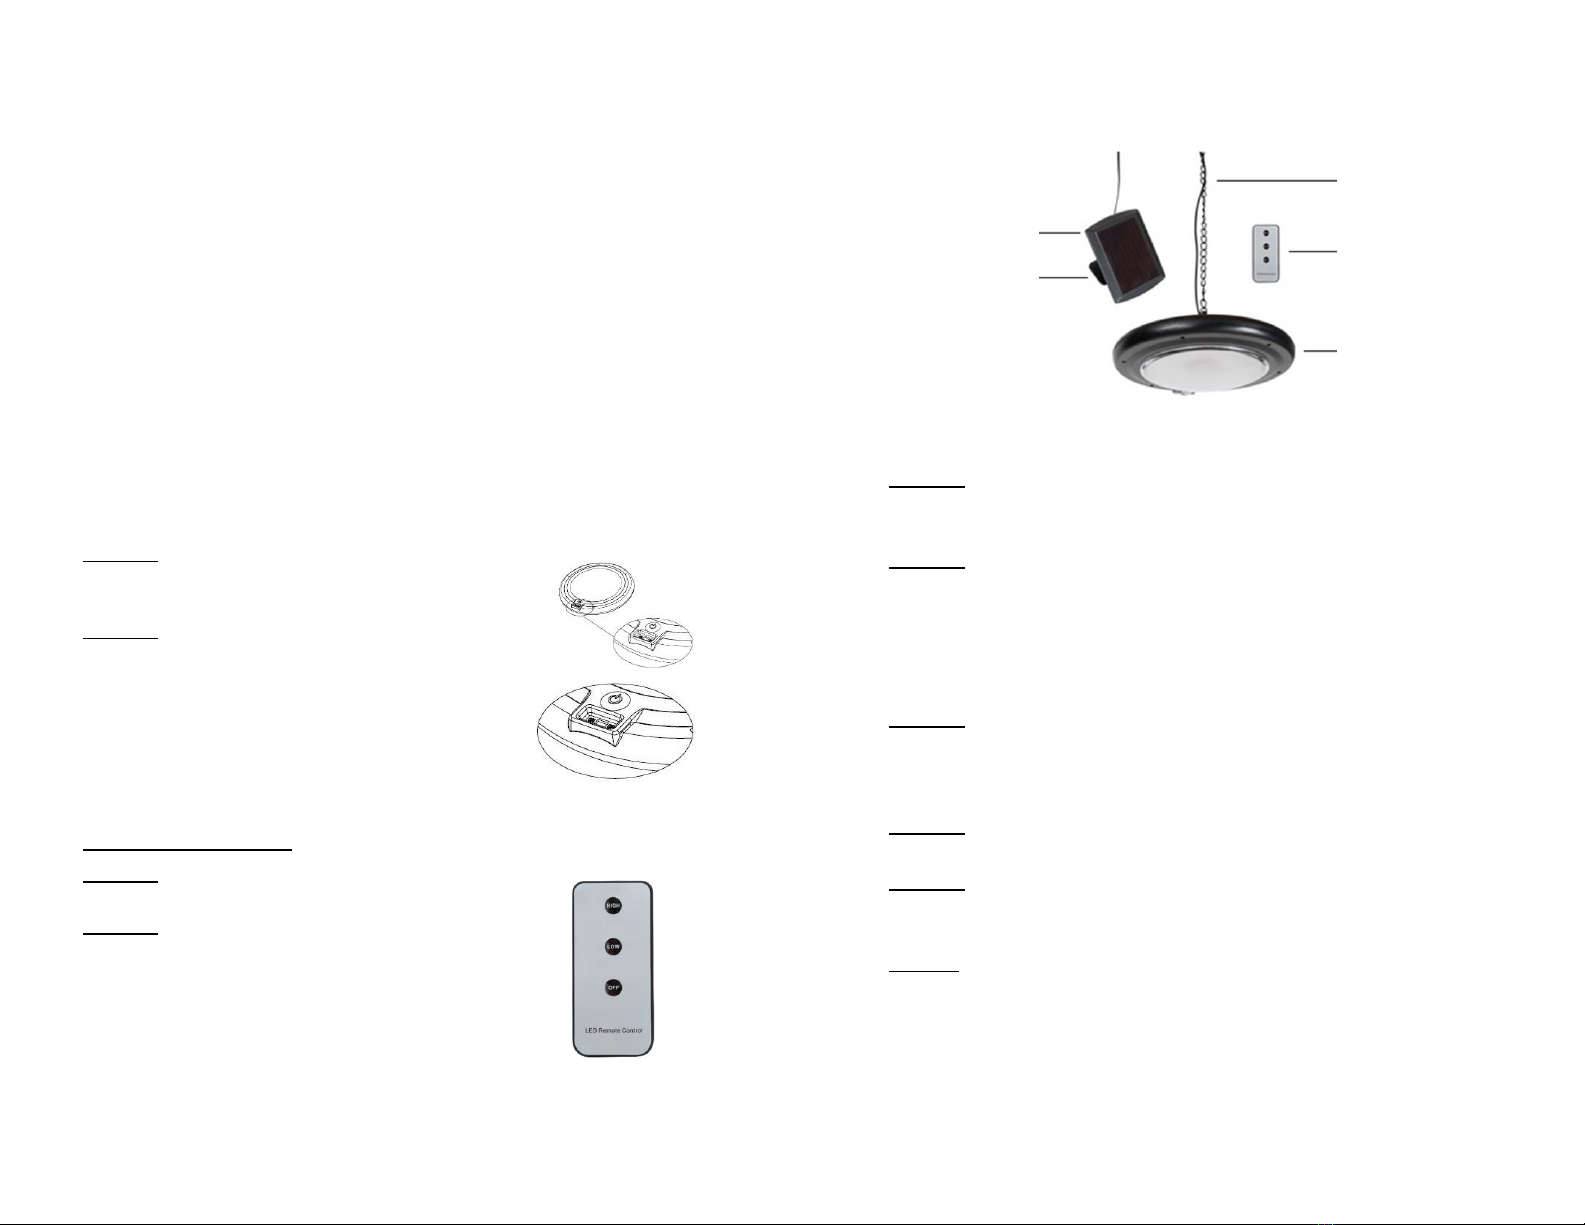
STEP 2: For daily operation, place the ON/OFF
switch in the <ON> position on the light fixture
(Figure 1). The light will automatically turn
on once it gets dark. NOTE: THE REMOTE
CONTROL WILL NOT OPERATE THE LIGHT
FIXTURE WHILE IN THE <ON> POSITION.
Operation (Remote)
For First Time Use:
STEP 1: Remove the pull tab from the battery
compartment on the remote.
STEP 2: Place the switch in the middle position
between the ON and OFF positions on the light
fixture. This is necessary for the light to be
operated by the remote control. Select <HIGH>
or <LOW> position for light level once it gets
dark; select <OFF> once done (Figure 2).
Schematic Diagram
Installation
STEP 1:
Hang fixture in desired location and adjust height if necessary as
required.
STEP 2:
Plug solar panel wire into lead end on the top of the light fixture.
Run solar panel wire to desired mounting location for the solar
panel to ensure you will have enough wire length. Be sure to
mount solar panel in a location where it will receive enough light
during the day.
STEP 3:
Using the mounting bracket for the solar panel as a guide,
measure and mark with a pencil in the desired location where
you will need to pre-drill for screws or wall anchors (if required).
STEP 4:
Secure screws through corresponding holes in mounting bracket.
STEP 5:
Slide solar panel onto mounting bracket until secure. Adjust
angle of solar panel as required.
STEP 6
Allow the unit to charge for up to 2 days in the <OFF> position.