manuals.online logo
Brands
  1. Home
  2. •
  3. Brands
  4. •
  5. FUTABA
  6. •
  7. Remote Control
  8. •
  9. FUTABA T10PX Installation instructions

FUTABA T10PX Installation instructions

WEB FULL MANUAL
&RPSOLDFHIRUPDWLRWDWHPHWIRU
7KLVGHYLFHFRPSOLHVZLWKSDUWRIWKH)&&5XOHV2SHUDWLRLVVXEMHFWWRWKHIROORZLWKUHHFRGLWLRV
7KLVGHYLFHPDRWFDXVHKDUPIXOLWHUIHUHFHDG7KLVGHYLFHPXVWDFFHSWDLWHUIHUH FHUHFHLYHGLFOXGLLWHUIHUHFHWKDWPD
FDXVHXGHVLUHGRSHUDWLR
5)5DGLDWLR([SRVXUH6WDWHPHW)RU73
7KLVHTXL SPHWFRPSOLHVZLWK)&&UDGLDWLRH[SRVXUHOLPLWVVHWIRUWKIRUDXFRWUROOHGHYLURPHW
7KLVWUDVPLWWHUPXVWRWEHFRORFDWHGRURSHUDWLLFRMXFWLRZLWKDRWKHUDWHDRUWUDVPLWWHU
5)5DGLDWLR([SRVXUH6WDWHPHW)RU566566(
7KLVHTXL SPHWFRPSOLHVZLWK)&&UDGLDWLRH[SRVXUHOLPLWVVHWIRUWKIRUDXFRWUROOHGHYLURPHW7KLVHTXLSPHWVKRXOGEHLVWDOOHG
DGRSHUDWHGZ LWKP LLPX PGLVW DFHFP EHWZHHW KHUDGLRD GRXUERG
7KHUHVSRVLEOHSDUWIRUWKHFRPSOLDFHRIWKLVGHYLFHLV
)XWDED6HUYLFH&HWHU
:DOO7ULDD+Z+X WVYL OOH/86
7(/ RU(PDLOFRWDFWXVI XWDEDFRP
&1
7RDVVXUHFRWLXHG)&&FRPSOLDFH
Anychangesormodicationsnotexpresslyapprovedbythegranteeofthisdevicecouldvoidtheuser’sauthoritytooperatetheequipment.
&RPSOLDFHIRUPDWLRWDWHPHWIRU&DDGD
7KLVGHYLFHFRPSOLHVZLWK,GXVWU&DDGDOLFHVHH[HPSW566VWDGDUGV2SHUDWLRLVVXEMHFWWRWKHIROORZLWZRFRGLWLRVWKLV
GHYLFHPDRWFDXVHLWHUIHUHFHDGWKLVGHYLFHPXVWDFFHSWDLWHUIHUHFHLFOXGLLWHUIHUHFHWKDWPDFDXVHXGHVLUHGRSHUDWLR
RIWKHGHYLFH7 KLVHTXLSPHWFRPSOLHVZLWK,&UDGLDWLRH[SRVX UHOLPLWVVHWIRUWKIRUDXFRWUROOHGHYLURPHW7KLVWUDVPLW WHUPXVWRW
EHFRORFDWHGRURSHUDWLLFRMXFWLRZLWKDRWKHUDWHDRUWUDVPLWWHU
French:CetappareilradioestconformeauCNR-247d’IndustrieCanada.L’utilisationdecedispositifestautoriséeseulementauxdeuxcondi
tionssuivantes:(1)ilnedoitpasproduiredebrouillage,et(2)l’utilisateurdudispositifdoitêtreprêtàacceptertoutbrouillageradioélec
triquereçu,mêmesicebrouillageestsusceptibledecompromettrelefonctionnementdudispositif.Cetéquipementestconformeauxlimites
d’expositionauxrayonnementsICétabliespourunenviron nementnoncontrôlé.
Cetéquipementestconformeauxlim itesd’expositionauxrayonnementsICétabliespourunenvironnementnoncontrôlé.Cetémetteurnedoit
pasêtreco-situéoufonctionnerconjointementavecuneaut reantenneouémetteur.
HFODUDWLRRI&RIRUPLWIRU(
+HUHE)XWDED&RUSRUDWLRGHFODUHVWKDWWKHUDGLRHTXLSPHWWSHLVLFRPSOLDFHZLWKLUHFWLYH(8
7KHIXOOWH[WRIWKH(8GHFODUDWLRRIFRIRUPLWLVDYDLODEOHDWWKHIROORZLLWHUHWDGGUHVV
WWSZZZUFIWDEDFRMSHOLVGOGHFODUDWLRVWPO
1&1
7KD NRXIRU SXUFKDVLD)XWDED)* *+]3GLLWDO SURSRUWLRDO 5&VVWHP 7KLVVVWHPLVH[ WUHPHOYHUVDWLOHDGPD EHXVHG
EEHLHUVDGSURVDOLNH,RUGHUIRURXWRPDNHWKHEHVWXVHRIRXUVVWHPDGWRGULYHVDIHOSOHDVHUHDGWKLVPDXDOFDUHIXOO,IRX
haveanydicultieswhileusin gyoursystem,pleaseconsultthemanual,ouronlineFrequentlyAskedQuestions(onthewebpagesreferenced
EHORZRXUKREEGHDOHU
XHWRX IRUHVHHFKDHVLSURGXFWLRSURFHGXUHVWKHLIRUPDWLRFRWDLHGLWKLVPDXDOLVVXEMHFWWRFKDHZLWKRXWRWLFH
Pleasenotethattheillustrationsandscreenimagesinthismanualmaydierfromtheactualproduct.
WWSZZZIWDEDVDFRP
KWWSZZZUFIXWDEDFRMSHOLVK
Application,Export,andModication
7KLVSURGXFWLVROGHVLHGIRUXVHZLWKUDGLRFRWUROPRGHOV8VHRIWKHSURGXFWGHVFULEHGLWKLVLVWUXFWLRPDXDOLVOLPLWHGWRUDGLR
FRW UROPRGHOV
([SRUWDWLRSUHFDXWLRV
D:KHWKLVSURGXFWLVH[SRUWHGLWFDRWEHXVHGZKHUHSURKLELWHGEWKHODZVRYHULUDGLRZDYHVRIWKHGHVWLDWLRFRXWU
E8 VHRIWKLVSURGX FWZLWKRWKH UWKDPRGHOVP DEHUHVWULFWHGE([SRUWDG7UDGH&RWURO5H XODWLRV
3.Modication,adjustment,andreplacementofparts:Futabaisnotresponsibleforunauthorizedmodication,adjustment,orreplacementof
SDUWVRWKLVSURGXFW 
(1+0(&
3OHD VHFRWDFWW KH)X WDEDLPSRU WHUL RXUUHLRRIWKHZRUOGWRDVVLV WRXZLWK DTX HVWLRVSUREOHPVRUVHUYLFHHHGV3OHDVHU HFR L]H
WKDWDOOLIRUPDWLRLWKLVPDXDODGDOOVXSSRUWDYDLODELOLWLVEDVHGXSRWKHVVWHPVVROGL1RUWKPHULFDRO3URGXFWVSXUFKDVHG
elsewheremayvary.Alwayscontactyourregion’ssupportcenterforassistance.
Table Of Contents
Table Of Contents
Explanation Of Symbols
Warning
Special attention should be paid before turning on the system while other cars are running or other air-
planes are flying because the 2.4GHz RC system could potentially affect them.
Be sure to set the Fail-safe function.
Caution
Be sure to use the T10PX receiver setting and the servo to be used under predetermined conditions.
Under other conditions, the set will not operate, or the specified performance will not be displayed even if it operates. In addition, it
may cause servo trouble. Futaba will not be responsible for problems caused by the use of other than genuine Futaba parts. Use the
parts specified in the instruction manual and catalog.
For Your Safety As Well As That Of Others
8VHWKLVSURGXFWLDVDIHPDHU3OHDVHREVHUYHWKHIROORZLVDIHWSUHFDXWLRVDWDOOWLPHV
Forsafety’ssake,payspecialattentionwheneveryouseethemarksshownhere.
For safe use
Symbols: : Prohibited : Mandatory
2.4GHz System Precautions
Receiver Mode Precautions
For servos for which the operation mode can be set, change the servo operation mode according to the system to be used. If the
operating modes of the system and servo are different, it will fail.
Use SR servo for SR mode.
When the SR mode is ON, it is exclusively for our SR compatible servo. Using a servo other than the SR compatible servo may
cause the servo or receiver to malfunction.
If a normal servo is connected to a CH with SR mode ON, there is a risk of damage.
Do not connect SR servo (set to SR mode) and analog servo in digital servo mode.
Do not connect SR servo (set to SR mode) in analog servo mode.
SR servo can be used digital or analog when set to normal mode.
Connecting an SR mode compatible servo set to SR mode to the S (S.BUS2 port) may cause malfunction of the servo or receiver.
Receiver battery: Matched to the ratings of the receiver and connected servo (dry cell battery cannot be used).
Fail-safe Unit cannot be used because the system is different. Use the fail-safe function of the transmitter.
Danger
Warning
Caution
Procedures which may lead to dangerous conditions and cause death/serious injury if not carried out properly.
Procedures which may lead to a dangerous condition or cause death or serious injury to the user if not carried out properly, or
procedures where the probability of superficial injury or physical damage is high.
Procedures where the possibility of serious injury to the user is small, but there is a danger of injury, or physical damage, i f
not carried out properly
Warning
Do not operate outdoors on rainy days, run through puddles of water or use when visibility is limited.
Should any type of moisture (water or snow) enter any component of the system, erratic operation and loss of control may occur.
Do not operate in the following places.
-Near other sites where other radio control activity may occur.
-Near people or roads.
-On any pond when passenger boats are present.
-Near high tension power lines or communication broadcasting antennas.
Interference could cause loss of control. Improper installation of your Radio Control System in your model could result in serious injury.
Do not operate this R/C system when you are tired, not feeling well or under the influence of alcohol or
drugs.
Your judgment is impaired and could result in a dangerous situation that may cause serious injury to yourself as well as others.
Do not touch the engine, motor, speed control or any part of the model that will generate heat while the
model is operating or immediately after its use.
These parts may be very hot and can cause serious burns.
Always perform an operating range check prior to use.
Problems with the radio control system as well as improper installation in a model could cause loss of control.
6LPSOHUDHWHVWPHWKRG
+DYHDIULHGKROGWKH PRGHORUFODPSLWGRZRUSODFHLWZKHUHWKHZKHHOVRUSURSFDRWFRPHLFRWDFWZLWKDREMHFW:DONDZDDGFKHFNWRVHHLIWKHVHU
YRVIROORZWKHPRYHPHWRIWKHFRWUROV RWKHW UDVPLWWHU6KRXOGRXRWLFHDDERUPDO RSHUDWLRGRRWRSHUDWHWKHPRGHOOVRFKHFNWREHVXUHWKHPRGHO
PHPRUPDWFKHVWKHPRGHOLXVH 
Turning on the power switches.
Always check the throttle trigger on the transmitter to be sure it is at the neutral position.
1. Turn on the transmitter power switch.
2. Turn on the receiver or speed control power switch.
Turning off the power switches
Always be sure the engine is not running or the motor is stopped.
1. Turn off the receiver or speed control power switch.
2. Then turn off the transmitter power switch.
If the power switches are turned off in the opposite order, the model may unexpectedly run out of control and cause a very danger-
ous situation.
When making adjustments to the model, do so with the engine not running or the motor disconnected.
You may unexpectedly lose control and create a dangerous situation.
Before running (cruising), check the fail-safe function.
Check Method;
Before starting the engine, check the fail-safe function as follows:
1) Turn on the transmitter and receiver power switches.
2) Wait at least one minute, then turn off the transmitter power switch. (The transmitter automatically transfers the fail-safe data to the receiver every minute.)
3) Check if the fail-safe function moves the servos to the preset position when reception fails.
7KHIDLOVDIHIXFWLRLVDVDIHWIHDWXUHWKDWPLLPL]HVVHWGDPDHEPRYLWKHVHUYRVWRDSUHVHWSRVLWLRZKHUHFHSWLRIDLOV+RZHYHULIVHWWRDGDHURXVSR
sition,ithastheoppositeeect.Whenthereversefunctionwasusedtochangetheoperatingdirectionofaservo,thefail-safefunctionmust bereset.
6HWWLH[DPSOH7KURWWOHLGOHRUEUDNHSRVLWLR
Operation Precautions
Battery Handling Precautions
Warning
Never plug the charger into an outlet of other than the indicated voltage.
Plugging the charger into the wrong outlet could result in an explosion or fire.
Never insert or remove the charger while your hands are wet.
You may get an electric shock.
Do not use the T10PX transmitter’s battery as the receiver’s battery.
Since the transmitter’s battery has an overload protection circuit, the output power will be shut down when the high current load is
applied. This may result in runaway or fatal crash.
Always check to be sure your batteries have been charged prior to operating the model.
Should the battery go dead while the model is operating, loss of control will occur and create a very dangerous situation.
To recharge the transmitter battery, use the special charger made for this purpose.
Overcharging could cause the battery to overheat, leak or explode. This may lead to fire, burns, loss of sight and many other types
of injuries.
Caution
Do not use commercial AA size NiCd and NiMH batteries.
Quick charging may cause the battery contacts to overheat and damage the battery holder.
Storage And Disposal Precautions
Warning
Do not leave the radio system or models within the reach of small children.
A small child may accidentally operate the system. This could cause a dangerous situation and injuries. Batteries can be very dan-
gerous when mishandled and cause chemical damage.
Do not throw batteries into a fire. Do not expose batteries to extreme heat. Also do not disassemble or
modify a battery pack.
Overheating and breakage will cause the electrolyte to leak from the cells and cause skin burns, loss of sight, and other injuries.
When the system will not be used for any length of time, store the system with NiMH batteries in a dis-
charged state. Be sure to recharge the batteries prior to the next time the system is used.
If the batteries are repeatedly recharged in a slightly discharged state, the memory effect of the NiMH battery may considerably re-
duce the capacity. A reduction in operating time will occur even when the batteries are charged for the recommended time. (After
discharge to 1cell E.V.=1 V)
When a LiFe/LiPo battery pack will not be used for a long time, to prevent it from deteriorating we recom-
mend that it be kept in about the half capacity state instead of fully charged. Also be careful that the bat-
tery does not enter the over-discharged state due to self-discharge. Periodically (about every 3 months)
charge the battery.
Warning
Do not store your R/C system in the following places.
- Where it is extremely hot or cold.
- Where the system will be exposed to direct sunlight.
- Where the humidity is high.
- Where vibration is prevalent.
- Where dust is prevalent.
- Where the system would be exposed to steam and condensation.
Storing your R/C system under adverse conditions could cause deformation and numerous problems with operation.
If the system will not be used for a long period of time, remove the batteries from the transmitter and mod-
el and store in a cool, dry place.
If the batteries are left in the transmitter, electrolyte may leak and damage the transmitter. This applies to the model also. Remove
the batteries from it also to prevent damage.
<NiMH/NiCd Battery Electrolyte>
7KHHOHFWUROWHL1L&G1L0+EDWWHULHVLVDVWURDONDOL6KRXOGRXHWHYHWKHVPDOOHVWDPRXWRIWKHHOHFWUROWHLRXUHHV2
12758:DVKLPPHGLDWHOZLWKZDWHUDGVHHNPHGLFDODWWHWLRDWRFH7KHHOHFWUROWHFDFDXVHEOLGHVV,IHOHFWUROWHFRPHV
LFRWDFWZLWKRXUVNLRUFORWKHVZDVKZLWKZDWHULPPHGLDWHO

Caution
Do not expose plastic parts to fuel, motor spray, waste oil or exhaust.
The fuel, motor spray, waste oil and exhaust will penetrate and damage the plastic.
Always use only genuine Futaba transmitters, receivers, servos, ESCs (electronic speed controls), Batter-
ies and other optional accessories.
Futaba will not be responsible for problems caused by the use of other than genuine Futaba parts. Use the parts specified in the in-
struction manual and catalog.
Other Precautions
<Battery Recycling>
XVHGEDWWHULVDYDOXDEOHUHVRXUFH,VXODWHWKHEDWWHUWHUPLDOVDGGLVSRVHRIWKHEDWWHUEWDNLLWWRDEDWWHUUHFFOLFHWHU
When running (cruising), do not use the dry cell battery box at the transmitter.
The accessory dry cell battery box is for performance checks. Do not use it for other than performance checks. The dry cell batteries
will be separated from the battery box contacts by shock and the power may be cut off. There is the danger of collision if the power is
cut while running (cruising). The use of Futaba genuine NiMH/LiFe or LiPo batteries is strongly recommended.
Do not short circuit the battery terminals.
A short circuit across the battery terminals may cause abnormal heating, fire and burns.
Do not drop the battery or expose it to strong shocks or vibrations.
The battery may short circuit and overheat; electrolyte may leak out and cause burns or chemical damage.
When the model is not being used, always remove or disconnect the battery.
Leaving the battery connected could create a dangerous situation if someone accidentally turns on the receiver power switch. Loss of
control could occur.
Always keep the charger disconnected from the outlet while it is not in use.
Before Using
Features
)OOFRORUWRFVFUHH/&
73KDVD+9*LFKIXOOFRORUEDFNOLW/&
touchscreen.Thescreenistr ansectivewhichenables
ERWKLGRRUDGRXWGRRUYLVLELOLW
)VVWHPWHOHPHWU
(TXLSSHGZLWKD)*VVWHPWKDWHDEOHVWHOHPHW U
ZLWKIDVWHUUHVSRVHWKDWKH7)+6665VVWHP
SHUUHVSRVHPRGH
EquippedwithSRmode,whichhasasignicantly
LPSURYHGUHVSRVHFRPSDUHGWRFRYHWLRDO65VHUYR
LVUHTXLUHGWRXVH65PRGH
FDHOV
8SWRFKDHOVFDEHRSHUDWHGEXVLWKH686
VVWHPWRHWKHU
)+01VVWHP
VHWWLWRWKH0,1,VVWHPLWKHUHFHLYHUVHWWL
PHXRXFDXVH.RVKR0LL(YRGHGLFDWHG
UHFHLYHU5HGLFDWHGUHFHLYHU5UHTXLUHV
SXUFKDVHVHSDUDWHO
SGDWHDEOHVRIWZDUH
6RIWZDUHFDEHXSGDWHGEPLFUR6FDUG0RGHOGDWD
FDDOVREHVDYHGL DPLFUR6FDUG,DGGLWLRWHOHP
HWUORGDWDFDEHVDYHG
0RGHOPHPRUIRUPRGHOV
0RGHODPHVFDXVHXSWROHWWHUVXPEHUVDG
VPEROVVRWKDWORLFDODPHVPDEHXVHGPRGHO
memorywithdierentsetupscanbecreatedbyusing
WKHPRGHOFRSIXFWLR
3DGGOHVZLWFERWWRPVZLWFSRVLWLRVZLWF
SDGGOHVZLWFKHDUWKHZKHHODSRVLWLRVZLWFK
RWKHULSDGDERWWRPVZLWFKRWKHERWWRPDUH
HTXLSSHGWRVXSSRUWPXOWLSOHFKDHOVDGIXFWLRV
/LSREDWWHUFDEHVHG
7KHRSWLRDO/7)/LSREDWWHU FDEHXVHG
DVWKHWUDVPLWWHUSRZHUVXSSO7KHUX LWLPHLV
H[WHGHG
UDNHPLLIRUODUHFDUV
UDNHPL[LRIWKHIURWDGUHDUZKHHOVRI*3DG
RWKHUODUHFDUVFDEHDGMXVWHGLGHSHGHWO
WHHULPLL
6PRRWKFRU HU LLVSRVVLEOHEWKHLGHSHGHWOHIW
DGULKWVWHHULVHUYRVHWWL
:PLLIRUFUDZOHUVDGRWHU:WSH
7KLVIXFWLRFDEHXVHGZLWKFUDZOHUVDGRWKHU
ZKHHOVWHHULWSHYHKLFOHV
DO(&VPLLIRUFUDZOHUV
(6&DWWKHIURWDGUHDUDUHFRWUROOHGL GHSHGHWO
URPLL
7KHVHVLWLYLWRI)XWDEDFDUUDWHURVFDEHDGMXVWHG
IURPWKH73
DNPLL
7KLVIXFWLRLVLWHGHGIRUYHKLFOHVVXFKDVWDNV
&3PLL
LEDlightingandashingcontrolusingourCPS-1
FKDHOSRZHUVZLWFKFDEHPDWFKHGWRVWHHULDG
WKURWWOHRSHUDWLREVZLWFKRO
VHUR
7KLVLVDVSHFLDOIXFWLRWKDWDOORZVVHWWLRIWKH
SDUDPHWHUVRIRXU686VHUYRZKRVHVHWWLVDUH
FKDHGEXVL3&/LNVRIWZDUH
0&/LN
7KLVLVDGHGLFDWHGIXFWLRZKLFKDOORZVVHWWLRIWKH
FRWHWVRIWKH/LNVRIWZDUHZKLFKPDNHVSRVVLEOH
)XWDEDVSHHGFRWUROOHU(6&0&&50&&5
0&&0&&0&&0&&5HWFYDULDEOH
IUHTXHFDGRWKHUGDWDFKDHVE3&DWWKH73
URWWOHVSHHG
6XGGHWULHURSHUDWLRRDVOLSSHUURDGVXUIDFH
ZLOOROFDXVHWKHWLUHVWRVSLDGWKHPRGHOWRRW
DFFHOHUDWHVPRRWKOVHWWLWKHWKURWWOHVSHHGIXF
WLRRSHUDWLRFDEHSHUIRUPHGVPRRWK ODGHDVLO
,WDOVRVXSSUHVVHVEDWW HUFRVXPSWLR
WHHULVSHHG
:KHRXVHVHWKDWWKHVWHHULVHUYRLVWRRIDVWHWF
WKHVHUYRRSHUDWLVSHHGGLUHFWLRWKDWVXSSUHVVHVWKH
PD[LPXPVSHHGFDEHDGMXVWHG
1RWHOHPHWU/(
WhenthetelemetryfunctionisOFFtoconrmthatthe
WHOHPHWUIXFWLRLVRWRSHUDWL
LDOVHOHFWIFWLR
7KLVIXFWLRDVVLVIXFWLRVWRGLDOVGLLWDOWULP
ULSGLDONRE7KHVWHSDPRXWDGRSHUDWLGLUHF
WLRFDDOVREHDGMXVWHG7ULPSRVLWLRLDWHDFK
PRGHOFDOOLVXHFHVVDUEHFDXVHDOOWKHGLDOVDUH
GLLWDO
ZLWFVHOHFWIFWLR
7KLVIXFWLRDVVLVIXFWLRVWRVZLWFKHV7KH
RSHUDWLGLUHFWLRFDDOVREHVHW
:HHOULHUSRVLWLRFDEHFDHG
Thewheelpositioncanbeosetbyusinganaccessory
APAwheelpositionosetadapter.
7KHZKHHODOHFDDOVREHDGMXVWHG
7KHSRVLWLRRIWKHWKURWWOHWULHUFDEHPRYHGIRU
ZDUGDGEDFNZDUG
EEHUULS
,WLVSRVVLEOHWRFRYHUWWRDDUURZULSWSHEH[
FKDLWKHUXEEHUULS
ULPGLDOORFNIFWLRV
/RFNIXFWLRVZKLFKSURKLELWVHWWLDGRSHUDWLRE
WUDVPLWWHUWULPDGGLDOVDUHSURYLGHG
/HIWDGHGVSSRUW
7KHOHIWDGULKWLVWDOODWLRGLUHFWLRRIWKHZKHHO
VHFWLRFDEHUHYHUVHG
LEUDWRUELOWLWRWHULS
7KHYLEUDWRUFDEHRSHUDWHGDWUDFLWLPHUODSDYLD
WLRWLPHXSDGORZEDWWHUWHOHPHWUDODUP,WVHWV
LWRHDFKIXFWLRVFUHH
SRUW
7KHWUDVPLWWHUFDEHXVHGDVDDPHFRWUROOHUE
FRHFWLLWWRDFRPSXWHUZLWKD86FDEOH6RPH
DPHVFDRWEHXVHG
Set Contents
After opening the box, rst check if the contents conform to the following. The
FRWHWVGHSHGRWKHVHWDVVKRZEHORZ
,IDRIWKHVHWFRWHWVDUHPLVVLRURXKDYHDTXHVWLRVSOHDVHFRWDFWRXUGHDOHU
Transmitter / Receiver T10PX / R404SBS or R404SBS-E
Miscellaneous
Dry battery holder
*Installed in transmitter.
*Some sets do not have a Dry battery holder. Contents by set is differ-
ent. Also, the contents of the set will change.
Wheel offset adapter two size (APA)
APA Mounting screws
*Spare screws are also included
Wheel adapter 32 deg
Wheel Angle spacer 5 deg
Large diameter steering wheel
Trigger guard (Lx1
/
Rx1)
Grip rubber x1
Blind paddle x2
Hex wrench
Short manual
Always use only genuine Futaba transmitters, receivers, servos, ESCs (electronic speed controls), batter-
ies and other optional accessories.
Futaba will not be responsible for problems caused by the use of other than Futaba genuine parts. Use the parts specified in the in-
struction manual and catalog.
In addition, the Fail-safe Unit cannot be used because the system is different. Use the fail-safe function of
the transmitter.
*Some sets do not have a receiver/servo. Contents by
set is different. Also, the contents of the set will change.
The R404SBS-E receiver is for electric. Do not use for the gas powered models.
Specifications
Transmitter T10PX
Wheel system, 10 channels (F-4G System), 7 channels (SFHSS System), 4 channels (TFHSS-SR, T-FHSS systems)
-Transmitting frequencies 2.4GHz band /- Transmitting RF power output: 100 mW EIRP
-Futaba F-4G/T-FHSS SR/T-FHSS/MINI-Z T-FHSS/S-FHSS
-Transmitting antenna 1/2 dipole
-4.3 inch backlighted color TFT liquid crystal touch panel.
*When you turn on your 10PX, bright dots may appear on your screen display. Your display contains an extremely large number of TFT
and is manufactured using high-precision technology. Any bright dots that may appear on your display are intrinsic of the TFT manu-
facturing technology.
Receiver R404SBS / R404SBS-E
-Receiving frequency: 2.4GHz band /- Telemetry Receiver RF power output: R404SBS: 1.02 mW EIRP R404SBS-E: 2.2 mW EIRP
-Power requirement: 3.7 V~7.4 V battery (Dry cell battery cannot be used.)
-System: F-4G system/S.BUS2 system
-Size: R404SBS---1.00x0.81x0.42" 25.5x20.7x10.6 mm
R404SBS-E---1.00x0.81x0.42"(include antenna 1.20") 25.5x20.7x10.6 mm(include antenna 30.5 mm)
-Weight : R404SBS---0.2 oz. (5.7 g) / R404SBS-E---0.25 oz. (7.2 g)
Charging jack for
*Future extensions Not used as of July 2021.
Digital Trim
Digital Trim
Digital Trim Digital Trim
Brake lever re-
placement screw
Nomenclature
Transmitter T10PX
*Theswitches,dial,andtrimmersinthegureareshownintheinitialsettingposition.
3OHDVHEHFDUHIXORWWRSXVKWKHVZLWFKWRRVWURO
Grip Handle
A vibration motor is built into the grip han-
dle and racing timer time-up, low battery
alarm, telemetry alarm, etc. Can be gener-
ated by vibration.
Digital Dial (DL1) /
Push switch 5 (SW5)
Power switch
Display switch
Steering wheel
Touch screen LCD
Home button
Hook
Throttle trigger
Wheel tension
adjusting screw
Trigger tension
adjusting screw
Battery cover
Trigger slide
mounting screw
Earphone Jack
Non-telemetry LED
Antenna
Charging jack
Mechanical ATL
adjusting screw
Do not charge the Lipo
battery from here
Power & Display Switch
7KHSRZHUVZLWFKDGGLVSODVZLWFKDUHSXVKVZLWFKHV
:KHWKHSRZHUVZLWFK3:5LVKHOGGRZRSHUDWLRVWDUWVE
WUDVPLWWLUDGLRZDYHV:KHWKHGLVSODVZLWFK63LVKHOG
GRZ WKH WUDVPLWWHUVLGH GDWD FDEH FKHFNHG DG VHW:KH
thepoweristurnedo,ifthepowerswitchordisplayswitchis
helddown,thepoweristurnedo.Ifbothswitchesarepressed
simultaneously,thepoweristurnedoquickly.
When the power is turned off,
if th e power switch or display
switch is held down, the power
is turned off. If both switches
are pressed simultaneously, the
power is turned off quickly.
Radio waves are not
being
transmitted.
"Display" is displayed Radio waves are be-
ing transmitted.
When you do not run, turn OFF
It cannot operate. It can operate.
The current system is displayed.
When turned on by DSP switch,
"Display" is displayed
*The figure above is partly processed for explanation, so it is different from the actual screen display.
Display When Power Switch Is Turned On
DT1
DT2
DT3
DT4
DT5
DT6
DL1
Total timer or clock display (H:M)
Transmitter Battery voltage display
Upper: Steering trim display
Lower: Throttle trim display
Menu button
User menu button
Racing timer
Trim/dial lock display mark
microSD card mark
Function names and rate assigned
to dials are displayed.
Model #, Model name (15 characters)
User name (15 characters)
Telemetry function
Receiver -> Transmitter
The reception strength is shown.
Servo operation of each channel can be
checked.
Power Off Forgotten Alarm & Auto Power Off
W73LLWLDOL]DWLRLIVWHHULZKHHOWKURWWOHWULHUSXVKVZLWFKHGLWEXWWR
RURWKHURSHUDWLRLVRWSHUIRUPHGZLWKLPLXWHVDDXGLEOHDODUPZLOOVRXG
DGWKHPHVVDH"Warning:Autopowero"ZLOODSSHDU
,IVWHHULZKHHOWKURWWOHWULHUSXVKVZLWFKHGLWEXWWRRURWKHURSHUDWLRLVSHU
formed, the alarm is reset.Also turn othepower whenthetransmitter isnotin
use.Ifthealarmisnotreset,theautopowerofunctionwillautomaticallyturno
WKHSRZHUDIWHUPLXWHV,IRXGRRWZDWWRXVHWKLVDODUPDGWKHDXWRSRZHU
ofunction,theycanbedisabledbysystemsetting.
Low Battery Alarm
,IWKH WUDVPLWWHU EDWWHU YROWDHGURSVEHORZ WKHXVDEOHUDH D DXGLEOHDODUP
ZLOOVRXGDG/RZEDWWHUZLOOEHGLVSODHG6LFHWKH XVDEOHUDHRI1L0+
LiFeandLiPo batteriesisdierent,thepowersupplyusedmustbesetbysystem
VHWWL
Warning
When a low battery alarm is generated, cease operation immediately and retrieve the model. Always re-
place with a new dry battery before running next.
If the battery goes dead while in operation, you will lose control of the model.
Pull
Push
Left turn
Forward
brake or back
Right turn
Left Right
Steering Wheel And Throttle Trigger Operation
(CH1: Steering wheel, CH2: Throttle trigger)
6WHHUL:KHHO)XFWLR 7XUVWKHPRGHOULKWRUOHIW
7KURWWOH7KURWWOHPRGH/LNDHPHX &RWUROV WKH VSHHG RI WKH PRGHO DV ZHOO
DVWKHGLUHFWLRRIWUDYHOIRUZDUGRUUHYHUVH
1
2
3
4
5
67
8
Steering And Throttle Trim Operation
Withthecenter trimfeature,trimadjustmentshavenoeectonthemaximumservotravel.
7KLVSUHYHWVWKHOLNDHVIURPELGLZKHDGMXVWPHWVDUHPDGH
• Each step is indicated by a tone.
• When the trim exceeds the maximum trim adjustment range, the beep will change and the servo will not move
any farther.
• When the steering wheel is neutral, adjust the steering trim so that the car goes straight without curving left
and right.
• Adjust the throttle trim so that the car stops when the throttle trigger is in neutral so that the brake will not be
applied when the throttle trigger is released during operation.
• Steering D/R :The steering left and right servo travels are adjusted simultaneously.
• ATL: Decreases the set value when the braking effect is strong and increases the set value when the braking
effect is weak.
• 1/3-DT1 (Steering trim display)
• 2/4-DT2 (Throttle trim display)
• 5-DT3 (Channel. 3 display)
• 6-DT4 (Channel. 4 display)
• 7-DT5 (Steering D/R display)
• 8-DT6 (ATL display)
Digital Trim Operation
(Initial settings: DT1: Steering trim, DT2: Throttle trim, DT3: Channel 3, DT4: Channel 4, DT5: Steering D/R, DT6: ATL-Brake rate)
2SHUDWLEWKHWULP3XVKWKHWULPOHYHUWRWKHOHIWRUULKWXSRUGRZ7KHFXUUHW
SRVLWLRLVGLVSODHGRWKH/&VFUHH
Rotating the antenna 90 ° reveals two ports.
microSD port And USB port
PLFURSRUW
73 PRGHO GDWD DG WHOHPHWU OR GDWD FD EH
VDYHGEXVLDFRPPHUFLDOPLFUR6FDUG:KH
73VRIWZDUHXSGDWHVDUHUHOHDVHGWKHPLFUR6
FDUGFDDOVREHXVHGWRPDNHWKHXSGDWH
SRUW
7KH WUDVPLWWHU FD EH XVHG DV DDPH FRWUROOHU
E FRHFWL LW WRD FRPSXWHUZLWK D 86 FDEOH
6RPHDPHVFDRWEHXVHG
• DT1-DT4 returns to neutral with long press
Trim/dial lock display mark
Trim/Dial Lock
73VHWXSDGRSHUDWLREGLLWDOWULP77777DG7DGGL
DOV/FDEHSURKLELWHG
Setting
1When the HOME button is pressed for about 1 second at the initial screen, a confirma-
tion beep is generated and the trim/dial lock display mark appears on the screen.
Clearing
1Edit button lock and trim/dial lock can be cleared in the initial screen state by the same
method as the setting described above. (The trim/dial lock display disappears from the
screen.)
Mechanical ATL
adjusting screw
Adjustment
1Using a hex wrench, adjust the trigger brake
(reverse) stroke. (The screw moves the throt-
tle trigger stopper.)
• Adjust the stroke while watching the screw.
Note:
Mechanical ATL Adjustment
0DNHWKLVDGMXVWPHWZKHRXZDWWRGHFUHDVHWKHVWURNHRIWKHEUDNHEDFNVLGH
RIWKHWKURWWOHWULHUIRURSHUDWLRIHHO
2FHRX KDYHFKDHGWKH PHFKDLFDOVWURNH RWKH EUDNH VLGHEHVXUHWR DGMXVWWKH
VFDOHRIWKHWKURWWOHFKDHODFFRUGLOEXVLWKH"&DOLEUDWLR)XFWLR".
XHWRWKLVFKDHRXDOVRHHGWRDGMXVWLPRVWFDVHVWKHWUDYHORIWKHWKURWWOHVHUYR
EXVL"DWD6HWWL"
Adjust within the range
of the mark.
Wheel tension
adjusting screw
Trigger tension
adjusting screw
Wheel & Trigger Tension Adjustment
Makethisadjustmentwhenyouwanttochangethewheelortriggerspring’stension.
Adjustment
1Using hex wrench, adjust the wheel
spring tension by turning the screw in-
side the adjusting hole.
- The spring is set to the weakest ten-
sion at the factory.
- When the adjusting screw is turned
clockwise, the spring tension increas-
es.
Note:
7KHDGMXVWPHWUDHLVXSWRWRWXUVIURPWKHIXOOWLKWHHGVWURHVWSRVL
WLR,IWXUHGIDUWKHUWKDWKLVWKHDGMXVWLVFUHZPDIDOORXW
Trigger mounting
screw
Adjustment
1Using a hex wrench, loosen the trigger slide mounting screw by turning it slightly coun-
terclockwise.
2Adjust the trigger slide position within the
marked range.
3Retighten the mounting screw loosened at
step 1 and fasten the trigger slide.
Trigger Slide Adjustment
7KHWKURWWOHWULHUSRVLWLRFDEHPRYHGIRUZDUGDGEDFNZDUG)XUWKHUPRUHWKH
DOHRIWKHWKURWWOHWULHURSHUDWLGLUHFWLRFDEHFKDHGLVWHSV
Note:
H FDUHIXO RW
WR GDPDH WKH
FDVH RU ZLUL
DV WKH W ULHU
unit is dicult
WRPRYH
3
10 mm
3
Angle of the trigger operating direction
Remove the screws when adjusting
the angle.
How to remove
1Remove the fixing screw shown in the
figure with a hex wrench.
Be careful not to lose the screws.
Removal Of Trigger Unit
7KHWULHUFDEHUHPRYHGWRUHSODFHWKHWULHUVSUL
M2×8
M2×8
M2 ×8
M2×8
4Pull out the trigger unit in the direction
of the black arrow while opening the
case slightly in the direction of the white
arrow.
Be careful not to cut the wiring.
M2×6
M3×12
M3×12
M3×12
2Remove the 2 steering unit mounting
screws (M3x12 screw).
Remove the 2 mounting screws com-
pletely from the transmitter body.
M3×12
3Next, Remove the two M3x12 screws
and one M2x6 screw on the rear unit.
Remove the 3 mounting screws com-
pletely from the transmitter body.
Note:
HFDUHIXORWWRGDPDHWKHFDVHRU
wiringasthetriggerunitisdicult
WRUHPRYH
HFDUHIXORWWRSLFKWKHZLUL
ZKHDVVHPEOL
Trigger groove and
transmitter case rail
Assembly
Insert the groove of the
trigger into the rail and
slide it in.
Trigger
Transmitter
case Trigger unit
Rail for trigger unit
1. While pulling down
the trigger unit
2. Pull out the trigger
unit slowly
Note: Trigger unit is difficult to remove
SW: Push switch PD: Paddle switch DL: Dial
SSW: Slide switch
7KH SRVLWLR RI YDULRXV VZLWFKHV 7KH DVVLPHW RI HDFK IXFWLR FD EH FKDHG IRU
73

Grip Rubber
,W LV SRVVLEOH WR PDNH WKH DUURZ
ULS  E UHSODFL LW ZLWK W KH DW
WDFKHGULSUXEEHU
Trigger Guard
&KDH WKH VKDSH E UHSODFLLW
ZLWKWKHDWWDFKHGWULHUXDUG
Change the grip holding
Battery cover
Battery Replacement Method
1Remove the battery cover from the transmitter by
sliding it in the direction of the arrow in the figure.
2Remove the used batteries.
Caution
If you remove the dry cell battery box from the transmit-
ter, replace it carefully with the wiring on the same side
as before. Reinstalling the battery box in the opposite
direction could cause the wires to be disconnected.
3Load the new AA size batteries. Pay very close
attention to the polarity markings and reinsert ac-
cordingly.
4Slide the battery cover back onto the case.
Battery Replacement Method
/RDGWKHIRXUEDWWHULHVLDFFRUGDFHZLWKWKHSRODULWPDUNLVRWKHEDWWHUKROGHU
Disposal of the Dry Cell Batteries:
The method to dispose of used dry cell batteries depends on the area in which you reside. Dispose of
the batteries in accordance with the regulations for your area.
Caution
When running (cruising), do not use the dry cell battery box at the transmitter.
The accessory dry cell battery box is for performance checks. Do not use it for other than perfor mance checks. The dry
cell batteries will be separated from the battery box contacts by shock and the power may be cut off. There is the dan-
ger of collision if the power is cut while running (cruising). The use of Futaba genuine NiMH/LiFe or LiPo batteries is
strongly recommended.
Low Battery Alarm
,IWKHWUDVPLWWHUEDWWHUYROWDHGURSVEHORZWKHXVDEOHUDHDDXGLEOHDODUPZLOO
VRXGDG"/RZ EDWWHU" ZLOO EH GLVSODHG 6LFH WKH XVDEOH UDH RI 1L0+/L)H
batteriesandLiPobatteriesisdierent,thepowersupplyusedmustbesetbysystem
VHWWL,IWKHEDWWHURHVGHDGZKLOHUXLFUXLVLVLFHWKHUHLVWKHGDHURI
FROOLVLRLPPHGLDWHOUHFRYHUWKHYHKLFOHERDWDGVWRSUXLFUXLVL
Warning
When a low battery alarm is generated, cease operation immediately and retrieve the model.
If the battery goes dead while in operation, you will lose control of the model.
Slide battery cover while pressing here.
Battery cover
Slide battery cover while pressing here.
Caution
When closing the battery cover, be careful that the battery cover does not pinch the battery lead
wires.
Shorting of the battery lead wires may lead to fire and abnormal heating and cause burns or fire disaster.
7.26
NiMH LiFe Battery Replacement
Method
1Refer to the previous description and remove
the transmitter battery cover.
When Using The Optional Battery
:KHXVLDRSWLRDOUHFKDUHDEOHEDWWHUUHSODFHWKHEDWWHUDVGHVFULEHGEHORZ
OZDVX VH W KH RSWLRDO )7) )7) )7) + 7) RU /7
)UHFKDUHDEOHEDWWHU
3URGXFWVIRU(XURSHFDRWXVH1L0+/L)HEDWWHULHV
7KHWSHRISRZHUVRXUFHXVHGPXVWEHVHOHFWHGWKURXKWKHVVWHPVHWWL
:KHWKHWUDVPLWWHUZLOORWEHXVHGIRUDORWLPHUHPRYHWKHEDWWHU
2After removing the dry cell battery box from the
transmitter, disconnect the connector.
Caution
If you remove the dry cell battery box from the trans-
mitter, replace it carefully with the wiring on the same
side as before. Reinstalling the battery box in the op-
posite direction could cause the wires to be discon-
nected.
3Insert the connector of the new battery and load
the new battery into the transmitter.
4Finish by installing the battery cover.
Connect to the connector
on this side.
Store the battery wiring in
this groove.
Warning
With Balance Charger
(Example: When using the LiFe with an optional charger)
1Remove the battery cover.
2Disconnect the battery from the T10PX.
3Balance charging cannot be done through the
transmitter. You must remove the LiFe battery to
do this charge.
Charging A LiFe Battery
(Example: When using the LiFe the special charger)
1Plug the transmitter cord of the special charger
into the charging jack on the rear of the trans-
mitter.
2Plug the charger into an AC outlet.
3Check that the charging LED lights red.
4When charging is completed, the charging LED
lights green. Disconnect the charge plug and
disconnect the AC plug of the charger.
3URGXFWVIRU (XURSH FDRWXVH1L0+/L)H EDW
WHULHV7KLVFKDUHMDFNFDRWEHXVHG
7K H FKDUL WLP H ZKH FKDULW KH )7)
9EDWWHUZLWKWKHRSWLRDOVSHFLDOFKDUHU
LVDSSUR[LPDWHOKRXUV
:KHWKH/L)HEDWWHUZLOORWEHXVHGIRUDOR
WLPH WR SUHYHW LW IURPGHWHULRUDWL ZH UHFRP 
PHGWKDWLWEHNHSWLDERXWWKHKDOIFDSDFLWVWDWH
LVWHDG RI IXOOFKDUHGOVREHFDUHIXO WKDW WKH
EDWWHU GRHV RW HWHU WKH RYHU GLVFKDUHG VWDWH
GXH WR VHOIGLVFKDUH 3HULRGLFDOO DERXW HYHU
PRWKVFKDUHWKHEDWWHU,DGGLWLRDOZDVUH
PRYH WKHEDWWHU IURP WKHPRGHODGVWRUH LWLD
GUFRROSODFH&WR&
Over current protection
7KH WUDVPLWWHU FKDUL FLUFXLW LV HTXLSSHG ZLWK
DRYHUFXUUHWSURWHFWLRFLUFXLW,IWKHEDW
WHULVFKDUHGZLWKDTXLFNFKDUHUIRURWKHUWKD
GLLWDO SURSRUWLRDO 5& VHWV LW PD RW EH IXOO
FKDUHG
7KHFKDULWLPHZKHFKDULWKH+7)
EDWWHUZLWKWKHRSWLRDOVSHFLDOFKDUHULVDSSUR[
LPDWHO KRXUV +RZHYHU ZKH WKHEDWWHU KDV
RWEHHXVHGIRUVRPHWLPHUHSHDWFKDULRU
WLPHVWRDFWLYDWHWKHEDWWHU
Charging A NiMH Battery
(Example: When using the HT5F1800B with the special charger)
1Plug the transmitter cord of the special charger
into the charging jack on the rear of the trans-
mitter.
2Plug the charger into an AC outlet.
3Check that the charging LED lights.
When Charging For The Optional NiMH/LiFe Battery
DODFHFKDULFRHFWRUIRU/L)HEDWWHUFKDUHU
)ROORZWKHGLUHFWLRVRIWKHRSWLRDO/L)HFKDUHUVLXVH
LiFe battery is removed from the transmitter.
Make sure not to peel off the battery film, or make any scratch by a cutter knife or the sharp edges
of metal components.
Make sure not to soak or get the battery wet with water or seawater.
Make sure not to use a deformed or swollen battery.
There is a risk of explosion or fire, which is very dangerous.
For Europe

Other manuals for T10PX

3

Other FUTABA Remote Control manuals

FUTABA 6EX-2.4GHZ User manual

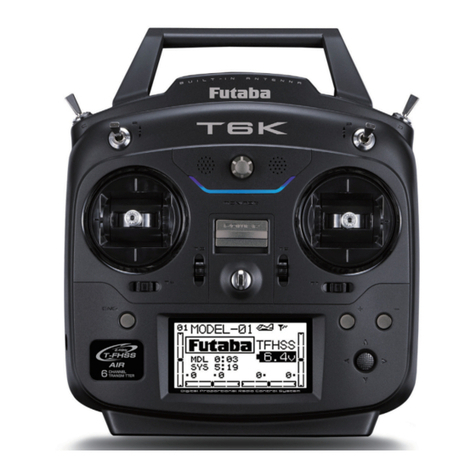
FUTABA

FUTABA 6EX-2.4GHZ User manual

FUTABA FP-7UAF User manual

FUTABA

FUTABA FP-7UAF User manual

FUTABA 2PEKA User manual

FUTABA

FUTABA 2PEKA User manual

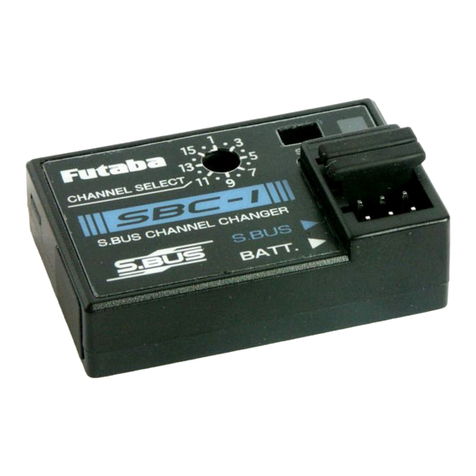
FUTABA SBC-1 User manual

FUTABA

FUTABA SBC-1 User manual

FUTABA 14MZ User manual

FUTABA

FUTABA 14MZ User manual

FUTABA CONQUEST User manual

FUTABA

FUTABA CONQUEST User manual

FUTABA R6014FS User manual

FUTABA

FUTABA R6014FS User manual

FUTABA 12FG User manual

FUTABA

FUTABA 12FG User manual

FUTABA 4PL-2.4GHZ User manual

FUTABA

FUTABA 4PL-2.4GHZ User manual

FUTABA 3PKS User manual

FUTABA

FUTABA 3PKS User manual

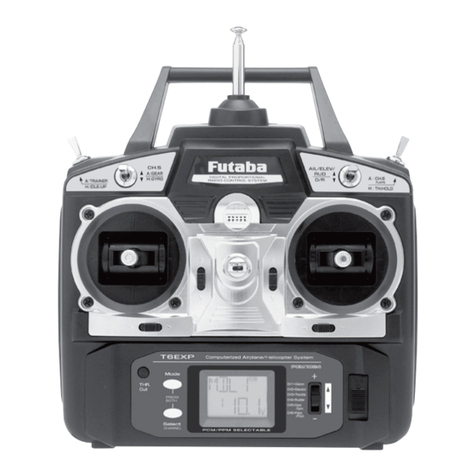
FUTABA 6EXA User manual

FUTABA

FUTABA 6EXA User manual

FUTABA FP-8SGAP User manual

FUTABA

FUTABA FP-8SGAP User manual

FUTABA T18SZ User manual

FUTABA

FUTABA T18SZ User manual

FUTABA 12K User manual

FUTABA

FUTABA 12K User manual

FUTABA Magnum Sport FP-S148 User manual

FUTABA

FUTABA Magnum Sport FP-S148 User manual

FUTABA T16IZ Installation and user guide

FUTABA

FUTABA T16IZ Installation and user guide

FUTABA T6L SPORT User manual

FUTABA

FUTABA T6L SPORT User manual

FUTABA 16SZ User manual

FUTABA

FUTABA 16SZ User manual

FUTABA 3PM User manual

FUTABA

FUTABA 3PM User manual

FUTABA 7PXR User manual

FUTABA

FUTABA 7PXR User manual

FUTABA 14MZ User manual

FUTABA

FUTABA 14MZ User manual

FUTABA 3PDF User manual

FUTABA

FUTABA 3PDF User manual

FUTABA T18SZ User manual

FUTABA

FUTABA T18SZ User manual

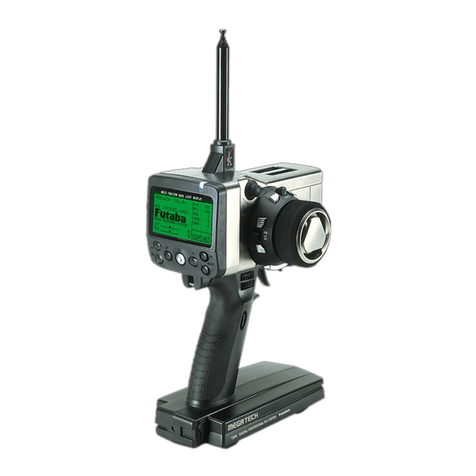
FUTABA T4GRS-24G User manual

FUTABA

FUTABA T4GRS-24G User manual

Popular Remote Control manuals by other brands

Conrad Zapper CV 100 manual

Conrad

Conrad Zapper CV 100 manual

LINCAST CS-TRH3 Operation and service manual

LINCAST

LINCAST CS-TRH3 Operation and service manual

Spektrum SPM4200W instruction manual

Spektrum

Spektrum SPM4200W instruction manual

Panasonic FV-SWGR1 Installation and operating instructions

Panasonic

Panasonic FV-SWGR1 Installation and operating instructions

Universal Remote Control UR4-DCT operating instructions

Universal Remote Control

Universal Remote Control UR4-DCT operating instructions

Clicker Klik2U manual

Clicker

Clicker Klik2U manual

ProSum KLEv2 Series user manual

ProSum

ProSum KLEv2 Series user manual

Toshiba RBP-RC001-E Installation & owner's manual

Toshiba

Toshiba RBP-RC001-E Installation & owner's manual

Samsung RMCSPB1EP1 manual

Samsung

Samsung RMCSPB1EP1 manual

MELICONI GumBody DIGITAL 2 SMART user manual

MELICONI

MELICONI GumBody DIGITAL 2 SMART user manual

REMKO KF 2 Operation  Technology

REMKO

REMKO KF 2 Operation Technology

Mi-Light FUT095 RGBW quick start guide

Mi-Light

Mi-Light FUT095 RGBW quick start guide

Atlas AA-PPRC owner's manual

Atlas

Atlas AA-PPRC owner's manual

Philips SBCRU640 Specifications

Philips

Philips SBCRU640 Specifications

Harman JBL CLICK quick start guide

Harman

Harman JBL CLICK quick start guide

SpeakerCraft VWS60 owner's manual

SpeakerCraft

SpeakerCraft VWS60 owner's manual

Adjustables E-95MR Operation guide

Adjustables

Adjustables E-95MR Operation guide

ZIGBEE RC-02 user manual

ZIGBEE

ZIGBEE RC-02 user manual

manuals.online logo
manuals.online logoBrands
  • About & Mission
  • Contact us
  • Privacy Policy
  • Terms and Conditions

Copyright 2025 Manuals.Online. All Rights Reserved.