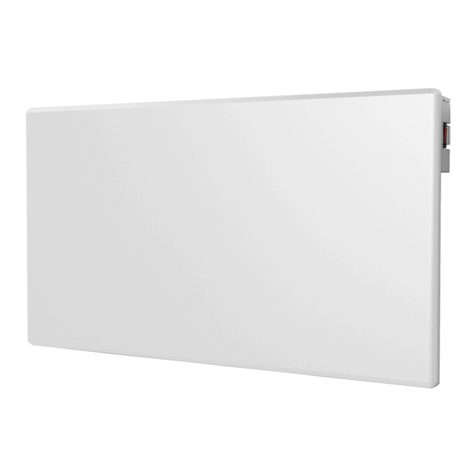
Futura ECO FAH600 User manual

FUTURA eco_FAH_Rev.1_26-02-2016 Made in Spain 1/20
ORIGINAL OPERATING INSTRUCTIONS
Read carefully and retain for future reference
ALUMINIUM HEATER
Type: FAH
Models:
FAH600; FAH900; FAH1200 & FAH1500

FUTURA eco_FAH_Rev.1_26-02-2016 Made in Spain 2/20
IMPORTANT WARNINGS
Dear Customer:
Thank you for your confidence in us by purchasing this radiator.
These appliances are extremely safe, silent and easy to install.
They do not require special maintenance. They are made of extruded
aluminum, a material of high durability respectful to the environment.
Before starting it for the first time, carefully read these instructions.
Retain them for future references.
GENERAL SAFETY INSTRUCTIONS
1. Please read carefully these instructions before starting the device
for the first time. Keep these instructions, as well as the
guarantee, your invoice and if possible, the complete packing with
all the elements inside.
2. The guarantee will cease to be valid in the case of not
following the recommendations of this manual.
3. Before connecting the appliance, make sure the mains voltage is
the 230 Volts, it correspond to the marked on the nameplate of
the appliance, and that the socket-outlet, where you connect the
appliance has an effective earth connection.
4. Check that the contracted power in your home is sufficient to
supply the appliances. The total draw of the radiators' currents
must not exceed the capacity of the circuit breaker that protects
them.
5. This radiator cannot be used in rooms with presence of gases or
other flammable products (glues, etc...).
6. WARNING: To prevent overheating, do not cover the device. Do
not use the device to dry clothes.
7. Make sure the power cable or other objects do not come into
contact with the radiator surface while in operation.
8. If the power cable becomes damaged it must be replaced by the
manufacturer or a suitably qualified trades person. Failure to
comply may danger your safety and voids your warranty.
9. Check the device and the supply cord regularly. Do not turn the
device on if it is damaged.
10. Do not place the device straight under a power socket.

FUTURA eco_FAH_Rev.1_26-02-2016 Made in Spain 3/20
11. PRECAUTION: Some parts of this product can reach very
high temperatures and cause burns. Pay special attention
when children or vulnerable people are around.
12. Children under the age of three should not be allowed to touch or
play with the radiator and should be supervised at all times.
13. This device can be used by children under 8 years of age, as well
as by people with reduced physical, sensory or mental
capabilities when suitably supervised and only when they have
been provided the instructions regarding the use of the device
and have understood the risks that could derive from it. Cleaning
must only be carried out by an appropriate adult.
14. Children between3 and 8 years should not turn on or off the
device, unless this is installed or placed in a normal position and
that children are under proper supervision or have received
instructions regarding the use of the device as security and they
have perfectly understood the potential dangers. Children
between 3 and 8 years old should not connect, adjust or clean the
appliance or perform any maintenance measure.
15. Warning:Do not use this heater near baths, showers or
swimming pools. It should not be possible to access the device's
controls from the bath, shower or any other surface that is in
contact with water.(Its use in zones 0 or 1 in bathrooms is totally
prohibited: seek advice from a qualified electrician).
16. For greater safety, this appliance is provided with a device that
interrupts its operation in the case of overheating.
17. This radiator has been designed exclusively to be fixed to the
wall. For further information on the fixing systems, consult the
section "INSTALLATION ANDWALL MOUNTING" of this manual.
18. Do not use accessories that have not been recommended by the
manufacturer, as they could entail a potential risk to the user, and
damage the device. Use only original accessories.
19. Keep all the packaging elements (plastic bags, cardboard and
polyethylene)out of the reach of children, as they can cause
potentially dangerous situations.
20. To disconnect the transmitter from the mains pull the plug, never
of the supply cord.
21. Do not attempt to service the device yourself. Contact a qualified
technician.

FUTURA eco_FAH_Rev.1_26-02-2016 Made in Spain 4/20
22. Use this device only for domestic / light commercial use and the
tasks for which it has been designed. This device has not been
designed for industrial use. It must not be used outdoors, in
greenhouses or for animal husbandry. Keep it away from heat,
direct sunlight, humidity and cutting tools. Do not under any
circumstances immerse in water or use this device with wet
hands. In the case of humidity or water in the device, immediately
disconnect the power supply and do not touch the wet parts.
23. Respect the "SPECIFIC SAFETY INSTRUCTIONS FOR THIS
APPLIANCE" listed below
SPECIFIC SAFETY INSTRUCTIONS FOR THIS DEVICE
The appliance must remain in a vertical position.
Always sure that the appliance remains fixed solidly at all times.
Please adhere to the installation distances indicated in this guide.
Do not hang any object in front or on top of the device.
Always ensure that the inlet and outlet air are not obstructed.
Always install the device so that it cannot enter into contact with
any combustible material such as curtains or towels (take into
account the gusts of wind).
To clean the device, consult the instructions in the
"MAINTENANCE" section, because if water enters the air grilles it
could seriously damage the device.
Do not insert any object through the grille or inside the device.
This radiator is designed to be connected by plug to the electric
installation and fixed to the wall installation. Follow the
instructions in "INSTALLATION".
The guarantee will not apply if these instructions have not
been observed.
INSTALLATION
During the first use and for a few minutes, could occur smells and noise due to
the dilatation of some internal parts. This is normal, so you must provide
adequate ventilation. The smells are momentary and quickly will dissipate.
For greater efficiency, make sure to calculate the power or the number of
elements of the apparatus according to the surface of the room. We
recommend contacting your dealer performing this calculation.
Fix the radiator to a firm wall and make sure it is well-levelled, in a room with
no furniture and no objects avoiding around.
Avoid installing the appliance in corners.

FUTURA eco_FAH_Rev.1_26-02-2016 Made in Spain 5/20
We advise against installing the appliance under the windows, because it is
favoring the heat loss.
The radiator must be away, at a minimum distance of 15 cm from any
combustible material, curtains, furniture, chairs, etc.(Fig. 1).
Allow for a minimum distance of 1 m, from the front of the unit to any obstacles
(furniture, walls, curtains, for example) that could hinder its operation.
Also keep a minimum distance of 15 cm between the appliance and the side
walls and any other obstacles (walls, for example) that may affect its function.
Also keep a minimum distance of 35 cm on top the appliance free of obstacles
and a minimum distance of 15 cm from the floor.
WARNING: If this appliance is installed in a bathroom, it must be installed only
within Zones 2 or Outside Zones (Zone3), according BS 7671 Requirements
for Electrical Installations, Section 701. The installation of this appliance within
Zones 0 or 1 of a bathroom is totally prohibited. The figure 2 bellow is only for
information purposes, we suggest you contact a professional electrician.
- Minimum Distances -
Fig. 1
Zone 1: Appliances supplied to Safety Extra Low Voltage (SELV).
Zone 2: Electrical Appliances Class II – IP X4
Zone 3: Electrical Appliances protected by RCD 30mA
Fig. 2
WALL-MOUNTING
Fig. 3
Secure the appliance to the wall, and follow these instructions:
Mark the position of the holes' suspension supports, considering the distance
(58 cm) in relation to the floor and the distance between the supports to supply
the given model according to "Figure 4".
Make the holes and insert the plugs included in the fixing kit. Attach the
suspension supports to the wall with screws until the piece is sufficiently
secured "Figure 5".
The appliance is equipped with the following:
- 2 radiator's suspension supports (Figure 3).

FUTURA eco_FAH_Rev.1_26-02-2016 Made in Spain 6/20
Hang the device from the safely wall-mounted supports, and finally, screw the
safety screw as far as it will go, until to feel that abuts the radiator "Figure 6".
Fig. 4
Fig. 5
Fig. 6
ELECTRIC SUPPLY CONNECTION
This appliance is equipped with a supply cord H05V2V2-F 3x1.0mm² and bipolar
plug with earthing.
Connect the plug to the socket-outlet with earthing.
Check the condition of your electrical installation and connection cables.
This appliance require earthing connection, due it has basic electrical insulation.
Contact a licensed electrician for assistance.
TECHNICAL CHARACTERISTICS
Model FAH600 FAH600 FAH1200 FAH1500
Rated Voltage 230 V~ 230 V~ 230 V~ 230 V~
Rated Frequenc
y
50 Hz 50 Hz 50 Hz 50 Hz
Rated Power Input 600 W 900 W 1200 W 1500 W
Class o
f
Protection I I I I
Degree of Protection IP IPX0 IPX0 IPX0 IPX0
Dimensions (LxHxD) (mm) 453x550x76 607x550x76 761x550x76 915x550x76
Weight (kg) 5,2 (11,46 lb) 7 (15,43 lb) 8,7 (19,18 lb) 10,6 (23,36 lb)

FUTURA eco_FAH_Rev.1_26-02-2016 Made in Spain 7/20
DIGITAL PROGRAMMABLE THERMOSTAT
The radiator is equipped with a digital, programmable thermostat.
Operation Guide
1.- Presentation
The programmable electronic thermostat has been specially designed to regulate
electric radiators screens.
It will become your best ally to optimize its energy consumption while
increasing your comfort.
- Large screen with backlighting.
- Weekly Programming in Intervals of 30 min.
- Temporary override function.
- Wire Pilot Function with 6 orders. (Only France)
- Holiday or Reception Function.
- 1 Configuration Menu (User).
- Consumption Control Radiator.
- Open Windows Function.
1.1 Screen
1. “ ”Operation Mode. The
active operation mode is displayed in the
box.
2. “ ” Programme Number (P1 to P9), (U1 to
U4) or System Settings Menu (01 to 11).
3. “ ” System Settings Menus.
4. “ ” Keypad Lock Activated.
5. “ ” Room Temperature Indicator.
6. Type of time display (12h AM/PM or 24h).
7. Graphic view of the programme of the current day.
8. Time, temperature and System Settings Menu setting area.
9. “ ” Indicator of appliance in operation.
10. “ ” Help pictogram to create programmes / Status of the programme in normal
mode / Control Menu of the radiator's consumption.
11. " " Wire Pilot function indicator pictogram. (Only France)
12. Current day.
13. “ ”Temporary cancellation function activated, or "ITCS" if flashing.
14. “ ” Window Opening Function (see section 5, System Settings Menu 07).

FUTURA eco_FAH
_
1.2 Ke
y
2.- Fir
s
This se
c
NOTE:
Menu".
2.1 En
Your ra
d
pressin
g
Press t
h
screen
w
ATTEN
T
recorde
d
check t
h
2.2 Se
t
-First
o
symb
o
-Use t
h
press
(
-When
y
-Then
a
-When
press
(
-Then
a
-Finally
_
Rev.1_26-02-2016
y
pad
s
t Use
c
tion will guide
To restore t
h
ergy Suppl
y
d
iator can be
A
g
(On/Off).
h
e On / Off ke
y
w
ill turn off for
a
T
ION: In case
d
lasts for ap
p
h
e settings inst
a
t
ting the Ti
m
o
f all, move th
o
l with a watch
h
e (-) and (+)
k
(
OK) and proc
e
y
ou have set t
h
a
djust the Day
(
the Day of the
(
OK).
a
djust the day
M
, set the Year
(
Rad
Min
u
Vali
d
Plu
s
Rig
h
you when putt
i
h
e factory se
t
y
A
ctivated
/
Start
(
y
once: Th
a
few seconds
.
the device's
p
p
roximately o
n
a
lled.
m
e and Dat
e
e cursor by p
“ ” is selecte
d
k
eys to adjust
t
e
ed to set the
m
h
e minutes pre
(
“1” Monday,
…
Week has be
e
M
onth (01,…,1
(
2016,…,2020,
Made in Spain
iator Start / St
o
u
s Key (-)
d
ation Key (O
K
s
Key (+)
h
t Navigation
K
i
ng the device
t
tings, consu
l
(
On mode) an
d
e appliance w
.
p
ower disconn
e
n
e hour. After
e
ressing the ri
g
d
.
t
he hours. Wh
e
m
inutes.
ss (OK).
…
, “7” Sunday)
a
e
n set, set the
2) and press (
O
etc.) y pulse (
O
o
p Key (On / O
K
)
K
ey (►)
into operation
f
l
t section 5
"
d
Deactivated
/S
ill emit two sh
o
e
cts, the mem
o
that time, w
e
g
ht navigation
e
n the correct
t
a
nd press (OK
Day of the M
o
O
K).
O
K).
ff) " "
f
or the first tim
e
"
System Setti
n
S
top (Off mode
o
rt beeps and
o
ry of the setti
e
recommend
key (►)until
t
ime has been
).
o
nth (01 to 31)
8/20
e
.
n
gs
) by
the
ngs
you
the
set
and

FUTURA eco_FAH_Rev.1_26-02-2016 Made in Spain 9/20
3. Operation Modes
Press ►to move along the display and select the
different operation modes “ ”,
selecting the one required and press (OK).
3.1 Timer Mode
The Timer mode “ ” will allow setting a temperature for a specific amount of time.
You can use this mode during a holiday period or to temporarily cancel a
programme.
-First, you must set the duration with the keys (-) and (+), the time “H” up to 24 h.
and the days in “d” onwards and confirm by pressing the (OK) key. The duration
can be set anywhere from 1 hour up to 44 days.
-Then, set the temperature required with keys (-) and (+), and confirm with the
(OK) key (Factory setting 21ºC).
-The Timer symbol “ ” will flicker and you will see the hour/day number count down
until the end of the period.
3.2 Manual Comfort Mode
The Manual Comfort mode “ ”enables setting a temperature that will be
maintained throughout the day. The temperature will be set with the (-) & (+) keys.
(Factory setting 21ºC)
3.3 Automatic Mode
By selecting the Automatic operation mode “ ”, the appliance will work with the
preset programme “P1”, as explained in the following image.
Monday to Friday
- Time Frames -
Saturday and Sunday
- Time Frames -
Nota.- If you need change the preset temperatures, do so in Comfort and ECO
mode.
= Comfort Temperature, space with bars,
Tª that you want to achieve.
= Reduced Temperature, space without
bars, Tª that you don't want to be reduced.

FUTURA eco_FAH
_
If you w
time slo
symbol
“
3.4 E
C
In ECO
day. Yo
u
NOTE:
T
3.5 Fr
o
Use thi
s
possibl
e
period
d
The pr
e
Setting
s
3.6 Pr
o
Once y
o
preset
p
Select
w
The rad
you sel
e
Facto
r
Remem
= Co
m
= Red
In Prog
r
U4). Th
e
_
Rev.1_26-02-2016
ant to modify,
t, press the (
O
“
” which will
C
O Mode
mode “”, t
h
u
can set your
T
he preset def
a
o
st Protecti
o
s
frost protec
t
e
freezing, for
d
uring winter.
e
set minimum
t
s
menu section
o
gram Mod
e
o
u have selec
t
p
rograms (P1 t
o
w
ith the keys (-
)
iator will go st
e
cted.
r
y Preset P
r
be
r
:
m
fort Temperatu
r
uced Temperat
u
r
amme mode “
e
se are progra
m
in a timely ma
n
O
K) key and a
d
keep the set t
e
h
e Reduced
T
own ECO tem
p
a
ult reduced t
e
o
n Mode
t
ion mode “
example, if
y
t
emperature i
s
5, number 05.
e
t
ed the Progr
a
o
P9). These a
)
and (+) and
p
raight into Aut
r
ograms (P1
r
e, space with b
a
u
re, space witho
u
”, after prog
m
mes that yo
u
Made in Spain
n
ner, the pres
e
d
just with the
k
e
mperature un
t
T
emperature w
i
p
erature by pr
e
e
mperature is 1
”,if you wan
t
y
ou are leavin
g
s
5°C (default
a
m mode “
”
re defined in t
h
p
ress (OK) to c
o
omatic mode
“
,…, P9)
P1
: Morning,
P2
: Morning,
P3
: Week &
W
P4
:
A
fternoo
n
P5
: Morning
&
P6
: Morning,
P7
: 7H - 19H
P8
: 8H - 19H
P9
: Weeken
d
a
rs, Tª that you
w
u
t bars, Tª that
y
ramme “P9”, t
h
u
can personali
s
e
t temperature
k
eys (-) or (+)
t
il end of the ti
m
i
ll be maintain
e
e
ssing the (-) a
8°C.
t
to protect y
o
g
your proper
t
value). It can
”
,you can cho
o
h
e last pages o
o
nfirm.
“
” and run
t
Afternoon & W
e
Noon, Evening
W
eekend
n
& Weekend
&
Afternoon (Ba
t
Afternoon & W
e
(Office)
& Saturday (Sh
d
(Secondary H
o
w
ant to achieve.
y
ou don't want t
o
h
ere are four p
s
e according t
o
1
during the cur
and displayed
m
e slot.
e
d throughout
nd (+) keys.
o
ur property f
t
y for a exten
be set in Sys
o
se between
n
f this manual.
t
he programm
e
e
ekend
& Weekend
t
hroom)
e
ekend
op)
o
use)
be reduced.
rogrammes (U
o
your needs.
1
0
/
20
rent
the
the
rom
ded
tem
n
ine
e
by
1to

FUTURA eco_FAH
_
“USE
R
The foll
o
Co
m
=
Co
m
Red
u
= Red
How to
e
- The pr
o
- The pr
o
- The (-
)
- The (+
- The (
►
- The (
O
Note.-
A
mode (
s
Exampl
e
3.7 C
o
_
Rev.1_26-02-2016
R
” Program
s
o
wing symbols
m
fort Temperat
u
m
fort Tempera
t
u
ced Tempera
uced Temperat
u
e
dit a user pro
g
o
gramming is
c
o
gramme editi
n
)
key activates
) key activates
►
)key advanc
e
O
K) key confir
m
A
fter confirmin
g
s
ee section 3.3
)
e
of user progr
a
o
nsumption
s
from U1 t
o
will be shown
u
re applied
t
t
ure, space wit
ture applied
u
re, space witho
u
g
ramme:
c
arried out in
3
= 30 mi
n
n
g always star
t
a reduced tem
a comfort tem
e
s the selected
m
s the program
g
the seventh
d
)
.
a
mme editing
s
Control M
o
F
(
“
t
Made in Spain
o
U4:
You can m
o
to your ne
e
of your own
To modify
a
key.
when making
y
t
o the selected
h bars, Tª that
to the selecte
d
u
t bars, Tª that
y
3
0 minutes slot
s
n
utes = 1
t
s on the first
d
perature in t
perature in
t
time slot.
me you have
e
d
ay, the syste
m
s
creen:
o
de
F
ollowing Pro
g
(
►), find the
“
”which e
t
he consumpti
o
o
dify the prog
r
e
ds. You can
a
programmes
(
a
use
r
progra
m
y
our own prog
r
half-hour.
you want to a
c
d
half-hour
y
ou don't want t
o
s
.
hour
d
ay of the wee
k
he selected ti
m
t
he selected ti
m
e
ntered for tha
t
m
automaticall
y
ram Mode “
Consumptio
n
nables you to
c
o
n of your radi
a
1
r
amme accord
a
lso store up t
o
(
U1 to U4).
m
, press the (
O
r
amme:
c
hieve.
be reduced.
k
(01 = Monda
y
m
e slot.
m
e slot.
t
day.
y
returns to A
U
” and after pr
e
n
Control M
o
c
heck and con
t
a
to
r
.
1
1
/
20
ing
o
4
O
K)
y
).
U
TO
e
ss
o
de
t
rol

FUTURA eco_FAH
_
IMPOR
T
of your
of your
you ha
v
actions
You mu
s
input of
- You c
a
- Consu
duratio
n
4. Spe
4.1 Ke
Use thi
s
areas s
u
- To lo
c
any ke
y
buttons
- The lo
c
- Repea
Th
e
remain
4.2 Wi
This fun
is worki
n
_
Rev.1_26-02-2016
T
ANT: The co
radiator. Ma
k
radiator. Th
e
v
e checked y
o
, the thermos
t
s
t consult the
“
your applianc
e
a
n change the
d
mption: Indica
t
n
s selected.
cials Funct
i
ypad Lock
s
function to p
r
u
ch as childre
n
c
k the keypad
o
(OK),(►),(-
)
at the same ti
m
c
king symbol “
t the same pro
e
keypad loc
k
available eve
n
ndow Open
ction enables
t
n
g.
nsumption c
o
k
ing alteration
e
thermostat
c
o
ur radiator c
o
t
at screen aut
“
SYSTEM SE
T
e
.
-
d
(
c
m
d
uration value
t
ed in kW/h. H
u
i
ons
r
event any ch
a
n
’s’ bedrooms
o
o
f your radiat
o
)
or (+). Once
m
e.
” will then ap
p
cedure to unlo
k
feature is a
v
n
in automati
c
ing Functi
o
t
he automatic
d
-
“
i
s
-
a
a
f
b
Made in Spain
o
ntrol is only
f
n
s in this men
c
alculates th
e
o
nsumption, i
f
omatically re
t
T
TINGS MEN
U
-
Press (OK),
a
d
uration of me
(
one day), “
c
onsecutive d
a
m
easure the c
o
by pressing (-)
u
ndredths are
a
nge in the the
o
r public areas
.
o
r, light up the
the LCD scre
e
p
ear.
ck the keypad.
v
ailable in all
c
locking mod
o
n
d
etection of a
n
-
While this
“
SYSTEM SE
T
con will ap
p
s
creen.
-
If the syste
m
a
round 3ºC,
a
pproximately
f
licker, as well
b
y the system.
f
or checking
t
u may inhibit
e
constant co
n
f
you have n
o
t
urns to AUT
O
U
”, section 08 t
o
a
nd after pres
s
asurement: “
” (one
w
a
ys), this valu
e
o
nsumption of
y
and (+).
shown for one
rmostat settin
g
.
LCD screen
b
e
n is lit briefly
modes. The
"
e.
n
open window
function is
T
TINGS MEN
U
p
ear in the left
m
detects a te
m
the heating
one hour.
T
as the temp
e
1
t
he consump
t
the performa
n
sumption. O
o
t carried out
a
O
mode.
o
select the p
o
s
ing (+) select
t
” (one hour),
“
w
eek), “ ”
(
e
corresponds
y
our radiato
r
.
hour and one
g
. This is usef
u
b
y briefly pres
s
press (OK) +
"
Stop" mode
when the radi
a
activated (
s
U
” section 07),
t
upper part of
t
m
perature dro
p
will stop
T
he icon
w
e
rature measu
r
1
2
/
20
t
ion
nce
nce
a
ny
o
wer
t
he
“
”
(
30
to
day
u
l in
s
ing
(►)
will
a
tor
s
ee
t
he
t
he
p
of
for
w
ill
r
ed

FUTURA eco_FAH
_
- Press
the win
d
5. Sys
t
Your th
e
this m
e
second
s
Now yo
Once s
e
Confirm
Exit the
No.
01
02
03
*
04
T
o
P
t
W
s
N
(
P
*
W
u
_
Rev.1_26-02-2016
any key to sto
d
ow detection
w
t
em Setting
e
rmostat has
a
e
nu, hold do
w
s
. The first me
n
u can select t
e
lected the set
t
your selection
System settin
g
: Types
:Celsius D
e
:Fahrenhei
t
Time s
e
(24:00)
(12:00 AM
: Automa
t
:The time
w
:The time
m
*
You must co
r
: Inter
n
T
he calibratio
n
o
peration for a
P
lace a therm
o
t
he ground. Af
t
W
hen entering
s
hown.
N
ow insert th
e
(
-) and (+), co
n
P
ress (OK) ag
a
*
Important n
o
W
hen calibrati
u
sed for heati
n
p this function
.
w
ill be reset.
s Menu
a
Settings Men
w
n the (OK)
n
u screen look
s
he setting yo
u
t
ing you wish t
o
by press (OK
)
g
s menu by sel
Prese
t
of Degrees o
n
e
grees
t
Degrees
e
lection
(Antemeridian
t
ic summer
w
w
ill change au
t
m
ust be chang
e
r
rectly set the
d
n
al Probe Cali
n
cannot be
minimum of 1
o
meter in the
m
t
er one hour, t
a
the calibratio
n
e
value measu
r
n
firm your mea
s
a
in to view the
o
te:
ng the room
n
g the room.
Made in Spain
.
The radiator
w
u. To access
button for 5
s
like this:
u
want to cha
n
o
change, alte
r
)
or (►).
ecting the “En
d
t
Values and
n
Screen
) / PM (Post m
w
inter time c
h
t
omatically.
e
d manually.
d
ate for this to
w
bration
completed u
n
day.
m
iddle of the ro
o
a
ke note of the
n
menu, the va
r
ed with your
t
s
urement with
difference ad
d
temperature
O
w
ill become o
p
n
ge by pressi
n
r
the value by
p
d
” option and
p
options
eridian)
h
ange
w
ork.
n
til the radiat
o
o
m at approxi
m
temperature.
lue measured
t
hermometer b
(OK) to save t
h
d
ed to the tem
p
O
NLY the rad
1
p
erative again
n
g the (►) but
p
ressing (-) or
p
ressing (OK).
o
r has been
m
ately 1.5 m fr
o
by the radiato
r
y means of k
e
h
e value.
p
erature value.
iators should
1
3
/
20
and
ton.
(+).
in
o
m
r
is
e
ys
be

FUTURA eco_FAH
_
No.
05
T
P
T
U
p
06
T
c
i
t
c
a
07
T
4
N
Y
08
I
c
D
r
09
A
p
P
*
i
10
11
P
_
Rev.1_26-02-2016
: Minimum
T
T
his menu all
o
P
rotection” mo
T
he default val
U
se the keys
p
ressing (OK).
: Smart t
e
T
his feature al
c
omfort tempe
r
tself and con
s
t
he time need
e
c
hange to yo
u
a
chieve the co
m
: Open wi
n
T
his function
a
4
.2).
N
O: Deactivat
e
Y
ES: Activate
t
: Adjusting
I
n this menu y
o
c
alculation of t
h
D
efault value:
S
r
adiator (Exam
: Default
s
A
llows you t
o
p
rogrammes,
e
P
ress (OK) for
*
Warning: B
e
i
nstructions ne
c
: S
o
: Exiting t
h
P
ress (OK) to
e
Prese
t
T
emperature:
o
ws setting th
de.
ue of this setti
n
(-) and (+) to
e
mperature co
lows the radia
t
r
ature set with
i
s
ider external
f
e
d to change t
h
u
r programme
m
fort tempera
t
n
dow automat
a
llows automa
e
the function.
t
he function.
the radiator
p
o
u can choose
h
e appliance's
S
ee your appl
ple: 1,000 W).
s
etting
o
reset your
e
tc.).
ten seconds
e
fore you us
e
c
essary to sta
r
o
ftware versio
n
h
e user menu
e
xit the menu
a
Made in Spain
t
Values and
e minimum t
e
n
g is 5.0°C
change the v
a
ntrol system
t
or to calculat
e
i
n your progra
m
f
actors such a
h
e room temp
e
the radiator
t
ure at the time
ic detection
tic detectiono
f
p
ower
the value of t
h
consumption (
iance's assig
n
thermostat t
o
e
this function
,
r
t-up the therm
o
n
a
nd return to t
h
options
e
mperature us
e
a
lue and confi
e
the time req
u
m
me. The radi
s the outside
e
rature. Every
will recalibrat
e
you want it.
f
window ope
n
h
e radiator's p
o
see section 3.
7
n
ed power on
o
the defaul
t
,
make sure
y
o
stat.
h
e main screen
1
e
d for the “Fr
o
rm its setting
u
ired to meet
t
ator will calibr
a
temperature
a
time you mak
e
e
to ensure
y
n
ing (see sect
i
o
wer to adjust
t
7
)
the rear of y
o
t
settings (ti
m
y
ou have all
t
.
1
4
/
20
o
st
by
t
he
a
te
a
nd
e
a
y
ou
i
on
t
he
o
ur
m
e,
t
he

FUTURA eco_FAH
_
6. Tec
h
Meas
u
Ambi
e
Opera
t
Trans
p
Order
s
Comfo
Timer
Minim
u
Contr
o
Electr
i
Suppl
y
Out
Maxi
m
(Only
R
Softw
a
7. Tro
u
Suppl
y
Error
m
The d
e
Outp
u
The d
e
coinci
d
Progr
a
_
Rev.1_26-02-2016
h
nical Feat
u
u
ring accurac
y
e
nt(Temperatu
r
t
ion:
p
ort and Stora
g
s
degrees of
a
rt, Eco,
u
m Temperatu
r
o
l Characteris
t
i
cal Protectio
n
y
m
um Load
R
esistive)
a
re Version
u
bleshooti
n
y
-
T
h
m
essage
-
T
-
e
vice seems t
o
u
t
-
-
-
e
vice seems t
o
d
e with the pro
g
a
mme
-
-
t
-
-
u
res Digital
y
Temperatur
e
r
es)
g
e:
a
djustment
r
e
t
ics
n
n
g
The appli
a
-
Check the po
w
h
e appliance's
-
The symbol
T
here is an err
o
-
Contact your
o
work correctl
y
-
Check the co
n
-
Check the po
w
-
Contact your
o
work correc
t
g
ramme.
-
Check the cl
o
-
Is the dif
f
t
emperature v
e
-
Are the progr
a
-
Check the wi
r
Made in Spain
Thermosta
t
e
0,1º
C
0ºC -
De -1
de 5°
de 5°
de 0.
5
Prop
o
Clas
s
230
V
TRIA
8 A (
1
Displ
a
(see
C
a
nce does not
t
w
er supply
screen shows
“ ”and the
o
r in the intern
a
installer or ret
a
y
, although the
n
nections.
w
er supply of t
installer or ret
a
t
ly, yet the te
m
o
ck
f
erence betw
e
e
ry significant?
a
mme section
s
r
e pilot functio
n
t
C
40ºC
0ºC a + 50ºC
C a 37°C (n
C a 37°C (n
5
°C a 10°C (n
o
rtional Band (
s
II - IP30
V
ac +
/
- 10% 50
H
C 230Vac
1
850W)16 A (
3
a
y in the user
m
C
hapter 5)
t
urn on.
the text “Err”
message “Er
r
a
l probe.
a
iler.
heating does
n
he heating ele
m
a
iler
m
perature in th
e
e
en the Co
m
s
too short (les
s
n
(Only France
)
1
o de 0,5°C)
o de 0,5°C)
o de 0,5°C)
PWM)
H
z
3
600W) in AC1
m
enu
r
” are flickeri
n
n
't work.
m
ent.
e
room does
n
m
fort and E
C
s
than 2 hours
)
)
1
5
/
20
n
g.
n
ot
C
O
)

FUTURA eco_FAH_Rev.1_26-02-2016 Made in Spain 16/20
8. Miscellaneous
Reference values for external probe (CTN 10kΩ).
-10 °C / -14 °F ~55k
25 °C / 77 °F ~10k
0 °C / 32 °F ~32k
30 °C / 86 °F ~8k
10 °C / 50 °F ~19k
40 °C / 104 °F ~5,3k ohm
20 °C / 68 °F ~12,5k
These values must be verified with an ohmmeter when the probe is disconnected.
THERMAL SAFETY
In the case of overheating, a safety device automatically cuts the radiators
operation. After cooling the radiator will automatically reset.
If the failure persists, the safety cut off would permanently stop the device.
In this case, an after-sale service authorised by the manufacturer must check the
device. Contact your retailer or installer.
MAINTENANCE
Your radiator requires no regular maintenance, however, to ensure its good
operation:
Always disconnect the device from the mains before performing any cleaning or
maintenance operation.
Let it cool down before cleaning.
To avoid any risk of electrical shock, clean the unit with a soft, damp cloth to wipe
the outside of the radiator and remove dust and dirt cloth.
Do not use detergent, solvent, abrasive products or any other chemical product to
clean the radiator.
NEVER immerse the device in water or any other liquids.
You can use a vacuum or flexible brush to clean the air grilles. This maintenance
must be carried out regularly to ensure optimum performance. Ensure the radiator
is totally dry before turning it back on.

FUTURA eco_FAH_Rev.1_26-02-2016 Made in Spain 17/20
PRESET PROGRAMMES (P1 TO P9)
P1: Morning, Afternoon & Weekend
P2: Morning, Noon, Evening & Weekend
P3: Week & Weekend
P4: Afternoon & Weekend
P5: Morning & Afternoon (Bathroom)
P6: Morning, Afternoon & Weekend
P7: 7H - 19H (Office)
P8: 8H - 19H & Saturday (Shop)
P9: Weekend (Secondary House)
* The sections indicate the comfort times.

FUTURA eco_FAH_Rev.1_26-02-2016 Made in Spain 18/20
EUDeclarationofConformity
Product: ALUMINIUM HEATER
Trademark:
Model
s
:FAH600; FAH900; FAH1200 & FAH1500
Batch & Serial No.: Mx YYDDD-
X
XX
(1)
(1) Explanation of code "Lot & Serial No."
Batch = Mx YYDDD; where: Mx = Assembly Line No. YY = year (15,16,17...99) DDD = Correlative day (001,..., 365)
Serial No. = XXX (001,..., 999)
Nosotros/Nous/We/Nós:
FUTURA DIRECT LTD
Hill Farm, Sleep Hill Lanem, Skelbrooke, DONCASTER, DN6 8LZ, UK
Phone: 01302 332 030 / Web: futuradirect.co.uk
Herebydeclare,thatthefollowingequipmentcomplieswithalltheessentialrequirementsforhealthandsafetyof
EuropeanDirectives.
2004/10/ECEMCDIRECTIVE2006/95/ECLVDIRECTIVE
2011/65/UERoHSDIRECTIVE2009/125/EC(ErPDirective)
Withreferencetotheapplicationofthefollowinfstandards:/Emaplicaçãodasseguintesnormas:
2004/10/EC EMC DIRECTIVE EN 55014-1:2006 +A1:2009 +A2:2011
EN 61000-3-2:2014
EN 61000-3-3:2013
EN 55014-2:1997 +AC: 1997 +A1:2001 +A2:2008
EN 61000-4-2:2009
EN 61000-4-3:2006 +A1:2008 +A2:2010
EN 61000-4-4:2012
EN 61000-4-5:2006
EN 61000-4-6:2013
EN 61000-4-11:2004
2006/95/EC LV DIRECTIVE EN 60335-2-30:2009 + CORR:2010 +A11:2012
EN 60335-1:2012 +AC:2014 +A11:2014
EN 62233:2008 +CORR:2008
2011/65/UE RoHS DIRECTIVE EN 62321-1:2013
2009/125/EC (ErP Directive)
(2005/32/EC)
EN 50564:2011

FUTURA eco_FAH_Rev.1_26-02-2016 Made in Spain 19/20
RECYCLING (Disposal of the product at the end of its useful life)
According to European Directive 2012/19/UE, on waste electrical and
electronic equipment (WEEE), old electrical household appliances cannot
be disposed of in the usual municipal containers; they have to be collected
separately to optimise the recycling of the components and materials that
comprise it, and reduce the impact on human health and the environment.
The crossed-out wheeled bin is marked on all Electrical and Electronic
products, to remind the consumer of their obligation dispose of them
separately.
The consumer must contact the local authority or the vendor to learn about
the correct disposal of his/her old electrical household appliance.

FUTURA eco_FAH_Rev.1_26-02-2016 Made in Spain 20/20
Imported by:
FUTURA DIRECT LTD
Hill Farm, Sleep Hill Lanem, Skelbrooke, DONCASTER, DN6 8LZ, UK
Phone: 01302 332 030 / Web: futuradirect.co.uk
This manual suits for next models
3
Table of contents
Other Futura Heater manuals
Popular Heater manuals by other brands

Frico
Frico Tiger 2 kW Original instructions

Kunft
Kunft KFH-2701 instruction manual

Mondial Designs Limited
Mondial Designs Limited MICA A-10 Instruction Manual and Technical Service

Consort
Consort PLSTi050ERF Installation & Control Guide

DeWalt
DeWalt DXH65FAV instruction manual

Frico
Frico Infrapalm IHPA Assembly and operating instructions