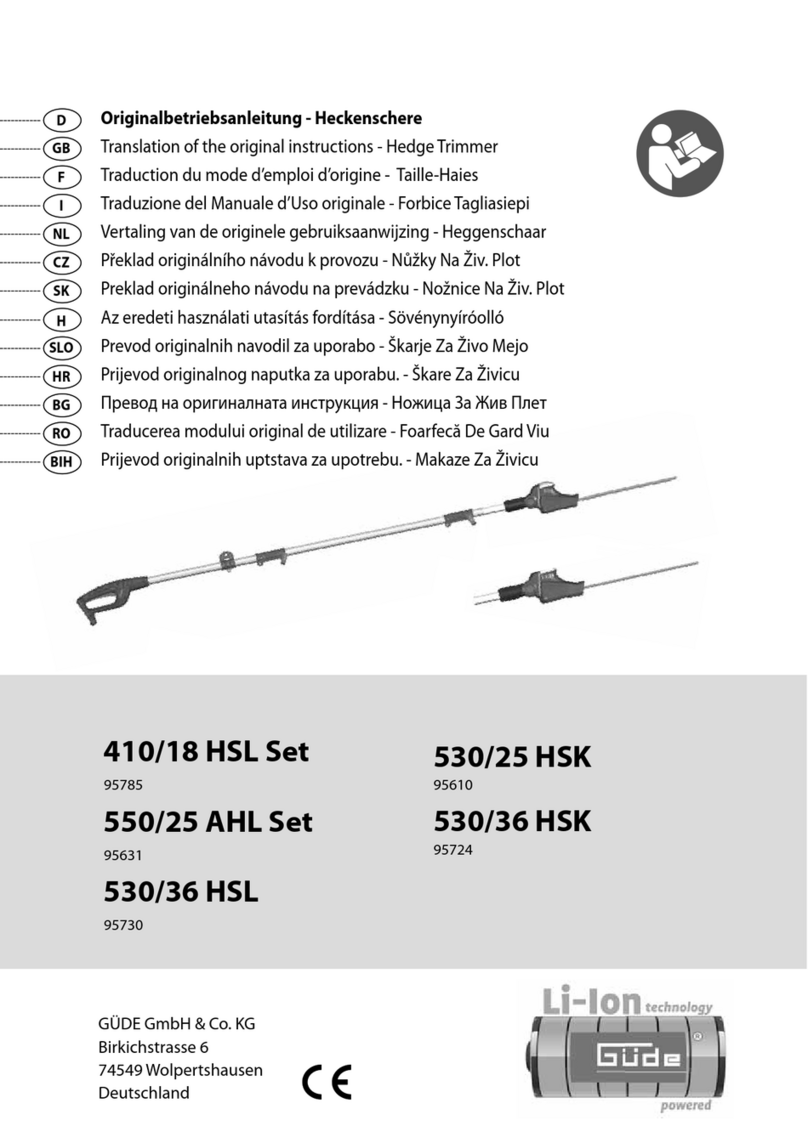
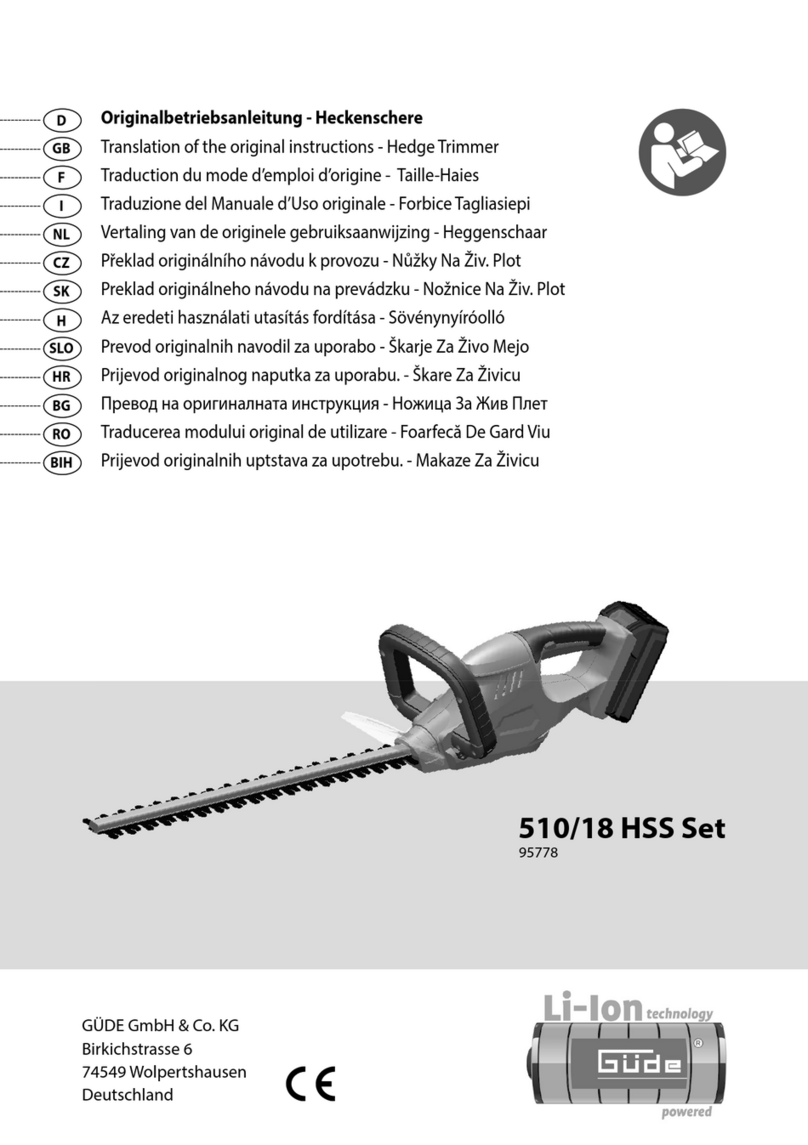
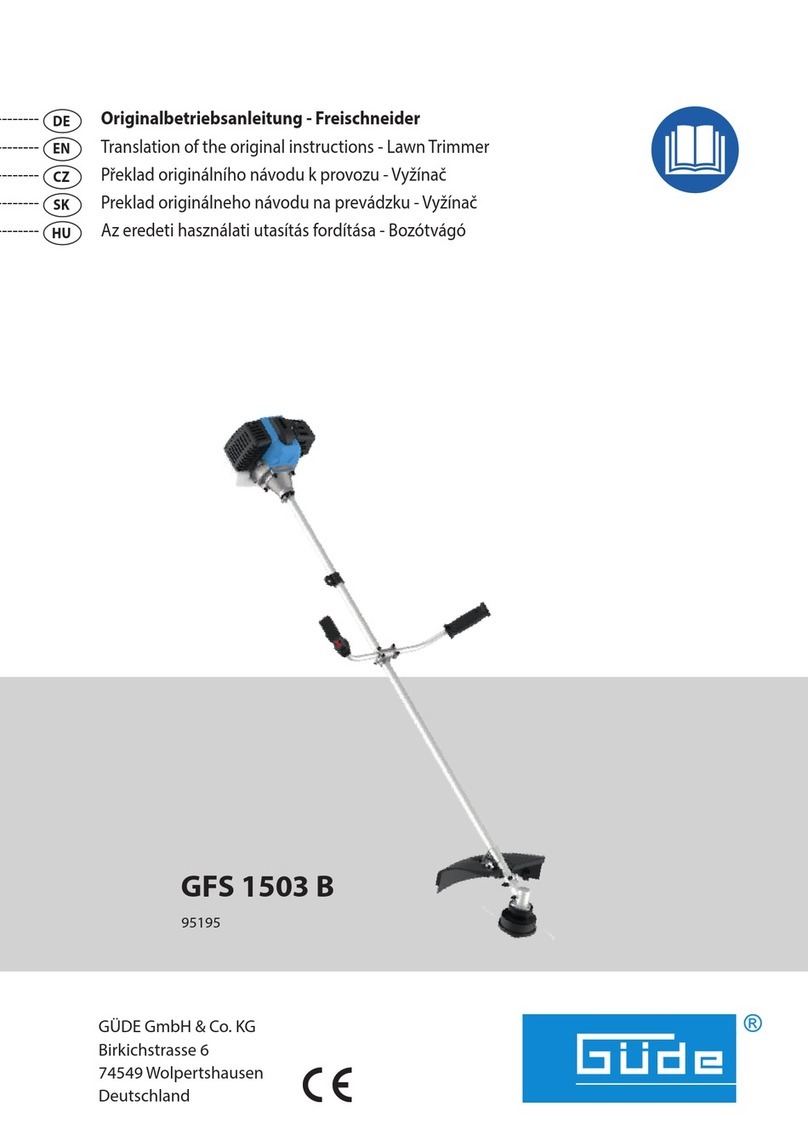
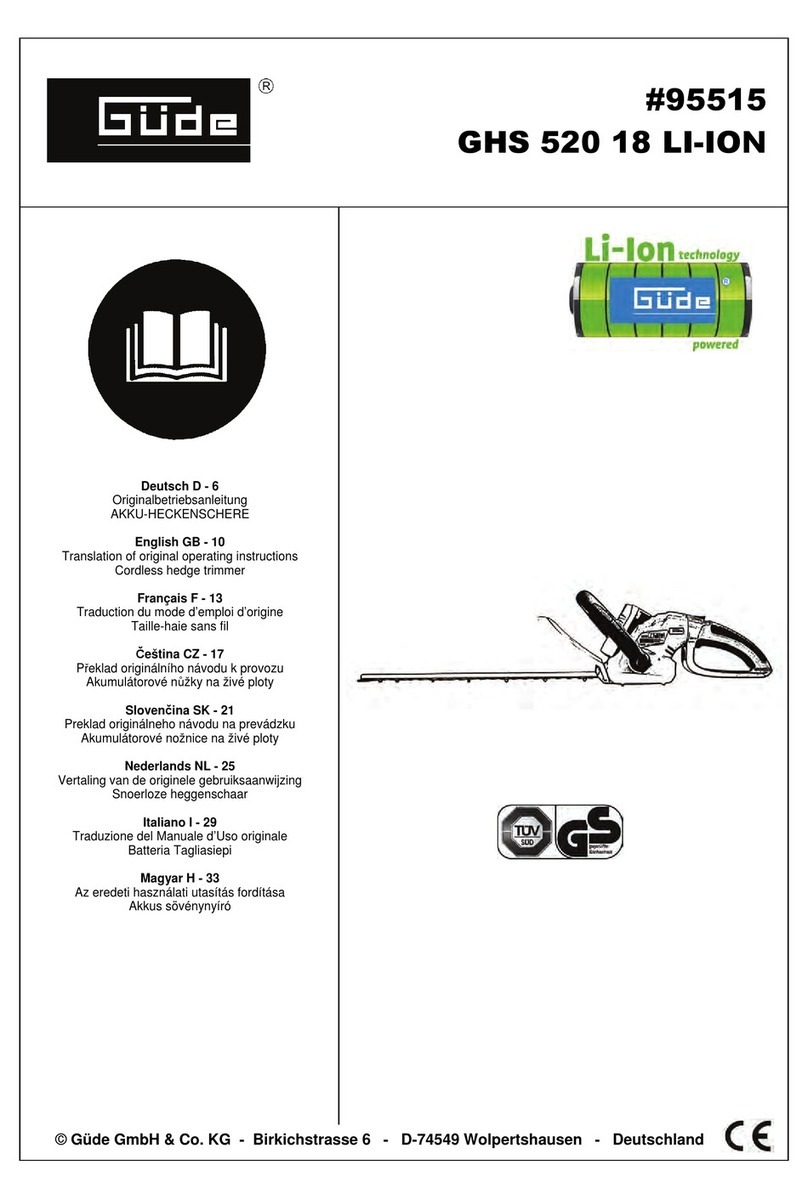
GÜDE HST 18-0 User manual

LIEFERUMFANG | DELIVERED ITEMS | ARTICLES DÉLIVRÉS | VOLUME DELLA FORNITURA |
LEVERINGSOMVANG | OBJEM DODÁVKY | ROZSAH DODÁVKY | SZÁLLÍTÁSI TERJEDELEM |
OBSEG DOBAVE | OPSEG ISPORUKE | ОБЕМ НА ДОСТАВКАТА | VOLUMUL LIVRĂRII |
OPSEG ISPORUKE | TESLIMAT KAPSAMI | ZAKRES DOSTAWY
GÜDEGmbH & Co. KG
Birkichstrasse6
74549Wolpertshausen
Deutschland
HS 18-0
58593
-------------------
DE
Originalbetriebsanleitung- Heckenschere
-------------------
EN
Translationof the original instructions - Hedge Trimmer
-------------------
FR
Traductiondu mode d’emploi d’origine - Taille-Haies
-------------------
IT
Traduzionedel Manuale d’Uso originale - Forbice Tagliasiepi
-------------------
NL
Vertalingvan de originele gebruiksaanwijzing - Heggenschaar
-------------------
CZ
Překlad originálního návodu k provozu- Nůžk y Na Živ.Plot
-------------------
SK
Preklad originálneho návodu na prevádzku - Nožnice Na Živ.Plot
-------------------
HU
Azeredeti használati utasítás fordítása - Sövénynyíróolló
-------------------
SL
Prevodoriginalnih navodil za uporabo - Škarje Za Živo Mejo
-------------------
HR
Prijevodoriginalnog naputka za uporabu. - Škare Za Živicu
-------------------
BG
Преводна оригиналната инструкция - Ножица За Жив Плет
-------------------
RO
Traducereamodului original de utilizare - Foarfecă De Gard Viu
-------------------
BIH
Prijevodoriginalnih uptstava za upotrebu. - Makaze Za Živicu
-------------------
PL
Tłumaczeńinstrukcja oryginalną - Wiertarka stołowa
2
1

1
DE Montage
GB Assembly
FR
Assemblage
IT Montaggio
NL Montage
CZ Montáž
SK Montáž
HU Szerelés
SL Montaža
HR Montaža
BG Монтаж
RO Montaj
BIH Montaža
PL Montaż
2-3
3
DE Betrieb
GB Operation
FR Fonctionnement
IT Esercizio
NL Gebruik
CZ Provoz
SK Prevádzka
HU Üzemeltetés
SL Delovanje
HR Rad
BG Работа
RO Funcţionare
BIH Rad
PL Eksploatacja
5-6
5
DE Reinigung / Wartung
GB Cleaning / Maintenance
FR Nettoyage / Entretien
IT Pulizia / Manutenzione
NL Schoonmaken / Onderhoud
CZ Čištění / Údržba
SK Čistenie / Údrzba
HU Tisztítás / Karbantartás
SL Čiščenje / Vzdrževanje
HR Čišćenje / Održavanje
BG Чистене / Поддръжка
RO Curățare / Întreţinere
BIH Čišćenje / Održavanje
PL Czyszczenie / konserwacja
8
DE Sägeanweisungen
GB Instructions for cutting
FR Consignes de sciage
IT Istruzioni per taglio
NL Zaagaanwijzingen
CZ Pokyny pro řezání
SK Pokyny pre rezanie
HU Vágási utasítások
SL Napotki za žaganje
HR Upute za rezanje
BG Инструкции за рязане
RO Instrucţiuni pentru tăiere
BIH Uputstva za rezanjetesterom
PL Instrukcje dotyczące piłowania
4
2
DE Inbetriebnahme
GB Starting-up the machine
FR mise en service
IT Messa in funzione
NL Inbedrijfstelling
CZ Uvedení do provozu
SK Uvedenie do prevádzky
HU Üzembe helyezés
SL Uvedba v pogon
HR Puštanje u rad
BG Пускане в действие
RO Punerea în funcţiune
BIH Puštanje u rad
PL Uruchomienie
4
7

2
1
DEinbau Kettenschwert und Kette
GB Assembly of chain bar and chain
FMontage du guide-chaîne et de la
chaîne
IMontaggio della lista di sega e della
catena
NL Inbouw kettingbalk en ketting
CZ Montáž řetězové lišty a řetězu
SK Montáž reťazovej lišty a reťaze
HA láncléc és a lánc felszerelése
SLO Montaža meča in verige
HR Montaža vodilice lanca i lanca
BG Монтаж на верижната летва и
веригата
RO Montajul ghidajului şi a lanţului
BIH Montaža vođice lanca i lanca
1
DE Montage
GB Assembly
FR
Assemblage
IT Montaggio
NL Montage
CZ Montáž
SK Montáž
HU Szerelés
SL Montaža
HR Montaža
BG Монтаж
RO Montaj
BIH Montaža
PL Montaż
11
3
2 A
B
A B
4

1
3
DEinbau Kettenschwert und Kette
GB Assembly of chain bar and chain
FMontage du guide-chaîne et de la
chaîne
IMontaggio della lista di sega e della
catena
NL Inbouw kettingbalk en ketting
CZ Montáž řetězové lišty a řetězu
SK Montáž reťazovej lišty a reťaze
HA láncléc és a lánc felszerelése
SLO Montaža meča in verige
HR Montaža vodilice lanca i lanca
BG Монтаж на верижната летва и
веригата
RO Montajul ghidajului şi a lanţului
BIH Montaža vođice lanca i lanca
1
DE Montage
GB Assembly
FR
Assemblage
IT Montaggio
NL Montage
CZ Montáž
SK Montáž
HU Szerelés
SL Montaža
HR Montaža
BG Монтаж
RO Montaj
BIH Montaža
PL Montaż
1
2A
B
A

4
1
DEinbau Kettenschwert und Kette
GB Assembly of chain bar and chain
FMontage du guide-chaîne et de la
chaîne
IMontaggio della lista di sega e della
catena
NL Inbouw kettingbalk en ketting
CZ Montáž řetězové lišty a řetězu
SK Montáž reťazovej lišty a reťaze
HA láncléc és a lánc felszerelése
SLO Montaža meča in verige
HR Montaža vodilice lanca i lanca
BG Монтаж на верижната летва и
веригата
RO Montajul ghidajului şi a lanţului
BIH Montaža vođice lanca i lanca
2
DE Akku
GB Battery
FR Batterie
IT Accumulatore
NL Accu
CZ Akumulátor
SK Akumulátor
HU Akkumulátor
SL Akumulator
HR Akumulator
BG Акумулатор
RO Acumulator
BIH Aku-baterija
PL Akumulator
1,5 Ah
2,0 Ah
3,0 Ah
4,0 Ah
#58541
#58542
#58543
#58544
HST 18-0
1 2
1
CLICK
2

1
5
DEinbau Kettenschwert und Kette
GB Assembly of chain bar and chain
FMontage du guide-chaîne et de la
chaîne
IMontaggio della lista di sega e della
catena
NL Inbouw kettingbalk en ketting
CZ Montáž řetězové lišty a řetězu
SK Montáž reťazovej lišty a reťaze
HA láncléc és a lánc felszerelése
SLO Montaža meča in verige
HR Montaža vodilice lanca i lanca
BG Монтаж на верижната летва и
веригата
RO Montajul ghidajului şi a lanţului
BIH Montaža vođice lanca i lanca
1,5 Ah
2,0 Ah
3,0 Ah
4,0 Ah
#58541
#58542
#58543
#58544
6
1
DEinbau Kettenschwert und Kette
GB Assembly of chain bar and chain
FMontage du guide-chaîne et de la
chaîne
IMontaggio della lista di sega e della
catena
NL Inbouw kettingbalk en ketting
CZ Montáž řetězové lišty a řetězu
SK Montáž reťazovej lišty a reťaze
HA láncléc és a lánc felszerelése
SLO Montaža meča in verige
HR Montaža vodilice lanca i lanca
BG Монтаж на верижната летва и
веригата
RO Montajul ghidajului şi a lanţului
BIH Montaža vođice lanca i lanca
2
3
DSchnittwinkel einstellen
GB Set the cutting angle
FRéglez l'angle de coupe
IImpostare l'angolo di taglio
NL Stel de snijhoek
CZ Nastavte úhel řezu
SK Nastavte uhol rezu
HÁllítsa be a vágási szög
SLO Set za rezanje kot tudi
HR Postavite kut rezanja
BG Определете ъгъла на рязане
RO Setați unghiul de tăiere
BIH Podesite kut rezanja
1
90°
0
3
DE Betrieb
GB Operation
FR Fonctionnement
IT Esercizio
NL Gebruik
CZ Provoz
SK Prevádzka
HU Üzemeltetés
SL Delovanje
HR Rad
BG Работа
RO Funcţionare
BIH Rad
PL Eksploatacja

6
1
DEinbau Kettenschwert und Kette
GB Assembly of chain bar and chain
FMontage du guide-chaîne et de la
chaîne
IMontaggio della lista di sega e della
catena
NL Inbouw kettingbalk en ketting
CZ Montáž řetězové lišty a řetězu
SK Montáž reťazovej lišty a reťaze
HA láncléc és a lánc felszerelése
SLO Montaža meča in verige
HR Montaža vodilice lanca i lanca
BG Монтаж на верижната летва и
веригата
RO Montajul ghidajului şi a lanţului
BIH Montaža vođice lanca i lanca
STOP
START
2
3
DE Betrieb
GB Operation
FR Fonctionnement
IT Esercizio
NL Gebruik
CZ Provoz
SK Prevádzka
HU Üzemeltetés
SL Delovanje
HR Rad
BG Работа
RO Funcţionare
BIH Rad
PL Eksploatacja
1

1
7
DEinbau Kettenschwert und Kette
GB Assembly of chain bar and chain
FMontage du guide-chaîne et de la
chaîne
IMontaggio della lista di sega e della
catena
NL Inbouw kettingbalk en ketting
CZ Montáž řetězové lišty a řetězu
SK Montáž reťazovej lišty a reťaze
HA láncléc és a lánc felszerelése
SLO Montaža meča in verige
HR Montaža vodilice lanca i lanca
BG Монтаж на верижната летва и
веригата
RO Montajul ghidajului şi a lanţului
BIH Montaža vođice lanca i lanca
8
1
DEinbau Kettenschwert und Kette
GB Assembly of chain bar and chain
FMontage du guide-chaîne et de la
chaîne
IMontaggio della lista di sega e della
catena
NL Inbouw kettingbalk en ketting
CZ Montáž řetězové lišty a řetězu
SK Montáž reťazovej lišty a reťaze
HA láncléc és a lánc felszerelése
SLO Montaža meča in verige
HR Montaža vodilice lanca i lanca
BG Монтаж на верижната летва и
веригата
RO Montajul ghidajului şi a lanţului
BIH Montaža vođice lanca i lanca
60° ± 10°
TIP 10 cm
100 cm
DArbeitsanweisungen
GB Work instructions
F
Instructions
I
Istruzioni di lavoro
NL
Werkaanwijzing
CZ
Pracovní instrukce
SK
Pracovné inštrukcie
H
Munkavégzési utasítások
SLO
Napotki za delo
HR
Radne upute
BG
Инструкции за експлоатация
RO
Instrucțiuni de lucru
BIH
Radna uputstva
4
DE Arbeitsanweisungen
EN Work instructions
FR
Instructions
IT
Istruzioni di lavoro
NL
Werkaanwijzing
CZ
Pracovní instrukce
SK
Pracovné inštrukcie
HU
Munkavégzési utasítások
SL
Napotki za delo
HR
Radne upute
BG
Инструкции за експлоатация
RO
Instrucțiuni de lucru
BIH
Radna uputstva
PL Procedury operacyjne
4

8
1
DEinbau Kettenschwert und Kette
GB Assembly of chain bar and chain
FMontage du guide-chaîne et de la
chaîne
IMontaggio della lista di sega e della
catena
NL Inbouw kettingbalk en ketting
CZ Montáž řetězové lišty a řetězu
SK Montáž reťazovej lišty a reťaze
HA láncléc és a lánc felszerelése
SLO Montaža meča in verige
HR Montaža vodilice lanca i lanca
BG Монтаж на верижната летва и
веригата
RO Montajul ghidajului şi a lanţului
BIH Montaža vođice lanca i lanca
1
DBetrieb
GB Operation
FFonctionnement
IEsercizio
NL Gebruik
CZ Provoz
SK Prevádzka
HÜzemeltetés
SLO Delovanje
HR Rad
BG Работа
RO Funcţionare
BIH Rad
25
DE Reinigung / Wartung
GB Cleaning / Maintenance
FR Nettoyage / Entretien
IT Pulizia / Manutenzione
NL Schoonmaken / Onderhoud
CZ Čištění / Údržba
SK Čistenie / Údrzba
HU Tisztítás / Karbantartás
SLO Čiščenje / Vzdrževanje
HR Čišćenje / Održavanje
BG Чистене / Поддръжка
RO Curățare / Întreţinere
BIH Čišćenje / Održavanje
PL Czyszczenie / konserwacja
2
3

17
ENGLISH
GB
Read and understand the
operating instructions before
using the appliance. Abide by all
the safety measures stated in the
service manual. Act responsibly toward third parties.
In case of any doubts about connection and
operation refer please to our customer center
Specied Conditions Of Use
The hedge trimmer is designed for trimming shrubs
and hedges in private hobby gardens
The device must not be used for crushing compost,
as persons or damage to property können.The hedge
trimmer is designed for trimming shrubs and hedges
in private hobby gardens.
Do not use this product in any other way as stated for
normal use.Not observing general regulations in force
and instructions from this manual does not make the
manufacturer liable for damages.
Requirements for operating sta
The operating sta must carefully read the Opera-
tingInstructions before using the appliance.
Technical Data
Cordless hedge trimmer........................................................................................................................ HST 18-0
Art. No ...................................................................................................................................................................................................58593
Battery Li-Ionen .......................................................................................................................................................... 18 V/2,0 Ah
Charger ........................................................................................................................................................................................3-5 h
Idle speed ........................................................................................................................................................................1.300 min-1
Cutting length .................................................................................................................................................................... 430 mm
Beam length .........................................................................................................................................................................515 mm
Max. cut thickness ................................................................................................................................................................15 mm
Net weight .................................................................................................................................................................................3,5 kg
Noise and Vibration Information
Sound pressure level LpA
1)............................................................................................................................................ 77,8 dB(A)
Gemessener Schallleistungspegel LWA
1)...................................................................................................................91,3 dB(A)
Garantierter Schallleistungspegel LWA.........................................................................................................................94 dB(A)
Wear ear protectors!
Vibration emission value ah
2) ................................................................................................................................................1,842 m/s2
1) Uncertainty K =3 dB (A), 2) Uncertainty K=1,5 m/s2
Warning: The vibration emission level will vary because of the ways in which a power tool can be used and may
increase above the level given in this information sheet.
The vibration emission level may be used to compare one tool with another.
It may be used for a preliminary assessment of exposure.
An accurate estimate of the vibratory load shouldalso take into account the times when the tool isshut down
or when it is running but not actually inuse. This may signicantly reduce the vibratoryload over the total
working period.
Identify additional safety measures to protect theoperator from the eects of vibration such as maintain the
tool and the accessories, keep thehands warm, organisation of work patterns.
Qualication : Apart from the detailed instructions
by aprofessional, no special qualication is necessary
forappliance using.
Minimum age : Das Gerät darf nur von Personen
betrieben werden, die das 18. Lebensjahr vollendet
haben. Eine Ausnahme stellt die Benutzung als
Jugendlicher dar, wenn die Benutzung im Zuge einer
Berufsausbildung zur Erreichung der Fertigkeit unter
Aufsicht eines Ausbilders erfolgt.
Training : Using the appliance only requires corre-
spondingtraining by a professional or the Operating
Instructions. Nospecial training is necessary.
The operator is responsible for accidents or risks to
third parties.
Observe to keep out of dangerous zone
Emergency procedure
Conduct a rst-aid procedure adequate to the injury
and summon qualied medical attendance as quickly
as possible. Protect the injured person from further
harm and calm them down. For the sake of eventual
accident, inaccordance with DIN13164, a workplace
DE

18
ENGLISH
GB
has to be ttedwith a rst-aid kit. It isessential to
replace any usedmaterial in the rst-aid kitimmedia-
tely after it has been used.
If you seek help,state the following pieces ofinfor-
mation:
1. Accident site
2. Accident type
3. Number of injured persons
4. Injury type(s)
Symbols
Caution!
Read the Operating Instructions!
Wear eye protection !
Wear ear protectors!
Wear protective helmet !
Wear protective gloves !
Take out the battery before cleaning or
adjusting the appliance or leaving the
applinace unsupervised for a while.
Do not use the charger when the electric
cable is damaged.
Warning against thrown-o items
Keep distance of persons
Observe to keep out of dangerous zone
Warning against cutting injuries
Electrical hazard , keep at least 10 m
distance away from electrical power lines.
Protect against humidity
Never expose tool to rain.
Akkulagerung bei max. bei 40°C. Nicht in
Flüssigkeiten eintauchen. Vor Flammen
und Feuer fernhalten.Akkulagerung bei
max. bei 40°C.
Storage temperature
Protect against moisture
Battery to be stored fully charged only.
Any damaged or disposed electric or
electronic devices must be delivered to
appropriate collection centres.
Protect against moisture
This side up
General Power Tool Safety Warnings
WARNING
Read all safety warnings and all instructions.Failure
to follow the warningsand instructions may result in
electric shock, re and/or serious injury.
Save all warnings and instructions for future
reference.
The term„power tool“ in the warnings refers to your
mains-operated (cordepower tool orbattery-opera-
ted (cordless) power tool.
1) Work area safety
a) Keep work area clean and well lit. Cluttered or
dark areas invite accidents.
b) Do not operate power tools in explosive atmo-
spheres, such as in the presence ofammable
liquids, gases or dust. Power tools create sparks
which may ignite thedust or fumes.
c) Keep children and bystanders away while opera-
ting a power tool. Distractions cancause you to
lose control.
2) Electrical safety
a) Power tool plugs must match the outlet. Never
modify the plug in any way. Do notuse any
adapter plugs with earthed (groundepower
tools.Unmodied plugs andmatching outlets will
reduce risk of electric shock.
b) Avoid body contact with earthed or grounded
surfaces, such as pipes, radiators,ranges and refri-
gerators. There is an increased risk of electric shock
if your body isearthed or grounded.
c) Do not expose power tools to rain or wet condi-
tions. Water entering a power toolwill increase

19
ENGLISH
GB
accidentally.
d) Store idle power tools out of the reach of child-
ren and do not allow personsunfamiliar with
the power tool or these instructions to operate
the power tool. Power tools are dangerous in the
hands of untrained users.
e) Maintain power tools. Check for misalignment or
binding of moving parts,breakage of parts and
any other condition that may aect the power
tool’soperation. If damaged, have the power tool
repaired before use. Many accidentsare caused by
poorly maintained power tools.
f) Keep cutting tools sharp and clean. Properly
maintained cutting tools with sharpcutting edges
are less likely to bind and are easier to control.
g) Use the power tool, accessories and tool bits etc.
in accordance with theseinstructions, taking into
account the working conditions and the work to
beperformed. Use of the power tool for opera-
tions dierent from those intended couldresult in
a hazardous situation.
5) Service
a) Have your power tool serviced by a qualied
repair person using only identicalreplacement
parts. This will ensure that the safety of the power
tool is maintained.
Additional safety instructions
Cordless hedge trimmer
• Keep parts of your body o the cutting blade. Do
not remove jammed material while the blades are
moving.
• When removing jammed material, make sure the
appliance is o.
• Attach the knife protection for transport or
storage. Before you start with the work, search the
thicket for hidden objects such as wire fences, etc.
• Do not let children, other persons or pets near
the cutting scissors.
• Do not use the cutting scissors if the cutting tool is
not tted properly or when it is damaged.
• Before adjusting the cutting scissors, make sure the
knives or blades do not touch stones or debris.
• Do not cut any hard objects. This could lead to
accidents and damage the cutting scissors.
• Avoid abnormal posture and do not work above
shoulder height.
• The battery voltage must match the voltage given
on the name plate.
• Do not attempt to remove shavings when the
knives are moving. When removing any jammed
material, make sure the cutting scissors are o
and stopped. When lifting or holding the cutting
scissors, do not hold the cutting knives.
CAUTION: Knives are still running for a short time
the risk of electric shock.
d) Do not abuse the cord. Never use the cord for
carrying, pulling or unplugging thepower tool.
Keep cord away from heat, oil, sharp edges or
moving parts. Damagedor entangled cords
increase the risk of electric shock.
e) When operating a power tool outdoors, use an
extension cord suitable foroutdoor use. Use of
a cord suitable for outdoor use reduces the risk of
electric shock.
f) If operating a power tool in a damp location
is unavoidable, use a residual currentdevice
(RCprotected supply. Use of an RCD reduces the
risk of electric shock.
3) Personal safety
a) Stay alert, watch what you are doing and use
common sense when operating apower tool. Do
not use a power tool while you are tired or under
the inuence ofdrugs, alcohol or medication. A
moment of inattention while operating power
toolsmay result in serious personal injury.
b) Use personal protective equipment. Always
wear eye protection. Protectiveequipment such
as dust mask, non-skid safety shoes, hard hat, or
hearing protectionused for appropriate conditions
will reduce personal injuries.
c) Prevent unintentional starting. Ensure the
switch is in the o-position beforeconnecting to
power source and/or battery pack, picking up or
carrying the tool. Carrying power tools with your
nger on the switch or energising power tools that
havethe switch on invites accidents.
d) Remove any adjusting key or wrench before
turning the power tool on. A wrenchor a key left
attached to a rotating part of the power tool may
result in personal injury.
e) Do not overreach. Keep proper footing and
balance at all times. This enables bettercontrol of
the power tool in unexpected situations.
f) Dress properly. Do not wear loose clothing or
jewellery. Keep your hair, clothingand gloves
away from moving parts. Loose clothes, jewellery
or long hair can becaught in moving parts.
g) If devices are provided for the connection of dust
extraction and collectionfacilities, ensure these
are connected and properly used. Use of dust
collection canreduce dust-related hazards.
4) Power tool use and care
a) Do not force the power tool. Use the correct po-
wer tool for your application. Thecorrect power
tool will do the job better and safer at the rate for
which it was designed.
b) Do not use the power tool if the switch does not
turn it on and o. Any power toolthat cannot be
controlled with the switch is dangerous and must
be repaired.
c) Disconnect the plug from the power source and/
or the battery pack from thepower tool before
making any adjustments, changing accessories,
or storingpower tools. Such preventive safety
measures reduce the risk of starting the powertool

20
ENGLISH
GB
after being switched o.
Putting into operation for your
safety
Take the battery out of the appliance before any
work on the appliance (e.g. maintenance, assem-
bly, etc.) and for any transport or storing of the
appliance.
Risk of injury if the On/O button is pressed uninten-
tionally.
Battery charging/charging process
Do not use any other charger. The charger included
has been designed for a Li-ion battery in your
appliance.
Respect the system voltage! The current source
voltage must match the details on the type label of
the charger.
Caution: The battery is supplied partially charged. To
guarantee the full performance of the battery, charge
the battery by a charger to the full extent before
using the appliance for the rst time.
The Li-Ion battery may be charged at any time
without the service life being shortened as a result.
Charging interruption does not damage the battery.
Due to the intelligent charging, the battery charging
state is automatically recognised and the battery is
always charged by the optimum charging current, de-
pending on the temperature and voltage. By this, the
battery is treated smoother and stays fully charged
when kept in the charger.
Caution: Charging is only possible when the battery
temperature is within the admissible temperature
range. See the instructions on the battery.
Charging instructions
The charger may get warm in continuous or consecu-
tive charging cycles with no interruption. However,
this is not a defective state and it is no technical
defect of the charger.
A signicantly shortened operation time after char-
ging indicates that the battery is worn out and it must
be replaced.
The battery has been tted with an NTC temperature
sensor, allowing charging within 0°C - 40°C only. Long
service life of the battery is achieved by this.
The Li-ion battery is tted with„Electronic Cell Pro-
tection (ECP)“ against deep discharge. The appliance
switches o by the protection circuit when the batte-
ry is discharged the appliance is no longer working.
Do not press the On/O button after the
appliance is automatically switched o. The
battery could get damaged.
Charging indicator Battery
3 green LED are on
-> Battery is fully charged
2 green LED are on
-> Battery is half full
1 green LED is on
-> Battery is almost empty
Instructions to the charger
Green LED permanently on:
Ready for operation
Red LED permanently on:
Battery being charged.
Red LED ashing:
Failures (Battery is overheated)
The charger may get warm in continuous or consecu-
tive charging cycles with no interruption. However,
this is not a defective state and it is no technical
defect of the charger.
A signicantly shortened operation time after char-
ging indicates that the battery is worn out and it must
be replaced.
The battery has been tted with an NTC temperature
sensor, allowing charging within 0°C - 40°C only. Long
service life of the battery is achieved by this.
The Li-ion battery is tted with„Electronic Cell Pro-
tection (ECP)“ against deep discharge. The appliance
switches o by the protection circuit when the batte-
ry is discharged the appliance is no longer working.
Do not press the On/O button after the appli-
ance is automatically switched o. The battery could
get damaged.
Notes to the lithium-ion battery
Its utility life is several years, which however much
depends on the use and storage conditions.
The lithium-ion battery capacity gets reduced over
time, even without being used, which is caused by a
parasitic reaction of lithium with the electrolyte.

21
GB
The manufacturer recommends storage at 15°C and
60% charging level, a compromise between accele-
rated aging and self-discharge. The battery should
always be charged to 40-60% approximately once in
six months. .
Lithium-ion batteries may only be charged by special
electronics.
Fumes can leak in case of damage and unauthorised
use of the battery pack. Supply fresh air and seek me-
dical advice if facing any problem. Fumes can irritate
the respiratory system.
Fire danger!
Never charge the batteries in an environment with
acids and easily ammable materials.
Risk of explosion!
Protect the appliance against heat and re.
Do not put the machine on heaters and do not expo-
se it to intensive sunlight for a long time.
Appliance to be used in an environment with tempe-
ratures from 5°C to 40°C if possible.
Risk of short circuit!
The battery must be packed (plastic bags, boxes) or
the contacts must be sealed with an adhesive tape for
disposal, transport or storage.
Never open the battery.
Storage and safety instructions for the lithium-ion
battery.:
Lithium is a highly reactive substance. Despite not
being present as lithium batteries as li-metal, the lithi-
um-ion battery components are highly ammable.
Mechanical damage can lead to internal short circuits.
Depending on circumstances, a defect cannot be
immediately recognised. Outbreak of re can occur
even 30 minutes later.
Storage:
Li-ion To be stored at 40-60% charge level and in cold
conditions.
Safety instructions Damaged lithium-ion battery can
ignite with a time delay of 30 minutes or more. Never
use water to extinguish a burning battery, use sand
instead. Leaked electrolytic liquid can be washed o
clothing with plenty of water. Electrolytic liquid is
ammable.
operation
Please observe the legal provisions of regulations
on protection against noise. These provisions can be
dierent in various places.
Attaching the shoulder safety strap
Caution! Always use the shoulder strap when
working. Switch o the appliance before releasing the
shoulder strap.
- Place the shoulder strap over your shoulders.
- Adjust the strap length so that the strap holder is at
the height of your hips.
Never wear the strap diagonally over your
shoulders and chest but only on one shoulder. By this,
the appliance can quickly be taken o your body in
case of emergency.
Height adjustment
Depending on the working height, an extension can
be tted or you can work without extension in lower
areas..
Maintenance
Take the battery always out before any work on
the appliance.
Before using the appliance, perform a visual inspec-
tion at all times to make sure the power cord and the
plug, in particular, are not damaged on the charger.
The machine must not be used under any circum-
stances if the machine or the safety devices are
damaged.
If the device is defective, the repair has to be made
exclusively by the customer service.
Use only original accessories and original spare parts.
The operating sta must carefully read the Opera-
tingInstructions before using the appliance.
Cleaning and storage
Caution! Always remove the battery from the
appliance and possibly wear protective gloves before
cleaning and storing.
At regular intervals, clean the clamping mechanism
by blowing it by compressed air or clean it with a
brush.
Keep the handles dry (no oil) for safe holding. Clean
the appliance with a damp cloth or a mild detergent.
Keep your appliance and its accessories in a dark, dry
and frost-free place inaccessible to children.
Guarantee
Warranty period of 12 months applies to commercial
use and 24 months applies to private use and com-
mences on the day of purchase of the device.
The guarantee does not cover any unauthorised
use such as appliance overloading, use of
violence, damage as a result of any unauthorised
interference or caused by foreign items.
Failing to follow the operating and assembly
instructions and common wear are.
Service
Do you have any technical questions? Any claim? Do
you need any spare parts or operating instructions?
We will quickly help you and without needles bure-
ENGLISH

22
GB
GB
aucracy at our web pages at www.guede.com in the
Servicing part. Please help us be able to help you. In
order to identify your device in case of claim we need
the serial No., product No. and year of production. All
this data can be found on the type label. Please enter
it here for future reference
Serial No.:
Art. No:
Year of production:
Tel.: +49 (0) 79 04 / 700-360
Fax: +49 (0) 79 04 / 700-51999
E-Mail: [email protected]
Disposal
Note to the disposal arising from icons placed
on the appliance or on the package. Descrip-
tion of the meanings can be found in section
“Marking”.
Environmentally safe disposal of batteries
The batteries are according to the current
state of technology best suited for the power
supply of electrical devices, independent of
the mains. If lithium-ion cells are disposed with
other household waste, they are harmful to the
environment. The batteries are lithium-ion ac-
cumulators and are therefore subject to special
waste disposal processes. Have any defective
batteries disposed by a specialised shop. The
batteries must be taken out before scrapping
the appliance.
Do not dispose of electrical appliances in
the household waste.
According to European Directive 2002/96/EC on
waste electrical and electronic equipment and
transposition to the national law, worn electrical
equipment must be collected separately and
put to recycling.
Recycling alternative to the return requirement:
As an alternative to recycling, the owner of
the electrical equipment is obliged to provide
assistance in professional recycling. For this
purpose, an old appliance can be put to a collec-
tion centre that will dispose of it in accordance
with the national circulation management and
the Waste Act.
This does not apply to accessories connected to
old appliances and auxiliary equipment without
electrical components.
Transport packaging disposal
The packaging protects the appliance against
damage during transport. Packaging materials
are usually chosen according to environmental-
friendliness and waste treatment aspects and
can therefore be recycled. Returning the pack-
aging to material circulation saves raw materials
and reduces waste. Parts of packaging (e.g.
foils, styrofoam ®) can be dangerous to children.
Risk of suocation! Keep the packaging out of
reach of children and dispose them as quickly
as possible.
ENGLISH

23
Inspection and maintenance plan
Generally Whole appliance
Plastic body
Knife/cutter bar
Regularly clean the outer part
Let regularly checked by authorized workshop
Check for cracks and ssures
Let regularly sharpen
Before any start-up ON/OFF switch
Charger connecting cable
Functional test
Functional test
storage Whole appliance To be cleaned and the knife bar slightly lubricated.
To be safely stored in a cold room. Have it checked in a
specialised workshop.
GB
ENGLISH
Failures - Causes - Removal
Failures Causes Removal
Cutting scissors not
working. Battery is discharged
Battery is too cold / hot
Appliance is defective
Internal cables are defective
Charge the battery, see the Note to charging
Have the battery warmed up / cooled down
Consult with the customer service centre
Unsteady running,
strong vibrations Appliance is defective Consult with the customer service centre
Too short duration
of work per battery
charge.
The battery has not been used for a long
time or been used just shortly
Battery is empty or defective
Charge the battery to full extent, see the
Note to charging
Replace (charge) the battery

40
NEDERLANDS
NL
Gebruik het apparaat pas nadat u
de gebruiksaanwijzing gelezen en
begrepen hebt. Let op alle, in de
gebruiksaanwijzing aangegeven,
veiligheidsinstructies. Gedraagt u zich verantwoord
tegenover andere personen.
Indien betreende de aansluiting en het bedienen
van het apparaat twijfels ontstaan, kunt u zich tot de
klantendienst wenden.
Voorgeschreven Gebruik Van Het
Systeem
De heggenschaar is ontworpen voor het snoeien van
struiken en heggen in prive hobby tuinen.
Het apparaat mag niet worden gebruikt voor het
vermalen van compost, als personen of schade aan
eigendommen können.The heggenschaar is ontwor-
pen voor het snoeien van struiken en heggen in prive
hobby tuinen.
Dit apparaat uitsluitend gebruiken voor normaal
gebruik, zoals aangegeven.Bij niet naleving van de
bepalingen uit de algemeen geldende voorschriften,
Technische Gegevens
Accu-Heggenschaar............................................................................................................................... HST 18-0
Artikel-Nr. .............................................................................................................................................................................................58593
batterij Li-Ionen .......................................................................................................................................................... 18 V/2,0 Ah
Laadapparaat .............................................................................................................................................................................3-5 h
Onbelast toerental .......................................................................................................................................................1.300 min-1
Kniplengte ........................................................................................................................................................................... 430 mm
Balklengte .............................................................................................................................................................................515 mm
Max. snijdikte .........................................................................................................................................................................15 mm
Netto gewicht...........................................................................................................................................................................3,5 kg
Geluids-/trillingsinformatie
Geluidsdrukniveau LpA
1)................................................................................................................................................ 77,8 dB(A)
Livello di potenza sonora misurato LWA
1) .................................................................................................................91,3 dB(A)
Livello di potenza sonora garantito LWA ......................................................................................................................94 dB(A)
Draag oorbeschermers!
Trillingsemissiewaarde ah
2) ....................................................................................................................................................1,842 m/s2
1) Onzekerheid K =3 dB (A), 2) Onzekerheid K=1,5 m/s2
Waarschuwing: Het trillingsniveau verandert afhankelijk van het gebruik van het elektrische gereedschap en
kan in sommige gevallen boven de in deze gebruiksaanwijzing aangegeven waarde liggen.
Het trillingspeil kan voor het vergelijken van elektrische werktuigen met elkaar gebruikt worden
Hij is ook geschikt voor een voorlopige inschatting van de trillingsbelasting.
Voor een precieze beoordeling van de trillingsbelastingdienen ook de tijden in aanmerking te wordengeno-
men dat het apparaat uitgeschakeld is ofweliswaar loopt, maar niet in gebruik is. Hierdoorkan de trillingsbela-
sting voor de gehele werkruimteaanmerkelijk afnemen.
Stel extra veiligheidsmaatregelen vast voor debeveiliging van de gebruiker tegen het eect vantrillingen, zoals
bijvoorbeeld onderhoud van elektrischen inzetgereedschap, het warm houden vande handen en de organisa-
tie van arbeidsprocessen.
evenals van de bepalingen uit deze gebruiksaanwij-
zing, kan de producent voor schaden niet aansprake-
lijk gesteld worden.
Eisen aan de bedienende persoon
De bedienende persoon moet, voor het gebruik van
hetapparaat, de gebruiksaanwijzing goed gelezen
hebben.
Kwalicatie : Behalve een uitvoerige instructie
doorvakkundig verkooppersoneel is er geen speciale
kwalicatievoor het gebruik van het apparaat nodig.
Minimale leeftijd : Possono lavorare con
l‘apparecchiosolo le persone che hannoraggiunto
18 anni. L’eccezionerappresenta lo sfruttamento
deiminorenni per lo scopodell’addestramento pro-
fessionaleper raggiungere la pratica sottocontrollo
dell‘istruttore.
Scholing : Om het apparaat te kunnen gebruiken
is enigpassend onderricht, door een vakman, resp.
debedieningsaanwijzing, voldoende. Een speciale
scholing isniet noodzakelijk.
De bedienende persoon is verantwoordelijk voor
ongevallen of gevaren tegenover derden.

41
NEDERLANDS
NL
Let op dat er zich geen personen in de gevarenomge-
ving ophouden.
Handelswijze in noodgeval
Tref de noodzakelijke maatregelen om éérste hulp
teverlenen, die met het letsel overeenkomt en vraag
zo snelmogelijk gekwaliceerde medische hulp aan.
Beschermgewonde personen voor overig letsel en
stel ze gerust.Voor het eventueel plaatsvinden van
een ongeval zoualtijd een verbandtrommel, volgens
DIN 13164, op dewerkplaats bij de hand moeten zijn.
Het uit deverbandtrommel genomen materiaal dient
onmiddellijkaangevuld te worden.
Indien u hulp vraagt, geef de volgende gegevens
door:
1. Plaats van het ongeval
2. Soort van het ongeval
3. Aantal gewonden mensen
4. Soort verwondingen
Symbolen
Opgelet!
Gebruiksaanwijzing lezen!
Bescherming van ogen dragen!
Draag oorbeschermers!
Veiligheidshelm dragen!
Veiligheidshandschoenen dragen!
Verwijder de accu voordat het apparaat
schoongemaakt, ingesteld of voor korte
tijd onbewaakt wordt achtergelaten.
Gebruik het laadapparaat niet, indien het
netkabel beschadigd is.
Waarschuwing voor weggeslingerde
onderdelen
Afstand van personen
Let op dat er zich geen personen in de
gevarenomgeving ophouden.
Waarschuwing voor snijletsels
Elektrisch gevaar, houdt op zijn minst 10
m uit de buurt van elektrische leidingen
in de lucht.
Tegen vocht beschermen
Stel de machine niet bloot aan regen.
Akkulagerung bei max. bei 40°C. Nicht in
Flüssigkeiten eintauchen. Vor Flammen
und Feuer fernhalten.Akkulagerung bei
max. bei 40°C.
Opslagtemperatuur
Tegen vocht beschermen.
Accu slechts volgeladen opslaan.
Beschadigde en/of verwijderde elek-
trische of elektronische apparaten bij de
daarvoor bestemde recyclingplaatsen
aeveren
Tegen vocht beschermen.
Verpakkingsoriëntering boven
Algemene veiligheidsinstructies
voor elektrische werktuigen
WAARSCHUWING
Lees alle veiligheidsinstructies en aanwijzingen.Het
niet opvolgen van veiligheidsinstructies en aanwijzin-
gen kan een elektrische schok, brand en/of zware letsels
veroorzaken.
Bewaar voor de toekomst alle veiligheidsinstruc-
ties en aanwijzingen.
De in de veiligheidsinstructies gebruikte term„elek-
trisch werktuig“ verwijst ook naar elektrische werktu-
igen met een netvoeding (met netkabel) en eveneens
naar elektrische werktuigen met een accuvoeding
(zonder netkabel).
1) Veiligheid op de werkplek
a) Houd je werkomgeving schoon en goed verlicht.
Wanorde of niet verlichte werkplekken kunnen tot
ongevallen leiden.
b) Gebruik het elektrische werktuig niet in een
explosiegevaarlijke omgeving waarin zich brand-
bare vloeistoen, gassen of stoen bevinden.
Elektrische werktuigen geven vonken af die stof of
dampen doen ontsteken.

42
NEDERLANDS
NL
apparaat met de schakelaar ingeschakeld aan de
stroomvoorziening aansluit, kan dit tot ongevallen
leiden.
d) Verwijder instelgereedschap of schroefsleu-
tels voordat het elektrische werktuig wordt
ingeschakeld. Een werktuig of sleutel, die zich aan
een draaiend apparaatonderdeel bevindt, kan tot
letsels leiden.
e) Vermijd abnormale lichaamshoudingen. Zorg
er altijd voor dat u veilig staat en het evenwicht
niet verliest. Op een dergelijke wijze kan het
elektrische werktuig in onverwachte situaties beter
gecontroleerd worden.
f) Draag geschikte kleding. Draag geen wijde
kleding of sierraden. Houd uw haar, kleding en
handschoenen ver van bewegende onderdelen.
Losse kleding, sierraden of lang haar kunnen door
bewegende delen gegrepen worden.
g) Als inrichtingen voor stofafzuiging en -opvang
gemonteerd kunnen worden, controleer dan of
deze aangesloten zijn en op juiste wijze gebruikt
worden. Gebruik van een stofafzuiging kan de
gevaren door stof verminderen.
4) Gebruik en behandeling van het elektrische
werktuig
a) Overbelast het apparaat niet. Gebruik voor het
werk het daarvoor bestemde elektrische werktu-
ig. Met het passende elektrische werktuig wordt
beter en veiliger, in het aangegeven prestatiege-
bied, gewerkt.
b) Gebruik geen enkel elektrisch werktuig waarvan
de schakelaar defect is. Een elektrisch werktuig,
dat niet meer in- of uitgeschakeld kan worden is
gevaarlijk en moet gerepareerd worden.
c) Neem de stekker uit het stopcontact en/of
verwijder de accu voordat instellingen aan
het apparaat worden uitgevoerd, onderdelen
worden vervangen of het apparaat na gebruik
wordt weggezet. Deze voorzorgsmaatregelen ver-
hinderen een ongewenste start van het elektrische
werktuig.
d) Bewaar elektrische werktuigen, die niet in
gebruik zijn, buiten het bereik van kinderen. Laat
personen niet het apparaat gebruiken die daar-
mee niet vertrouwd zijn of deze aanwijzingen
niet hebben gelezen. Elektrische werktuigen zijn
gevaarlijk, indien deze door onervaren personen
worden gebruikt.
e) Onderhoud elektrische werktuigen zorgvuldig.
Controleer of de bewegelijke onderdelen perfect
functioneren en niet klemmen, of onderdelen
gebroken of zodanig beschadigd zijn dat de
functie van het elektrische werktuig is beïnvloed.
Laat beschadigde onderde Vele ongevallen vinden
hun oorzaak in slecht onderhouden elektrische
werktuigen.
f) Houd snijwerktuigen scherp en schoon. Zorgvul-
dig onderhouden snijwerktuigen met scherpe snij-
kanten lopen minder snel vast en zijn eenvoudiger
te bedienen.
g) Gebruik elektrische werktuigen, accessoires,
c) Houd kinderen en overige personen tijdens het
gebruik van elektrische werktuigen op afstand.
Bij aeiding kan de controle over het apparaat
verloren gaan.
2) Elektrische veiligheid
a) De aansluitstekker van het elektrische werktuig
dient in het stopcontact te passen. De stekker
mag op geen enkele wijze veranderd worden.
Gebruik geen adapterstekker samen met rand-
geaarde elektrische werktuigen.Ongewijzigde
stekkers en passende stopcontacten verlagen het
risico van een elektrische schok.
b) Vermijd lichamelijk contact met geaarde opperv-
lakten zoals buizen, verwarmingselementen,
fornuizen en koelkasten. Er bestaat een verhoogd
risico van een elektrische schok, indien uw lichaam
geaard is.
c) Houd elektrische werktuigen ver van regen of
andere nattigheid. Indringing van water in een
elektrisch werktuig verhoogt het risico van een
elektrische schok.
d) Gebruik de elektrakabel niet om het elektrische
werktuig te dragen, op te hangen of om de
stekker uit het stopcontact te trekken. Houd de
kabel ver van warmte, olie, scherpe kanten en/of
bewegende apparaatonderdelen. Beschadigde
of verdraaide kabels verhogen het risico van een
elektrische schok.
e) Indien met een elektrisch werktuig in de open
lucht gewerkt wordt, gebruik dan enkel verleng-
kabels die voor het gebruik in de open lucht
geschikt zijn. Het gebruik van een voor buitenge-
bruik geschikte verlengkabel vermindert het risico
van een elektrische schok.
f) Als gebruik van het elektrische gereedschap in
een vochtige omgeving onvermijdelijk is, maak
dan gebruik van een veiligheidsschakelaar voor
foutstroom. Het gebruik van een veiligheidsscha-
kelaar voor foutstroom vermindert het risico van
een elektrische schok.
3) Veiligheid van personen
a) Wees attent, let op wat u doet en ga met ver-
stand aan het werk met elektrische werktuigen.
Gebruik niet een elektrisch werktuig, indien u
moe bent of onder invloed van drugs, alcohol of
medicijnen staat. Een moment van onopletten-
dheid bij het gebruik van een elektrisch werktuig
kan tot ernstige letsels leiden.
b) Draag persoonlijke beschermende uitrustingen
en altijd een veiligheidsbril. Het dragen van
persoonlijke beschermende uitrustingen, zoals een
stofmasker, veiligheidsschoenen met antislipzool,
veiligheidshelm of gehoorbeschermer, afhankelijk
van het type en het gebruik van het elektrische
werktuig, vermindert het risico van letsels
c) Vermijdt een ongewenste inbedrijfneming. Con-
troleer of het elektrische werktuig uitgeschakeld
is, indien dit aan de stroomtoevoer en/of accu
aangesloten, opgetild of gedragen wordt. Als
u bij het dragen van het elektrische werktuig
een vinger aan of bij de schakelaar hebt of het

43
NEDERLANDS
NL
inzetwerktuigen etc. in overeenstemming met
deze aanwijzingen. Houd daarbij rekening met
de arbeidsomstandigheden en de uit te voeren
werkzaamheden. Het gebruik van elektrische
werktuigen voor andere dan de beoogde toepas-
singen kan tot gevaarlijke situaties leiden.
5) Service
a) Laat uw elektrische werktuig uitsluitend door
gekwaliceerd vakkundig personeel en uitslui-
tend met originele reserveonderdelen repareren.
Daardoor wordt gewaarborgd dat de veiligheid van
het apparaat behouden blijft.
Aanvullende veiligheidsinstructies
Accu-Heggenschaar
• Houd altijd alle lichaamsdelen op afstand van het
snijmes. Verwijder geen snijgoed of houd niet het
te snoeien materiaal met de hand vast terwijl de
messen zich bewegen. Controleer of het apparaat
is uitgeschakeld voordat u geklemd materiaal
verwijdert.
• Tijdens transport of bij opslag plaats altijd eerst de
bescherming op het mes.
• Voordat met werkzaamheden wordt begonnen,
zoek in de heg naar verborgen objecten, zoals
draadafrasteringen.
• Houd personen, vooral kinderen en huisdieren,
op afstand van de heggenschaar.
• Gebruik de heggenschaar niet, indien het
snijwerktuig niet juist is bevestigd of beschadigd.
• Stel voor het inschakelen van de heggenschaar
vast dat de messen geen stenen of puin kunnen
raken.
• Snij geen harde voorwerpen. Dit kan tot letsels
leiden en de heggenschaar beschadigen.
• Vermijd een abnormale lichaamshouding en werk
niet boven schouderhoogte.
• De accuspanning moet overeenkomen met de op
het typeplaatje aangegeven spanning.
• Probeer geen snijgoed te verwijderen of houd
geen enkel te snoeien materiaal vast terwijl
de messen zich bewegen. Controleer of de
heggenschaar is uitgeschakeld en volledig tot
stilstand is gekomen voordat u geklemd materiaal
gaat verwijderen. Raak de snijmessen niet aan als u
de heggenschaar optilt of vasthoudt.
VOORZICHTIG: De messen draaien na het
uitschakelen noch kort na.
Inbedrijfstelling voor uw veiligheid
Verwijder de accu voor alle werkzaamheden aan
het apparaat (bijv. onderhoud, montage etc.) eve-
nals bij transport en opslag van het apparaat.
Bij ongewenste inschakeling van de aan/uit-scha-
kelaar bestaat letselgevaar.
Accu laden/Laadproces
Gebruik geen ander laadapparaat. Het meegelever-
de laadapparaat is aangepast op de in uw apparaat
passende Li-ion-accu.
Volg de netspanning op! De spanning van de
stroombron moet met de gegevens op het typeplaat-
je van het laadapparaat overeenkomen.
Aanwijzing: De accu wordt gedeeltelijk geladen
geleverd. Om de volle prestatie van de accu te garan-
deren, laad de accu vóór het eerste gebruik van het
apparaat volledig op.
De Li-ion-accu kan ieder moment opgeladen worden,
zonder de levensduur te bekorten. Een onderbreking
van het laadproces schaadt de accu niet.
Door de intelligente laadtechniek wordt de laadstand
van de accu automatisch herkend en afhankelijk van
de accutemperatuur en -spanning telkens met de
optimale laadstroom geladen. Hierdoor wordt de
accu gespaard en blijft bij opslag, door de timer van
de laadapparaat, altijd volledig opgeladen.
Aanwijzing: Het laadproces is enkel mogelijk, indien
de temperatuur in het bereik van de toegestane laad-
temperatuur ligt. Zie aanwijzingen op de accu.
Aanwijzingen betreende het laden
Bij continue laadcycli of meerdere malen achtereen-
volgende laadcycli zonder onderbreking kan het
laadapparaat warm worden. Dit is echter onschadelijk
en duidt niet op een technische storing van het
Laadapparaat.
Een aanzienlijk verkorte gebruikstijd na het opladen
geeft aan dat de accu versleten is en vervangen moet
Worden.
De accu is met een NTC-temperatuurbewaking uitge-
rust die een opladen enkel in het temperatuurbereik
tussen 0 °C en 40 °C toelaat. Daardoor wordt een
hoge levensduur van de accu bereikt.
De li-ion-accu is door de„Electronic Cell Protection
(ECP)“ tegen te diepe ontlading beschermd. Bij
ontladen accu wordt het apparaat door een veilig-
heidsschakeling uitgeschakeld. Het apparaat werkt
niet meer.
Druk na de automatische uitschakeling van
het apparaat niet meer op de aan/uit-scha-
kelaar. De accu kan beschadigd worden.
Indicatie van de laadstand batterij
Other manuals for HST 18-0
1
This manual suits for next models
1
Table of contents
Languages:
Other GÜDE Trimmer manuals

GÜDE
GÜDE GFS 52.3 User manual

GÜDE
GÜDE GFS 850-4S User manual

GÜDE
GÜDE GFS 1504 B User manual

GÜDE
GÜDE GFS 700-4S User manual

GÜDE
GÜDE 94081 User manual

GÜDE
GÜDE SET 510 User manual

GÜDE
GÜDE 250/18 RT Set User manual

GÜDE
GÜDE GHS 690 L User manual

GÜDE
GÜDE 510/18 HS Set User manual

GÜDE
GÜDE 410/18 HSL Set User manual

GÜDE
GÜDE GHS 620 User manual

GÜDE
GÜDE FS 36-0 User manual

GÜDE
GÜDE HST 18-0 User manual

GÜDE
GÜDE GHS 510 G User manual

GÜDE
GÜDE GHS 520 18 LI-ION Wiring diagram

GÜDE
GÜDE GTHS 565 User manual

GÜDE
GÜDE RT 18-0 User manual

GÜDE
GÜDE 510/18 HSS Set User manual

GÜDE
GÜDE HS 36-0 User manual

GÜDE
GÜDE HS 18-0 User manual