14 15
LITHIUM BATTERY(LiPo/LiFe/LiIon)PROGRAM
These programs are only suitable for charging and discharging Lithium
batteries with a nominal voltage of 3.3V, 3.6V and 3.7V per cell. These
batteries need to adopt different charge technique is termed a constant
voltage(CV) and constant current(CC) method. The charge current varies
according to the battery capacity and performance. The final voltage of
charge process is also very important; it should be precisely matched with
the charade voltage of the battery. They are 4.2V for LiPo, 4.1V for Lilo, and
3.6 V for LiFe. The charge current and nominal voltage as for cell count set
on the charge program must always be correct for the battery to be
charged.
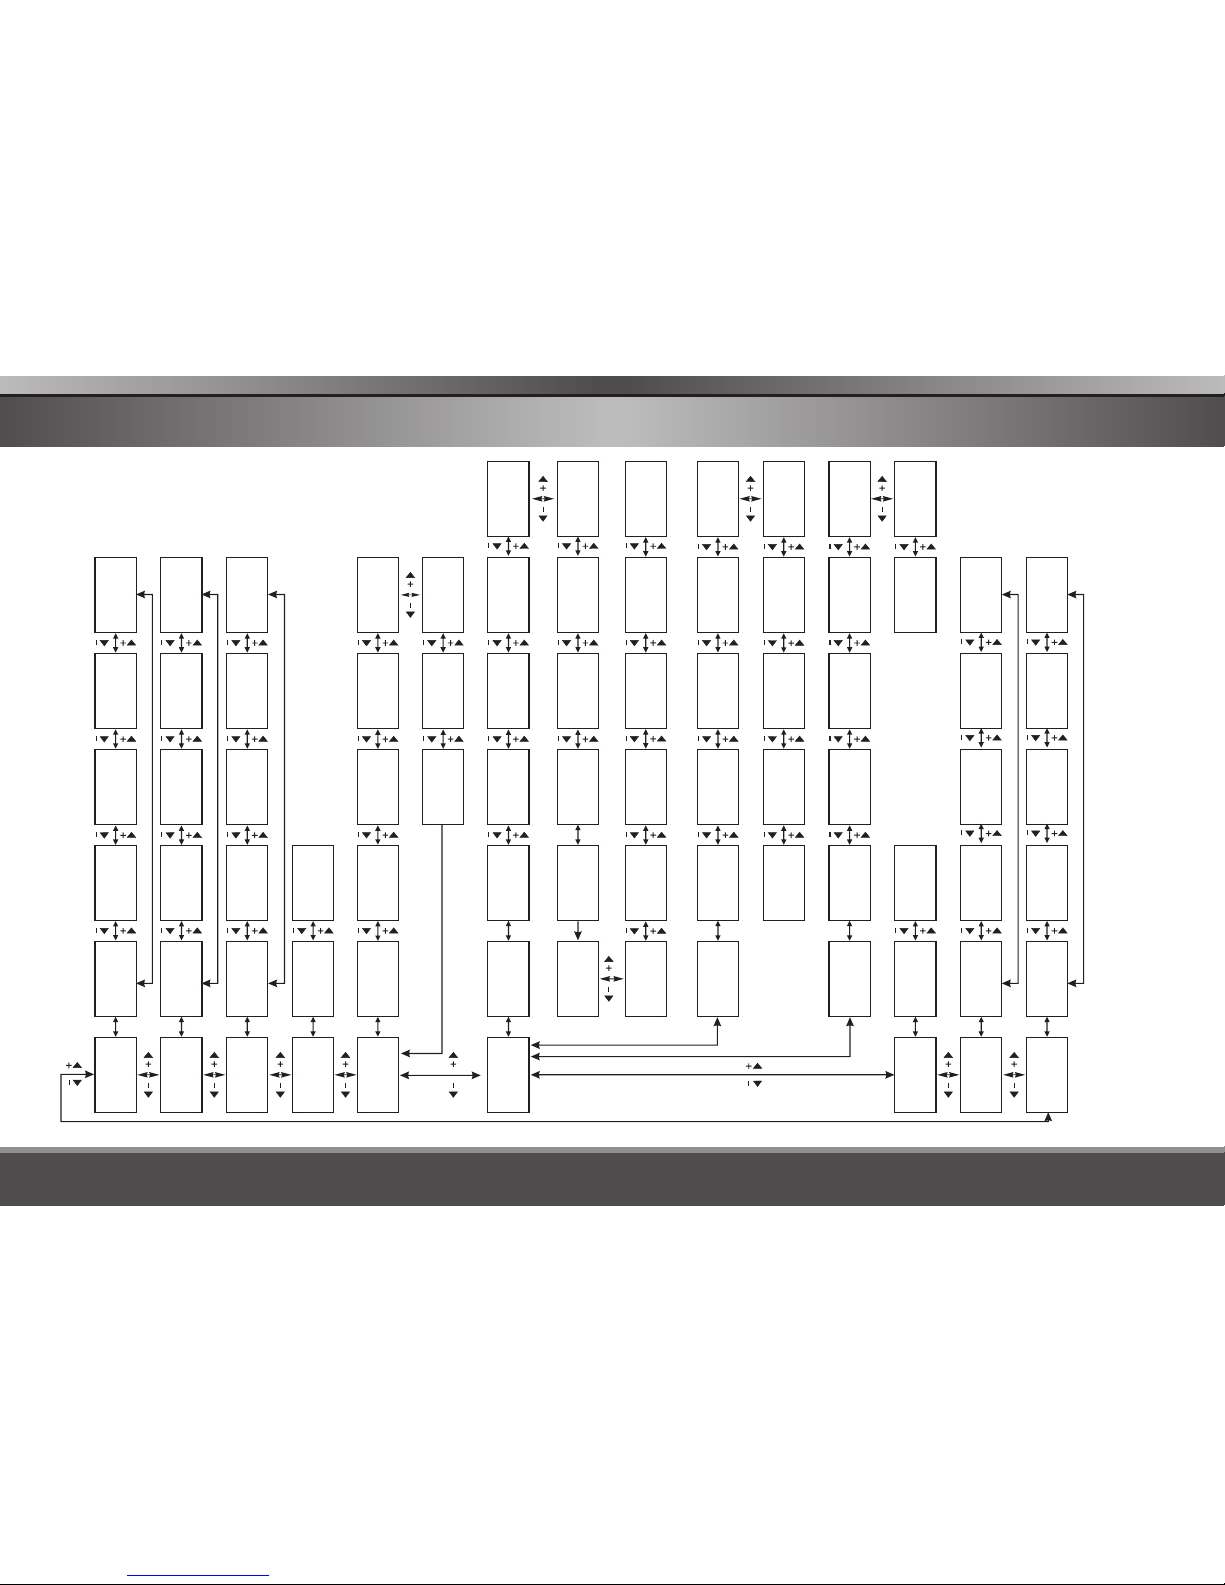
When you are willing to alter the parameter value in the program, press
Start/Enter key to make it blink then change the value with or key.
The value will be stored by pressing Start/Enter key once.
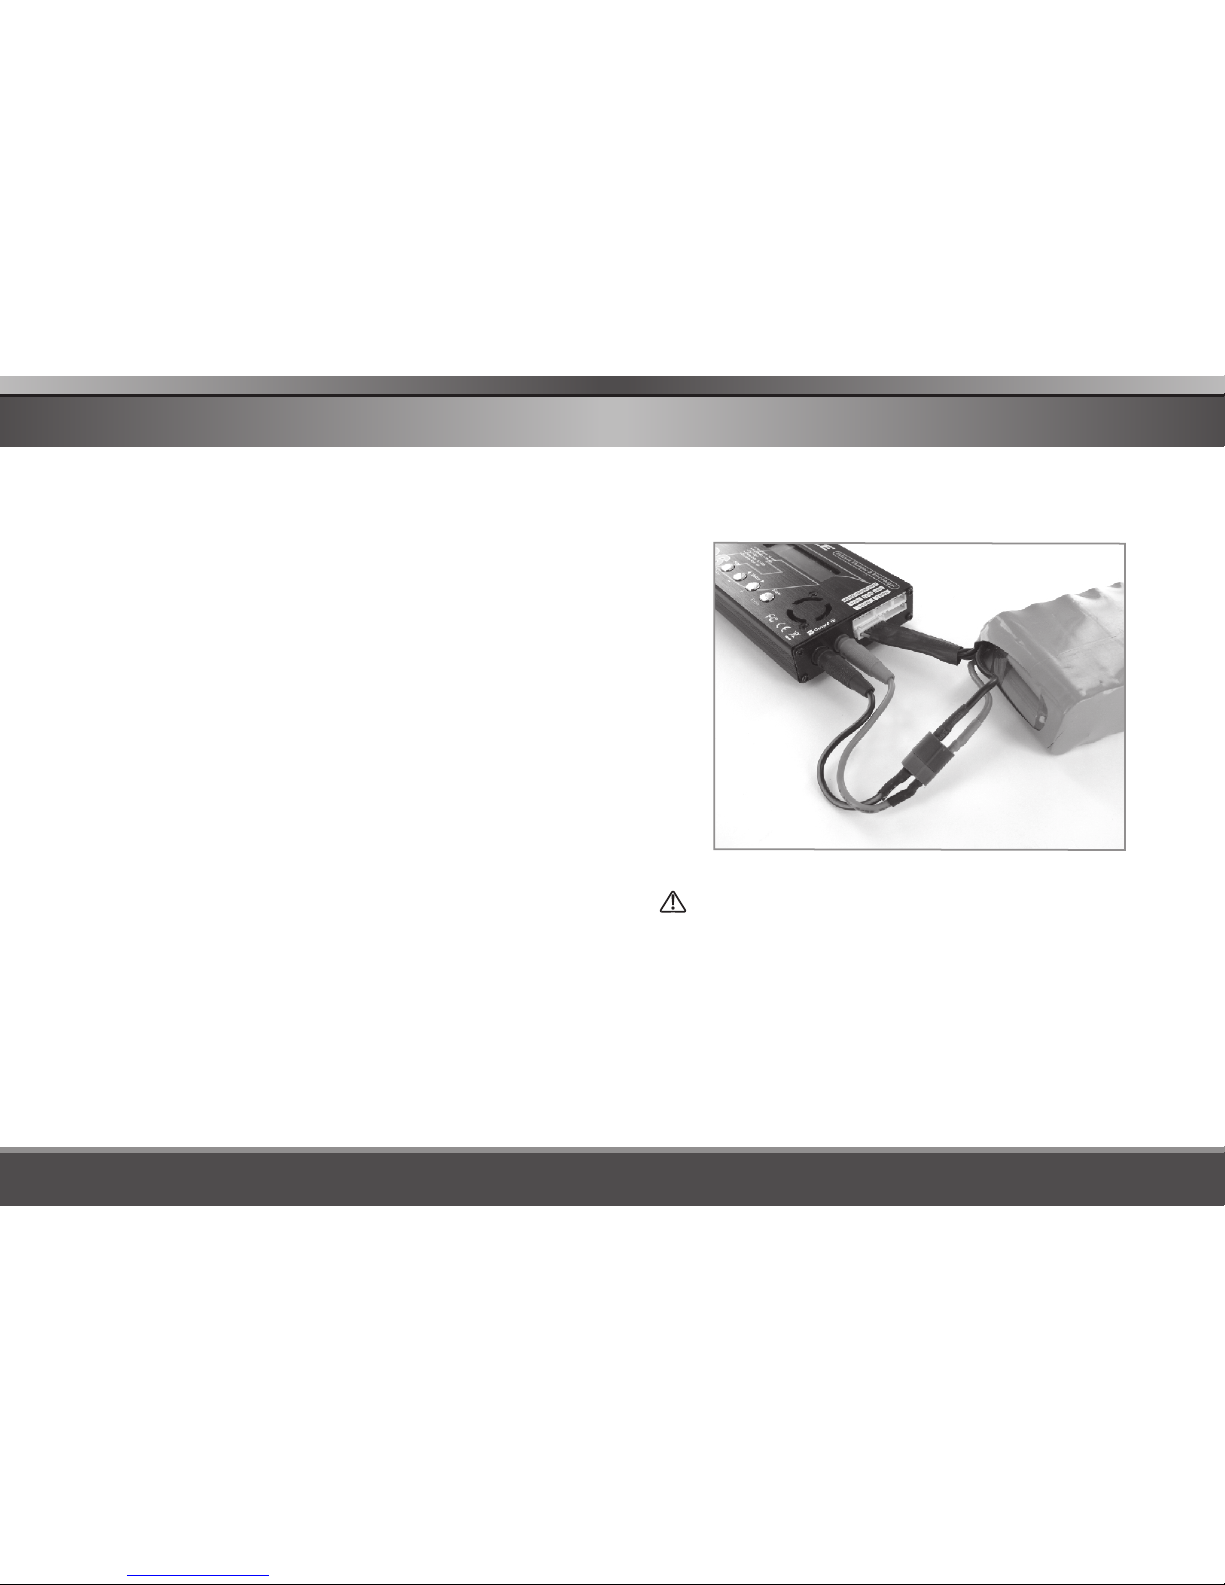
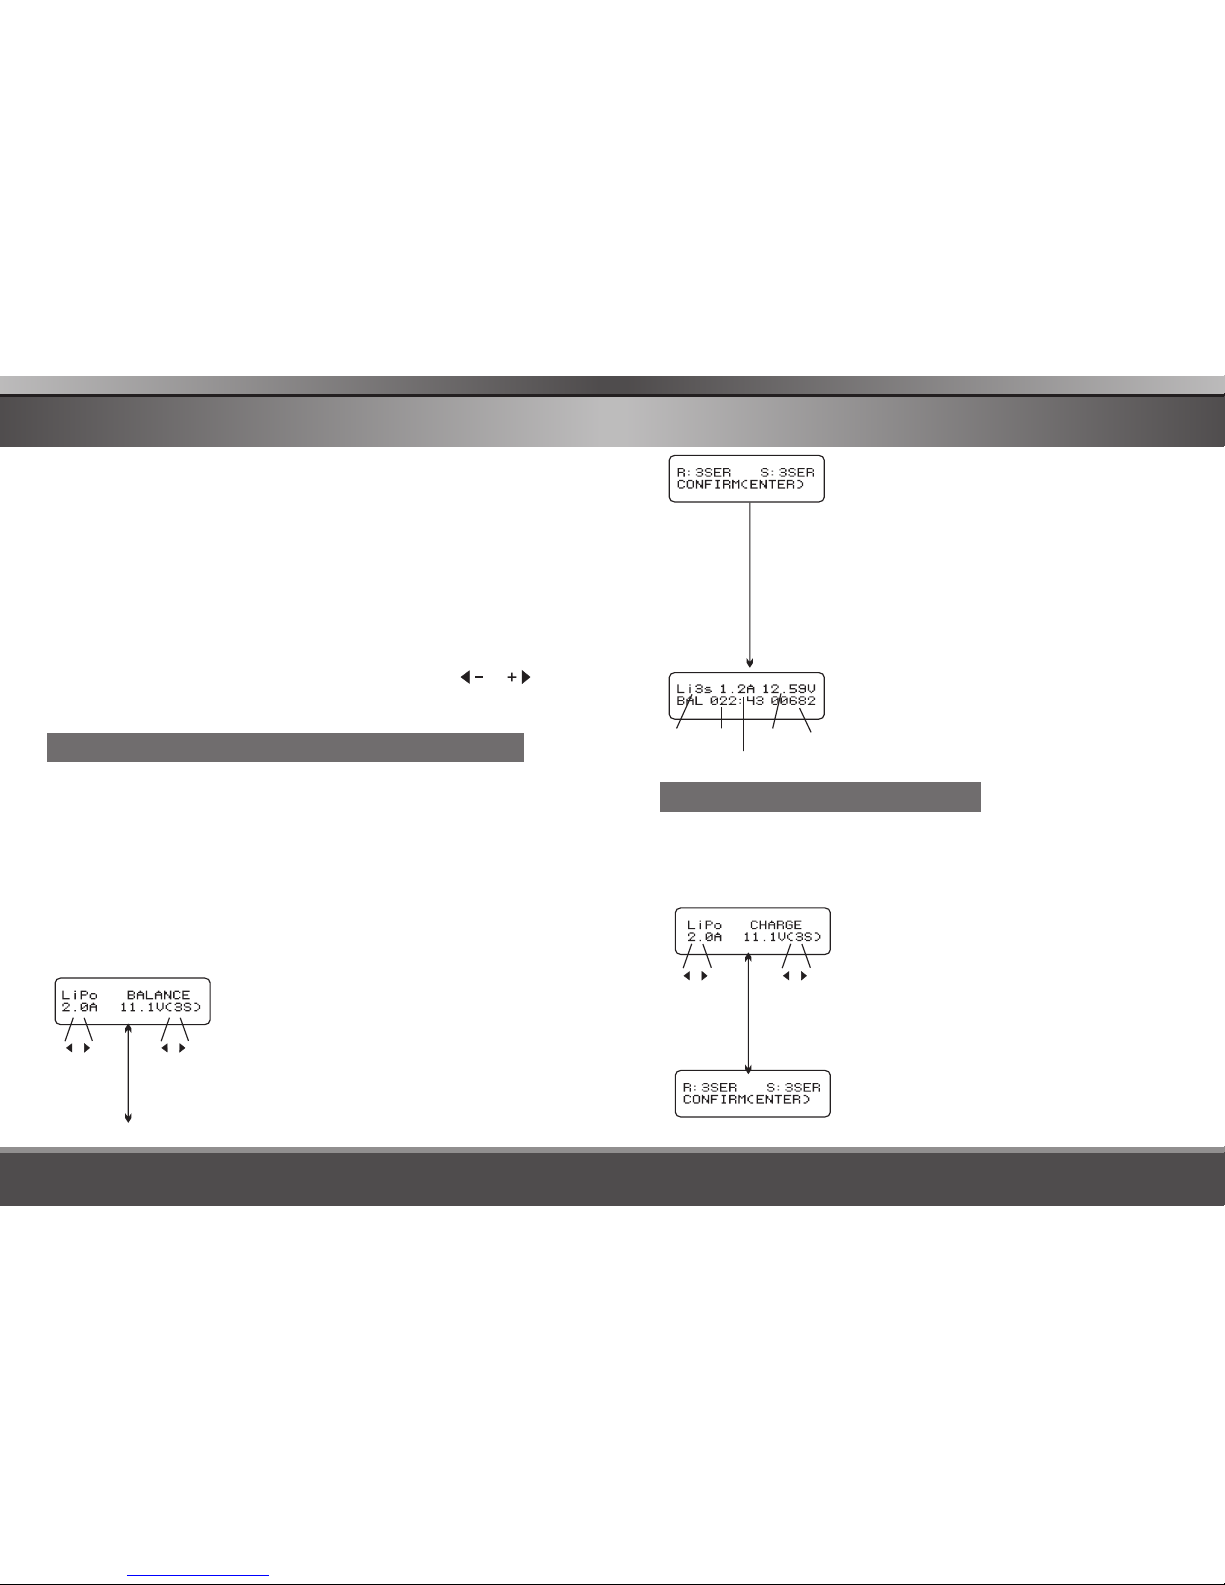
CHARGING LITHIUM BATTERY AT BALANCE MODE
This function is for balancing the voltage of Lithium-polymer battery cells
while charging. In the balance mode, the battery needs to have a balance
lead to connect to the battery's power lead to the output of charger. In this
mode, the charging process will be different from ordinary charging mode.
The internal processor of the charger will monitor the voltages of each cell
of the battery pack and controls charging current that is feeding to each cell
to normalise the voltage.
Note: We recommends charging lithium batteries with a balance lead in the
balance mode only.
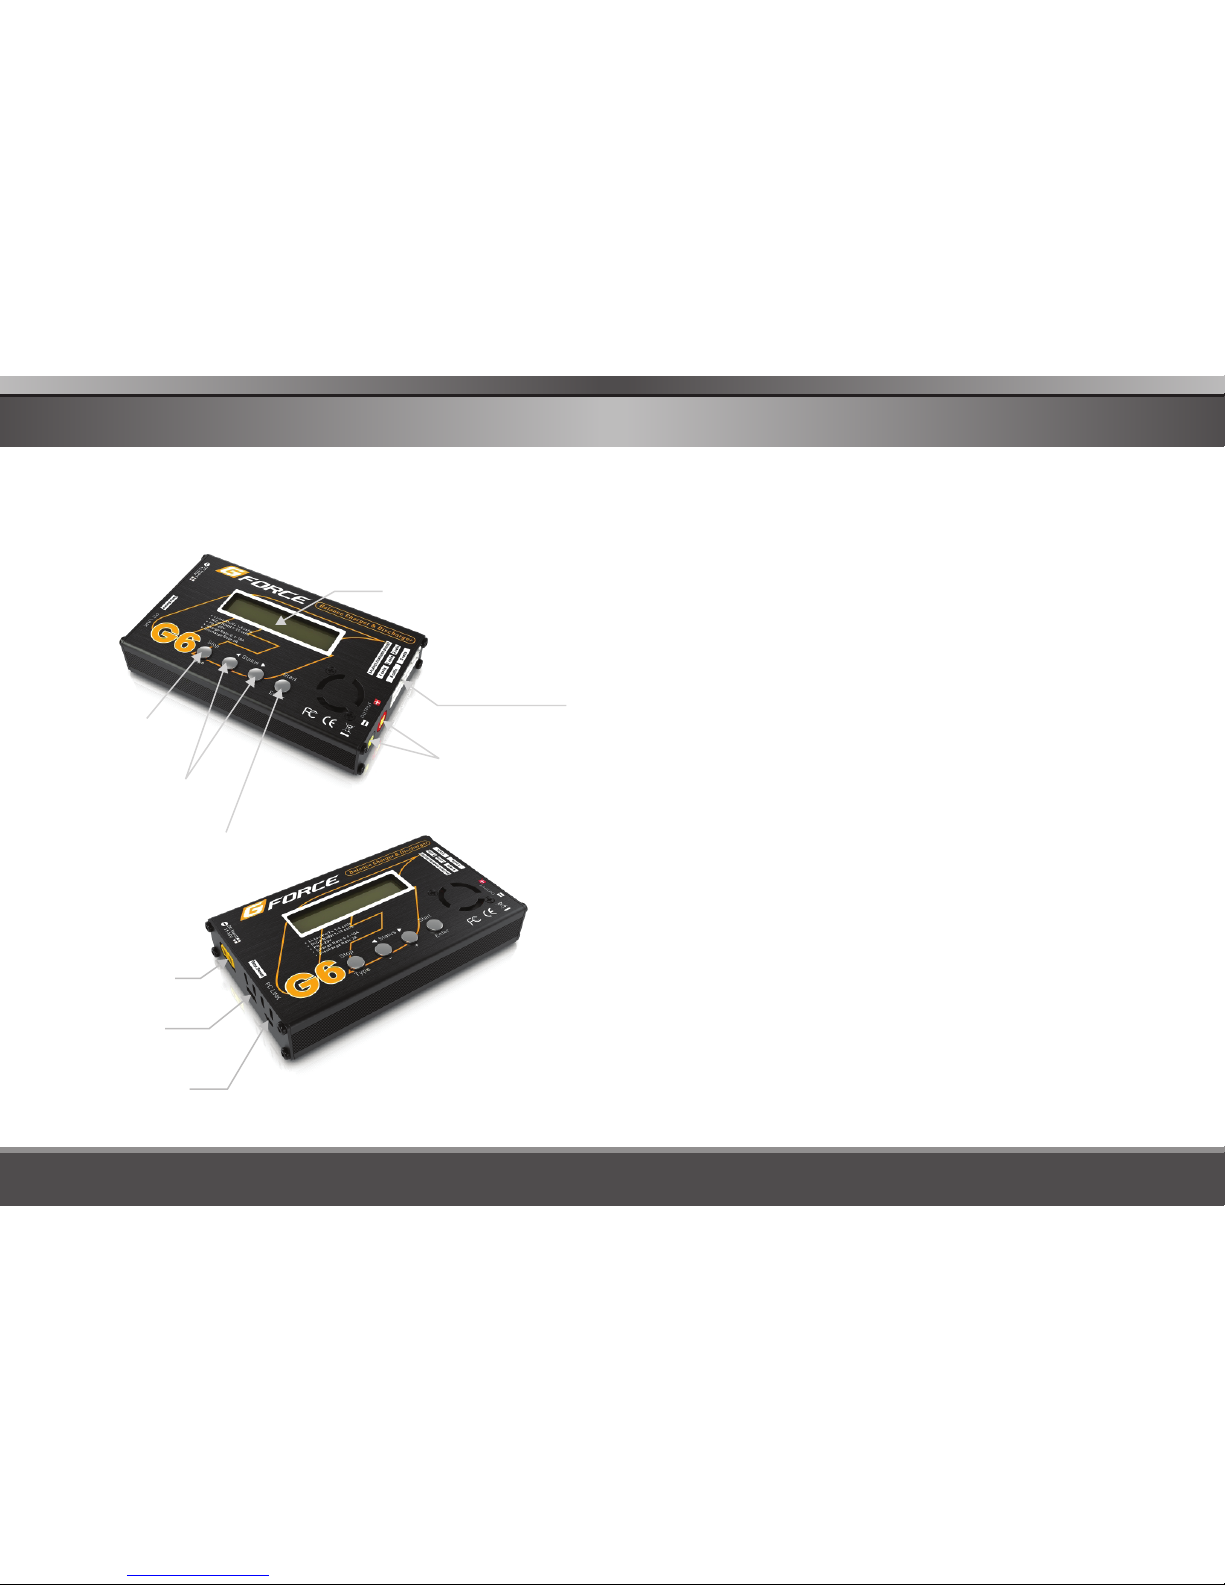
The left side of the first line shows the type of
battery you choose. The value on the left of the
second line of the charger is current user set.
After setting the current and voltage, press
Start/Enter key for more than 3 seconds to start
the process.(charge current: 0.1-10.0A,
voltage: 2S-6S).
-+
Start
Enter
Batt type
Stop '> 3 seconds '
Number
of
cells
Battery
voltage
Charging
time Charged
capacity
Charging
current
This screen shows the real-time status during
charge process. Press Batt Type/Stop key once
to stop the charge process.
This displays the number of cells you set up
and the processor detects. s detected by the
charger and cells set by you at the previous
screen. If both numbers are identical you can
start charging by press Start/Enter button. If
not, press Batt Type/Stop button to go back to
previous screen to carefully check the number
of cells of the battery pack before going ahead.
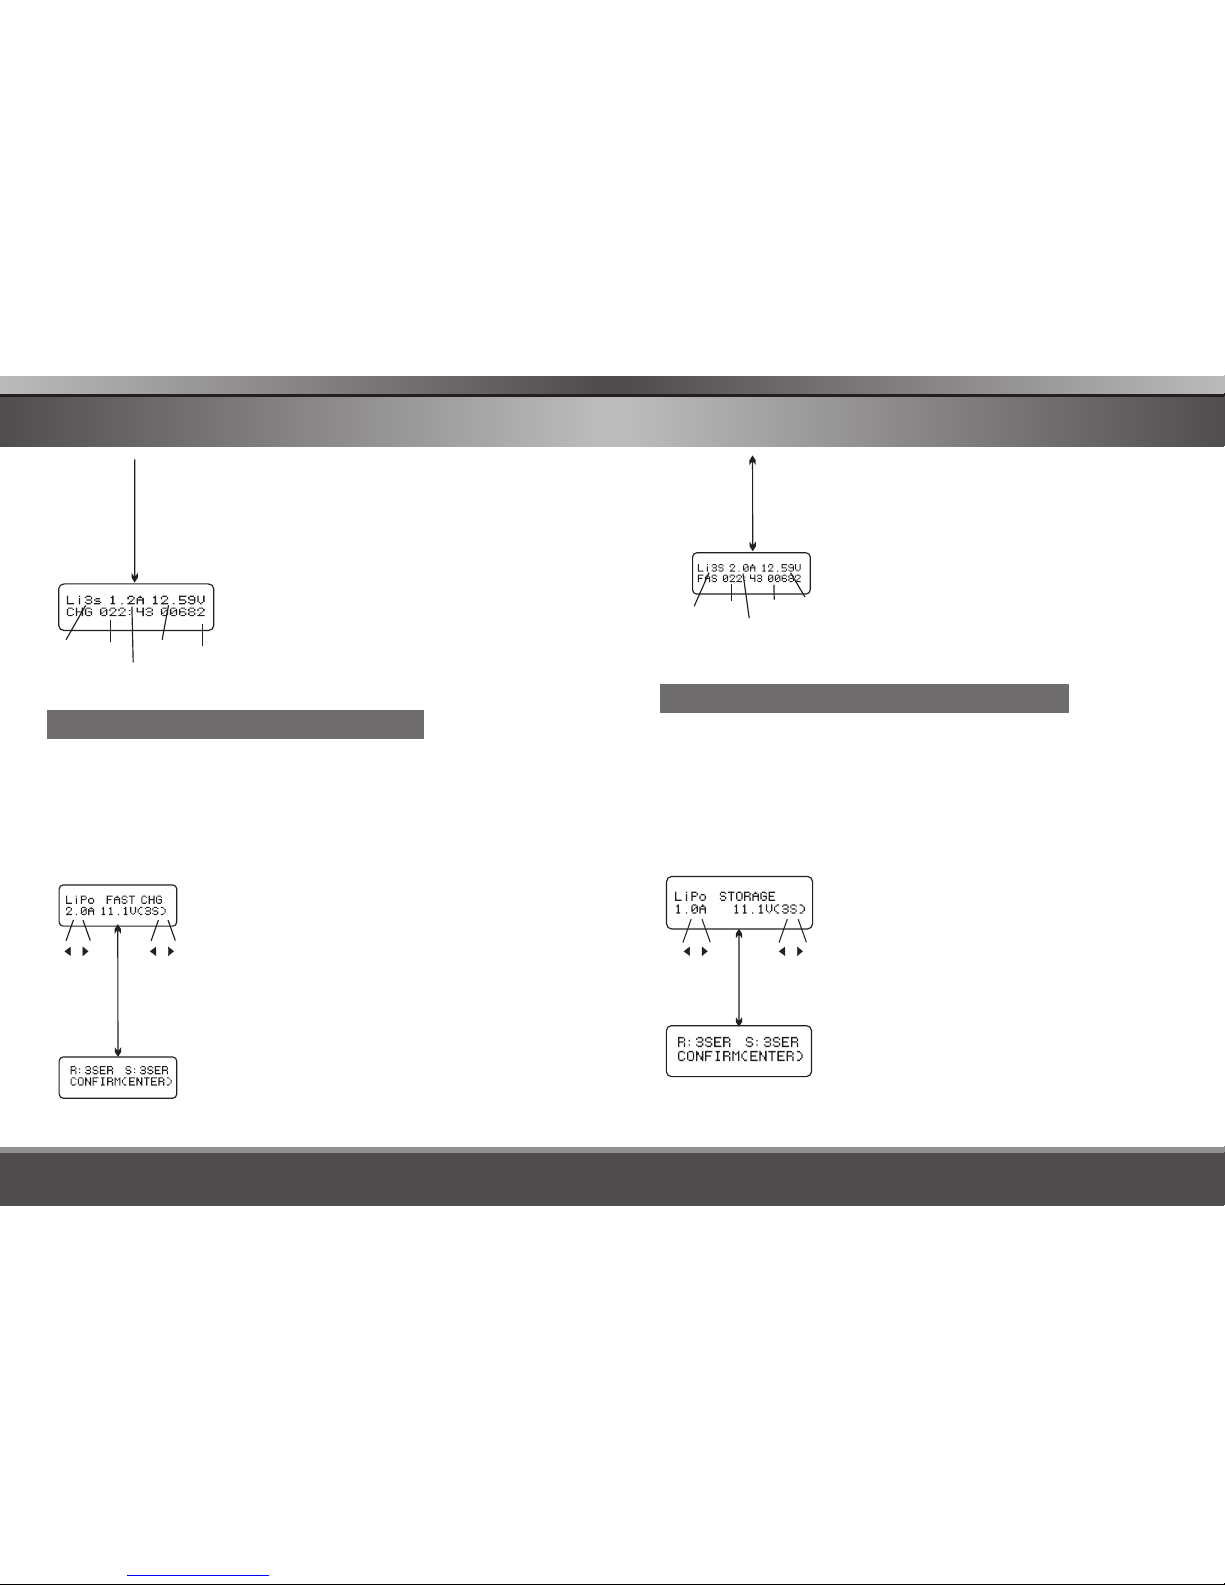
CHARGING OF LITHIUM BATTERY
This charging mode is for charging Li-Po/Ion/Fe battery without balance
lead.
Note: We recommends charging lithium batteries with a balance lead in the
balance mode only.
The left side of the first line shows the type of
battery you choose. The value on the left of the
second line of the charger is current user set.
After setting the current and voltage, press
Start/Enter key for more than 3 seconds to start
the process.(charge current: 0.1-10.0A,
voltage: 1S-6S).
This displays the number of cells you set up
and the processor detects. s detected by the
charger and cells set by you at the previous
Start
Enter
Start
Enter
Batt type
Stop '> 3 seconds '
LITHIUM BATTERY(LiPo/LiFe/LiIon)PROGRAM
-+
-+-+