Dear Customer,
Please read ALL these instructions before assembly.
The assembly of your new Essential greenhouse requires no
technical knowledge. However it is important that the
assembly instructions are followed carefully.
All fixings are found in bags 2 to 10.
Extra fixings may be included in your kit.
Fix casement stays or auto vents with screw type SC004 and
using the pre fitted side vent as a guide.
Greenhouse Base Notes
The measurements must match that of the base plan. A
suitable foundation on which to construct the base must be
laid depending on local ground conditions. Ensure the base is
square and level and diagonal measurements are equal.
Fixing Greenhouse to Base
Check that the structure is square, ensuring dimensions
across diagonals are even, before securing to the base.
Steel Base (refer to step 5)
Position a fixing bracket on the inside of the steel base and
using screw type SC125 fix through the bracket and into the
greenhouse cill.
Position and fix all the brackets supplied evenly around the
structure’s base.
Tools Required for Assembly
PZ2 Screwdriver
Electric Screwdriver (Optional)
Drill
A Clamp When Fixing Sections Together
(Recommended)
10mm Spanner
Spirit Level
Tape Measure
7mm HSS Bit
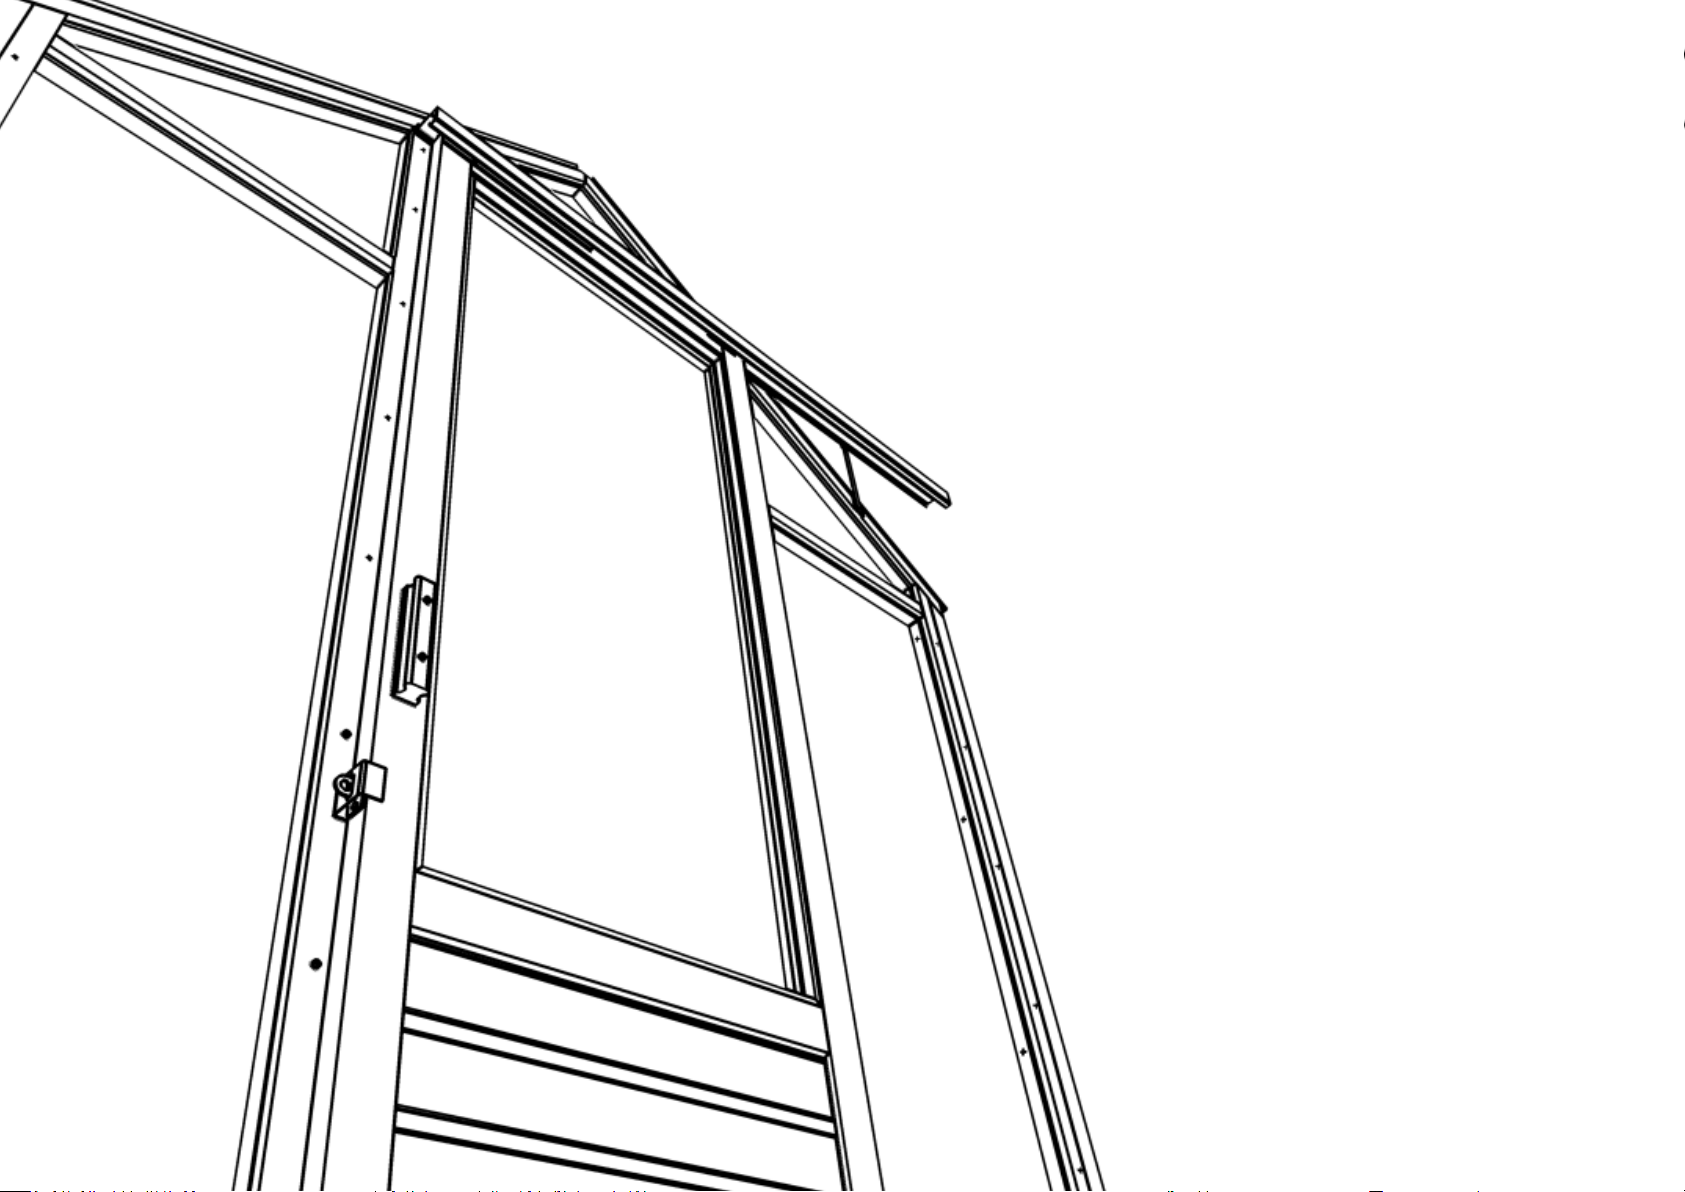
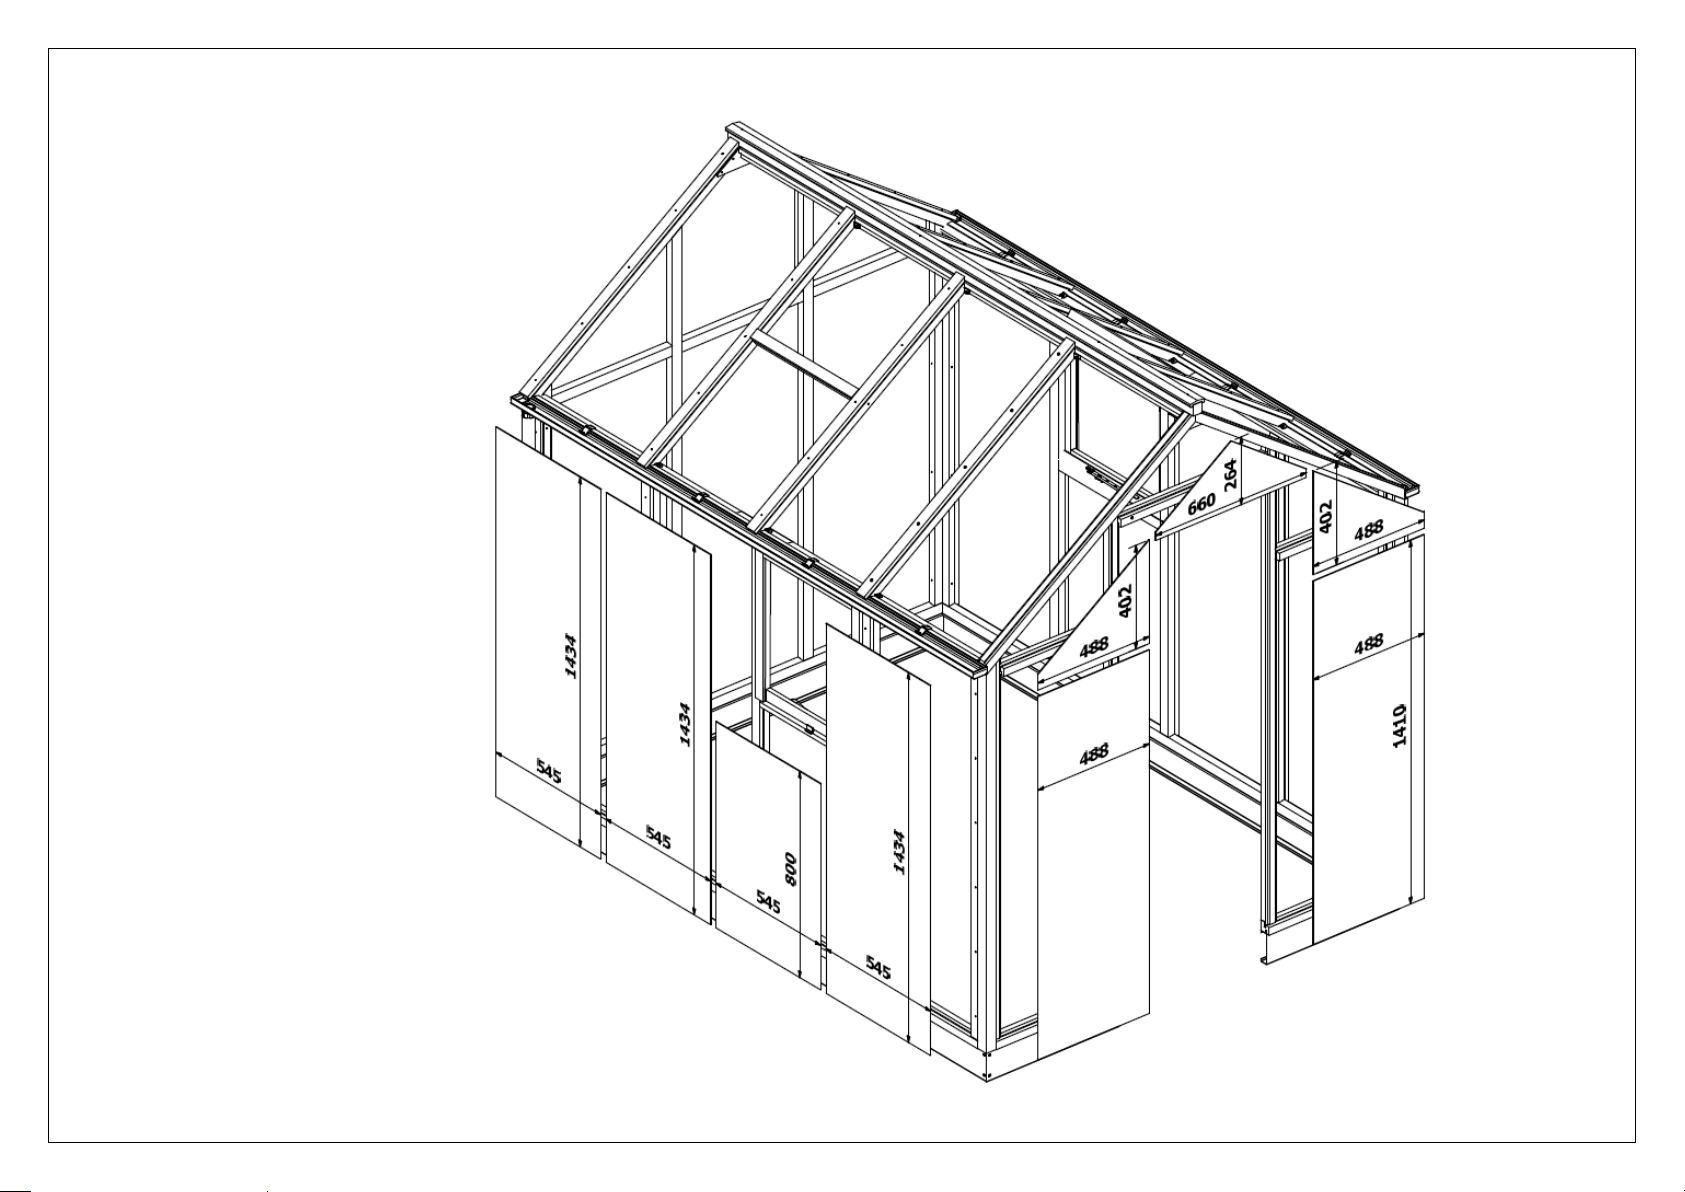
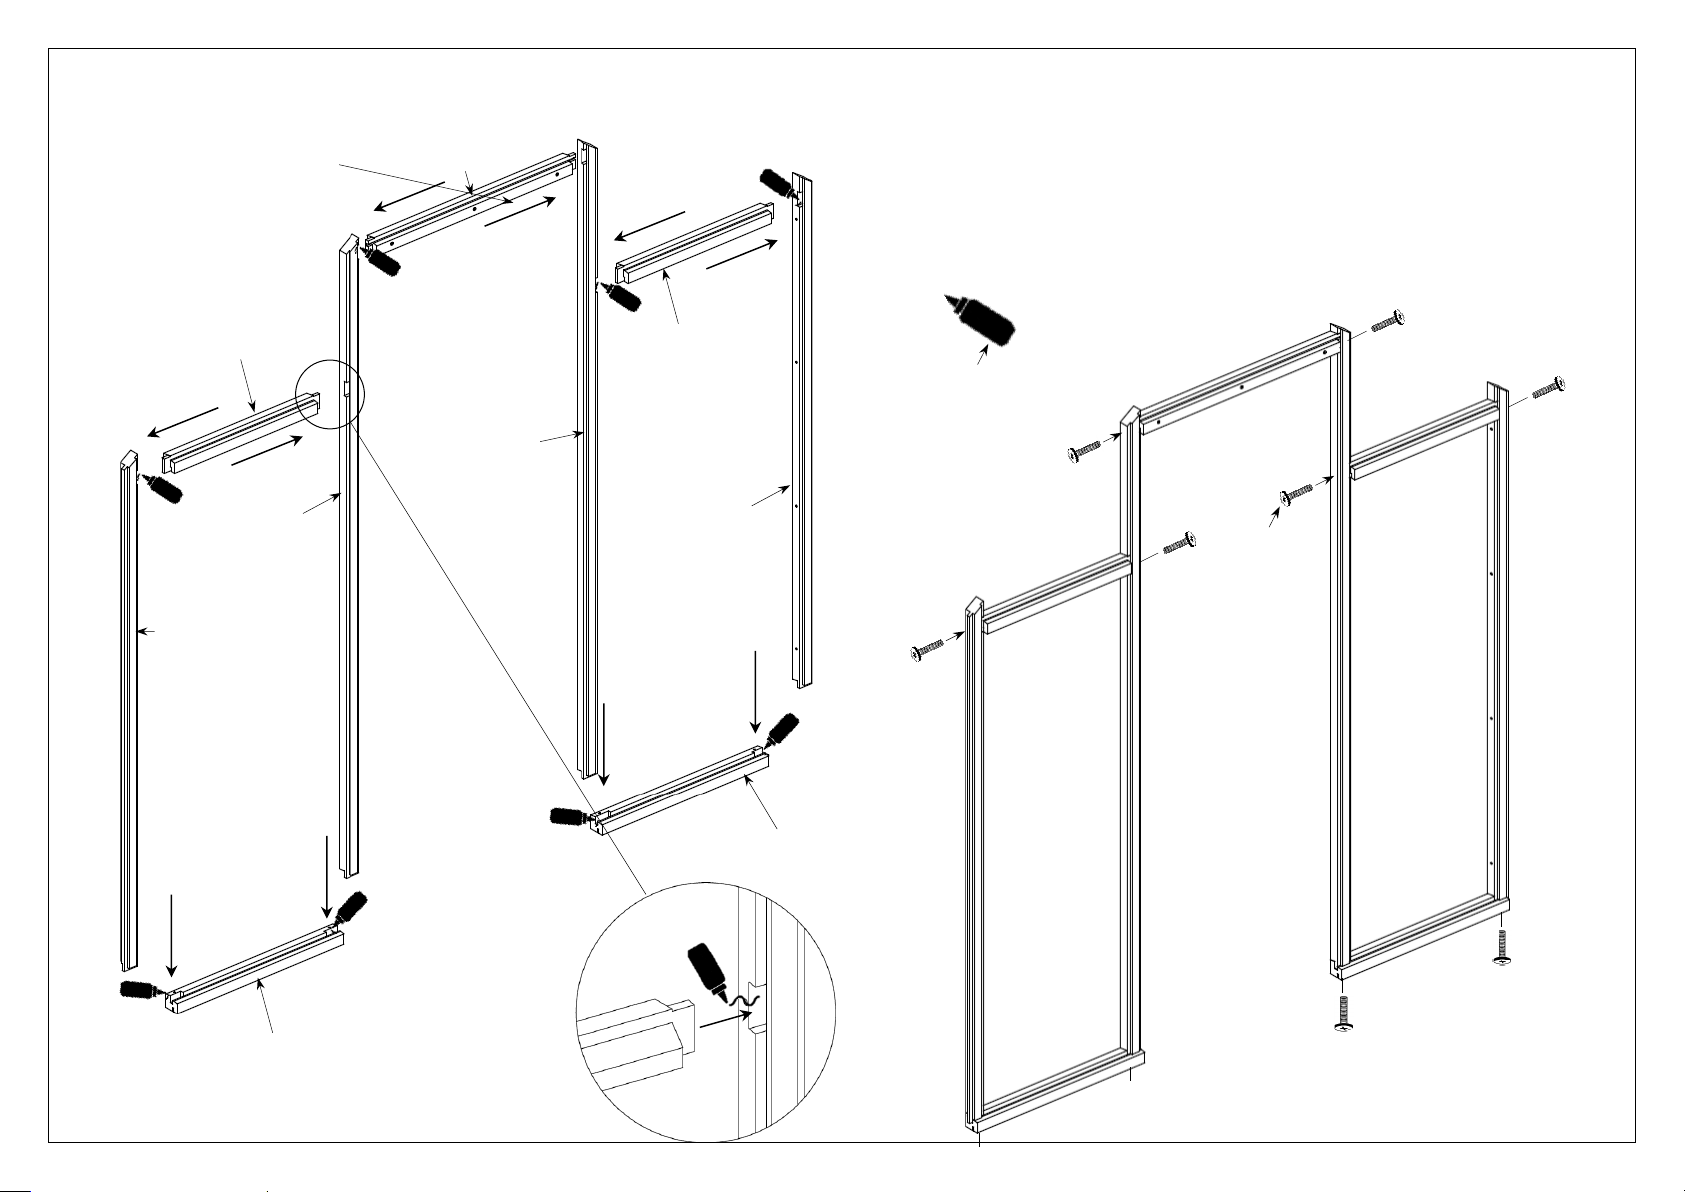
Assembling Gables and Side Walls
IMPORTANT: When building the gables and side walls,
ensure the back of the components are always flush. This
is to ensure when glazing, the glass fits without any
problems.
Because cedar wood is a natural product, it may be
required to sand/plane some parts to ensure they fit
comfortably.
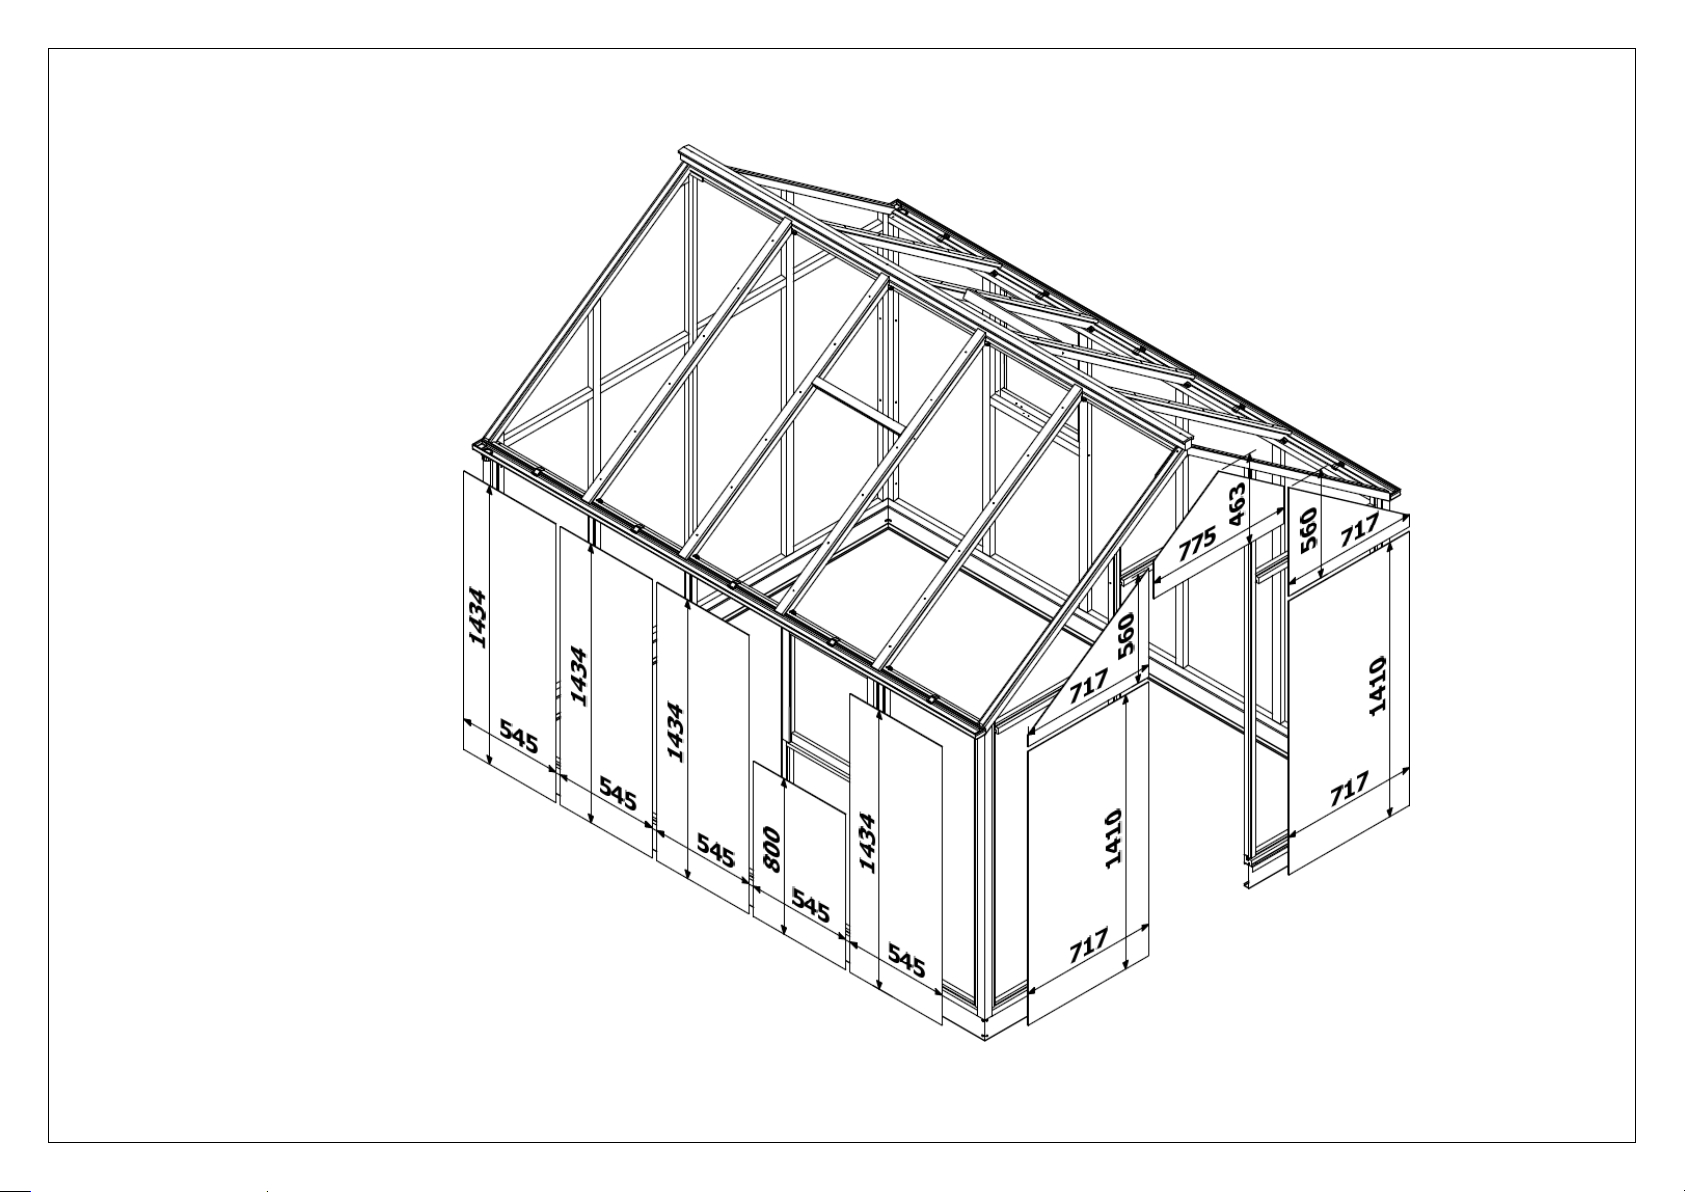
Roof Vent
Fix casement stays or autovents with screw type SC004 and
using the pre fitted side vent as a guide.
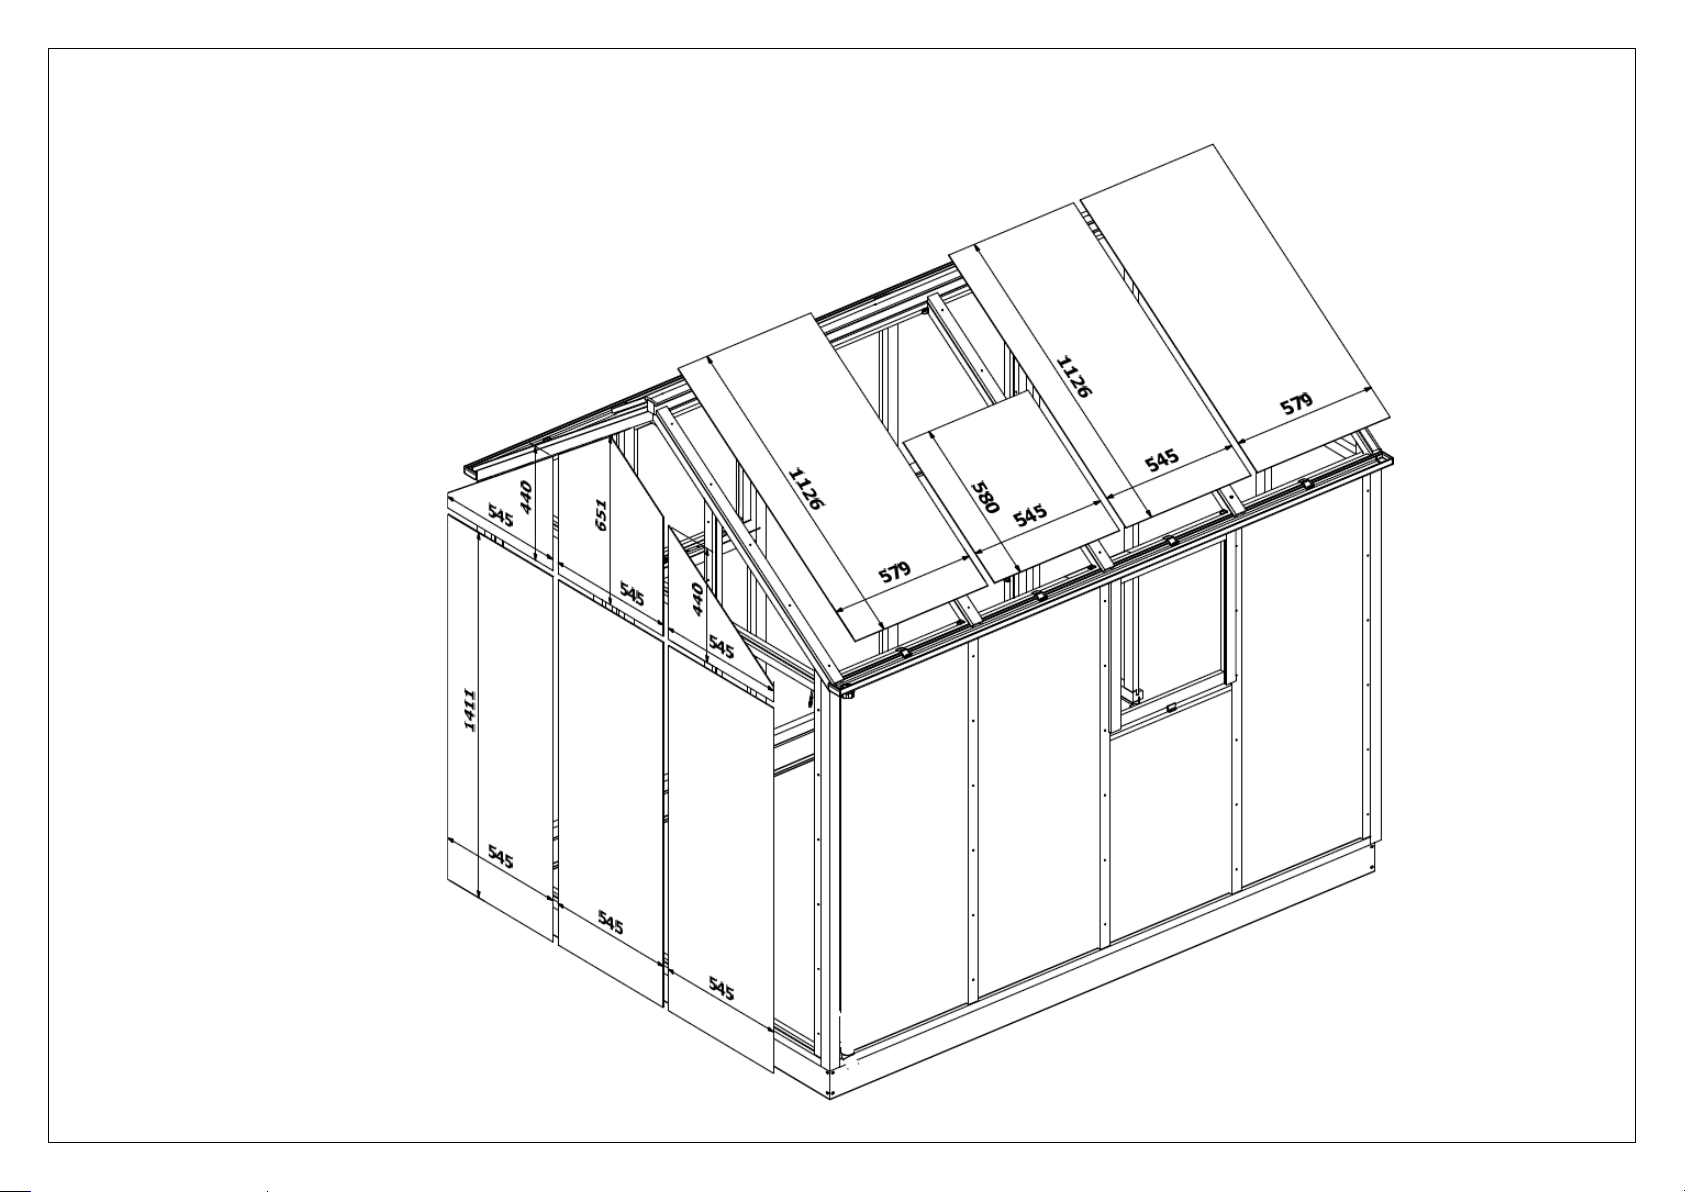
Glazing Notes (Refer to Step 15)
We recommend 2 people for glazing the structure.
Safety goggles and gloves are required when handling glass.
Low Threshold (refer to step 29)
If you choose to fit this, a clear mastic sealant can be applied
along its length at ground level. Also anti-slip tape (PT705) is
supplied and can be applied along its length.
Caring for Your Greenhouse
Clean the gutter for leaves, etc.
Remove greater snow loads from roof.
Take precautions against snow falling down from for
instance a tree or a roof.
Secure door and windows preventing wind damage.
Cedar Wood Information
Cedar is prone to absorption of moisture to attain balance
with the surrounding atmosphere.
As a result this moisture can track to the inside of the
greenhouse particularly in the areas that are subject to the
greatest weathering. Because of the fibre structure of the
cedar it will also dry very quickly which often will leave a mark
where the extractives have been released. These extractives
are the oils naturally present in the cedar that make it resistant
to rot.
As the wood weathers it gradually changes colour, the first
stage is the darkening of the wood as water soluble extractives
are drawn to the surface. In time this trend reverses and the
wood gradually turns silver grey.
Insurance
Please note that insurance companies usually cover
greenhouses automatically. Contact your insurance company
to confirm your cover.
Guarantee
Gabriel Ash grants a guarantee of 10 years which covers
replacement of faulty parts. The guarantee does not cover
glass, transport, assembly, freight, etc.
Gabriel Ash grants a guarantee of 2 years on painted parts.
Note that marks in the painting may occur due to suspension
of the profiles.
The guarantee is invalid if the greenhouse is not assembled
according to these instructions.
Complaints
All our greenhouses are built to high standards of quality.
However should a complaint occur please contact your
dealer.
Optional Extras
Autovent
Louvre Vent
Benching
Shelving
Blinds
Waterbutt
Please visit our website for more details on the above
products: www.gabrielash.com