CAUTION: AFTER THE BEAD HAS BEEN SET TO THE WHEEL, STOP THE AIR FLOW TO THE VALVE STEM, PLACE A
VALVE CORE IN THE STEM, AND MOVE THE TIRE / WHEEL ASSEMBLY TO A TIRE INFLATION CAGE AND THEN
CONTINUE INFLATING TO THE MANUFACTURER’S RECOMMENDED OPERATING PRESSURE.
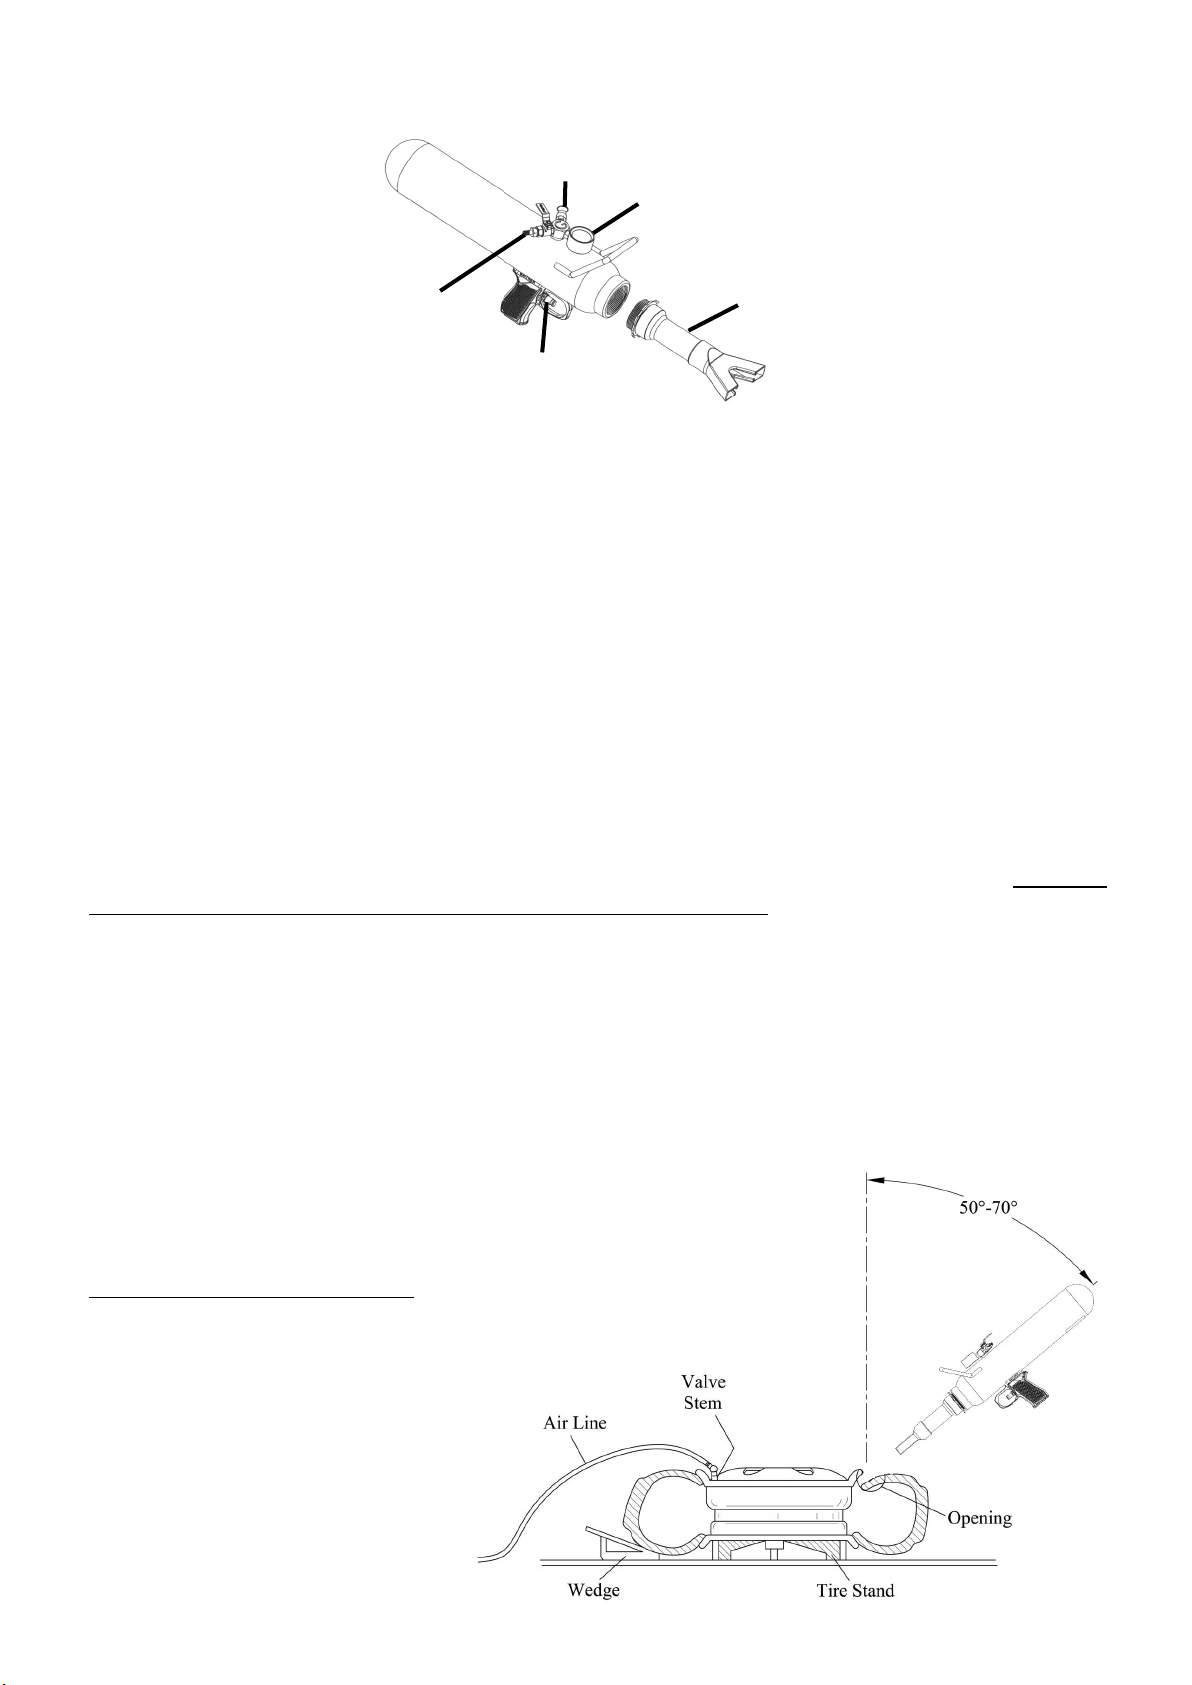
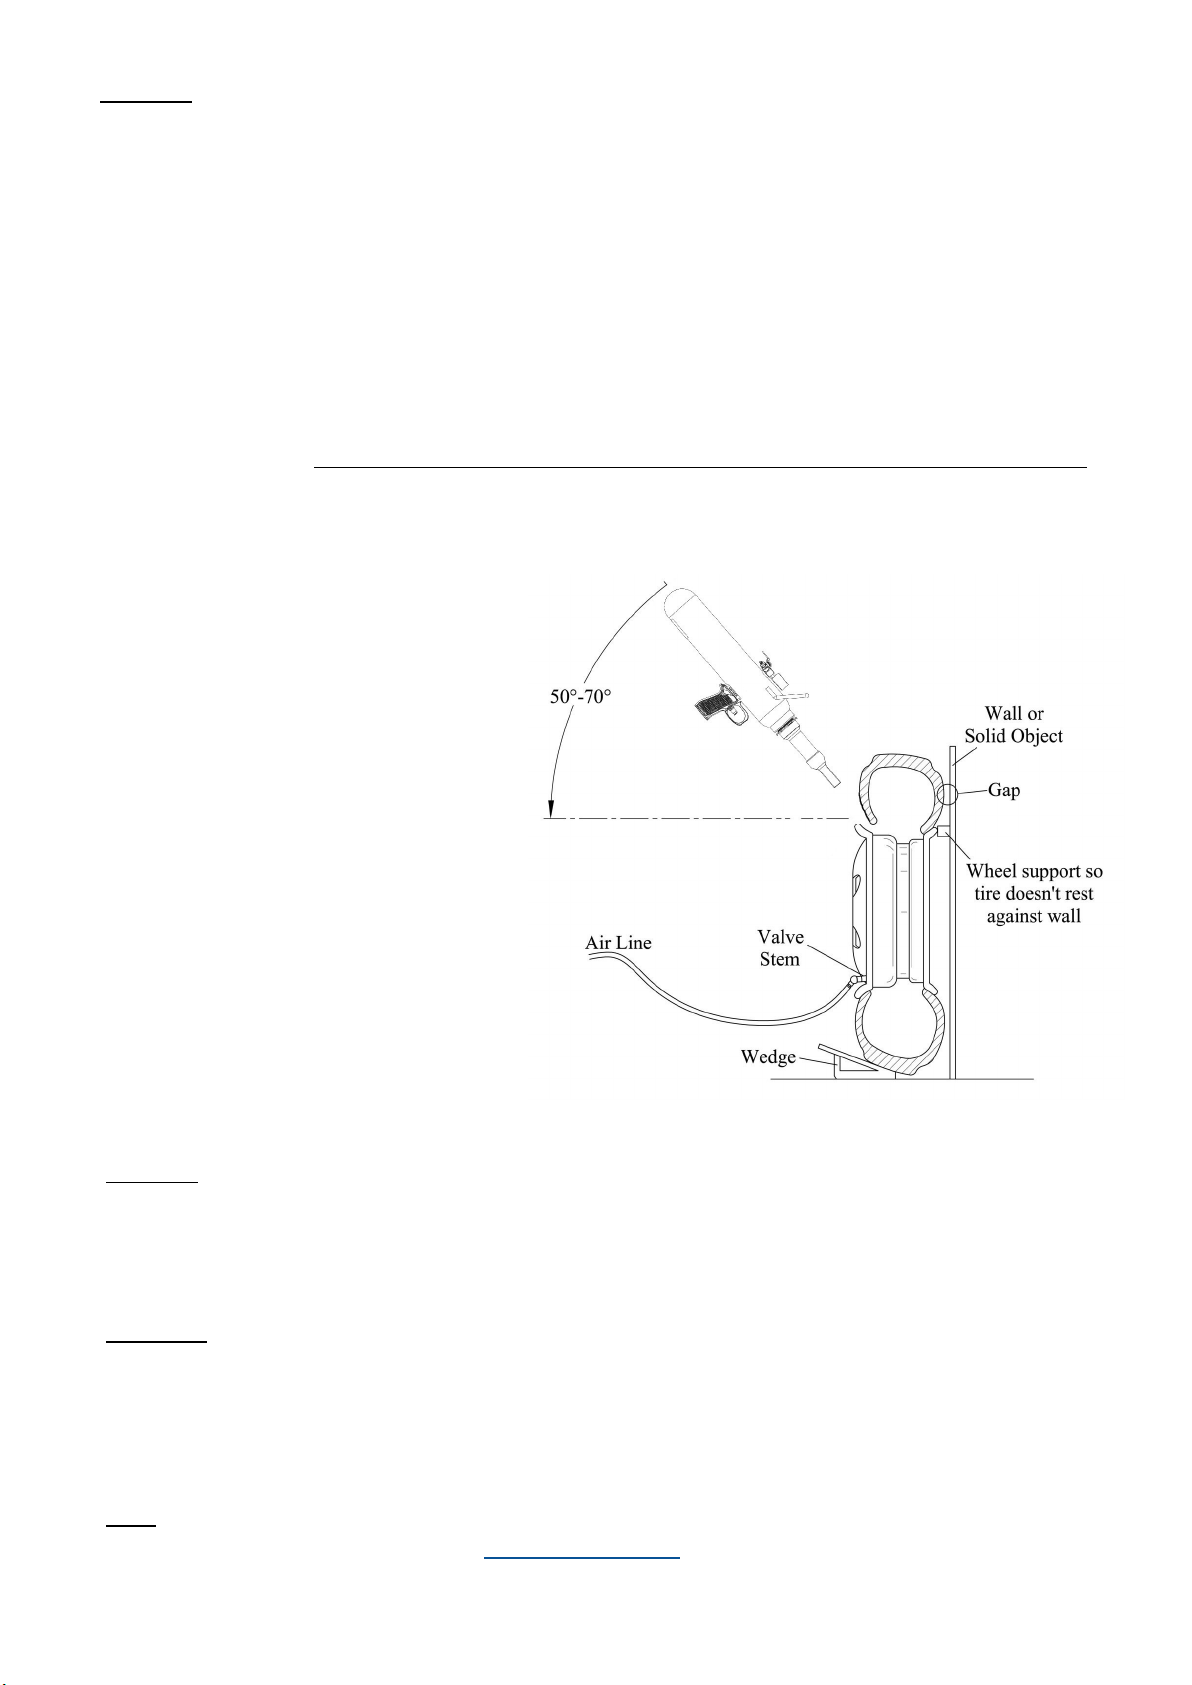
Using the Bead Bazooka® with the re/wheel assembly in a vercal posion: (recommended for truck res only)
1) Adjust sloed double barrel so that the barrel ange is on the boom same side as the handle stock with trigger release
(opposite side of the pressure gauge) and parallel to the ground. Make sure the barrel is fastened ghtly with the lock nut.
2) Place re/wheel assembly against a wall or solid prop so the boom (or back bead) is already set to the wheel. (see diagram
#3) Make sure the valve stem is poinng out and the long side of the wheel is closest to you. The Gaither Tire Wedge (GB-53)
can be used as a prop to help set the bead properly.
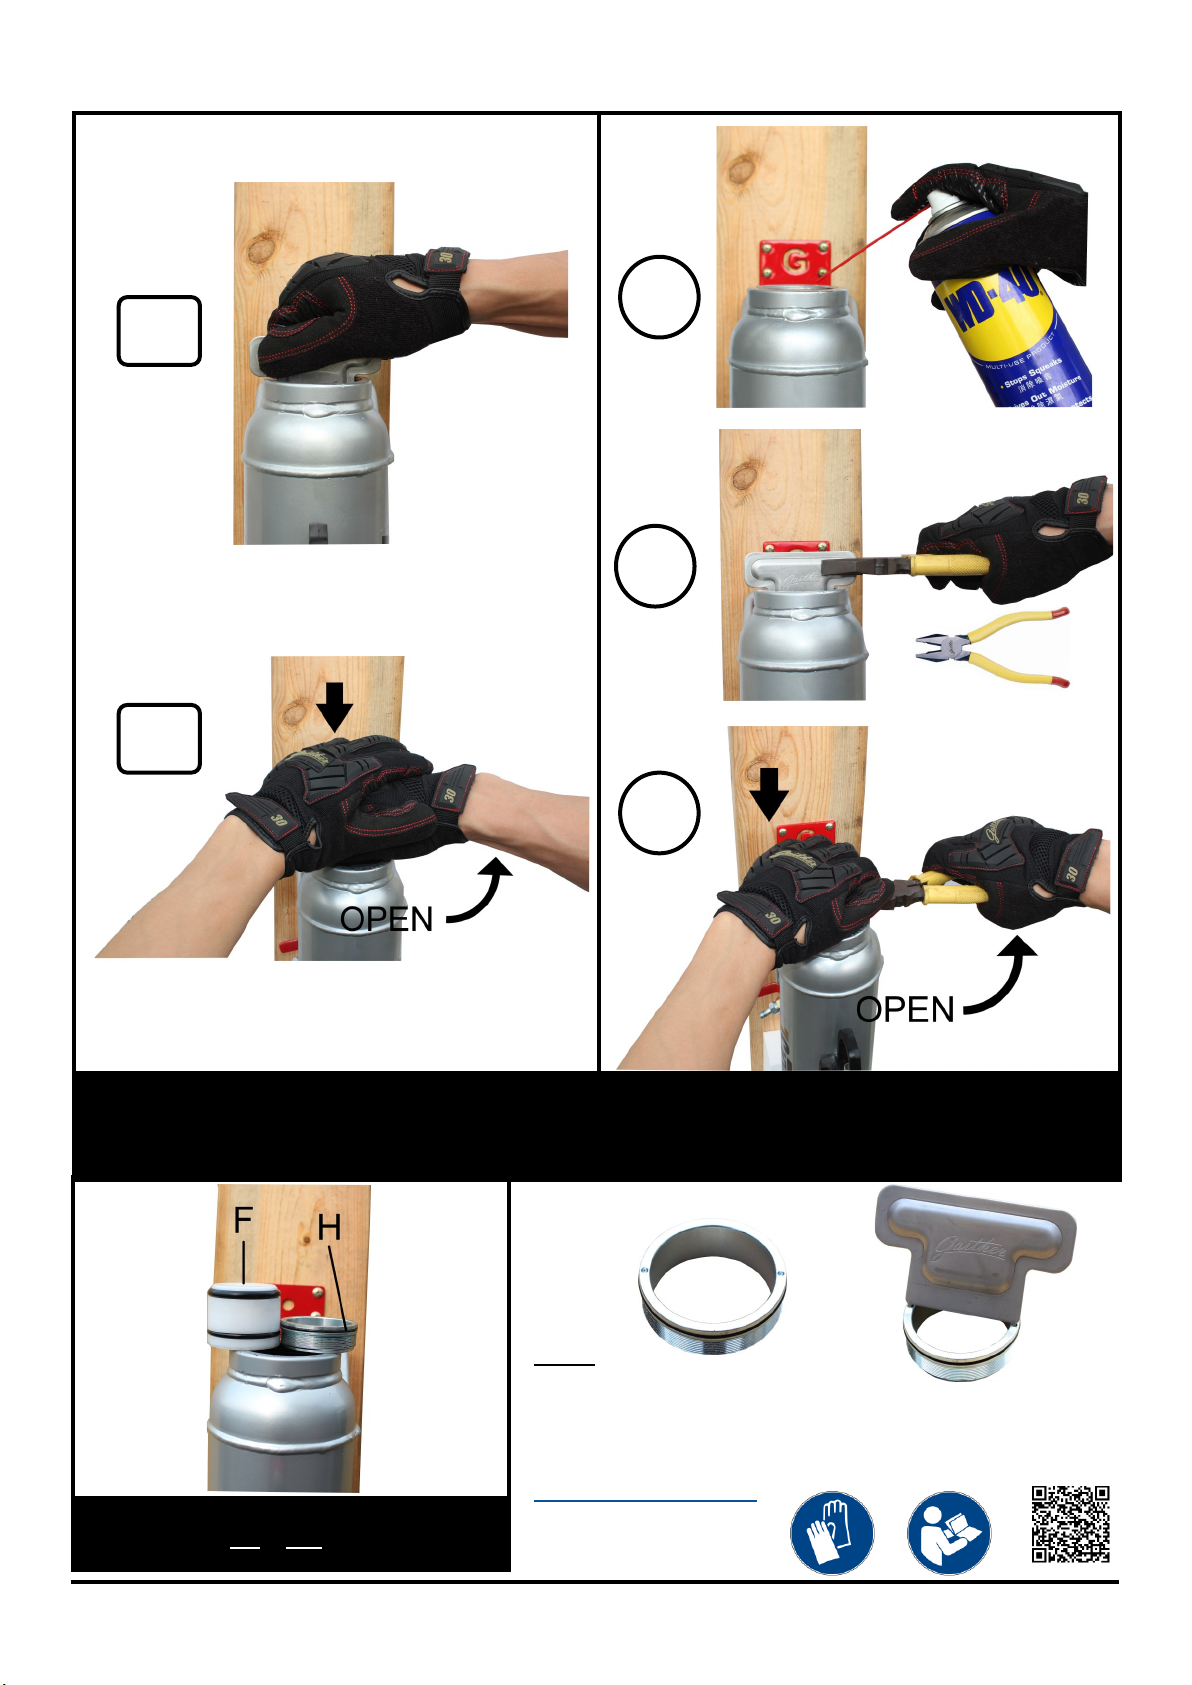
3) Aach an airline to your air coupler nipple and open the intake valve to ll the air tank to the desired working pressure. (see
proper storage and unit charging recommendaon –next page) Normal working pressure in the vercal posion is from 20 to
150 psi / 1.5 to 10 Bar. The amount of pressure that is needed in the tank depends on the re size and condion of the re.
4) Using two hands; one on the handle stock with trigger release and the other on the handle which is on top of the tank, direct
the sloed double barrel ange to the wheel exactly opposite the valve stem. Once you are in posion to re the Bead Bazoo-
ka® you may want to bring the barrel away from the wheel approximately 1” to 2” so that the barrel does not contact the bead
as it quickly rises from the force of air ow. Make
sure that there is no valve core in the valve stem
and using an airline or the Gaither Whip Hose (GB-
52) apply a steady ow of air into the valve stem
while simultaneously ring the Bead Bazooka®.
5) Posion the Bead Bazooka® so that the sloed
double barrel opening is poinng directly
into the largest gap between the re and
wheel. Normally a 50-70 degree angle is the
best.
6) Secure ghtly the Bead Bazooka® with both hands
on both handles and place your index nger onto
the trigger. Pull gently to release the air inside of
the tank. Hold steady the unit and always keep the
air ow directed into the gap between the re and
wheel. Note: If this does not properly set the bead
to the wheel, repeat the procedure at a higher
pressure.
CAUTION: AFTER THE BEAD HAS BEEN SET TO THE WHEEL, STOP THE AIR FLOW TO THE VALVE STEM, PLACE A
VALVE CORE IN THE STEM, AND MOVE THE TIRE / WHEEL ASSEMBLY TO A TIRE INFLATION CAGE AND THEN
CONTINUE INFLATING TO THE MANUFACTURER’S RECOMMENDED OPERATING PRESSURE.
WARNING: COMPRESSED AIR IS DANGEROUS - ALWAYS WEAR EYE AND EAR PROTECTION. ALWAYS FOLLOW
THE INSTRUCTIONS GIVEN ABOVE. THE BEAD BAZOOKA IS A TOOL FOR THE TIRE INDUSTRY AND SHOULD NEVER
BE USED OTHERWISE. THIS TOOL IS NOT A GUN. THIS TOOL IS NOT A TOY AND SHOULD NEVER BE USED FOR
ANYTHING EXCEPT FOR ITS SPECIFIED USE.
Note: For other trouble shoong issues and maintenance suggesons for your new Bead Bazooka®, as well as
ps for problemac res, please log on to www.gaithertool.com
DO NOT PLACE THE BARREL FIRMLY
AGAINST THE RIM,
but instead it should be held 2-3” away from
the wheel flange when firing for better overall
lift and performance
Diagram #3