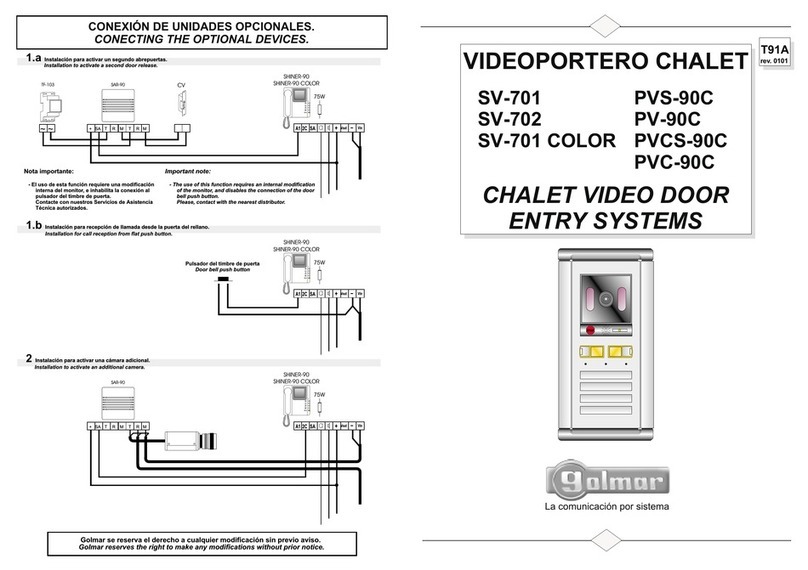
galmar MV-0 CODE User manual

PLACA CODIFICADA
PORTERO ELECTRÓNICO
VIDEOPORTERO
con instalación simplificada
simplified installation
CODED CALL
AUDIO & VIDEO DOOR
ENTRY SYSTEM
MV-0 CODE
MVC-0 CODE
MP41-0 CODE
T123
rev. 0101
La comunicación por sistema

MAIN MODULES DESCRIPTION
Front view
DESCRIPCIÓN DE LOS MÓDULOS DE MANDO
Vista frontal
1Vista frontal.
Front view.
a
a
b
d
c
f
i
j
l
m
STOP
1
4
7
C
2
5
8
3
6
9
0k
e
g
h
a. Orificios sujeción placa.
b. Cámara (sólo en placas de videoportero).
c. Iluminación (sólo en placas con cámara color).
d. Indicador de canal ocupado.
e. Pulsador de luz.
f. Zumbador de confirmación de pulsación.
g. Indicador luminoso de código correcto.
h. Indicador luminoso de código erróneo.
i. Teclado.
j. Tecla de borrado.
k. Tecla de llamada.
l. Orificio micrófono.
m. Rejilla protectora altavoz.
Panel fixing holes.
Camera (only in video door panels).
Illumination (only in door panels with color camera).
Busy channel indicator.
Light push button.
Push confirmation buzzer.
Right code light indicator.
Wrong code light indicator.
Keyboard.
Cancel key.
Call key.
Microphone hole.
Protective speaker grille.

MAIN MODULES DESCRIPTION
Back view
DESCRIPCIÓN DE LOS MÓDULOS DE MANDO
Vista posterior
a. Orificios sujeción placa
b. Ajuste vertical cámara b/n.
c. Ajuste horizontal cámara color.
d. Regleta de conexión PLUZ-91.
e. Junta de estanqueidad.
f. Conector cable plano.
g. Interruptores de programación de los códigos de acceso.
h. Regleta conexión control de accesos.
i. Módulo de sonido.
j. Ajuste de volúmenes de audio.
k. Puentes configuración placa.
l. Conector módulo de sonido y cámara.
m. Conector bus del teclado.
n. Circuito CVOc.
o. Orificios sujeción circuito CVOc.
p. Regleta conexión CVOc.
Panel fixing holes.
Tilt b/w camera adjustment.
Pan color camera adjustment.
PLUZ-91 terminal connector.
Waterproof seal.
Flat cable connector.
Access control configuration switch.
Access control connector.
Sound module.
Audio volume adjustments.
Door panel configuration jumpers.
Sound module and camera connector.
Keyboard bus connector.
CVOc circuit.
CVOc circuit fixing holes.
CVOc terminal connector.
k l
n
o
p
e
a
a
b
c
d
j
f
g
h
i
CV1
~
P
L1~1VO +ICOM-+V
1234
- +12 ~1 ~2 CV2 CV1 TP A2 A1
m
2Vista posterior.
Back view.
CV A
IN L2 CVL1
OUT
V
-
V
1+
-
2
ARRIBA UP
2
1
2
1

AUXILIARY MODULE DESCRIPTION
Front and back view
DESCRIPCIÓN DEL MÓDULO DE COMPLEMENTO
Vista frontal y posterior
3Módulo de complemento informativo C-CODE.
C-CODE auxiliary informative module.
bc
a. Orificios sujeción placa.
b. Módulos informativos.
c. Soportes tarjetero.
Panel fixing holes.
Informative modules.
Card holders.
a
a

DOOR PANEL INSTALLATIONINSTALACIÓN DE LA PLACA
1
J2
16 1
AR2T17 J3
20
ARRIBA UP
ARRIBA
27 13
L2
1 2 +- OUT
V
IN
V
-L1
28
CVCV A
25
26
24
23
22
21
20
19
11
12
10
9
8
7
6
5
27 13 27
28 28
12
11
10
25
26
24
23
22
21
20
19
9
25
26
24
23
822
21
20
19
UP
ARRIBA
18
17
16
15
4
3
2
1ARRIBA
18
17
16
15 UP
4
3
2
1
18
17
16
15
12
13
11
10
13 27
28
12
11
10
9
8
25
26
24
23
22
21
20
19
9
8
UP
4
3
2
1ARRIBA
18
17
16
15 UP
4
3
2
1
L2L1
1Empotrar, enrasar y nivelar la caja de empotrar.
Level and flush fit the box.
1650
1850
1450
2Fijar el circuito CVOc en la caja y configurar los puentes. Conectarlo a la instalación.
Fix the CVOc circuit in the flush fitting box and set the jumpers. Connect it to the installation.
1
2
3
4
. Cuando haya más de una placa, quitarlo en todas, excepto
en la placa más próxima a los monitores.
. Quitar si existe central de conserjería en el sistema, y se desea
que la placa llame a la central.
. Quitarlo en la placa que se desee activar el autoencendido (sólo
en placas de videoportero).
When there is more than one door panel, remove in all,
except at the closest panel to the monitors.
Remove if porter’s exchange exists, and if the door panel must
call to it.
Remove at the panel to be activated with auto switch-on (only in
video door panels).
. No quitar nunca. / Never remove.
ARRIBA UP
J2
1
AR2T17
16 1
J3
20
123 4
V
IN
-21 + V
OUT -CVL2L1 CV A
3Fijar y conectar las lamparitas en la caja de empotrar.
Fix and connect the lamps in the flush fitting box. 4Sujetar la placa a la caja de empotrar con los muelles bisagra.
Fix the panel in the flush fitting box using the springed hinge.
Conectar el circuito CVOc a la placa.
Connect the CVOc circuit to the door panel.

DOOR PANEL INSTALLATIONINSTALACIÓN DE LA PLACA
AJUSTE VOLUMENES.
AUDIO LEVEL ADJUSTMENTS.
AJUSTE CÁMARA.
CAMERA ADJUSTMENT.
CÁMARA COLOR.
COLOR CAMERA.
CÁMARA B/N.
B/W CAMERA.
5Verifique y ajuste el sistema.
Check and adjust the system.
6Extraer los inmovilizadores de los marcos laterales.
Extract the locking screws of the side frames.
7Ensamblar y sujetar los marcos laterales con los inmovilizadores. Incorporar y fijar la placa. Colocar los cabezales embellecedores.
Assemble and attach the side frames with the locking screws. Incorporate and attach the panel. Assemble the decorative head frames.
8Modificación de los códigos de apertura de puerta.
Changing the door open access codes.
11
1
1
1
22
2
2
2
33
3
3
3
44
4
4
4
El número de códigos que se pueden grabar son 3 para apertura normal
y un cuarto de apertura con código de pánico. Todos los códigos son de 4 cifras,
siendo los valores asignados en fábrica: 1111, 2222, 3333 y 4444 respectivamente.
Para modificar un código de acceso, proceder como sigue:
1. Seleccionar la posición de memoria mediante los interruptores1y2.
2. Entrar en modo grabación, colocando el interruptor 3 en ON.
3. Introducir el nuevo código mediante el teclado.
4. Salir del modo de grabación colocando el interruptor 3 en OFF.
Después de introducir el código 4 el equipo se bloqueará
durante 3 minutos. Comprobar que la grabación se ha realizado con éxito transcurrido
este intervalo de tiempo. Si finalizado el proceso de grabación se desconecta el equipo
de la alimentación y se vuelve a conectar, el bloqueo desaparecerá, pudiendo iniciar
la comprobación de códigos.
El proceso de grabación se debe realizar estrictamente en el orden que se muestra
(del código 1 al código 4).
The recording procedure must be strictly done in the sam order as shown ( from 1st code to 4th code).
The total number of codes that can be recorded are three for normal door
opening, and a fourth for door opening with a panic code. All codes have
four digits, and factory assigned values are: 1111, 2222, 3333 and 4444.
To modify an access code, proceed as follows:
1. Select the memory position by using switches 1 and 2, as shown.
2. Enter in recording mode, by placing switch number 3 in ON position.
3. Press the new access code using the keypad.
4. Exit from the recording mode, by placing switch number 3 in OFF position.
When the 4th code
has been recorded, the system will remain blocked during 3 minutes. Check that the recorded codes operate correctly once the 3 minutes
has been passed. If the system is disconnected from the power supply and connected it again, the codes could be checked inmediately.
Primer código
First code
Segundo código
Second code
Tercer código
Third code
Modo de grabación ‘ON’.
Recording mode ‘ON’.
Cuarto código
Fourth code
Modo de grabación ‘OFF’.
Recording mode ‘OFF’.
1234

DOOR PANEL INSTALLATIONINSTALACIÓN DE LA PLACA
1. Unir mediante un cable el borne ‘-’ del circuito del teclado y uno de los
bornes de la caja de empotrar, mediante un conector tipo ‘faston’ macho.
2. Atornillar un cable corto al borne ‘TP’ del circuito del teclado, terminando
el cable con un conector tipo ‘faston’ hembra.
3. Cerrar el circuito uniendo los terminales,’faston’.
4. Conectar el dispositivo anti-hurto a los bornes del relé libre de contacto
‘A1’ y ‘A2’ del circuito del teclado.
5. Colocar el interruptor número 4 del circuito del teclado en la posición OFF.
6. Cerrar cuidadosamente la placa, tal y como se describe en el apartado 13.
7. Para abrir la placa con el dispositivo conectado, hacerlo cuidadosamente
para no desconectar el cable; colocar el interruptor 4 en la posición ON,
y desconectar el cable. Repetir desde el paso 1 para volver a cerrar la placa.
1. Connect a wire between the ‘-’ terminal of the keypad pcb and one of the
flush fitting box terminals, by using a male ‘faston’ connector.
2. Screw a short wire to ‘TP’ terminal of the keypad pcb, and finish the wire
with a female ‘faston’ connector.
3. Short the circuit connecting the two ‘faston’ connectors.
4. Connect the anti-burglary device between ‘A1’ and ‘A2’ terminals of the
keypad pcb (free contacts relay).
5. Set switch number 4 to OFF position.
6. Attach the door panel as described on point 13.
7. To open the door panel with the device connected, open it carefully to avoid
wire disconnection; set switch 4 to ON position and disconnect the wire.
Repeat from step 1 to close the door panel again.
9Conexión a un dispositivo anti-hurto (sólo módulos de mando con control de accesos).
Connection to an anti-burglary device (only main modules with access control).
2
3
1
1
10 Instalación de la resistencia calefactora (sólo cámara b/n).
Heater resistor installation (only b/w camera).
+24V
1. Retirar los cuatro tornillos que inmovilizan la carcasa de la
telecámara.
2. Introducir los pins, suministrados en el kit, en los taladros
dispuestos en el circuito y soldarlos. Insertar la resistencia
calefactora en los pins, con el cable de alimentación en el
lado marcado ‘+’.
3. Pasar el cable de alimentación de la resistencia calefactora
por el orificio de la carcasa, y conectarlo al borne ‘+’ del
circuito CVO. Finalmente, cerrar la carcasa.
Remove the four screws that fix the camera case.
Introduce the pins, supplied with the kit, into the holes fitted
on the PCB and solder them. Insert the heater resistor into
the pins, with the power wire by the side with ‘+’ impressed.
Cable the power wire of the heater resistor through the hole
of the case, and connect it to the ‘+’ terminal of the CVO
circuit. Finally, close the case.
Nota: Instalar sólo en lugares muy húmedos y frios.
Note: To be installed only in cold and wet places.

TELEPHONE/MONITOR CODE ASSIGNATIONCODIFICACIÓN DE LOS TELÉFONOS/MONITORES
00 13 26 39
01 14 27 40
02 15 28 41
03 16 29 42
04 17 30 43
05 18 31 44
06 19 32 45
07 20 33 46
08 21 34 47
09 22 35 48
10 23 36 49
11 24 37 50
12 25 38 51
44 44
44 44
44 44
44 44
44 44
44 44
44 44
44 44
44 44
44 44
44 44
44 44
44 44
55 55
55 55
55 55
55 55
55 55
55 55
55 55
55 55
55 55
55 55
55 55
55 55
55 55
6 666
6 666
6 666
6 666
6 666
6 666
6 666
6 666
6 666
6 666
6 666
6 666
6 666
7 777
7 777
7 777
7 777
7 777
7 777
7 777
7 777
7 777
7 777
7 777
7 777
7 777
888 8
888 8
888 8
888 8
888 8
888 8
888 8
888 8
888 8
888 8
888 8
888 8
888 8
99 99
99 99
99 99
99 99
99 99
99 99
99 99
99 99
99 99
99 99
99 99
99 99
99 99
10 10 10 10
10 10 10 10
10 10 10 10
10 10 10 10
10 10 10 10
10 10 10 10
10 10 10 10
10 10 10 10
10 10 10 10
10 10 10 10
10 10 10 10
10 10 10 10
10 10 10 10
111 1
111 1
111 1
111 1
111 1
111 1
111 1
111 1
111 1
111 1
111 1
111 1
111 1
222 2
222 2
222 2
222 2
222 2
222 2
222 2
222 2
222 2
222 2
222 2
222 2
222 2
33 33
33 33
33 33
33 33
33 33
33 33
33 33
33 33
33 33
33 33
33 33
33 33
33 33
52 65
53 66
54 67
55 68
56 69
57 70
58 71
59 72
60 73
61 74
62 75
63 76
64 77
44
44
44
44
44
44
44
44
44
44
44
44
44
55
55
55
55
55
55
55
55
55
55
55
55
55
66
66
66
66
66
66
66
66
66
66
66
66
66
77
77
77
77
77
77
77
77
77
77
77
77
77
88
88
88
88
88
88
88
88
88
88
88
88
88
99
99
99
99
99
99
99
99
99
99
99
99
99
10 10
10 10
10 10
10 10
10 10
10 10
10 10
10 10
10 10
10 10
10 10
10 10
10 10
11
11
11
11
11
11
11
11
11
11
11
11
11
22
22
22
22
22
22
22
22
22
22
22
22
22
33
33
33
33
33
33
33
33
33
33
33
33
33
Puente colocado
Jumper placed
Puente no colocado
Jumper not placed

TELEPHONE/MONITOR CODE ASSIGNATIONCODIFICACIÓN DE LOS TELÉFONOS/MONITORES
78 91 104 117
79 92 105 118
80 93 106 119
81 94 107 120
82 95 108 121
83 96 109 122
84 97 110 123
85 98 111 124
86 99 112 125
87 100 113 126
88 101 114 127
89 102 115 128
90 103 116 129
44 44
44 44
44 44
44 44
44 44
44 44
44 44
44 44
44 44
44 44
44 44
44 44
44 44
55 55
55 55
55 55
55 55
55 55
55 55
55 55
55 55
55 55
55 55
55 55
55 55
55 55
6 666
6 666
6 666
6 666
6 666
6 666
6 666
6 666
6 666
6 666
6 666
6 666
6 666
7 777
7 777
7 777
7 777
7 777
7 777
7 777
7 777
7 777
7 777
7 777
7 777
7 777
888 8
888 8
888 8
888 8
888 8
888 8
888 8
888 8
888 8
888 8
888 8
888 8
888 8
99 99
99 99
99 99
99 99
99 99
99 99
99 99
99 99
99 99
99 99
99 99
99 99
99 99
10 10 10 10
10 10 10 10
10 10 10 10
10 10 10 10
10 10 10 10
10 10 10 10
10 10 10 10
10 10 10 10
10 10 10 10
10 10 10 10
10 10 10 10
10 10 10 10
10 10 10 10
111 1
111 1
111 1
111 1
111 1
111 1
111 1
111 1
111 1
111 1
111 1
111 1
111 1
222 2
222 2
222 2
222 2
222 2
222 2
222 2
222 2
222 2
222 2
222 2
222 2
222 2
33 33
33 33
33 33
33 33
33 33
33 33
33 33
33 33
33 33
33 33
33 33
33 33
33 33
130 143
131 144
132 145
133 146
134 147
135 148
136 149
137 150
138 151
139 152
140 153
141 154
142 155
44
44
44
44
44
44
44
44
44
44
44
44
44
55
55
55
55
55
55
55
55
55
55
55
55
55
66
66
66
66
66
66
66
66
66
66
66
66
66
77
77
77
77
77
77
77
77
77
77
77
77
77
88
88
88
88
88
88
88
88
88
88
88
88
88
99
99
99
99
99
99
99
99
99
99
99
99
99
10 10
10 10
10 10
10 10
10 10
10 10
10 10
10 10
10 10
10 10
10 10
10 10
10 10
11
11
11
11
11
11
11
11
11
11
11
11
11
22
22
22
22
22
22
22
22
22
22
22
22
22
33
33
33
33
33
33
33
33
33
33
33
33
33
Puente colocado
Jumper placed
Puente no colocado
Jumper not placed

TELEPHONE/MONITOR CODE ASSIGNATIONCODIFICACIÓN DE LOS TELÉFONOS/MONITORES
168
4567 8910123
156
157
158
159
160
161
162
163
164
165
166
167
4
4
4
4
4
4
4
4
4
4
4
4
5
5
5
5
5
5
5
5
5
5
5
5
6
6
6
6
6
6
6
6
6
6
6
6
7
7
7
7
7
7
7
7
7
7
7
7
8
8
8
8
8
8
8
8
8
8
8
8
9
9
9
9
9
9
9
9
9
9
9
9
10
10
10
10
10
10
10
10
10
10
10
10
1
1
1
1
1
1
1
1
1
1
1
1
2
2
2
2
2
2
2
2
2
2
2
2
3
3
3
3
3
3
3
3
3
3
3
3
169
170
171
172
173
174
175
176
177
178
179
180
4
4
4
4
4
4
4
4
4
4
4
4
5
5
5
5
5
5
5
5
5
5
5
5
6
6
6
6
6
6
6
6
6
6
6
6
7
7
7
7
7
7
7
7
7
7
7
7
8
8
8
8
8
8
8
8
8
8
8
8
9
9
9
9
9
9
9
9
9
9
9
9
10
10
10
10
10
10
10
10
10
10
10
10
1
1
1
1
1
1
1
1
1
1
1
1
2
2
2
2
2
2
2
2
2
2
2
2
3
3
3
3
3
3
3
3
3
3
3
3
182
183
184
185
186
187
188
189
190
191
192
193
4
4
4
4
4
4
4
4
4
4
4
4
5
5
5
5
5
5
5
5
5
5
5
5
6
6
6
6
6
6
6
6
6
6
6
6
7
7
7
7
7
7
7
7
7
7
7
7
8
8
8
8
8
8
8
8
8
8
8
8
9
9
9
9
9
9
9
9
9
9
9
9
10
10
10
10
10
10
10
10
10
10
10
10
1
1
1
1
1
1
1
1
1
1
1
1
2
2
2
2
2
2
2
2
2
2
2
2
3
3
3
3
3
3
3
3
3
3
3
3
181
45 678910123
194
45678 91012 3
207
4567 8910123
195
196
197
198
199
200
201
202
203
204
205
206
4
4
4
4
4
4
4
4
4
4
4
4
5
5
5
5
5
5
5
5
5
5
5
5
6
6
6
6
6
6
6
6
6
6
6
6
7
7
7
7
7
7
7
7
7
7
7
7
8
8
8
8
8
8
8
8
8
8
8
8
9
9
9
9
9
9
9
9
9
9
9
9
10
10
10
10
10
10
10
10
10
10
10
10
1
1
1
1
1
1
1
1
1
1
1
1
2
2
2
2
2
2
2
2
2
2
2
2
3
3
3
3
3
3
3
3
3
3
3
3
208
209
210
211
212
213
214
215
216
217
218
219
4
4
4
4
4
4
4
4
4
4
4
4
5
5
5
5
5
5
5
5
5
5
5
5
6
6
6
6
6
6
6
6
6
6
6
6
7
7
7
7
7
7
7
7
7
7
7
7
8
8
8
8
8
8
8
8
8
8
8
8
9
9
9
9
9
9
9
9
9
9
9
9
10
10
10
10
10
10
10
10
10
10
10
10
1
1
1
1
1
1
1
1
1
1
1
1
2
2
2
2
2
2
2
2
2
2
2
2
3
3
3
3
3
3
3
3
3
3
3
3
Puente colocado
Jumper placed
Puente no colocado
Jumper not placed
220
45678910123
221
222
223
224
225
226
227
228
229
230
231
4
4
4
4
4
4
4
4
4
4
4
5
5
5
5
5
5
5
5
5
5
5
6
6
6
6
6
6
6
6
6
6
6
7
7
7
7
7
7
7
7
7
7
7
8
8
8
8
8
8
8
8
8
8
8
9
9
9
9
9
9
9
9
9
9
9
10
10
10
10
10
10
10
10
10
10
10
1
1
1
1
1
1
1
1
1
1
1
2
2
2
2
2
2
2
2
2
2
2
3
3
3
3
3
3
3
3
3
3
3
232
233
4
4
5
5
6
6
7
7
8
8
9
9
10
10
1
1
2
2
3
3

1Una o varias puertas de acceso.
One or several access doors.
1.1. Recepción de llamadas procedentes de la placa.
1.
Caso de existir más placas, éstas quedarán desconectadas, visualizándose mediante el indicador “Stop”.
En este instante el monitor recibe la llamada, que tendrá una duración de 5 segundos, tras los cuales aparecerá la imagen en el monitor
principal sin que el visitante lo perciba; en los monitores en paralelo (caso de existir), utilizar el pulsador de video espía para que aparezca la
imagen. Si transcurridos 30 segundos no se ha descolgado el auricular del monitor, monitor y placas pasarán al estado de reposo.
Para establecer comunicación descolgar el auricular del monitor: en dicho instante se iluminará el indicador “Stop” de la placa activa. La
comunicación tendrá una duración máxima de un minuto y medio, o hasta colgar el auricular. En dicho instante la(s) placa(s) pasará(n) al estado
de reposo inicial.
Para accionar el abrepuertas, pulsar el botón naranja durante los procesos de llamada o comunicación; con una sola pulsación se acciona el
abrepuertas durante unos 4 segundos aproximadamente.
Para realizar la llamada el visitante deberá introducir el código correspondiente a la vivienda con la que desea establecer comunicación.
Durante la pulsación de cada tecla, un tono acústico confirmará que se ha realizado la pulsación. Una vez introducido el código, pulsar la tecla de
llamada .Si se ha presionado una tecla por equivocación, pulsar la tecla de borrado C y volver a introducir el código.
%
%
1.5. Apertura de puerta mediante el control de accesos.
To make a call, the visitor should key in the code corresponding to the apartment he wishes to contact. A beep will will be heard as each button
is pressed. When the code has been introduced, press the call button . If an incorrect button is pressed, use the clear button C and key in the code
again.
1.3. Open the door using the access control.
2. Autoencendido.
1.3. Llamada desde la puerta del rellano.
1.4. Anexo para instalaciones dotadas de dispositivos opcionales.
Para establecer comunicación con la placa, sin haber sido llamado, descolgar el auricular y presionar el botón de autoencendido; en dicho
instante se iluminará el indicador “Stop” de la(s) placa(s). La comunicación se prolongará durante un intervarlo de un minuto y medio, o bién hasta
que se cuelgue el auricular del monitor. El indicador “Stop” de la(s) placa(s) se apagará, pasando al estado de reposo inicial.
Al recibir la llamada desde el pulsador de puerta, el monitor emite un tono continuo, distinto al de la llamada desde la placa y parpadea el
indicador luminoso de encendido. Si la llamada de puerta se recibe durante el proceso de comunicación, sólo parpadeará el indicador luminoso.
El empleo de esta función inhabilita la activación del dispositivo opcional 1.
La activación de dispositivos opcionales requiere el uso de una unidad SAR-90 por cada uno. La activación del dispositivo 1 se realiza
manteniendo presionado el pulsador correspondiente, durante los procesos de comunicación o llamada. Para activar del dispositivo 2, mantener
presionado dicho pulsador en cualquier momento.
1.1. Calling from the door panel.
1.2. Autoswitch-on operation.
1.3. Call reception from the flat door bell push button.
1.4. Systems with optional devices.
In case of several door panels, they will be disconnected, shown by the “Stop” busy channel indicator.
At this moment the call sound will be received at the monitor in the dwelling, lasting in 5 seconds; the picture will appear on the master monitor
without the visitor being aware of this; on the slave monitors (if exist), press the “Video Spy” button to see the picture. If the call is not answered after 30
seconds, the channel will be freed.
To stablish communication, pick up the monitor handset: at that moment the indicator light “Stop” at the active door panel will light.
Communication lasts for one and a half minutes or until the handset is replaced. The “Stop” light at the panel(s) goes out, and the channel is freed.
To open the door, press the door release button during call or communication progresses; with one press, the door release operates for
approximately 4 seconds.
To establish communication with the door panel, without being called, pick up the handset and press the autoswitch-on button; at this moment
the indicator light “Stop” at the door panel(s) will light.
Once started, communication lasts for one and a half minutes, or until the monitor handset is replaced. The “Stop” light at the panel(s) will go
out, and the channel will be freed.
When a call is received from the door push button, an acoustic tone will be heard on the monitor, different that the produced when the call is
done from the door panel, and the on-off light indicator will blink. If the call is done during communication progress, only the on-off light will blink.
The use of this function disables the activation of the 1st optional device.
To operate optional devices, the use of a SAR-90 is required for each one. To activate the device 1, press the corresponding button during call or
communication progresses. To operate the device 2, press such button at any time.
To open the door, key in the four digit entry code. An audible beep confirms each entry as the number is pressed. If a key is pressed in error,
press the cancel button (C), and key in the code again.
If the code is correct, the green led lights and the door release mechanism is activated for about four seconds.
If the code is incorrect, the red led lights for four seconds. If five consecutive incorrect codes are keyed-in, the red led lights and the door panel
is blocked for one minute.
If the code is the panic one, the green led lights and the door release mechanism is activated, and a second relay will be activated for the
conection, i.e., of an alarm.
Para abrir la puerta, introducir el código de cuatro cifras de apertura. Durante la pulsación de cada tecla, un tono acústico confirmará que se
ha realizado la pulsación. Si se ha presionado una tecla por equivocación, pulsar la tecla de borrado (C) y volver a introducir el código.
Si el código introducido es correcto, se encenderá el led verde y se accionará el abrepuertas durante unos cuatro segundos
aproximadamente.
Si el código introducido es incorrecto, se encenderá el led rojo durante cuatro segundos. Si se introducen cinco códigos erróneos
consecutivos, se encenderá el led rojo y se bloqueará la placa durante un minuto.
Si el código introducido es el de pánico, primero se encenderá el led verde y se abrirá la puerta, y seguidamente se acciónará un segundo
relé para la conexión, por ejemplo, de una alarma.
OPERATION DESCRIPTION
Video door entry systems
DESCRIPCIÓN DE FUNCIONAMIENTO
Videoportero

2Una o varias puertas de acceso con central de conserjería.
One or several access doors with porter’s exchange.
2.1. Comunicación entre placa y monitor.
La central de conserjería debe estar desconectada, o la placa debe estar configurada para llamar directamente a los monitores.
Cuando la central de conserjería está conectada, y las placas han sido configuradas para llamar al conserje, todas las llamadas realizadas
en las placas serán recibidas por la central
La placa que realiza la llamada entra en comunicación, desconectándose la otra y pasando al estado de canal ocupado.
Descolgar el auricular de la centralita para establecer comunicación con la placa. Si el auricular de la centralita se halla descolgado, se
establecerá la comunicación automáticamente. La comunicación tiene una duración de un minuto y medio o hasta colgar el auricular de la
centralita.
Si antes de establecer comunicación se desea ver al visitante sin que éste lo advierta, pulsar la tecla de “Video Espía” sin descolgar el
auricular. Esta función tiene la misma duración que la llamada, y se puede establecer comunicación descolgando el auricular. Para finalizar la
función de video espía, pulsar la tecla de borrado.
Para permitir el acceso del visitante a la finca, presionar el pulsador naranja durante el proceso de comunicación
Caso de existir más placas, éstas quedarán desconectadas, visualizándose mediante el indicador “Stop”.
En este instante el monitor recibe la llamada, que tendrá una duración de 5 segundos, tras los cuales aparecerá la imagen en el monitor
principal sin que el visitante lo perciba; en los monitores en paralelo (caso de existir), utilizar el pulsador de video espía para que aparezca la
imagen. Si transcurridos 30 segundos no se ha descolgado el auricular del monitor, monitor y placas pasarán al estado de reposo.
Para establecer comunicación descolgar el auricular del monitor: en dicho instante se iluminará el indicador “Stop” de la placa activa. La
comunicación tendrá una duración máxima de un minuto y medio, o hasta colgar el auricular. En dicho instante la(s) placa(s) pasará(n) al estado
de reposo inicial.
Para accionar el abrepuertas, pulsar el botón naranja durante los procesos de llamada o comunicación; con una sola pulsación se acciona el
abrepuertas durante unos 4 segundos aproximadamente.
La llamada tendrá una duración de 30 segundos en la central.
; con una sola pulsación se
acciona el abrepuertas durante unos 4 segundos aproximadamente.
Descolgar el auricular de la centralita y presionar la tecla de autoencendido. Establecerá comunicación de audio y vídeo, con la placa
configurada para dicha función. La comunicación tendrá una duración de un minuto y medio o hasta colgar el auricular. La centralita de conserjería
puede abrir la puerta de la placa seleccionada, sin haberse realizado llamada previa.
Para realizar la llamada, descolgar el auricular de la centralita e introducir, a través del teclado, el código correspondiente a la vivienda,
seguidamente, presionar la tecla de llamada. El sonido de la llamada será diferente del que se recibe cuando la llamada se realiza en la placa. Para
renunciar a la llamada desde la centralita, colgar el auricular de la centralita.
Descolgar el auricular del monitor para establecer comunicación de audio con la centralita. La comunicación tiene una duración de un minuto
y medio o hasta colgar uno de los auriculares. Si la centralita tiene conectada una telecámara auxiliar y está configurada como telecámara del
sistema, la comunicación con el monitor será de audio y video.
Durante este proceso, las placas estarán en canal ocupado, liberándose el canal una vez finalizada la comunicación.
Para realizar la llamada, descolgar el auricular del monitor y presionar la tecla de abrepuertas. Se realizará la llamada durante 30 segundos
en la centralita. Para renunciar a la llamada, colgar el auricular del monitor.
Descolgar el auricular de la centralita para establecer comunicación de audio con el monitor. Si la centralita tiene conectada una telecámara
auxiliar y está configurada como telecámara del sistema, la comunicación con el monitor será de audio y video. La comunicación tiene una
duración de un minuto y medio o hasta colgar uno de los auriculares.
Durante este proceso, las placas estarán en canal ocupado, liberándose el canal una vez finalizada la comunicación.
Para establecer comunicación con la placa, sin haber sido llamado, descolgar el auricular y presionar el botón de autoencendido; en dicho
instante se iluminará el indicador “Stop” de la(s) placa(s). La comunicación se prolongará durante un intervarlo de un minuto y medio, o bién hasta
que se cuelgue el auricular del monitor. El indicador “Stop” de la(s) placa(s) se apagará, pasando al estado de reposo inicial.
Al recibir la llamada desde el pulsador de puerta, el monitor emite un tono continuo, distinto a los de llamada desde placa y central de
conserjería, y parpadea el indicador luminoso de encendido. Si la llamada de puerta se recibe durante el proceso de comunicación, sólo
parpadeará el indicador luminoso.
El empleo de esta función inhabilita la activación del dispositivo opcional 1.
La activación de dispositivos opcionales requiere el uso de una unidad SAR-90 por cada uno. La activación del dispositivo 1 se realiza
manteniendo presionado el pulsador correspondiente, durante los procesos de comunicación o llamada. Para activar del dispositivo 2, mantener
presionado dicho pulsador en cualquier momento.
2.2. Comunicación entre placa y la central de conserjería.
2.3. Comunicación de la centralita de conserjería a la placa de calle.
2.4. Comunicación de la centralita de conserjería al monitor.
2.5. Comunicación del monitor a la centralita de conserjería.
2.6. Autoencendido.
2.7. Llamada desde la puerta del rellano.
2.8. Anexo para instalaciones dotadas de dispositivos opcionales.
.
Para realizar la llamada el visitante deberá introducir el código correspondiente a la vivienda con la que desea establecer comunicación.
Durante la pulsación de cada tecla, un tono acústico confirmará que se ha realizado la pulsación. Una vez introducido el código, pulsar la tecla de
llamada .Si se ha presionado una tecla por equivocación, pulsar la tecla de borrado C y volver a introducir el código.
Para realizar la llamada el visitante deberá introducir el código correspondiente a la vivienda con la que desea establecer comunicación.
Durante la pulsación de cada tecla, un tono acústico confirmará que se ha realizado la pulsación. Una vez introducido el código, pulsar la tecla de
llamada .
%
%
OPERATION DESCRIPTION
Video door entry systems
DESCRIPCIÓN DE FUNCIONAMIENTO
Videoportero

2Una o varias puertas de acceso con central de conserjería.
One or several access doors with porter’s exchange.
2.1. Communication from the door panel to the monitor.
2.2. Communication from the main door panel to the porter's exchange.
The porter's exchange must be disconnected or the panel configured for direct calling to the flat.
When the porter's exchange is connected, and the door panel is configured to call the exchange, all calls made from the panel are routed
through the exchange
The door panel from which the call is made enters into communication, the other is disconnected and changes to busy channel.
Pick up the exchange handset to establish comunication with the door panel. If the exchange handset is not on the cradle, communication is
established automatically. Communication lasts for a minute and a half or until the exchange handset is replaced.
If you wish to see the visitor before entering into communication, without the visitor being aware of this, without lifting the handset, press the
"Video Espia" button. This function lasts the same time as the call. During "Video espia" communication can be established by picking up the
handset. To end the "Video espia " function, press the delete key.
To allow the visitor access to the building, press the orange button while communication is in progress. With one press, the door-release
operates for approximately 4 seconds.
In case of several door panels, they will be disconnected, shown by the “Stop” busy channel indicator.
At this moment the call sound will be received at the monitor in the dwelling, lasting in 5 seconds; the picture will appear on the master monitor
without the visitor being aware of this; on the slave monitors (if exist), press the “Video Spy” button to see the picture. If the call is not answered after 30
seconds, the channel will be freed.
To stablish communication, pick up the monitor handset: at that moment the indicator light “Stop” at the active door panel will light.
Communication lasts for one and a half minutes or until the handset is replaced. The “Stop” light at the panel(s) goes out, and the channel is freed.
To open the door, press the door release button during call or communication progresses; with one press, the door release operates for
approximately 4 seconds.
This will last for 30 seconds at the exchange.
Pick up the exchange handset and press the auto switch-on button. Audio and video communication will be established with the street panel
configured for this function. Communication will last until the handset is replaced or one minute and a half has passed. The porter's exchange can
open the door at the selected panel, without a previous call having been made.
To make a call, pick up the exchange handset and, using the keyboard, enter the code corresponding to the flat, immediately, press the call
key. The monitor will sound different that when the call is made at the door panel. To cancel the call from the exchange, replace the exchange
handset.
Pick up the monitor handset to establish audio communication with the exchange. Communication lasts for a minute and a half, or until one of
the two handsets is replaced. If the exchange has an auxiliary camera connected and configured as a system camera, communication with the
monitor will be in audio and video.
During this process, the door panels are in busy channel, being freed when communication ends.
To make the call, pick up the monitor handset and press the door release button. A 30 second two-tone call will be heard at the exchange. To
annul the call, replace the monitor handset.
Pick up the exchange handset to establish audio communication with the monitor . If the exchange is equipped with an auxiliary camera
connected as a system camera, communication with the monitor will be in audio and video. Communication lasts for a minute and a half, or until
one of the two handsets is replaced.
During communication between the exchange and the monitor, the door panels in the street will be in busy channel, being freed when the
communication finishes.
To establish communication with the door panel, without being called, pick up the handset and press the autoswitch-on button; at this moment
the indicator light “Stop” at the door panel(s) will light.
Once started, communication lasts for one and a half minutes, or until the monitor handset is replaced. The “Stop” light at the panel(s) will go
out, and the channel will be freed.
When a call is received from the door push button, an acoustic tone will be heard on the monitor, different that the produced when the call is
done from the door panel or the porter's exchange, and the on-off light indicator will blink. If the call is done during communication progress, only the
on-off light will blink.
The use of this function disables the activation of the 1st optional device.
To operate optional devices, the use of a SAR-90 is required for each one. To activate the device 1, press the corresponding button during call or
communication progresses. To operate the device 2, press such button at any time.
.
2.3. Communication from the porter's exchange to the street door panel.
2.4. Communication from the porter's exchange to a monitor.
2.5. Communication from a monitor to the porter's exchange.
2.6. Autoswitch-on operation.
2.7. Call reception from the flat door bell push button.
2.8. Systems with optional devices.
To make a call, the visitor should key in the code corresponding to the apartment he wishes to contact. A beep will will be heard as each button
is pressed. When the code has been introduced, press the call button . If an incorrect button is pressed, use the clear button C and key in the code
again.
To make a call, the visitor should key in the code corresponding to the apartment he wishes to contact. A beep will will be heard as each button
is pressed. When the code has been introduced, press the call button .
%
%
OPERATION DESCRIPTION
Video door entry systems
DESCRIPCIÓN DE FUNCIONAMIENTO
Videoportero

1Una o varias puertas de acceso.
One or several access doors.
1.1. Recepción de llamadas procedentes de la placa.
1.
Para realizar la llamada el visitante deberá introducir el código correspondiente a la vivienda con la que desea establecer comunicación.
Durante la pulsación de cada tecla, un tono acústico confirmará que se ha realizado la pulsación. Una vez introducido el código, pulsar la tecla de
llamada .Si se ha presionado una tecla por equivocación, pulsar la tecla de borrado C y volver a introducir el código.
Caso de existir más placas, éstas quedarán desconectadas, visualizándose mediante el indicador “Stop”.
En este instante el teléfono recibe la llamada, que tendrá una duración de 5 segundos. Si transcurridos 30 segundos no se ha descolgado el
auricular del teléfono, teléfono y placas pasarán al estado de reposo.
Para establecer comunicación descolgar el auricular del teléfono: en dicho instante se iluminará el indicador “Stop” de la placa activa. La
comunicación tendrá una duración máxima de un minuto y medio, o hasta colgar el auricular. En dicho instante la(s) placa(s) pasará(n) al estado
de reposo inicial.
Para accionar el abrepuertas, pulsar el botón naranja durante los procesos de llamada o comunicación; con una sola pulsación se acciona el
abrepuertas durante unos 4 segundos aproximadamente.
%
2. Llamada desde la puerta del rellano.
1.3. Apertura de puerta mediante el control de accesos.
Al recibir la llamada desde el pulsador de puerta, el teléfono emite un tono continuo, distinto al de la llamada desde la placa. Si la llamada de
puerta se recibe durante el proceso de comunicación, no se recibirá ningún aviso.
1.1. Calling from the door panel.
1.2. Call reception from the flat door bell push button.
1.3. Open the door using the access control.
To make a call, the visitor should key in the code corresponding to the apartment he wishes to contact. A beep will will be heard as each button
is pressed. When the code has been introduced, press the call button . If an incorrect button is pressed, use the clear button C and key in the code
again.
In case of several door panels, they will be disconnected, shown by the “Stop” busy channel indicator.
At this moment the call sound will be received at the telephone in the dwelling, lasting in 5 seconds. If the call is not answered after 30 seconds, the
channel will be freed.
To stablish communication, pick up the telephone handset: at that moment the indicator light “Stop” at the active door panel will light.
Communication lasts for one and a half minutes or until the handset is replaced. The “Stop” light at the panel(s) goes out, and the channel is freed.
To open the door, press the door release button during call or communication progresses; with one press, the door release operates for
approximately 4 seconds.
When a call is received from the door push button, an acoustic tone will be heard on the telephone, different that the produced when the call is
done from the door panel. If the call is done during communication progress, no acoustic tone will be received.
%
Para abrir la puerta, introducir el código de cuatro cifras de apertura. Durante la pulsación de cada tecla, un tono acústico confirmará que se
ha realizado la pulsación. Si se ha presionado una tecla por equivocación, pulsar la tecla de borrado (C) y volver a introducir el código.
Si el código introducido es correcto, se encenderá el led verde y se accionará el abrepuertas durante unos cuatro segundos
aproximadamente.
Si el código introducido es incorrecto, se encenderá el led rojo durante cuatro segundos. Si se introducen cinco códigos erróneos
consecutivos, se encenderá el led rojo y se bloqueará la placa durante un minuto.
Si el código introducido es el de pánico, primero se encenderá el led verde y se abrirá la puerta, y seguidamente se acciónará un segundo
relé para la conexión, por ejemplo, de una alarma.
To open the door, key in the four digit entry code. An audible beep confirms each entry as the number is pressed. If a key is pressed in error,
press the cancel button (C), and key in the code again.
If the code is correct, the green led lights and the door release mechanism is activated for about four seconds.
If the code is incorrect, the red led lights for four seconds. If five consecutive incorrect codes are keyed-in, the red led lights and the door panel
is blocked for one minute.
If the code is the panic one, the green led lights and the door release mechanism is activated, and a second relay will be activated for the
conection, i.e., of an alarm.
OPERATION DESCRIPTION
Audio door entry systems
DESCRIPCIÓN DE FUNCIONAMIENTO
Portero electrónico

2Una o varias puertas de acceso con central de conserjería.
One or several access doors with porter’s exchange.
2.1. Comunicación entre placa y teléfono.
La central de conserjería debe estar desconectada, o la placa debe estar configurada para llamar directamente a los teléfonos.
Cuando la central de conserjería está conectada, y las placas han sido configuradas para llamar al conserje, todas las llamadas realizadas
en las placas serán recibidas por la central
La placa que realiza la llamada entra en comunicación, desconectándose la otra y pasando al estado de canal ocupado.
Descolgar el auricular de la centralita para establecer comunicación con la placa. Si el auricular de la centralita se halla descolgado, se
establecerá la comunicación automáticamente. La comunicación tiene una duración de un minuto y medio o hasta colgar el auricular de la
centralita.
Para permitir el acceso del visitante a la finca, presionar el pulsador naranja durante el proceso de comunicación
Para realizar la llamada el visitante deberá introducir el código correspondiente a la vivienda con la que desea establecer comunicación.
Durante la pulsación de cada tecla, un tono acústico confirmará que se ha realizado la pulsación. Una vez introducido el código, pulsar la tecla de
llamada .Si se ha presionado una tecla por equivocación, pulsar la tecla de borrado C y volver a introducir el código.
Caso de existir más placas, éstas quedarán desconectadas, visualizándose mediante el indicador “Stop”.
En este instante el teléfono recibe la llamada, que tendrá una duración de 5 segundos. Si transcurridos 30 segundos no se ha descolgado el
auricular del teléfono, teléfono y placas pasarán al estado de reposo.
Para establecer comunicación descolgar el auricular del teléfono: en dicho instante se iluminará el indicador “Stop” de la placa activa. La
comunicación tendrá una duración máxima de un minuto y medio, o hasta colgar el auricular. En dicho instante la(s) placa(s) pasará(n) al estado
de reposo inicial.
Para accionar el abrepuertas, pulsar el botón naranja durante los procesos de llamada o comunicación; con una sola pulsación se acciona el
abrepuertas durante unos 4 segundos aproximadamente.
Para realizar la llamada el visitante deberá introducir el código correspondiente a la vivienda con la que desea establecer comunicación.
Durante la pulsación de cada tecla, un tono acústico confirmará que se ha realizado la pulsación. Una vez introducido el código, pulsar la tecla de
llamada .La llamada tendrá una duración de 30 segundos en la central.
; con una sola pulsación se
acciona el abrepuertas durante unos 4 segundos aproximadamente.
Descolgar el auricular de la centralita y presionar la tecla de autoencendido. Establecerá comunicación de audio con la placa configurada
para dicha función. La comunicación tendrá una duración de un minuto y medio o hasta colgar el auricular. La centralita de conserjería puede abrir
la puerta de la placa seleccionada, sin haberse realizado llamada previa.
Para realizar la llamada, descolgar el auricular de la centralita e introducir, a través del teclado, el código correspondiente a la vivienda,
seguidamente, presionar la tecla de llamada. El sonido de la llamada será diferente del que se recibe cuando la llamada se realiza en la placa. Para
renunciar a la llamada desde la centralita, colgar el auricular de la centralita.
Descolgar el auricular del teléfono para establecer comunicación de audio con la centralita. La comunicación tiene una duración de un
minuto y medio o hasta colgar uno de los auriculares.
Durante este proceso, las placas estarán en canal ocupado, liberándose el canal una vez finalizada la comunicación.
Para realizar la llamada, descolgar el auricular del teléfono y presionar la tecla de abrepuertas. Se realizará la llamada durante 30 segundos
en la centralita. Para renunciar a la llamada, colgar el auricular del teléfono.
Descolgar el auricular de la centralita para establecer comunicación de audio con el teléfono. La comunicación tiene una duración de un
minuto y medio o hasta colgar uno de los auriculares.
Durante este proceso, las placas estarán en canal ocupado, liberándose el canal una vez finalizada la comunicación.
Al recibir la llamada desde el pulsador de puerta, el teléfono emite un tono continuo, distinto a los de llamada desde placa y central de
conserjería. Si la llamada de puerta se recibe durante el proceso de comunicación, no se recibirá ningún aviso.
%
%
2.2. Comunicación entre placa y la central de conserjería.
2.3. Comunicación de la centralita de conserjería a la placa de calle.
2.4. Comunicación de la centralita de conserjería al teléfono.
2.5. Comunicación del teléfono a la centralita de conserjería.
2.6. Llamada desde la puerta del rellano.
.
OPERATION DESCRIPTION
Audio door entry systems
DESCRIPCIÓN DE FUNCIONAMIENTO
Portero electrónico

2Una o varias puertas de acceso con central de conserjería.
One or several access doors with porter’s exchange.
2.1. Communication from the door panel to the telephone.
2.2. Communication from the main door panel to the porter's exchange.
The porter's exchange must be disconnected or the panel configured for direct calling to the flat.
When the porter's exchange is connected, and the door panel is configured to call the exchange, all calls made from the panel are routed
through the exchange
The door panel from which the call is made enters into communication, the other is disconnected and changes to busy channel.
Pick up the exchange handset to establish comunication with the door panel. If the exchange handset is not on the cradle, communication is
established automatically. Communication lasts for a minute and a half or until the exchange handset is replaced.
To allow the visitor access to the building, press the orange button while communication is in progress. With one press, the door-release
operates for approximately 4 seconds.
To make a call, the visitor should key in the code corresponding to the apartment he wishes to contact. A beep will will be heard as each button
is pressed. When the code has been introduced, press the call button . If an incorrect button is pressed, use the clear button C and key in the code
again.
In case of several door panels, they will be disconnected, shown by the “Stop” busy channel indicator.
At this moment the call sound will be received at the telephone in the dwelling, lasting in 5 seconds. If the call is not answered after 30 seconds, the
channel will be freed.
To stablish communication, pick up the telephone handset: at that moment the indicator light “Stop” at the active door panel will light.
Communication lasts for one and a half minutes or until the handset is replaced. The “Stop” light at the panel(s) goes out, and the channel is freed.
To open the door, press the door release button during call or communication progresses; with one press, the door release operates for
approximately 4 seconds.
To make a call, the visitor should key in the code corresponding to the apartment he wishes to contact. A beep will will be heard as each button
is pressed. When the code has been introduced, press the call button . This will last for 30 seconds at the exchange.
Pick up the exchange handset and press the auto switch-on button. Audio communication will be established with the street panel configured
for this function. Communication will last until the handset is replaced or one minute and a half has passed. The porter's exchange can open the
door at the selected panel, without a previous call having been made.
To make a call, pick up the exchange handset and, using the keyboard, enter the code corresponding to the flat, immediately, press the call
key. The telephone will sound different that when the call is made at the door panel. To cancel the call from the exchange, replace the exchange
handset.
Pick up the telephone handset to establish audio communication with the exchange. Communication lasts for a minute and a half, or until one
of the two handsets is replaced.
During this process, the door panels are in busy channel, being freed when communication ends.
To make the call, pick up the telephone handset and press the door release button. A 30 second two-tone call will be heard at the exchange.
To annul the call, replace the telephone handset.
Pick up the exchange handset to establish audio communication with the telephone. Communication lasts for a minute and a half, or until one
of the two handsets is replaced.
During communication between the exchange and the telephone, the door panels in the street will be in busy channel, being freed when the
communication finishes.
When a call is received from the door push button, an acoustic tone will be heard on the telephone, different that the produced when the call is
done from the door panel or the porter's exchange. If the call is done during communication progress, no acoustic tone will be received.
%
%
.
2.3. Communication from the porter's exchange to the street door panel.
2.4. Communication from the porter's exchange to a telephone.
2.5. Communication from a telephone to the porter's exchange.
2.6. Call reception from the flat door bell push button.
OPERATION DESCRIPTION
Audio door entry systems
DESCRIPCIÓN DE FUNCIONAMIENTO
Portero electrónico

AUXILIARY MODULE LABELSETIQUETAS PARA EL MÓDULO DE COMPLEMENTO
1. Introducir el código de la vivienda :
2. Pulsar la tecla
3. En caso de error, pulsar la tecla C
y repetir desde el punto 1.
Instrucciones para realizar la llamada
109
87
131
153
107
85
129
151
105
83
127
149
103
81
125
147
101
79
123
145
99
77
121
143
97
75
119
141
95
73
117
139
93
71
115
137
91
69
113
135
89
67
111
133
110
88
132
108
86
130
152
106
84
128
150
104
82
126
148
102
80
124
146
100
78
122
144
98
76
120
142
96
74
118
140
94
72
116
138
92
70
114
136
90
68
66
112
134
22
44
20
42
64
18
40
62
16
38
60
14
36
58
12
34
56
10
32
54
8
30
52
6
28
50
4
26
48
2
0
24
46
21
43
65
19
41
63
17
39
61
15
37
59
13
35
57
11
33
55
9
31
53
7
29
51
5
27
49
3
25
47
1
23
45

AUXILIARY MODULE LABELSETIQUETAS PARA EL MÓDULO DE COMPLEMENTO
1. Enter the code number :
2. Press bell key
3. If a wrong code entered, press cancel 'C'
and start again from step 1.
Calling instructions
197
175
219
195
173
217
239
193
171
215
237
191
169
213
235
189
167
211
233
187
165
209
231
185
163
207
229
183
161
205
227
181
159
203
225
179
157
201
223
177
155
199
221
198
176
220
196
174
218
194
172
216
238
192
170
214
236
190
168
212
234
188
166
210
232
186
164
208
230
184
162
206
228
182
160
204
226
180
158
202
224
178
156
154
200
222

INSTALLATION DIAGRAM
One access door
ESQUEMA DE INSTALACIÓN
Una puerta de acceso
*
DISTRIBUIDOR
SPLITTER
*
DISTRIBUIDOR
SPLITTER
CV
1
Vout Vin
L1 L2 CV CV A
2
+
--
123
SW
4
PV-90 CODE
PVC-90 CODE
A-490/1-A
0 230
PRI NR
+
-
A-490/2-A
Vout Vin
SA2CA1
+
-
SHINER-90
SHINER-90 COLOR
75W
Vout Vin
SA2CA1
+
-
SHINER-90
SHINER-90 COLOR
75W
Vout Vin
SA2CA1
+
-
SHINER-90
SHINER-90 COLOR
75W
Vout Vin
SA2CA1
+
-
SHINER-90
SHINER-90 COLOR
75W
Vout Vin
SA2CA1
+
-
SHINER-90
SHINER-90 COLOR
75W
Vout Vin
SA2CA1
+
-
SHINER-90
SHINER-90 COLOR
75W
Vout Vin
SA2CA1
+
-
SHINER-90
SHINER-90 COLOR
75W
Vout Vin
SA2CA1
+
-
SHINER-90
SHINER-90 COLOR
75W
NOTAS: en placas con cámara color, realizar un puente entre ‘ 2’
del circuito CVO y ‘M’ de la regleta de conexión PLUZ-91.
* cortar la resistencia en todos los distribuidores excepto en el último.
~
~NOTES: on door panels with color camera, link ‘ 2’ of the CVO
circuit with ‘M’ of the PLUZ-91 terminal connector.
* cut the resistor in all the splitters except in the last one.
SECCIONES MINIMAS. / MINIMUM SECTIONS.
0.5mm
Vin - Vout
+~1~2
1.0mm
1.0mm 2.5mm
RG59
100m. 200m. 300m.
RG59 RG59 **
** Reforzar la malla con un hilo adicional de 1mm².
Reinforce the shield with an additional wire of 1mm².
2.5mm
2
22
2
2
-
0.75mm
2
TF-103
1
4
7
C
2
5
8
3
6
9
0
STOP

INSTALLATION DIAGRAM
One access door
ESQUEMA DE INSTALACIÓN
Una puerta de acceso
CAJA
EMPALMES
JUNCTION
BOX
CAJA
EMPALMES
JUNCTION
BOX
CV
1
Vout Vin
L1 L2 CV CV A
2
+
--
123
SW
4
PE4-91 CODE
A-490/1-A
0 230
PRI NR
+
-
A-490/2-A
SECCIONES MINIMAS. / MINIMUM SECTIONS.
0.5mm
+~1~2
1.0mm
1.0mm 2.5mm
100m. 200m. 300m.
2.5mm
2
22
2
2
-
0.75mm
2
TF-103
SA HZ
+
-
T-840
1
SA HZ
+
-
T-840
1
SA HZ
+
-
T-840
1
SA HZ
+
-
T-840
1
SA HZ
+
-
T-840
1
SA HZ
+
-
T-840
1
SA HZ
+
-
T-840
1
SA HZ
+
-
T-840
1
1
4
7
C
2
5
8
3
6
9
0
This manual suits for next models
2
Table of contents
Other galmar Intercom System manuals